Realism tattoo can heal clean when you size it right, keep the contrast honest, and stop chasing fake-detail flexes. I rushed one of my early portrait layouts too small, and it taught me fast that realism doesn’t fail because it’s realism. It fails because the design-to-placement match was wrong. I am Marco Ferrer, and these 13 ideas show what holds, what gets spicy, and what gives you clean payoff for the price.
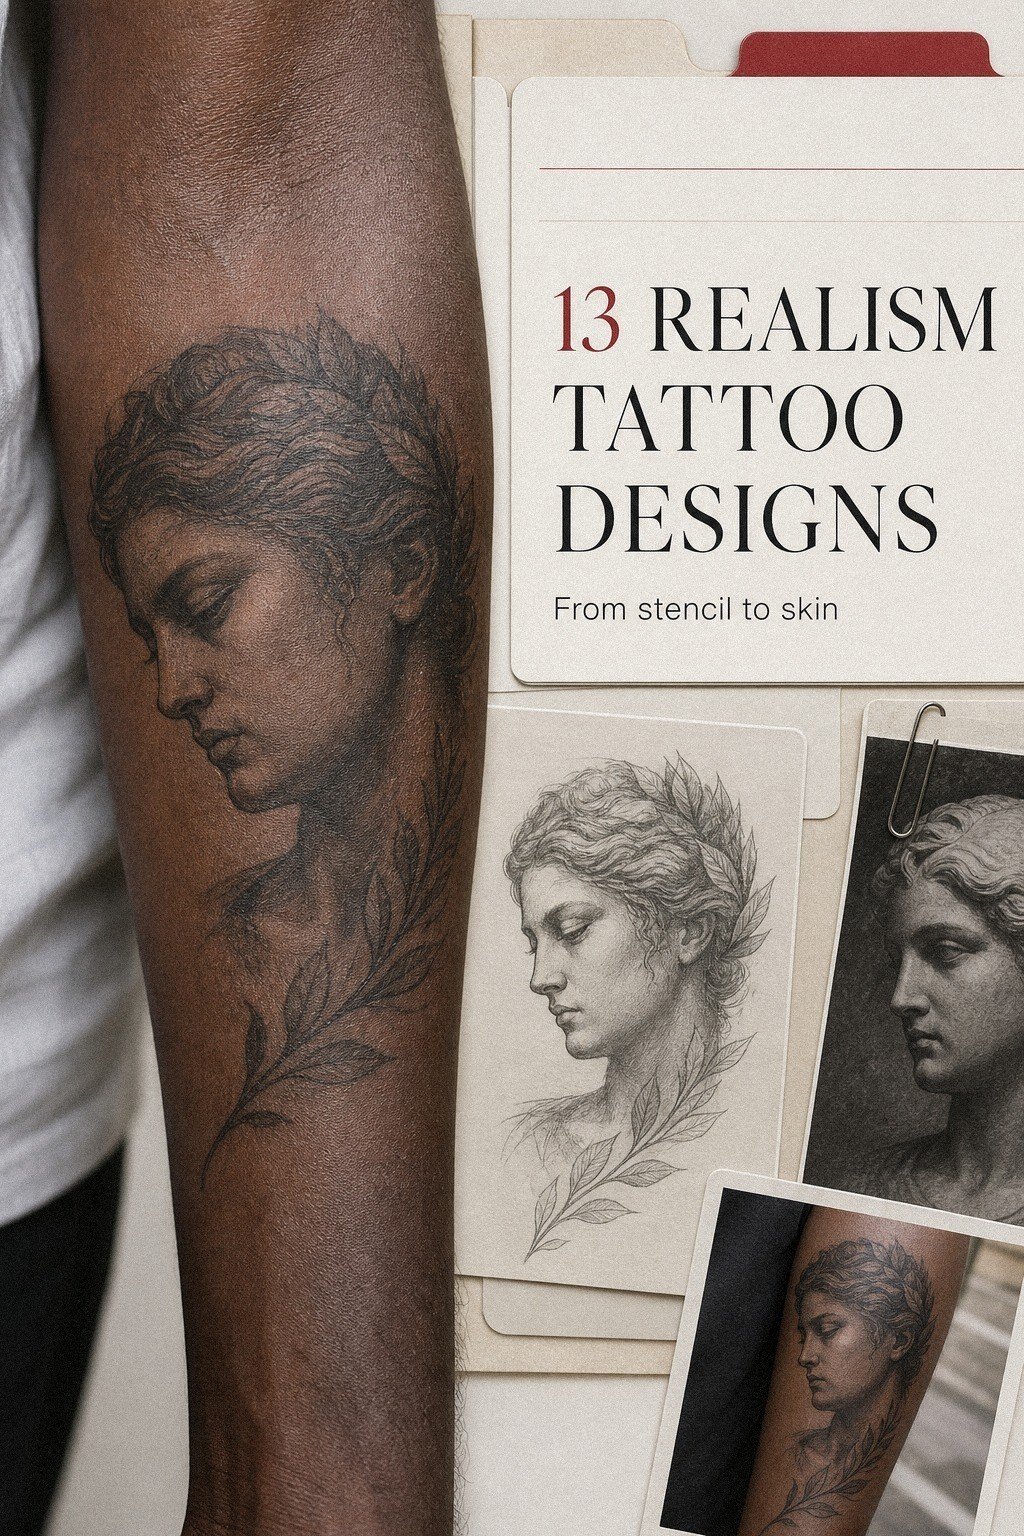
- Start With a Hyper Realism Portrait on the Forearm
- Why Does a Black and Grey Realism Sleeve Age Better Than a Busy One?
- Microrealism Pet Portrait for the Wrist
- Use Shoulder Flow for a Neo Realism Tiger
- Wet Highlights vs Fuzzy Lashes in a Realistic Eye
- Nikko Hurtado Energy, but Smarter: Full Color Realism Rose on Ribs
- Keep the Skull Simple and the Shading Soft
- Is a Single Needle Hand Tattoo Ever Worth It?
- Build a Realistic Lion Chest Piece Around Width
- Movie Character Realism: Stencil Drama vs Healed Read
- Caravaggio Contrast Makes a Blackwork Raven Hit Harder
- Let the Calf Carry a Realistic Ocean Wave
- Healed Realism and the Silver-Skin Test
1Start With a Hyper Realism Portrait on the Forearm
[IMAGE: hyper realism portrait on outer forearm, healed black and grey, flat daylight]
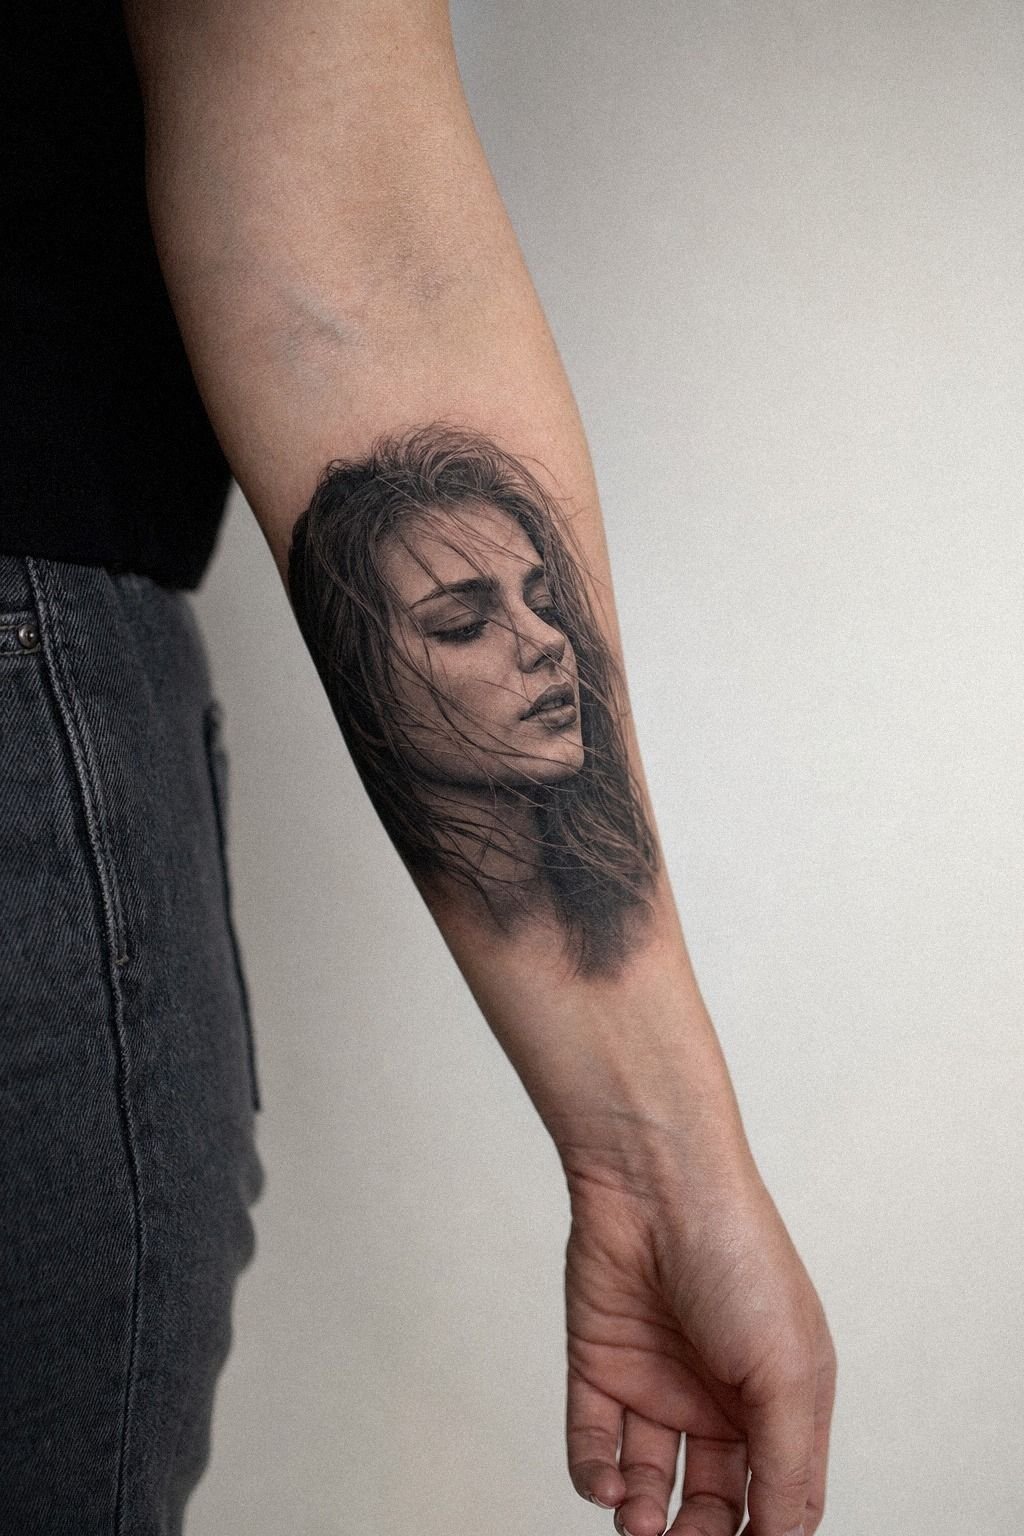
Start with the forearm if you want a hyper realism portrait that still reads clearly after the shine is gone. You get a long, low-wear surface, solid visibility for your artist, and pain that’s usually more chill than ribs or sternum. On fair cool-pink skin, black and grey realism can sit extra clean because the tonal shifts show up fast.
I like a portrait in the 4 to 6 inch range here. Smaller than that, and the eyelashes, pores, and lip edge can drift toward soup once the lines relax.
You also need a hard tone map. Deep blacks in the pupils.
Mid-tone grey wash through the cheeks. Tiny clean highlights left open instead of overworked white.
That’s my Three-Tone Lock, and it keeps the face from healing soft and flat. If you’re planning your first portrait, study healed examples in this realism tattoo artists guide.
And yes, ask to see them in flat daylight too!
2Why Does a Black and Grey Realism Sleeve Age Better Than a Busy One?
[IMAGE: black and grey realism sleeve wrapping arm, healed contrast, no muddy background]
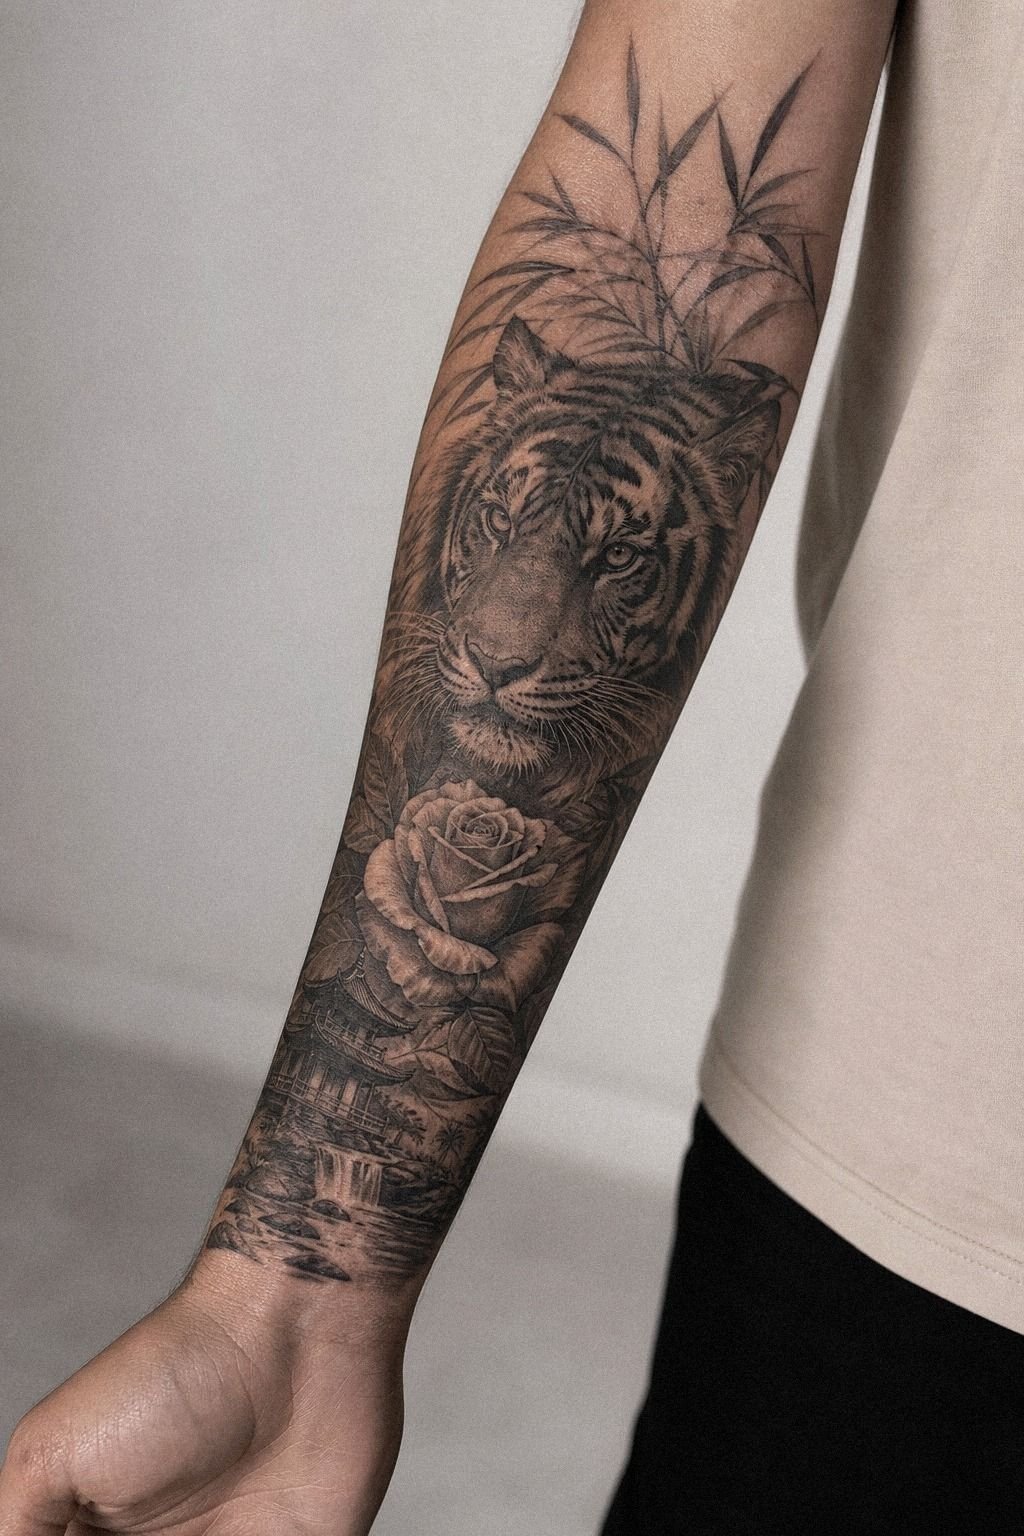
Build your sleeve around contrast first, not around random cool moments. A black and grey realism sleeve earns its punch when the big darks, open skin, and transition zones are planned before the tiny flex details. If you start with ten disconnected portraits, clocks, roses, smoke, and praying hands, the session time climbs fast while the read gets worse.
I block sleeves with what I call the Anchor-and-Air Map. One dominant face or animal.
One secondary form. One quiet lane where the eye can rest.
That is what makes a dramatic sleeve feel bold instead of crowded. If money is tight, I’d rather see you do one strong forearm panel now and build later than force a half-cooked sleeve today.
That’s the smarter call, and it heals nicer too. For more subject planning, start with this realism tattoo ideas guide.
3Microrealism Pet Portrait for the Wrist
[IMAGE: microrealism pet portrait on wrist, healed muzzle and eye shine, simple background]
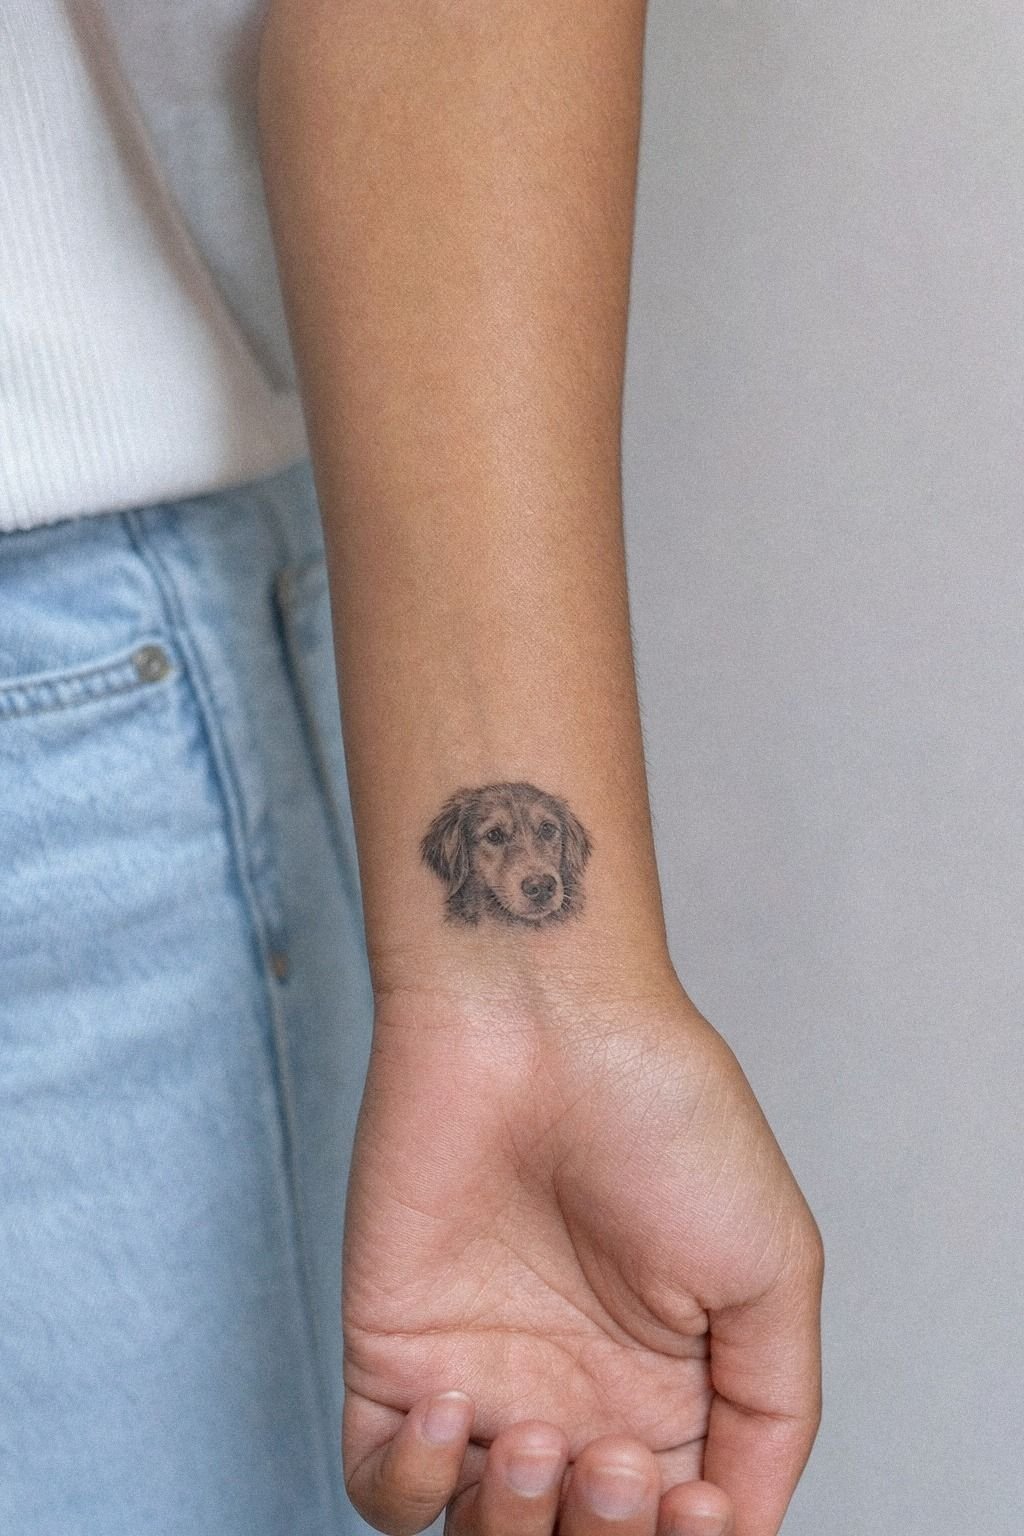
Keep a pet portrait on the wrist simple, front-facing, and slightly larger than your first instinct. A healed microrealism pet portrait on medium olive skin can look ridiculously sweet if the nose, eyes, and fur edge stay clean. The wrist, though, is a motion-heavy zone.
Watches rub. Sleeves catch.
Sun hits.
My rule here is the One-Fur Rule. One fur texture, not five.
Tiny stacked hairs everywhere will chew up your read. If you want your dog’s exact brindle swirl copied hair by hair, I’m not your artist.
References are for vibe and anatomy, not photocopy worship. A wrist pet piece usually lands best around 2.5 to 3.5 inches and can take 1.5 to 3 hours depending on detail. If you need to keep the price down, simplify the chest fur and background first, not the eyes.
If you want a softer memorial angle, a meaning-led concept like this Yggdrasil tattoo meaning article can sharpen the story without making the tattoo busier.
4Use Shoulder Flow for a Neo Realism Tiger
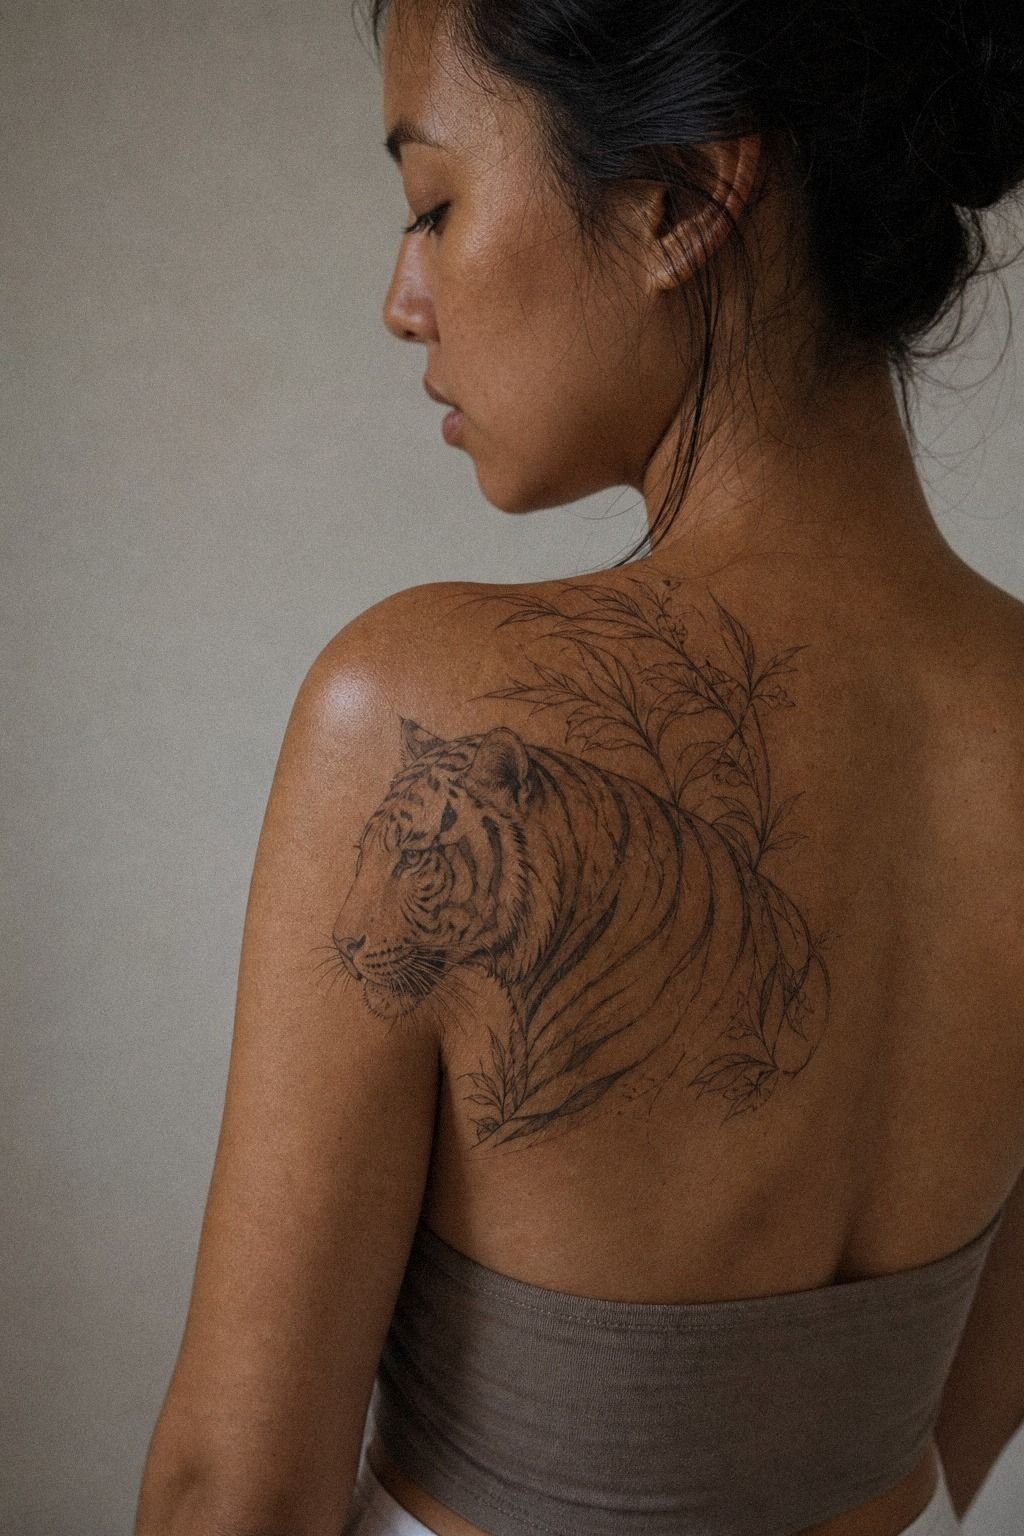
[IMAGE: neo realism tiger wrapping shoulder cap, bold eye, black and grey with warm brown notes]
Use the shoulder when you want movement. A neo realism tiger wrapping that cap can follow the body in a way a flat stencil on paper never will.
On golden tan skin, black and grey or restrained warm browns usually age better than trying to cram ten color notes into one cat. The shoulder gives the jaw, whiskers, and forehead stripes enough clearance without looking sticker-flat.
I like the tiger’s eye riding slightly forward, the muzzle tipping down, and the whisker bed opening toward the outer arm. That creates the Shoulder Arc Sweep, and it keeps the design fierce when your arm hangs naturally.
Shoulder work is usually moderate on the pain scale, with the collarbone edge getting spicier. If you’re mixing realism with graphic structure, compare healed examples in this realism tattoo ideas guide.
5Wet Highlights vs Fuzzy Lashes in a Realistic Eye
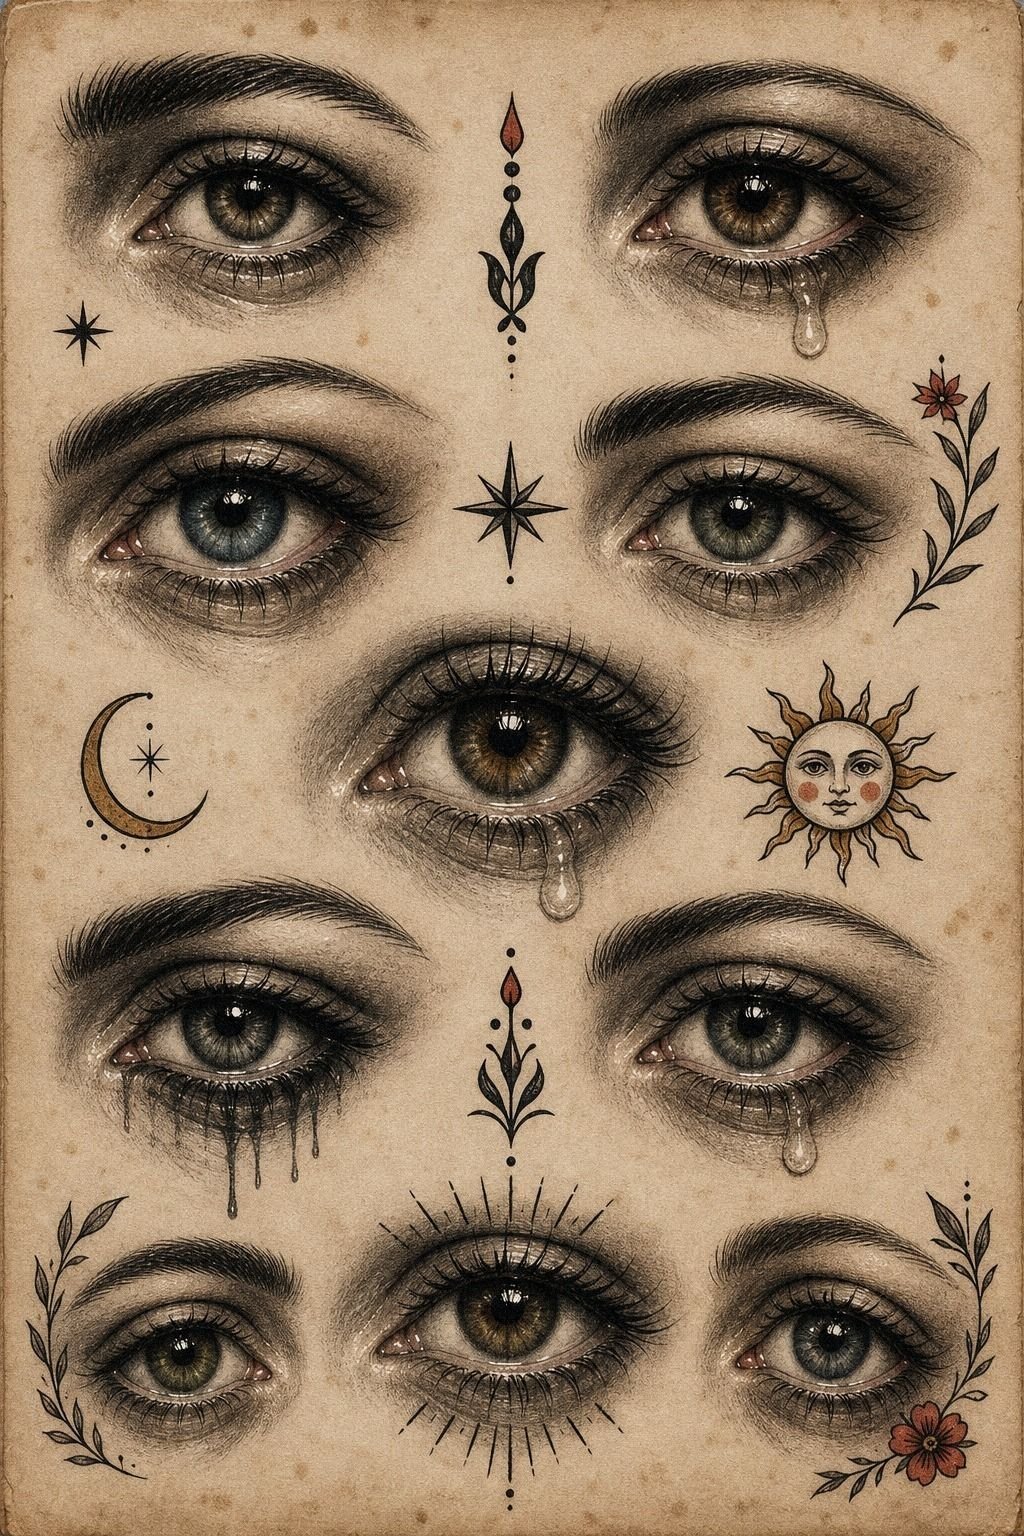
[IMAGE: realistic eye tattoo close crop, healed catchlight, crisp upper lid, dark iris ring]
A realistic eye only works if the wet highlights feel intentional and the lashes don’t turn fuzzy. This subject is small, emotional, and easy to overwork.
What do I want to see in the drawing? A crisp upper lid.
Clear tear duct shape. One strong catchlight.
Maybe two, max.
This is where I use Wet Highlight Discipline. Leave tiny skin breaks for shine, then back them up with darks around the iris and lash line so the contrast holds after healing.
Too much white ink chasing glassy shine is a trap. It looks loud fresh, then calms down hard.
I’d rather have fewer highlights that heal nice than five flashy ones that disappear. That is better long-term payoff, even if the fresh photo looks less dramatic. If you want to push symbolism without muddying the focal point, compare it with this yin yang tattoo meaning piece.
6Nikko Hurtado Energy, but Smarter: Full Color Realism Rose on Ribs
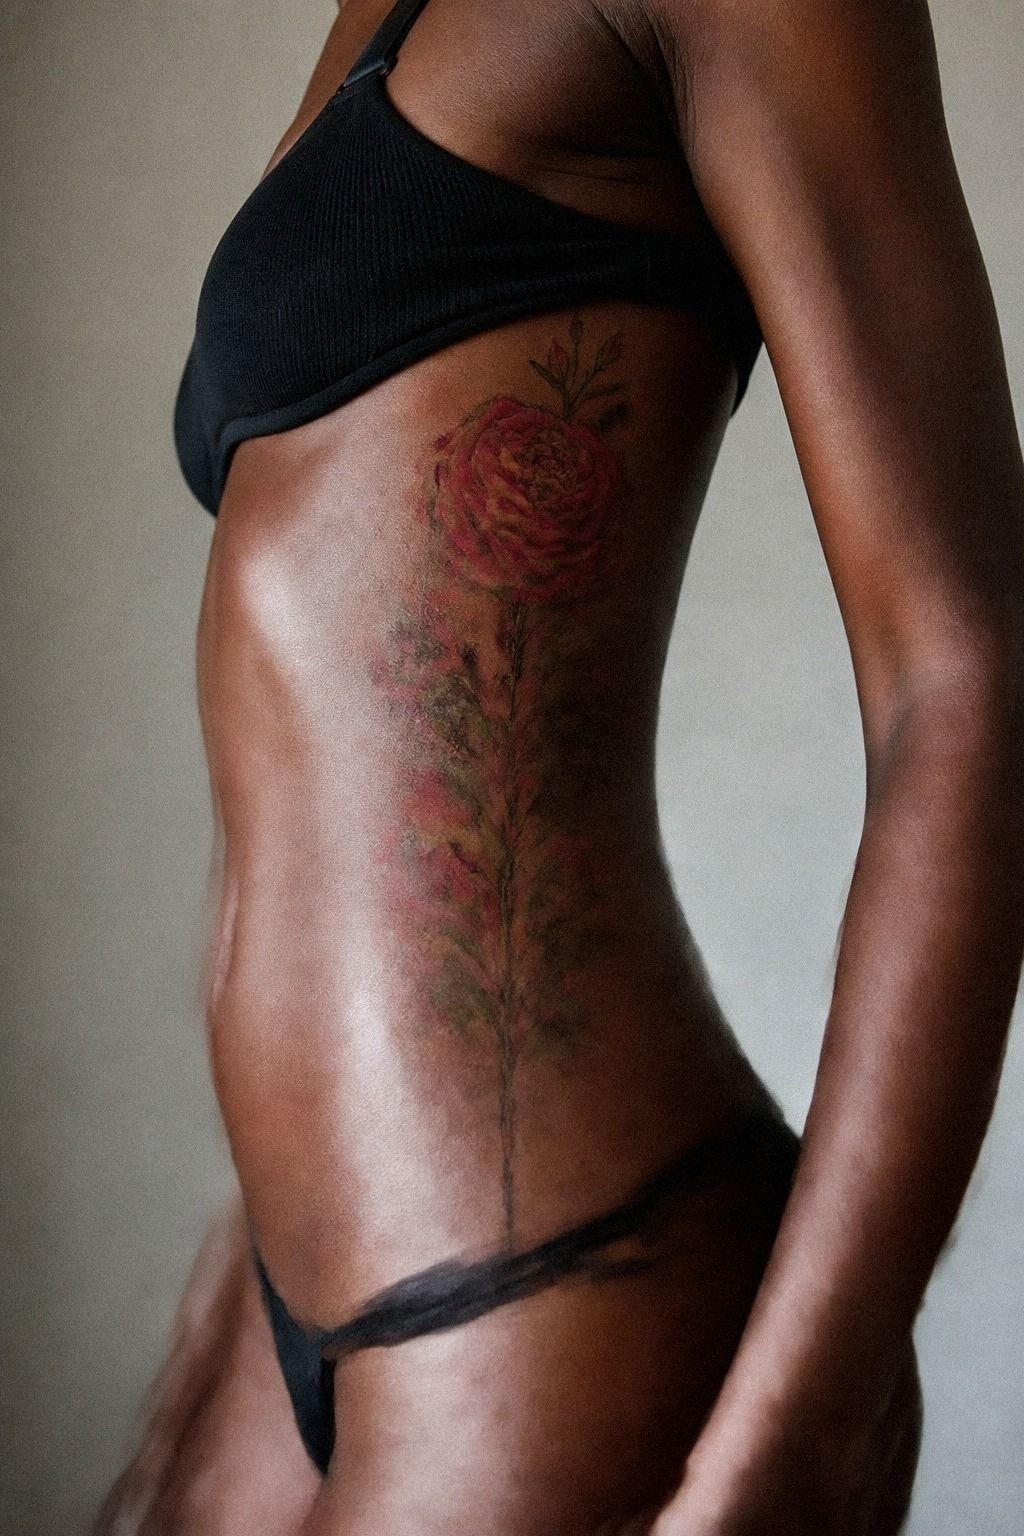
[IMAGE: full color realism rose on ribs, saturated reds, anchored edges, healed skin texture]
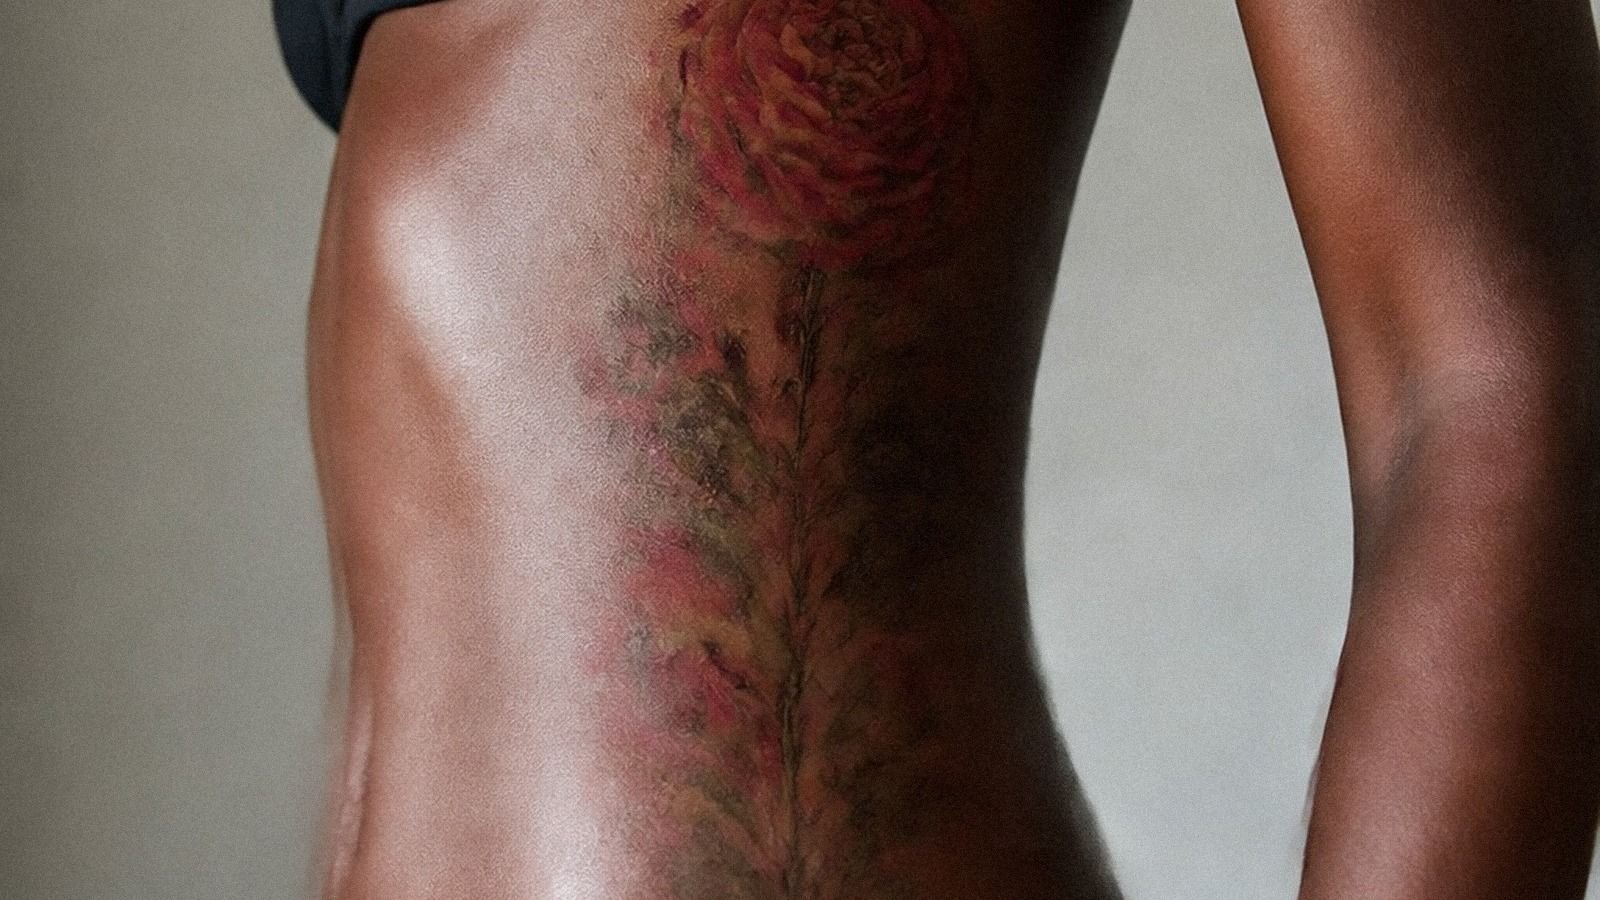
Color realism on the ribs can be gorgeous, but you need discipline or the skin gets overworked fast. A full color realism rose should still be anchored with clear petal edges, dark folds, and a strong outer silhouette. Otherwise the whole thing goes soft once the redness drops.
Ribs are already spicy. You don’t need muddy color on top of that.
When I do this kind of rose, I think in the order of solid fill, whip shade, and restraint. I want saturated reds packed in one clean pass, not scratched at fifty times.
I want the shadow under the fold pushed with purpose. And I want the petal count edited down so the tattoo stays elegant instead of fussy. Is color realism here worth it?
Yes, if you go big enough, pick an artist with healed color work, and accept the higher cost of slower packing. If you want the rose to carry a richer symbolic pull too, this yellow rose tattoo meaning guide is a smart side read.
7Keep the Skull Simple and the Shading Soft
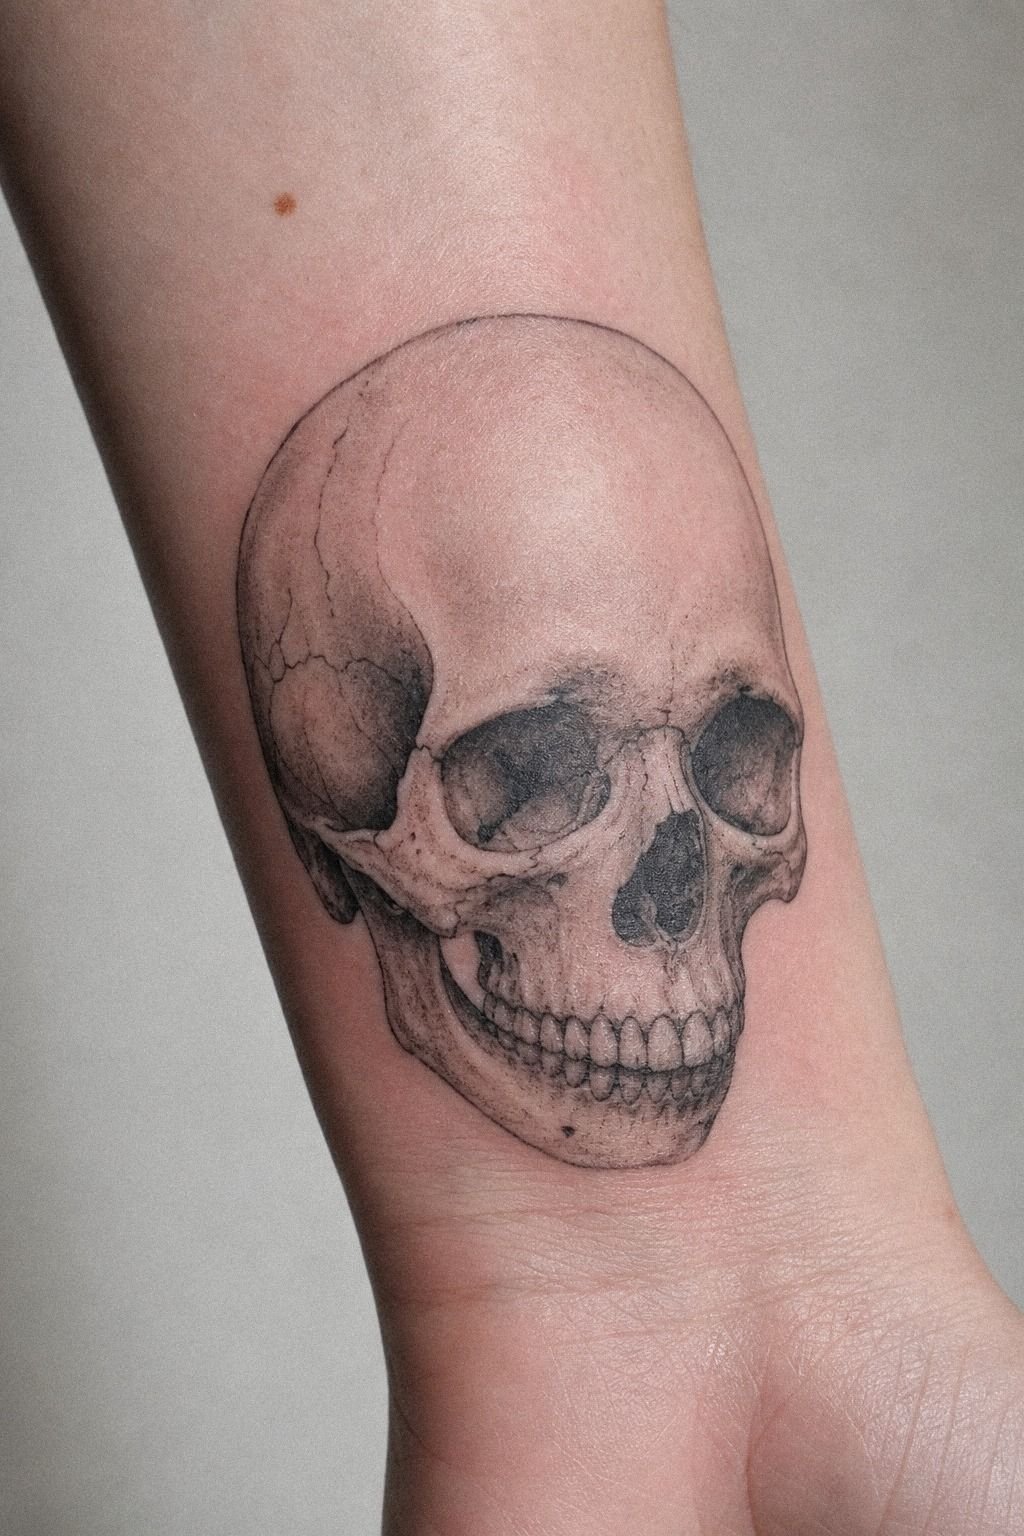
[IMAGE: realism skull tattoo on wrist, smooth black and grey planes, no smoky clutter]
Make the skull simple enough that the structure does the work. A realism skull tattoo on the wrist lives or dies by clean planes: forehead dome, cheek hollow, nasal cavity, and tooth block. If you force every crack and pore into a small wrist piece, the whole thing turns muddy.
My favorite approach is the Bone Plane Method. Think sculpture, not sticker detail.
Push the dark behind the zygomatic arch, soften the frontal bone, and keep the tooth row suggested instead of etched like piano keys. I’d skip smoke pouring off the skull in a tiny tattoo.
That background is usually what kills the read first. A wrist skull often heals best around 2.5 to 4 inches, and high-wear friction means you should plan for sunscreen and maybe a touch-up later. If you want to compare stronger focal shapes, this realism tattoo ideas guide shows what reads clean without fake drama.
8Is a Single Needle Hand Tattoo Ever Worth It?
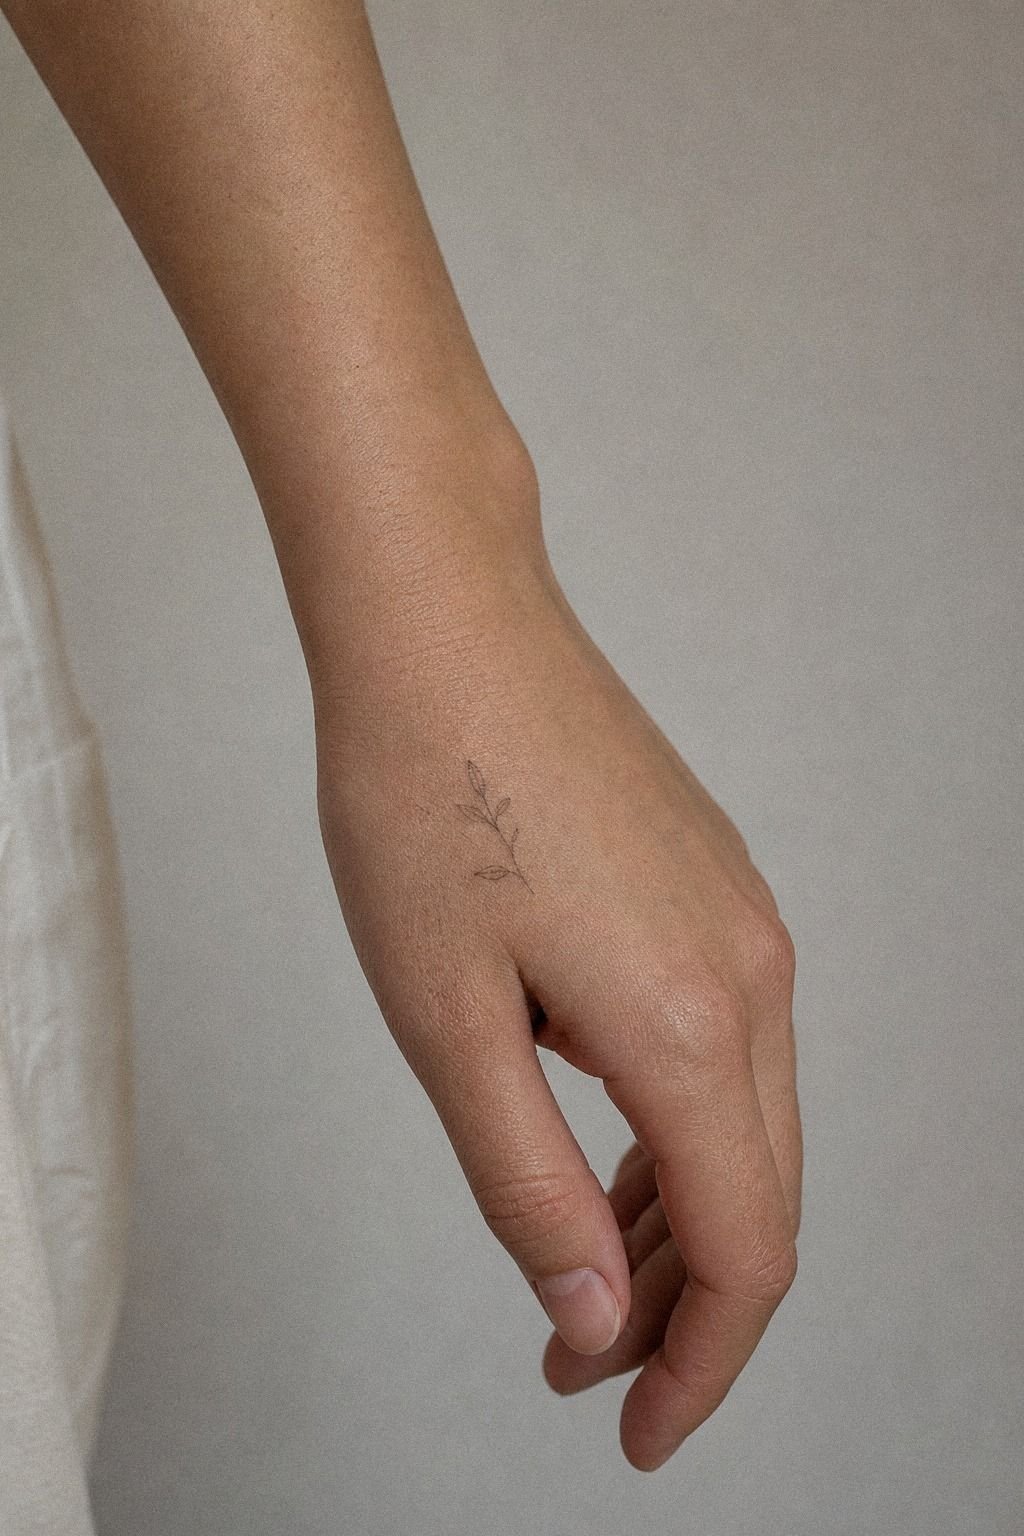
[IMAGE: single needle microrealism hand tattoo healed on top of hand, one focal shape, open skin]
Choose the hand only if you accept maintenance. A healed single needle microrealism hand tattoo can look insanely clean in daylight, especially on medium warm ivory skin where soft graphite values show nicely.
But hands are high-wear. Constant washing.
Sun. Movement.
Tiny blowout risk around thinner skin.
I use the Hand Hold Rule for this spot: one focal shape, one contour lane, one shadow mass. That’s it.
Tiny script woven through fingers or microscopic textures all over the metacarpals almost never age as cute as people hope. You want the tattoo to read at a glance, not only on day one in a studio photo.
So, is it worth it? Only if the design is stripped down, you expect likely touch-ups, and you understand the upkeep.
9Build a Realistic Lion Chest Piece Around Width
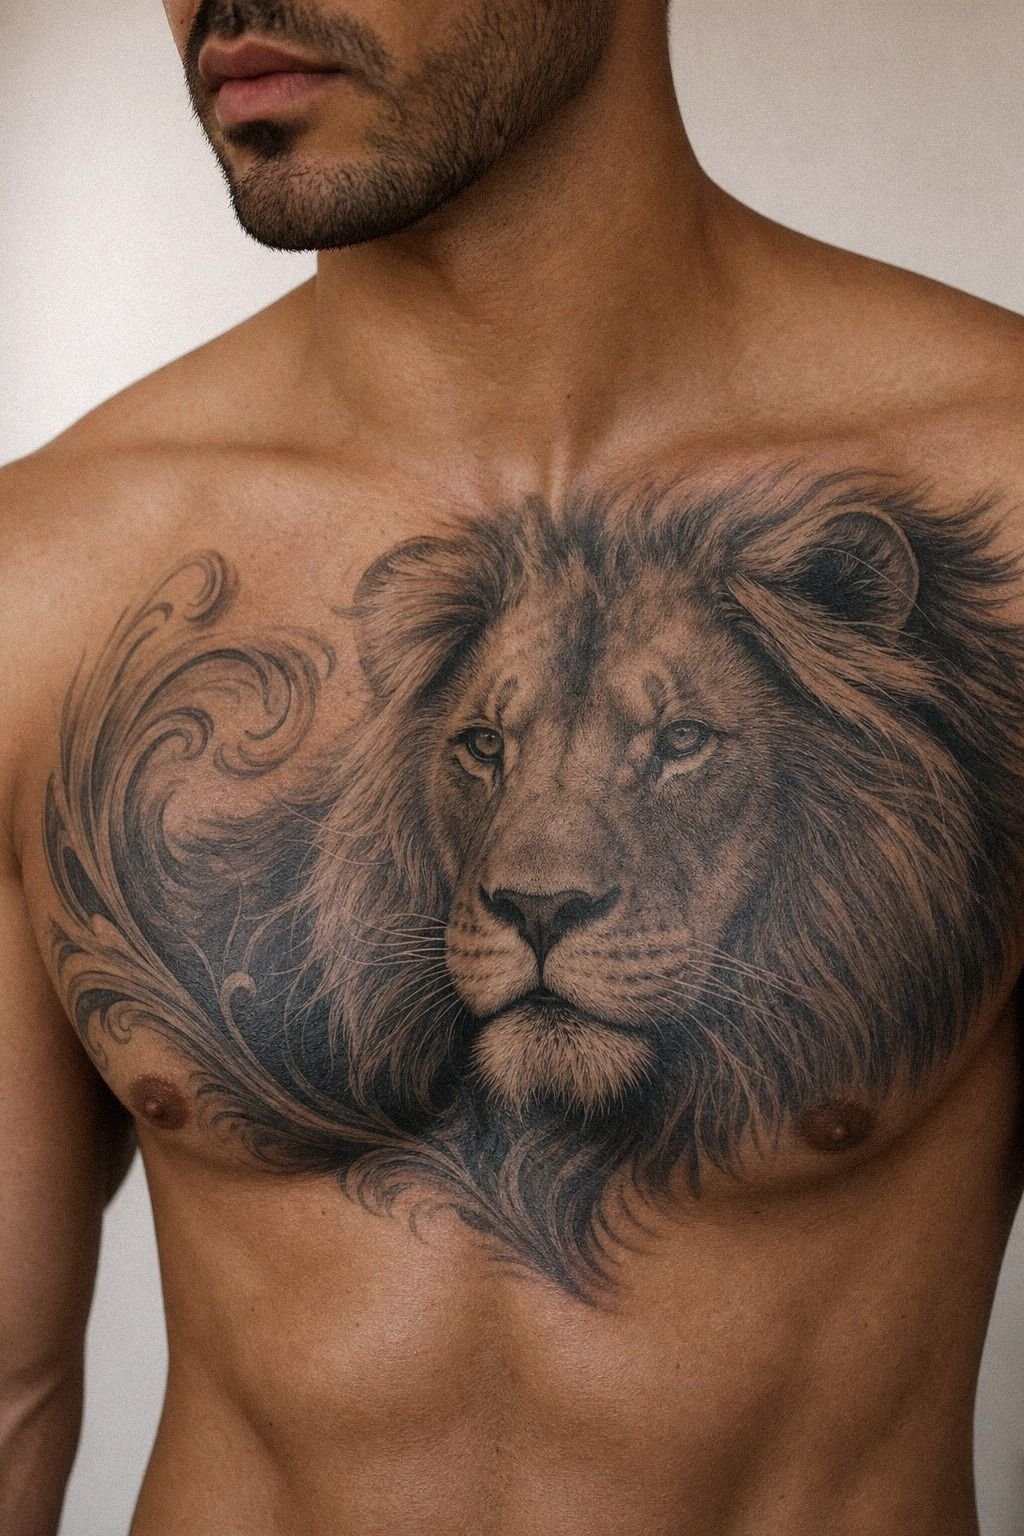
[IMAGE: realistic lion chest tattoo spanning pec, bold mane shadows, healed black and grey]
Scale up on the chest or don’t do a lion there at all. A realistic lion chest tattoo needs enough width for the mane rhythm, the eye spacing, and the muzzle to sit clean across the pec without collapsing into fur soup. On medium olive skin, black and grey usually wins because it lets the mane shadows and nose leather texture read without fighting undertone shifts.
That’s my Chest Power Grid. The lion’s eyes stay level with your natural chest line, the darkest mane pockets sit under the jaw, and the outer strands break before the armpit crease so the design doesn’t get chewed up by movement.
Chest pain ranges from manageable over the pec to seriously spicy near the sternum and collarbone. A lion this size might take 5 to 9 hours over multiple passes, so the time adds up.
Do not cheap out on the darkest pass. That is where the tattoo gets its punch.
If you want the design to carry a more powerful myth edge, this Zeus tattoo meaning article can help you tighten the theme before you book.
10Movie Character Realism: Stencil Drama vs Healed Read
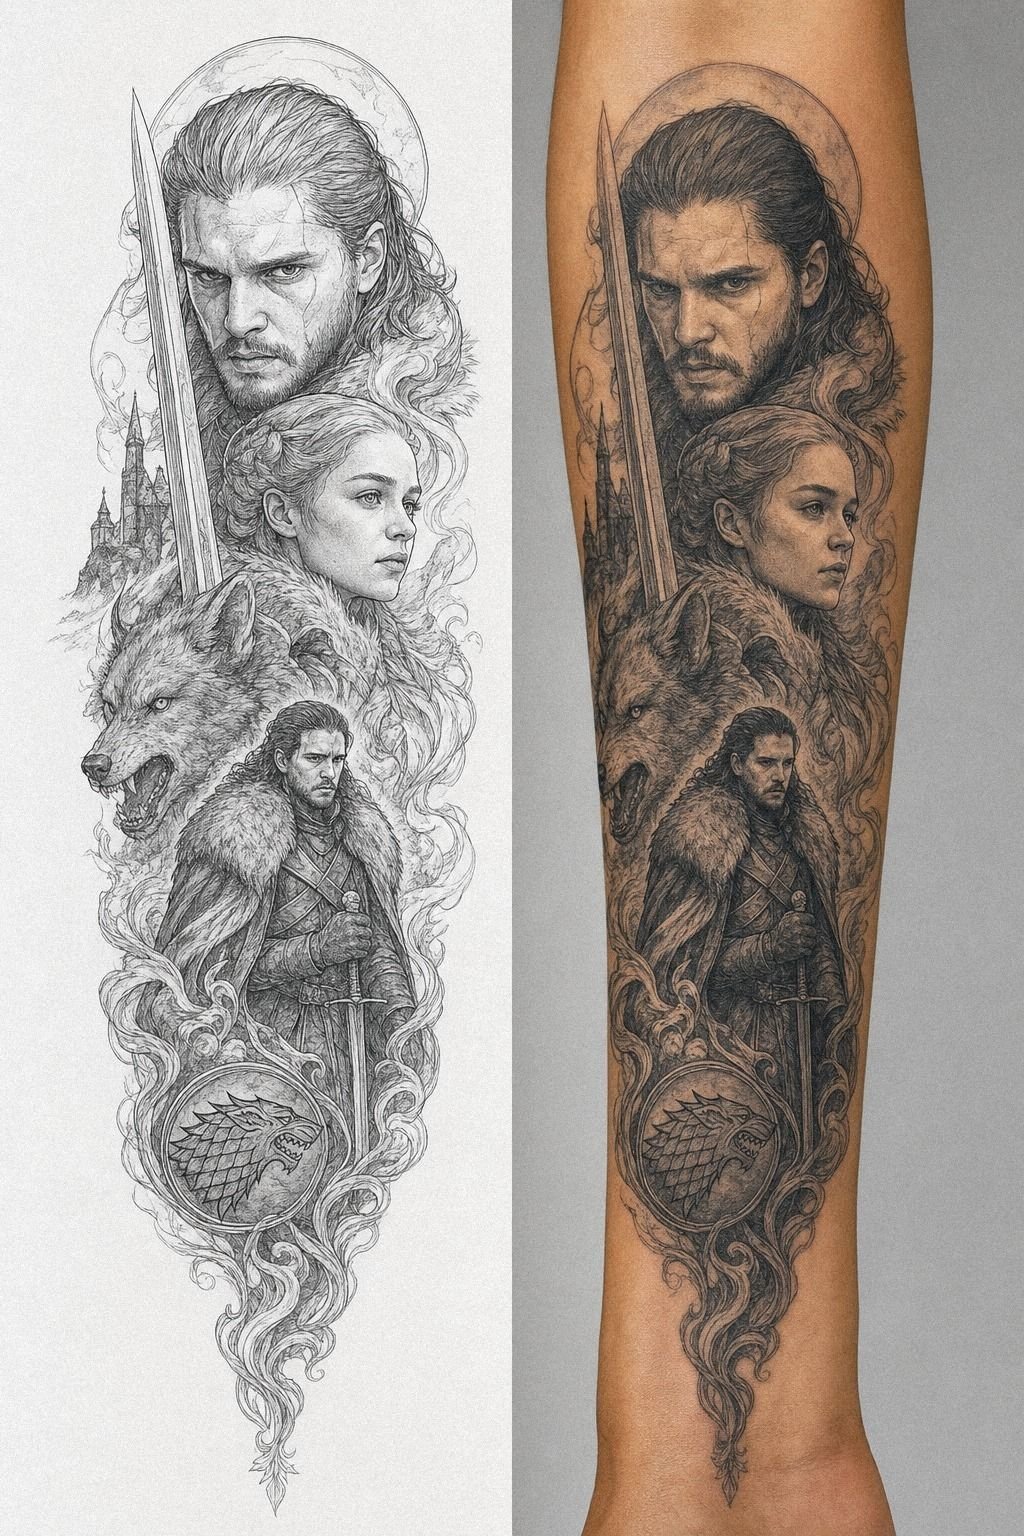
[IMAGE: movie character realism tattoo forearm panel, stencil beside healed result, strong shadow map]
Use the stencil-versus-healed view to judge whether the design had a real plan. A movie character realism tattoo can look electric fresh because the stencil already feels cinematic, but healed read is the truth. If the artist relied on tiny costume trim, little skin pores, and smoke wisps to sell the likeness, the tattoo may lose power once the surface settles.
I judge this category with the Poster-Test Rule. Squint. If the silhouette, eye sockets, nose bridge, and one hero shadow still read, the likeness has a chance.
If the likeness disappears when you blur it a little, it was never solid. That’s why I tell clients not to spend movie-character money on a tiny panel just because the price feels easier today. Save, go larger, and make it worth it.
For cleaner layout direction, this realism tattoo ideas guide is a solid filter.
11Caravaggio Contrast Makes a Blackwork Raven Hit Harder
[IMAGE: blackwork realism raven on outer arm, solid beak base, crisp wing edge, healed contrast]
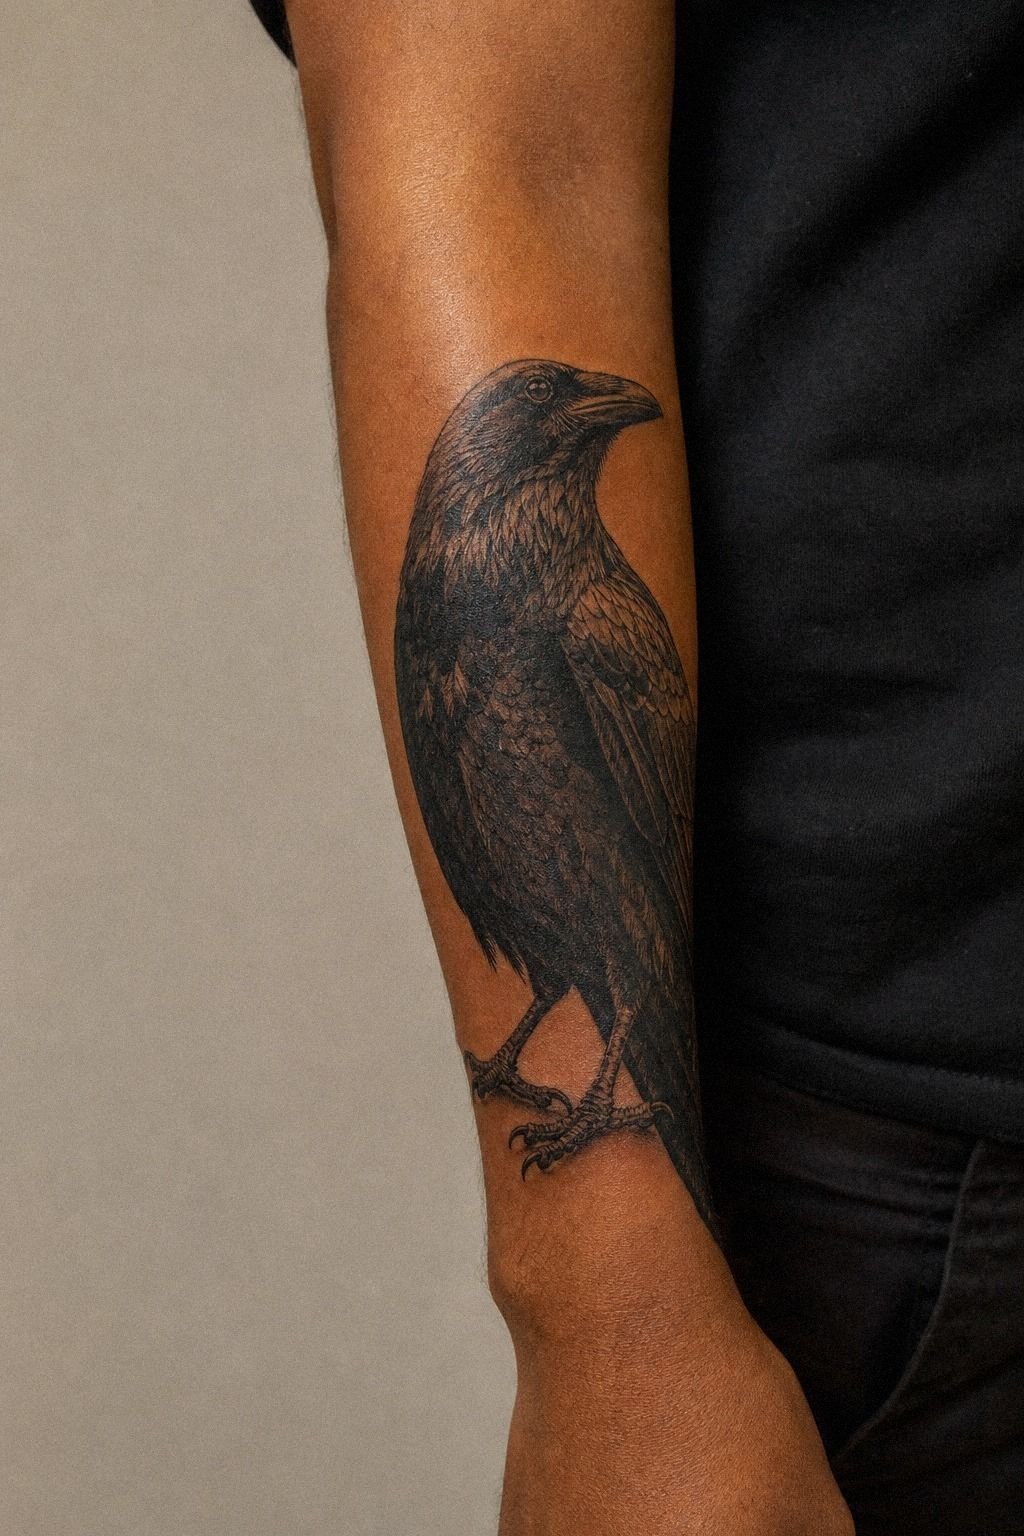
Go heavier with blackwork when you want a raven that stays moody instead of fading into soft mush. A blackwork realism raven on deep brown skin with warm undertone can look fierce because the silhouette leads first, then the feather texture comes second. Too many artists reverse it.
They chase every barb and feather split, then forget the bird needs a strong body shape.
My Shadow Wing Rule fixes that. Pack the beak base and eye socket solid. Keep the wing edge crisp.
Use feather breaks sparingly so the skin tone becomes part of the read, not visual noise. But don’t confuse blackwork realism with pure flat fill.
You still need soft transitions in the neck and shoulder feathers, usually with diluted black or a gentle grey wash pass. That’s where the raven gets its depth.
12Let the Calf Carry a Realistic Ocean Wave
[IMAGE: realistic ocean wave tattoo on calf, broad foam shapes, dark trough, healed read]
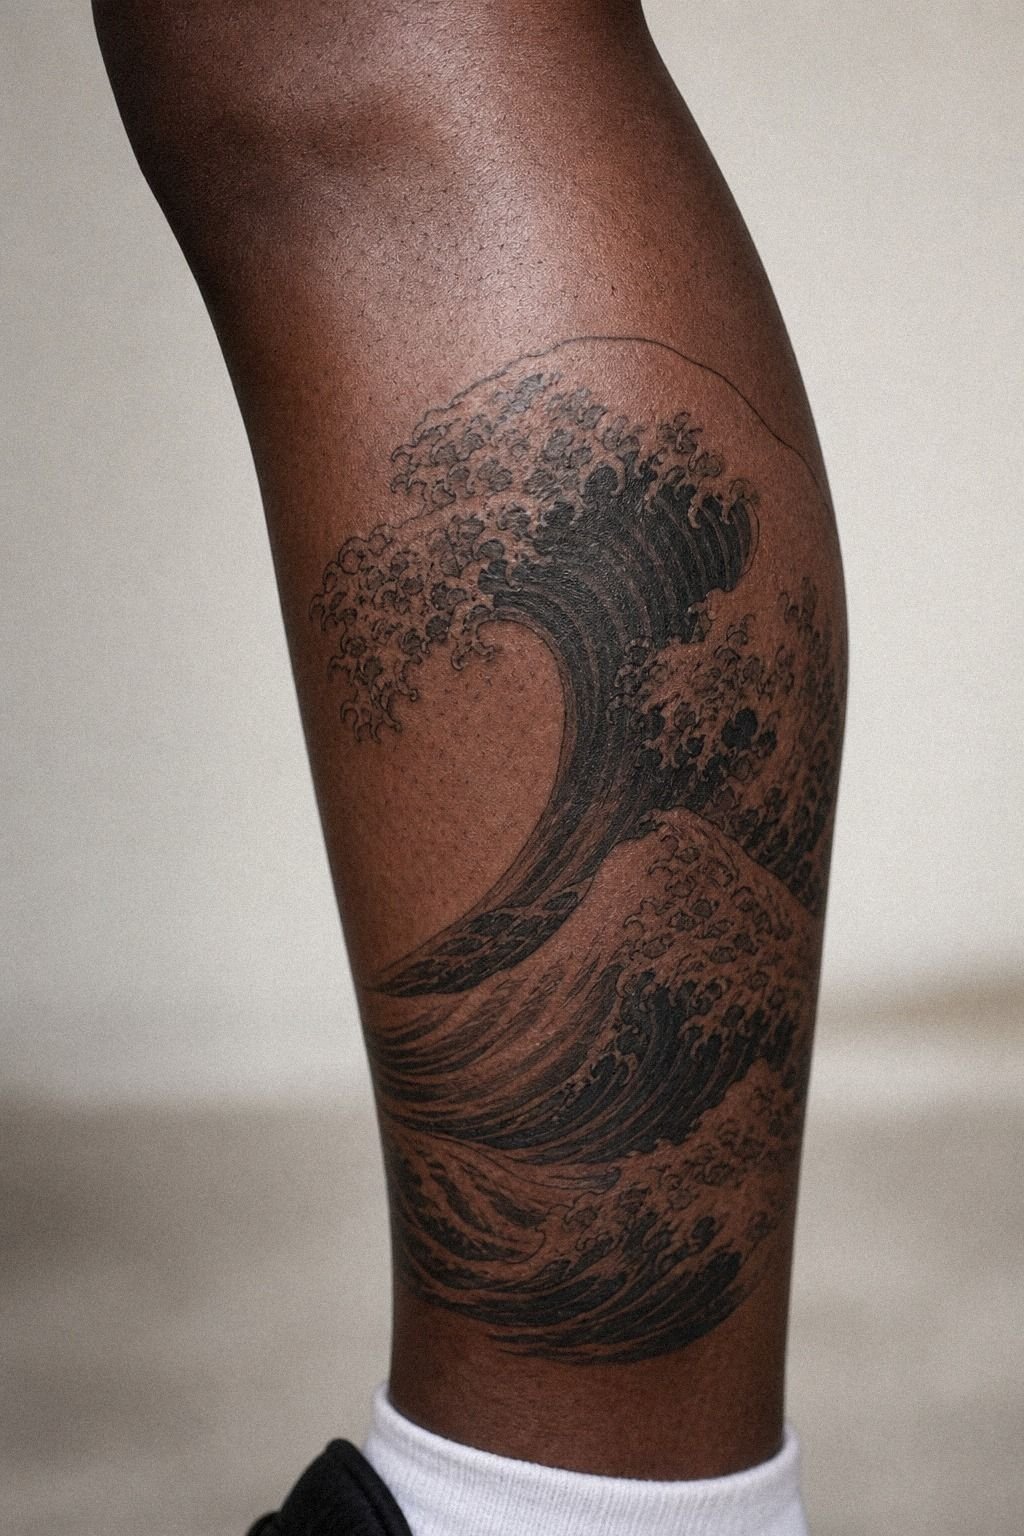
Let the calf do the work for a wave. A realistic ocean wave tattoo on deep ebony skin can hold up beautifully when the foam shapes are broad, the darkest water pockets are obvious, and the curl follows the leg instead of fighting it. The calf is a low-wear zone compared with hands or feet, which is why I recommend it a lot for first-time realism collectors.
I build wave pieces with the Crest-and-Trough Split. One clean pull for the top curl.
One shadow lane under the lip. One open foam field so the water still breathes after healing.
If you chase every mist particle, forget it. The tattoo turns to haze. A calf wave around 5 to 8 inches often takes 3 to 5 hours depending on contrast and texture, and it’s usually excellent payoff for the amount of clean read you get.
If you want to layer in symbolism without losing that strong water shape, this yin yang tattoo meaning article can give you a cleaner direction.
13Healed Realism and the Silver-Skin Test
[IMAGE: healed realism tattoo on inner forearm, silver-skin stage, readable shadows and open highlights]
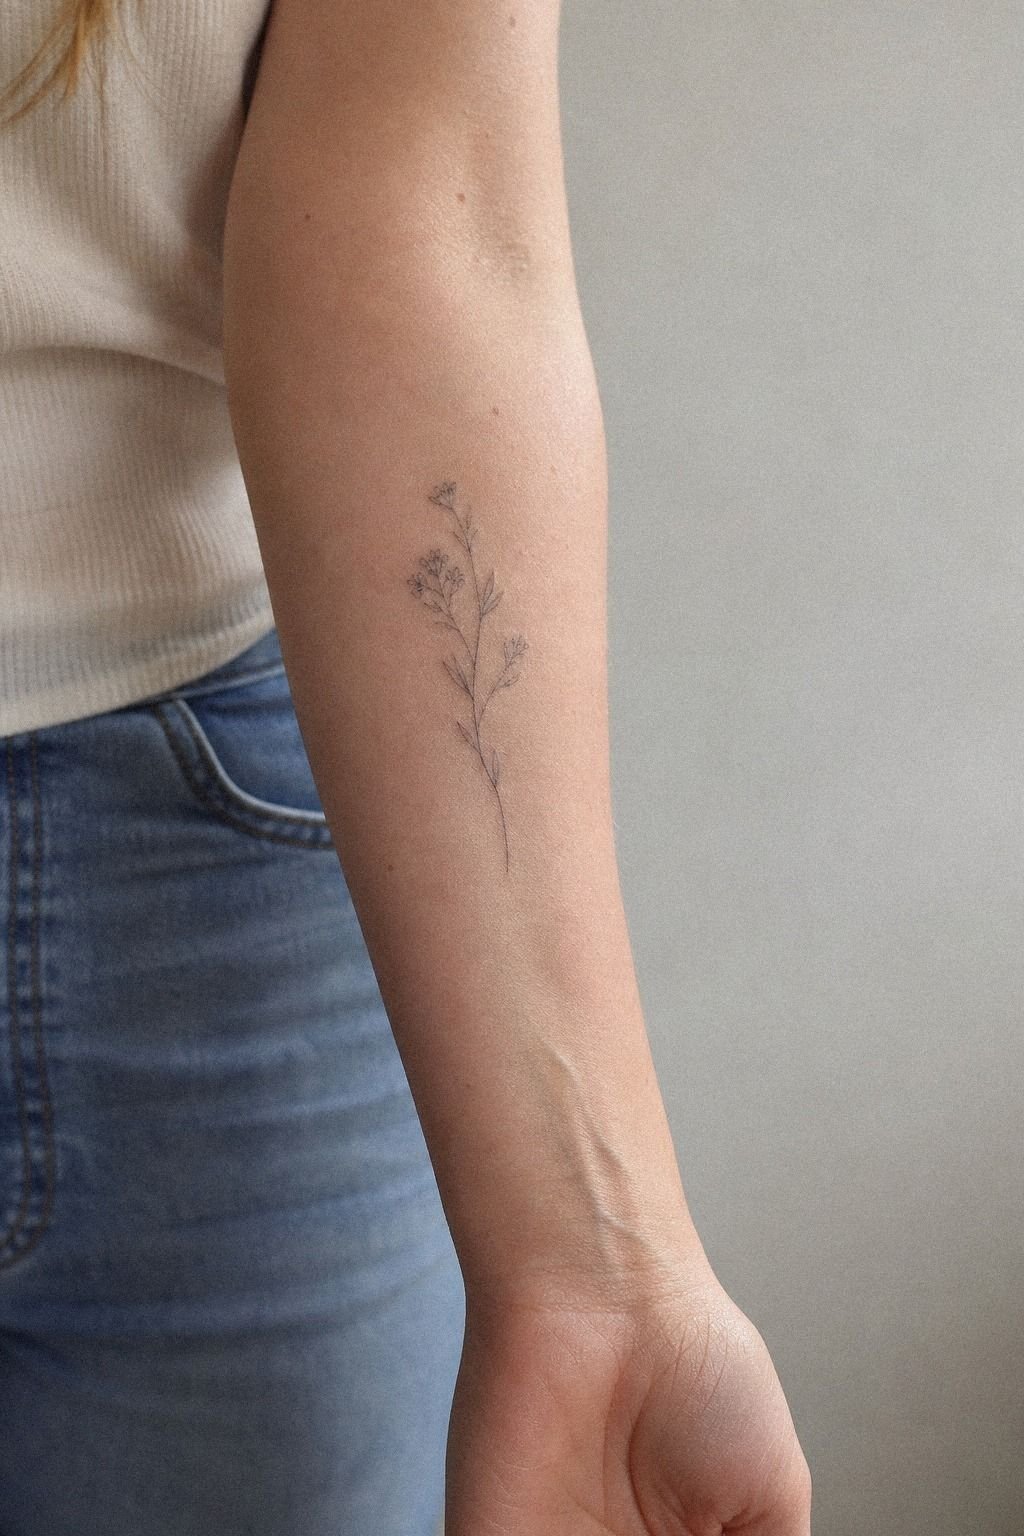
Study healed tattoos before you book, because healed softness is not failure. A healed realism tattoo on the inner forearm should soften a little. That’s normal skin behavior, not bad work.
What you want is soft contrast that still keeps the image readable at a glance: clean edges where they count, open highlights, and enough dark structure underneath the mid-tones.
This is my Silver-Skin Test. If the tattoo still reads after the peel, through the shiny silver-skin stage, and again once the texture settles, the artist made smart choices.
If it only wowed while it was fresh and wet, something was off. Surface healing is usually about 2 to 4 weeks, while the deeper settle can take 2 to 3 months. Don’t suffocate it with ointment.
Wash with gentle unscented soap, use a thin layer, and keep pools, gym friction, and direct sun off it. If you’re still vetting portfolios, keep this realism tattoo artists guide open while you compare healed work.
What Realism Tattoos Need To Age Well
[IMAGE: healed realism collage showing forearm portrait, calf wave, chest lion, and hand tattoo in flat daylight]
I see the same mistake over and over: people assume realism ages badly because they’ve seen tiny, over-detailed tattoos heal into blur. That’s not a realism problem. It’s a design judgment problem.
When I map realism well, I don’t try to tattoo every fact in the reference. I edit. I choose the shadows that carry the form.
I drop the textures that won’t survive. And I scale the image to the body part instead of forcing a Pinterest-exact copy into a spot that can’t hold it. If you want more examples of strong subject editing, look through this realism tattoo ideas guide and this geo realism tattoo guide.
Here’s the honest money talk. Realism gets expensive when clients spend on detail that won’t matter in a year. Bigger isn’t always better, but smart size is usually worth it because it protects the read.
A forearm portrait at 5 inches can have better long-term payoff than a cheap 2-inch chest portrait that heals like mush. Same with placement.
Low-wear skin gives you more return for the price because the tattoo isn’t fighting friction every day.
These are the numbers I use most in consults when someone wants realism that heals crisp instead of flat:
If you want the no-bullshit version, black is your best friend for longevity and placement is your second-best friend. Color is spice. Single needle is beautiful, but only when the subject is stripped down enough to survive. And high-wear zones like hands, fingers, feet, elbows, knees, and inner bicep demand more humility from both you and your artist.
I learned that the hard way with a small portrait that looked flashy fresh and just okay healed. Since then, I’ve pushed simpler shapes, stronger darks, and cleaner skin breaks.
The work heals better. Clients come back happier. That’s the whole point, right?
And that’s why I keep preaching scale and contrast to every realism client I tattoo. It works better, and it heals cleaner!
A Few Things Worth Answering
[IMAGE: realism tattoo FAQ reference showing healed forearm, calf, shoulder, and chest placements]
How much does a realism tattoo usually cost?
A realism tattoo usually costs more than a basic outline because the shading takes longer. Typical US pricing is about $100 to $250 an hour, with many shops holding a $50 to $100 minimum. If you’re comparing artists and rates, this realism tattoo artists guide gives you a cleaner booking baseline.
– Small forearm portrait. Around 2 to 4 hours – Medium calf or shoulder piece.
Around 3 to 6 hours – Full sleeve realism. Multi-session, often 15+ hours
Are realism tattoos a good idea for a first tattoo?
Yes, a realism tattoo can be a good first tattoo if you keep the concept clean and the placement smart. Low-wear zones like outer forearm, calf, shoulder, and thigh usually heal nicer and feel more manageable than ribs, hands, or feet. For strong first-session references, browse this realism tattoo ideas guide.
– Clear subject choice. One face, one flower, one animal – Better longevity. More width for contrast – Easier session.
Less spicy than sternum or ribs
How do I choose a tattoo artist for realism tattoos?
Choose an artist whose healed realism still looks crisp, not just fresh and glossy. Healed portfolio photos tell you more than ring-light shots ever will.
– Clean line edges. No fuzzy halos – Solid tonal control.
Darks, mids, open highlights – Real specialty. Portraits, animals, black and grey, or color realism – Good studio hygiene. Fresh barriers, clean setup, clear aftercare
You can start comparing portfolios with this realism tattoo artists guide.
How much do realism tattoos hurt?
Realism tattoos don’t hurt more because they’re realism. Placement decides most of it. Outer arm, calf, and shoulder are usually chill, while ribs, hands, feet, sternum, and collarbone get much spicier.
If you need more placement examples before you commit, this realism tattoo ideas guide helps.
– Lines. Sharper sting – Shading. Dull burn – Color packing.
Often the spiciest part!
How long does a realism tattoo take to heal?
Most realism tattoos heal on the surface in about 2 to 4 weeks, then keep settling underneath for 2 to 3 months. Simple aftercare matters more than buying fancy stuff. I also tell clients to compare healed examples in this realism tattoo artists guide so they know what settled contrast really looks like.
– Gentle unscented soap – Thin layer ointment, then light lotion – No picking flakes – No pool water, hard gym friction, or direct sun early on
What’s the best placement for a realism tattoo?
The best placement for a realism tattoo is usually a low-wear area with enough flat length for the image to breathe. Forearm, calf, outer shoulder, and thigh are my safest calls for clarity and aging. For more examples, see this realism tattoo ideas guide.
– Forearm. Great for portraits and symbols – Calf.
Strong for waves, animals, and vertical flow – Shoulder. Best for wrap and motion – Thigh. Big canvas, softer pain curve
Can I get a realism tattoo on a budget?
You can save money by choosing a smaller concept, but don’t DIY realism on your own skin. Budget smart, not reckless.
A weak home kit can’t replace clean technique, sterile setup, or years of tonal control. If you need lower-cost inspiration that still has strong payoff, this realism tattoo ideas guide is where I’d start.
– Better move. Save for one solid session – Safer plan.
Smaller tattoo in a low-wear spot – Hard no. Cheap DIY kits and scratcher shortcuts
Where I’d Start First
[IMAGE: forearm realism portrait consult beside healed calf wave and shoulder tiger, flat daylight, crisp contrast]
If I had to pick one, I’d start with the forearm portrait. You get clean visibility, honest contrast, and better healing than fussier spots. Pin that direction for later and compare artists through this realism tattoo artists guide.