I almost made my first dainty ladybug tattoo too small. It looked cute on paper, but it would’ve turned fuzzy fast. The good news is that a ladybug can stay clean for years if you give the lines room, pick a smart placement, and don’t treat red ink like an afterthought.
- Tiny Red-Ink Ladybug on the Wrist
- Fine-Line Ladybug Behind the Ear
- Minimalist Ladybug on the Ankle
- Cute Ladybug Resting on a Wildflower
- Blackwork Ladybug With Delicate Dots
- Ladybird Tattoo Along the Collarbone
- Dainty Ladybug on a Finger
- Ladybug With Tiny Botanical Details
- Simple Ladybug on the Inner Arm
- Matching Ladybug Tattoos for Best Friends
- Ladybug With a Fine Crescent Moon
- Watercolor Ladybug With Crisp Linework
- Ladybug Tattoo Between the Shoulder Blades
- Micro Ladybug Near the Hip
- Ladybug With Initials and Fine Lettering
- Side-Rib Ladybug With Subtle Shading
- Ladybug and Four-Leaf Clover Design
- Tiny Ladybug Trail Along the Forearm
- Meaningful Ladybug Tattoo With Red Accents
1Tiny Red-Ink Ladybug on the Wrist
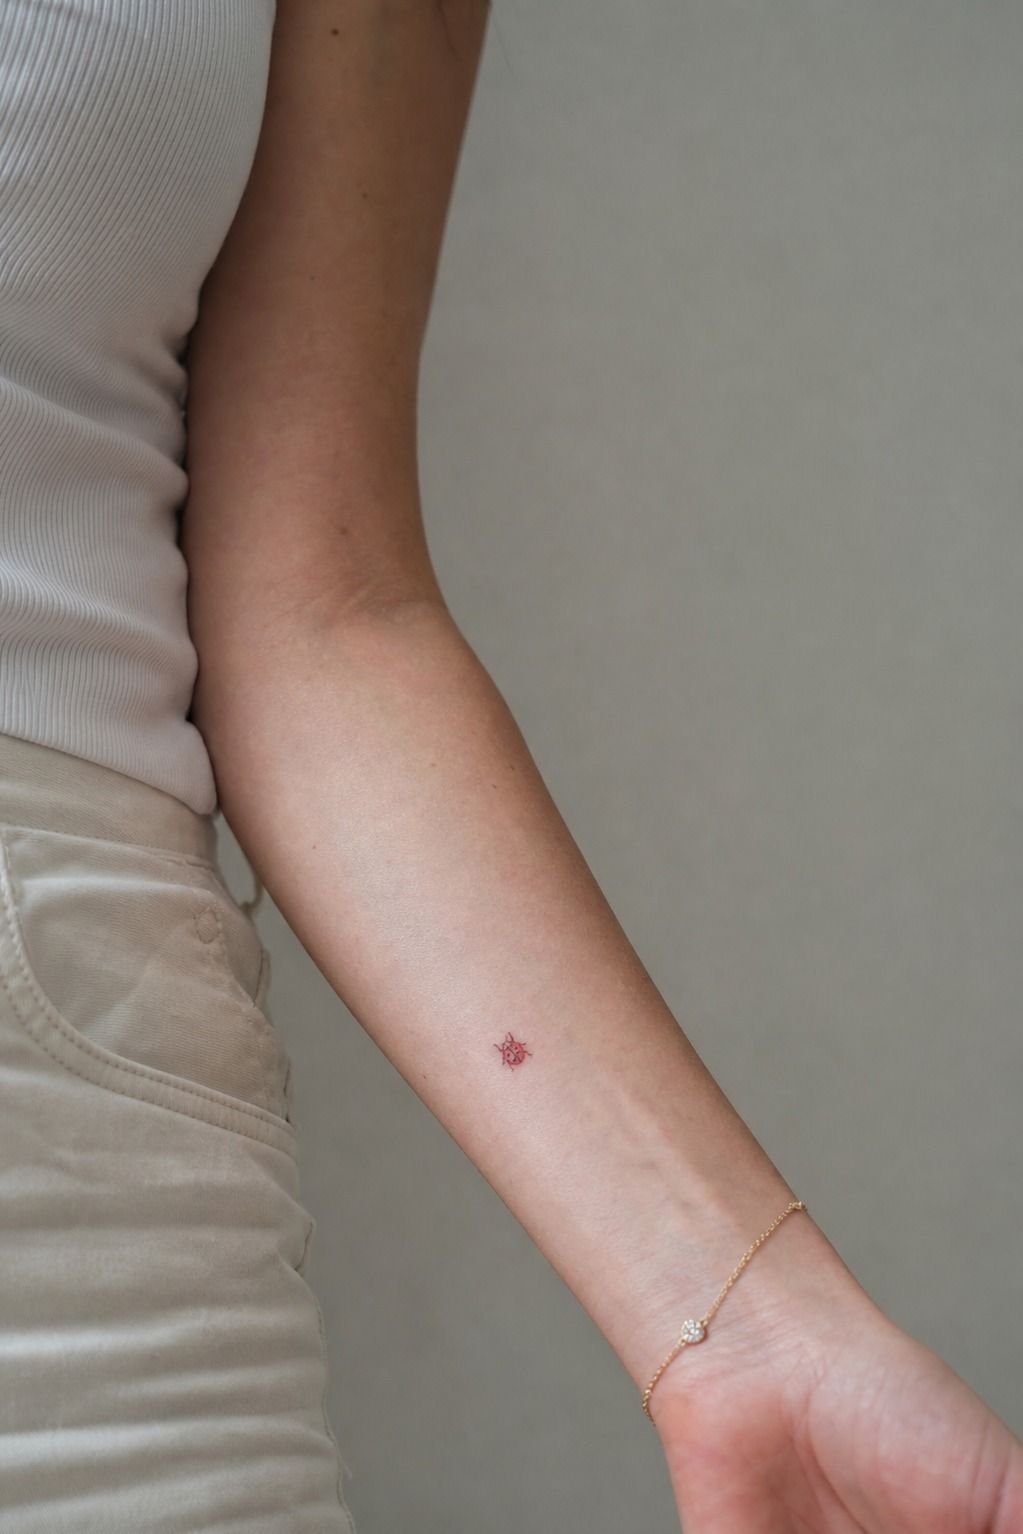
A tiny red ladybug on the wrist works when you keep it around 1 inch wide and let the black outline do the heavy lifting. You want a clean oval body, a few solid spots, and no tiny legs fighting for space. Red pigment gives it that bright little pop without making the design busy.
Your wrist moves constantly, so I’d place it slightly above the crease instead of right on it. That skin bends, gets washed, and catches sun.
Ask for crispy black linework around the red fill, because black is what keeps your ladybug readable once the fresh shine is gone. See more ladybug tattoo design options before locking your stencil.
2Fine-Line Ladybug Behind the Ear
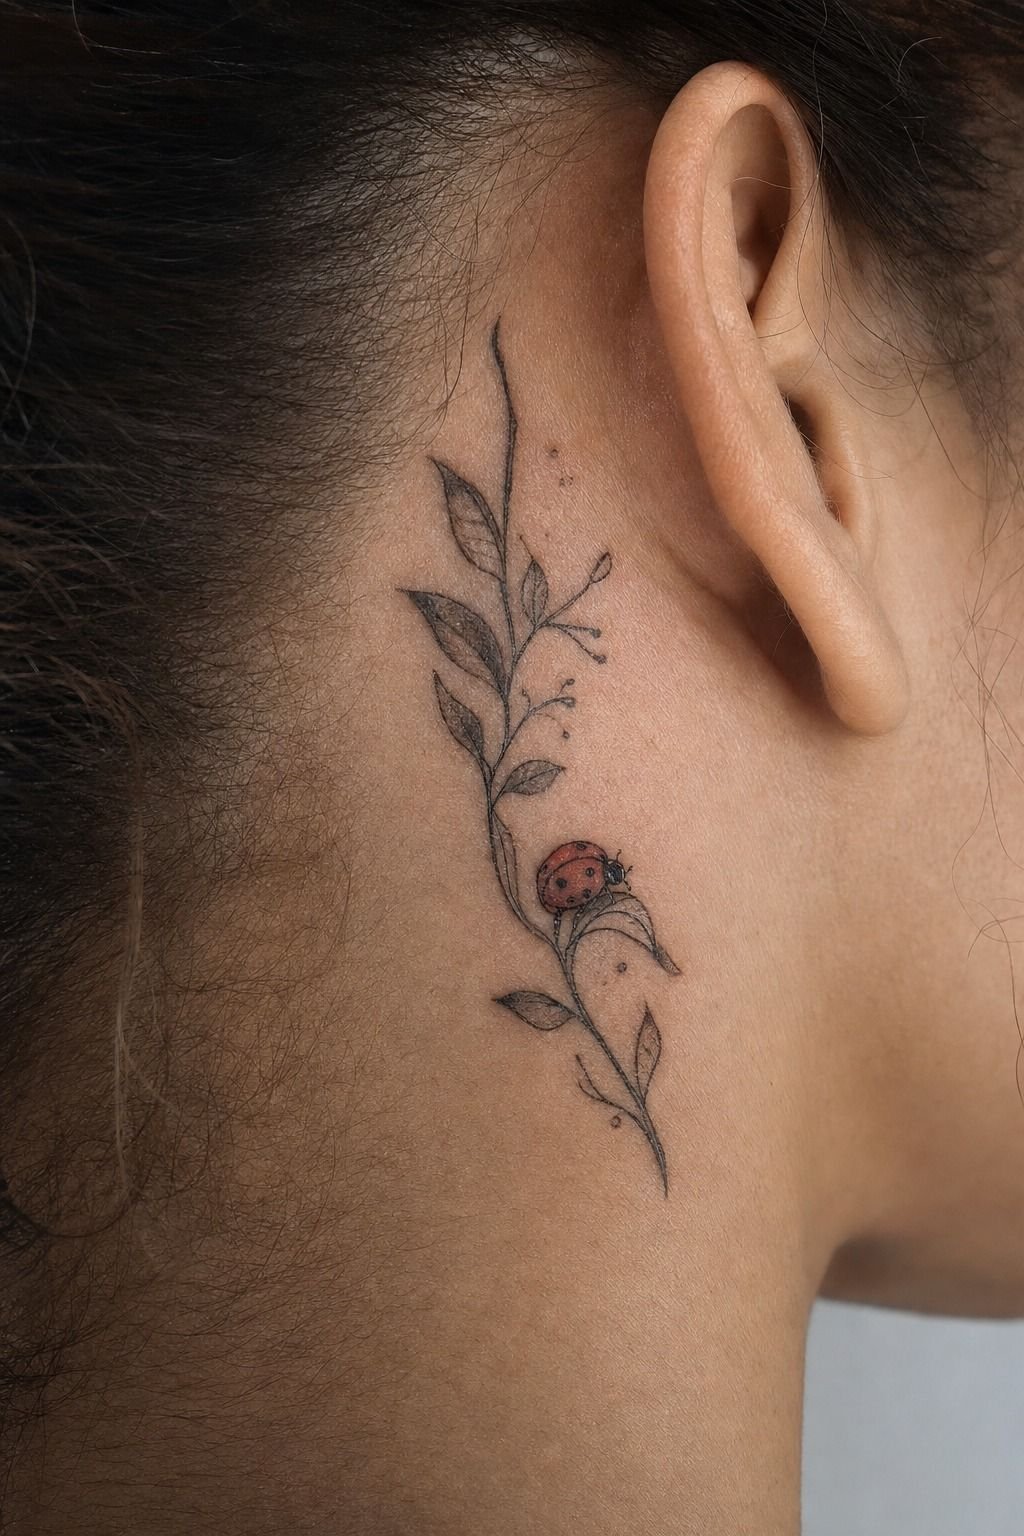
Behind-the-ear ladybug tattoos look intimate and charming, especially when the insect follows the curve where your ear meets your neck.
3Minimalist Ladybug on the Ankle
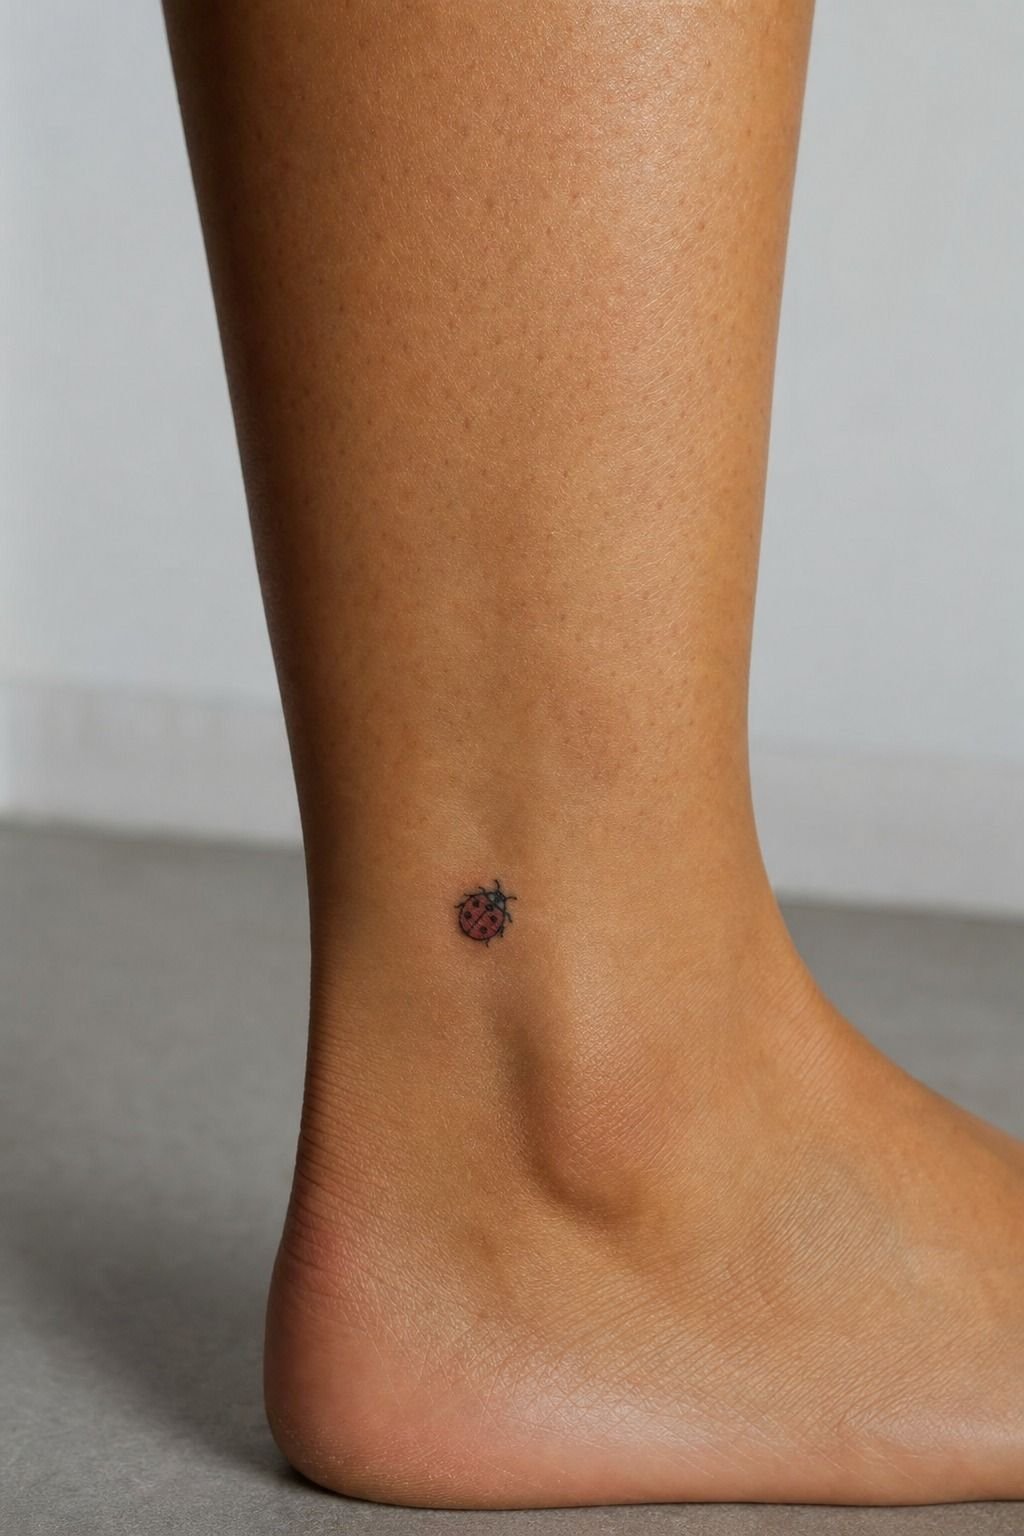
A minimalist ankle ladybug should look soft and deliberate, not like a random dot near your shoe line. Give the body a little breathing room and use a bold outer contour, even if the rest is single needle. Dynamic Black ink is a solid choice for the outline because it heals with reliable contrast.
Ankles are low-wear compared with feet, but socks and boots can chew up a fresh tattoo. You’ll want loose footwear for several days and no long walks if it’s rubbing.
The outer ankle is more forgiving than the bony front. Small, clean, and a little off-center.
That’s the move.
4Cute Ladybug Resting on a Wildflower
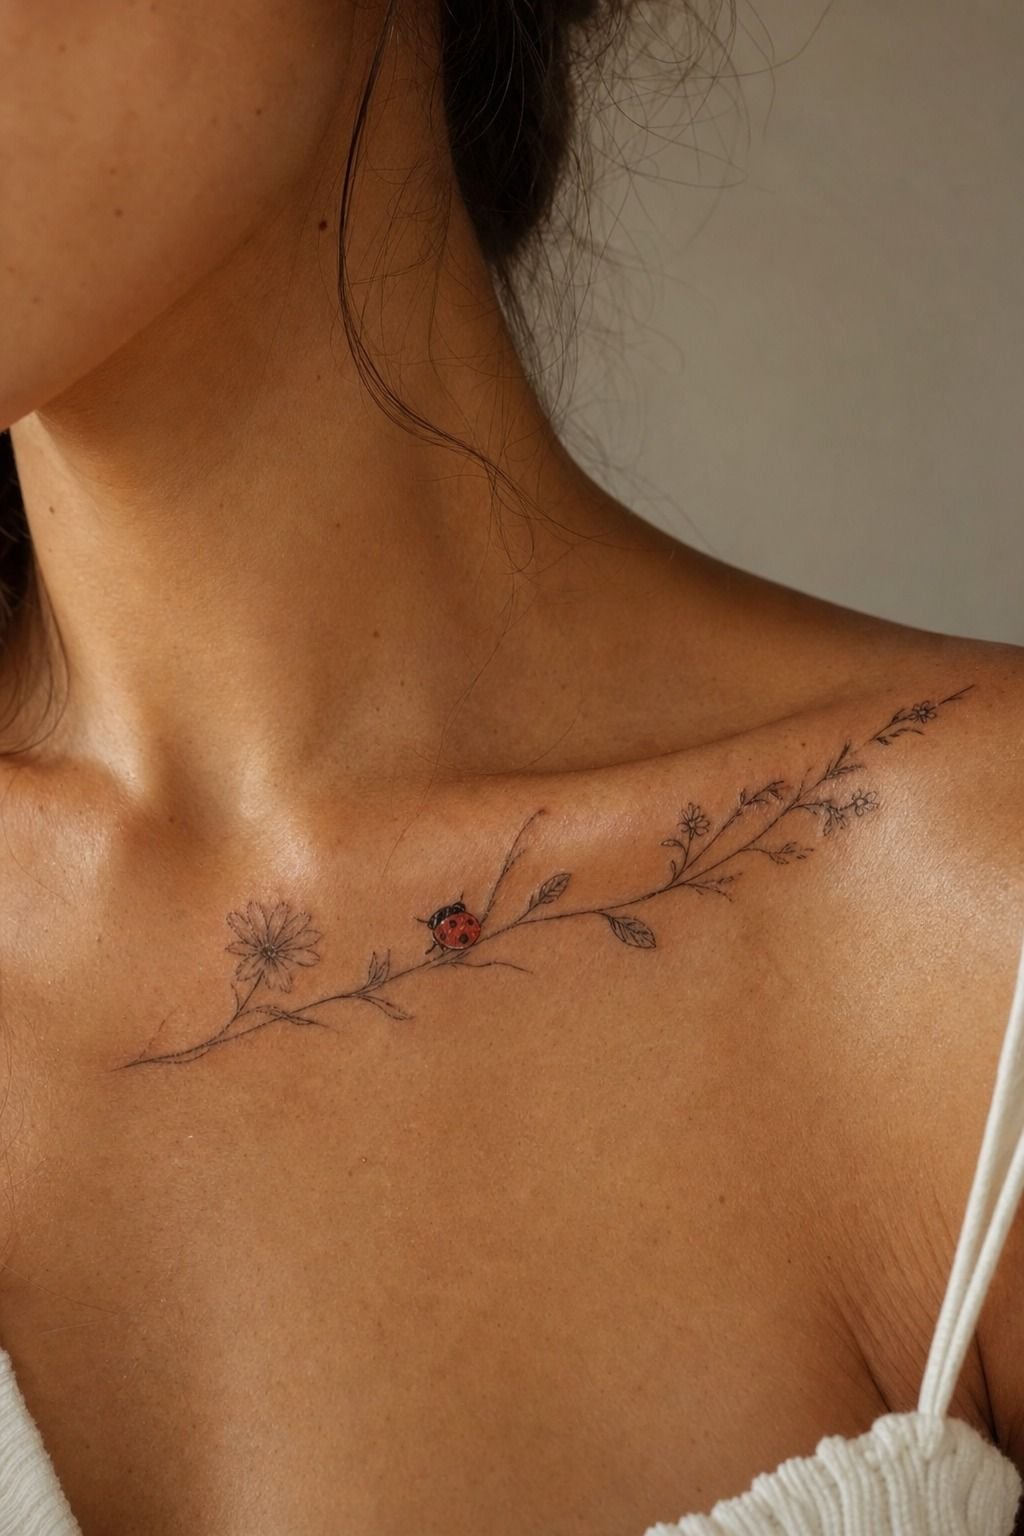
A ladybug resting on a wildflower belongs on the collarbone because the stem can follow your natural body flow. Use a flower with open petals, like a daisy or small cosmos, then let the ladybug sit at the top where the red accent catches your eye. Single-needle linework keeps the botanical parts airy.
Don’t shrink every petal until it becomes soup later. I’d make the whole design at least 2.5 inches across, especially if you want stippled leaves.
Your artist should build the flower first, then settle the bug into it. It’ll look more organic and less like a sticker pasted onto your skin.
5Blackwork Ladybug With Delicate Dots
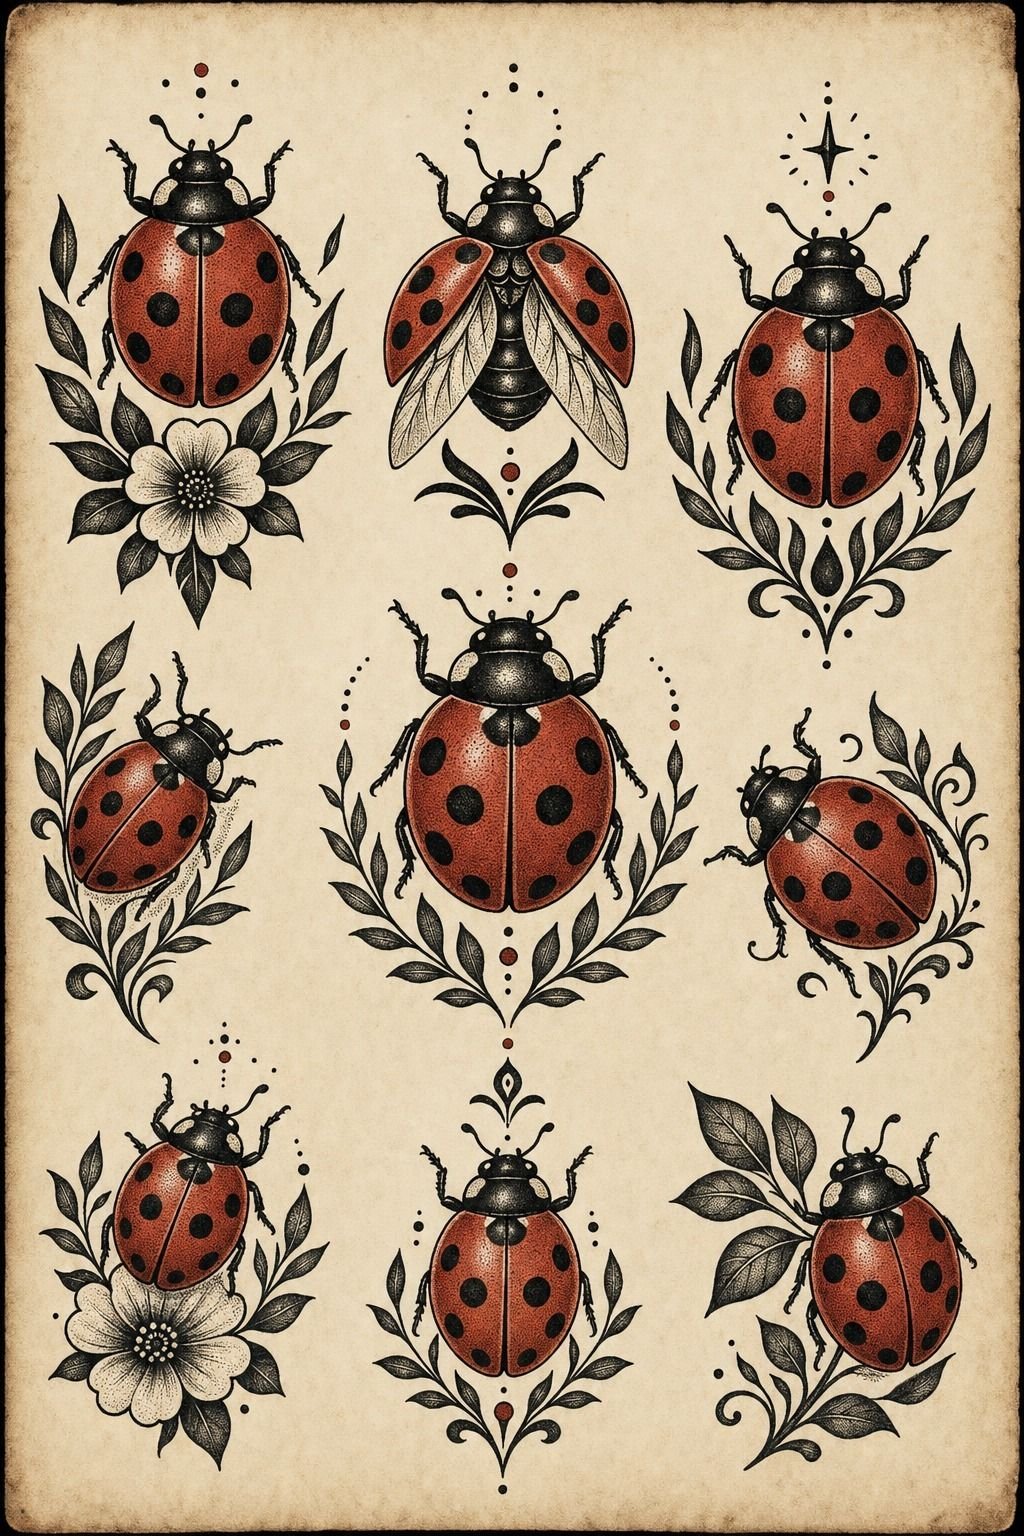
Blackwork ladybugs don’t need red to feel alive. On a flash sheet, I’d look for a shell built from solid black fill, clean negative-space spots, and a few delicate dot clusters around it. Blackwork flash holds better than a pile of whisper-thin details, period.
You can pick one from a get-what-you-get sheet or ask for a custom redraw based on the same mood. I wouldn’t copy a Pinterest tattoo exactly.
Bring references for vibe, then let the artist make it fit your skin and placement. That’s how you avoid leaving with a design everybody else already has.
6Ladybird Tattoo Along the Collarbone
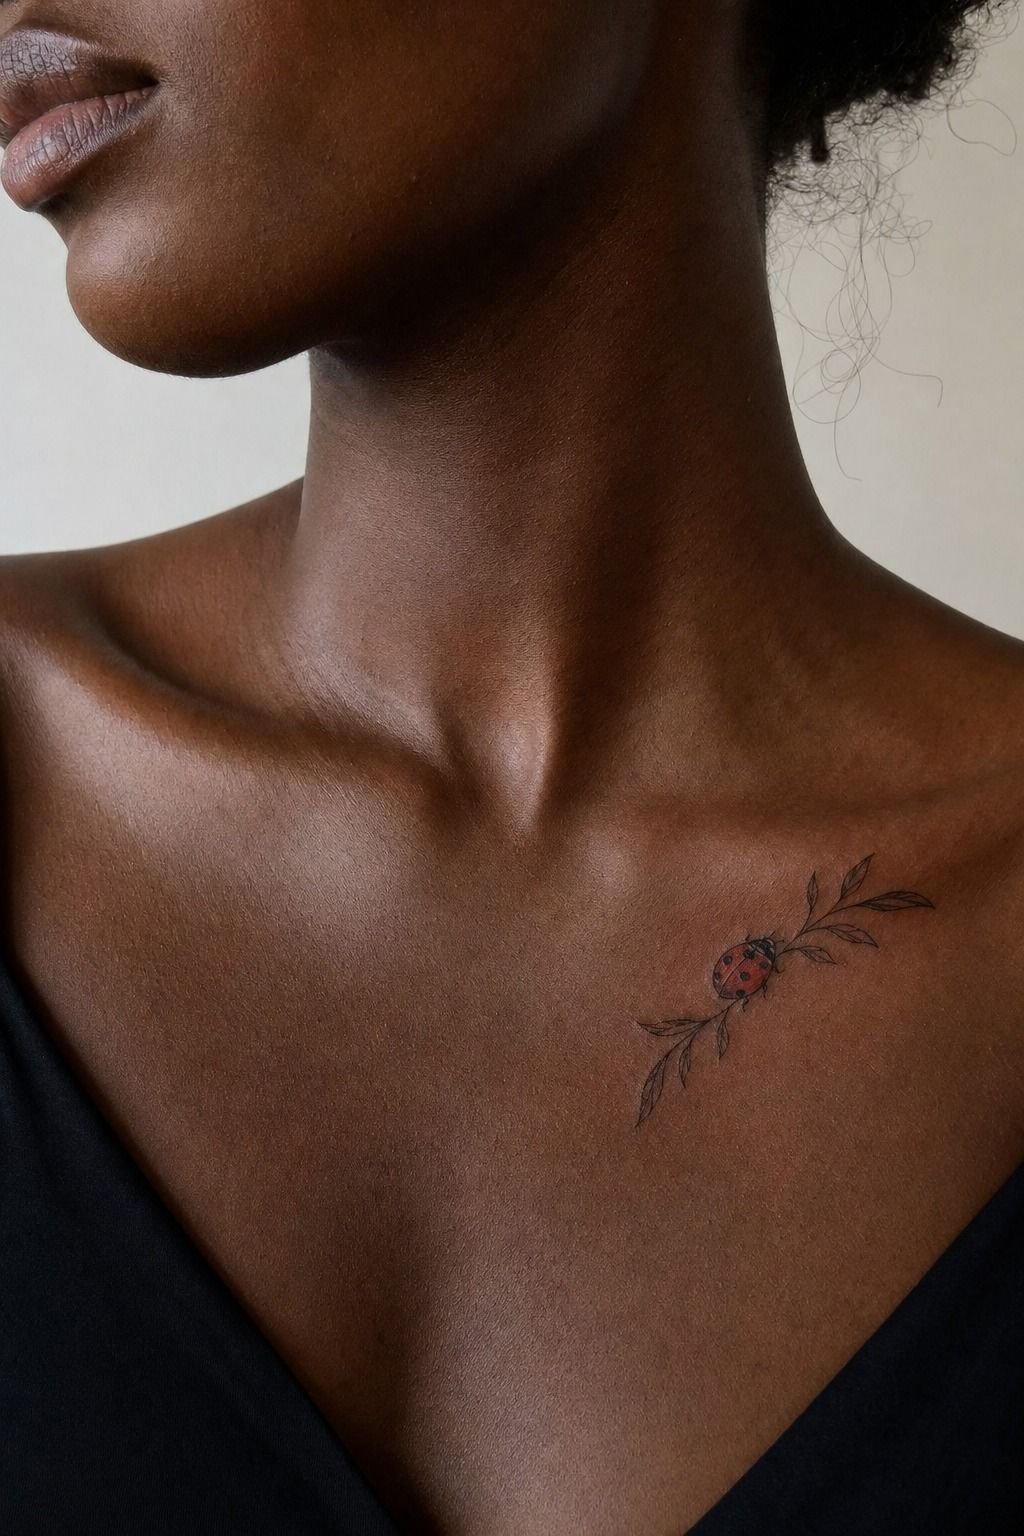
A ladybird tattoo along the collarbone should travel with the bone instead of sitting dead center like a badge. Place the bug at a slight angle, wings facing upward, and let one fine stem or dotted path guide the eye outward. Carbon Black ink keeps those tiny legs from disappearing.
Collarbones can be spicy, but the visual payoff is real. You’ll see it in tank tops, but it can still tuck away under a tee.
I’d skip an oversized flower cluster here because it fights the placement. One ladybird, one small botanical cue, enough negative space.
Clean skin does half the design work.
7Dainty Ladybug on a Finger
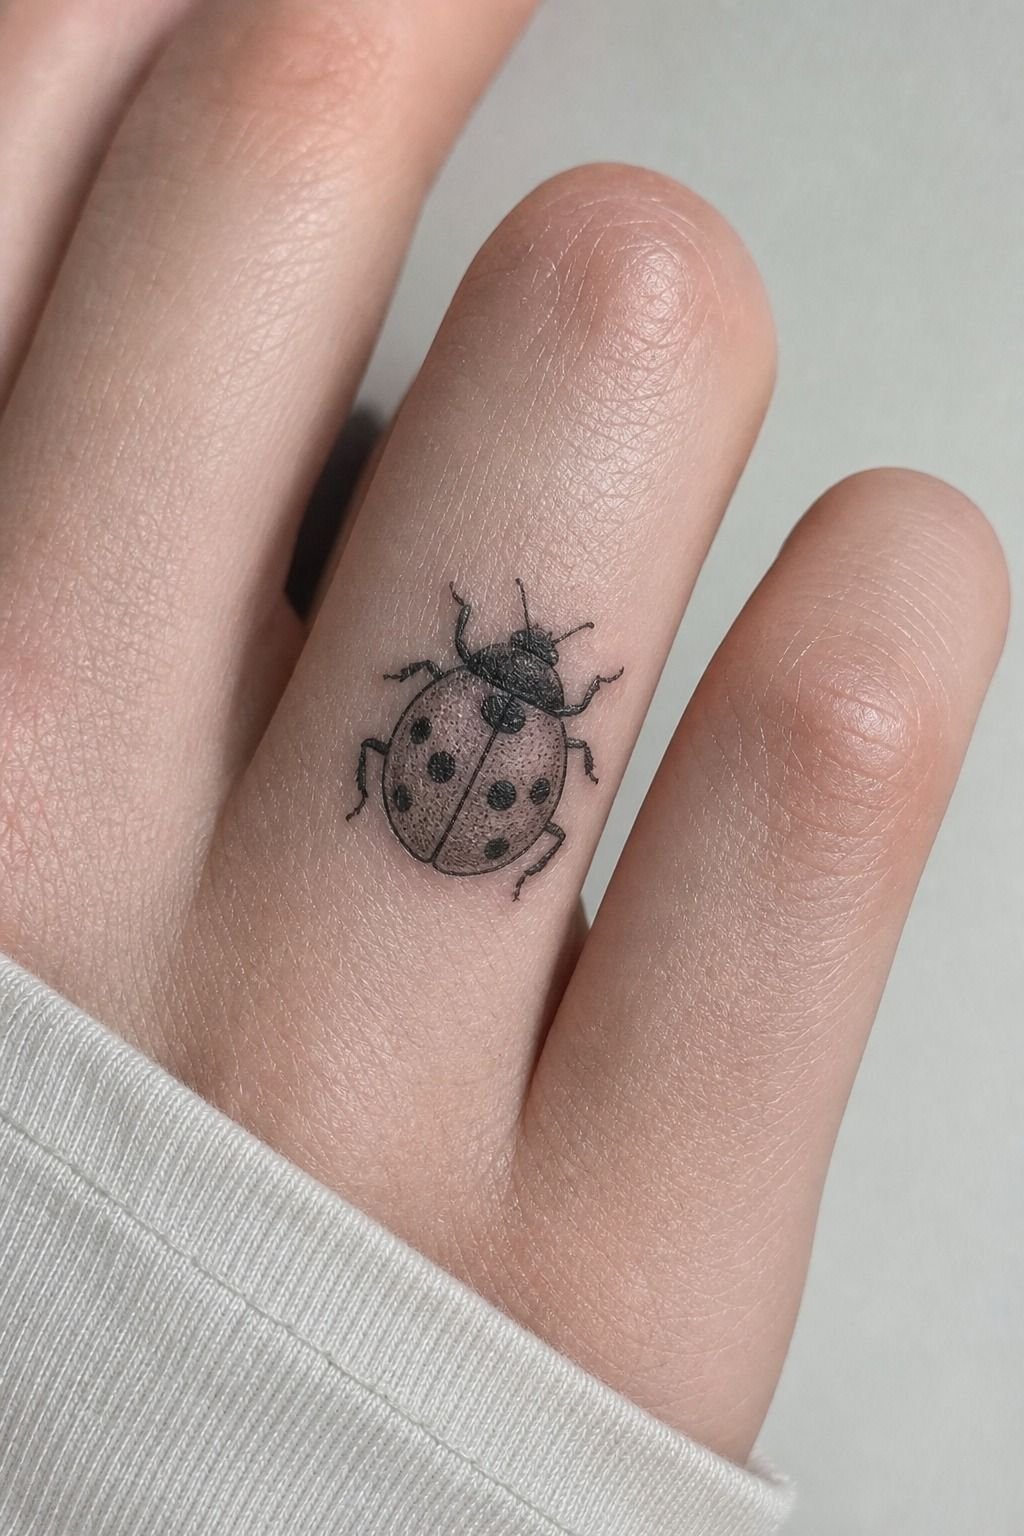
Finger tattoos are cute. They’re also high-wear zones, and anybody telling you otherwise is selling you a fantasy. A ladybug on the side of a finger needs to be very simple: black outline, two or three spots, and a shell closer to 0.5 inches than microscopic.
Your hands get washed, rubbed, bumped, and exposed to UV every day. Solid black ink will outlast tiny red dots here, while red can be added later if you accept touch-ups. I’d choose the side of the index finger over the knuckle, since constant folding can break up those crispy lines fast.
8Ladybug With Tiny Botanical Details
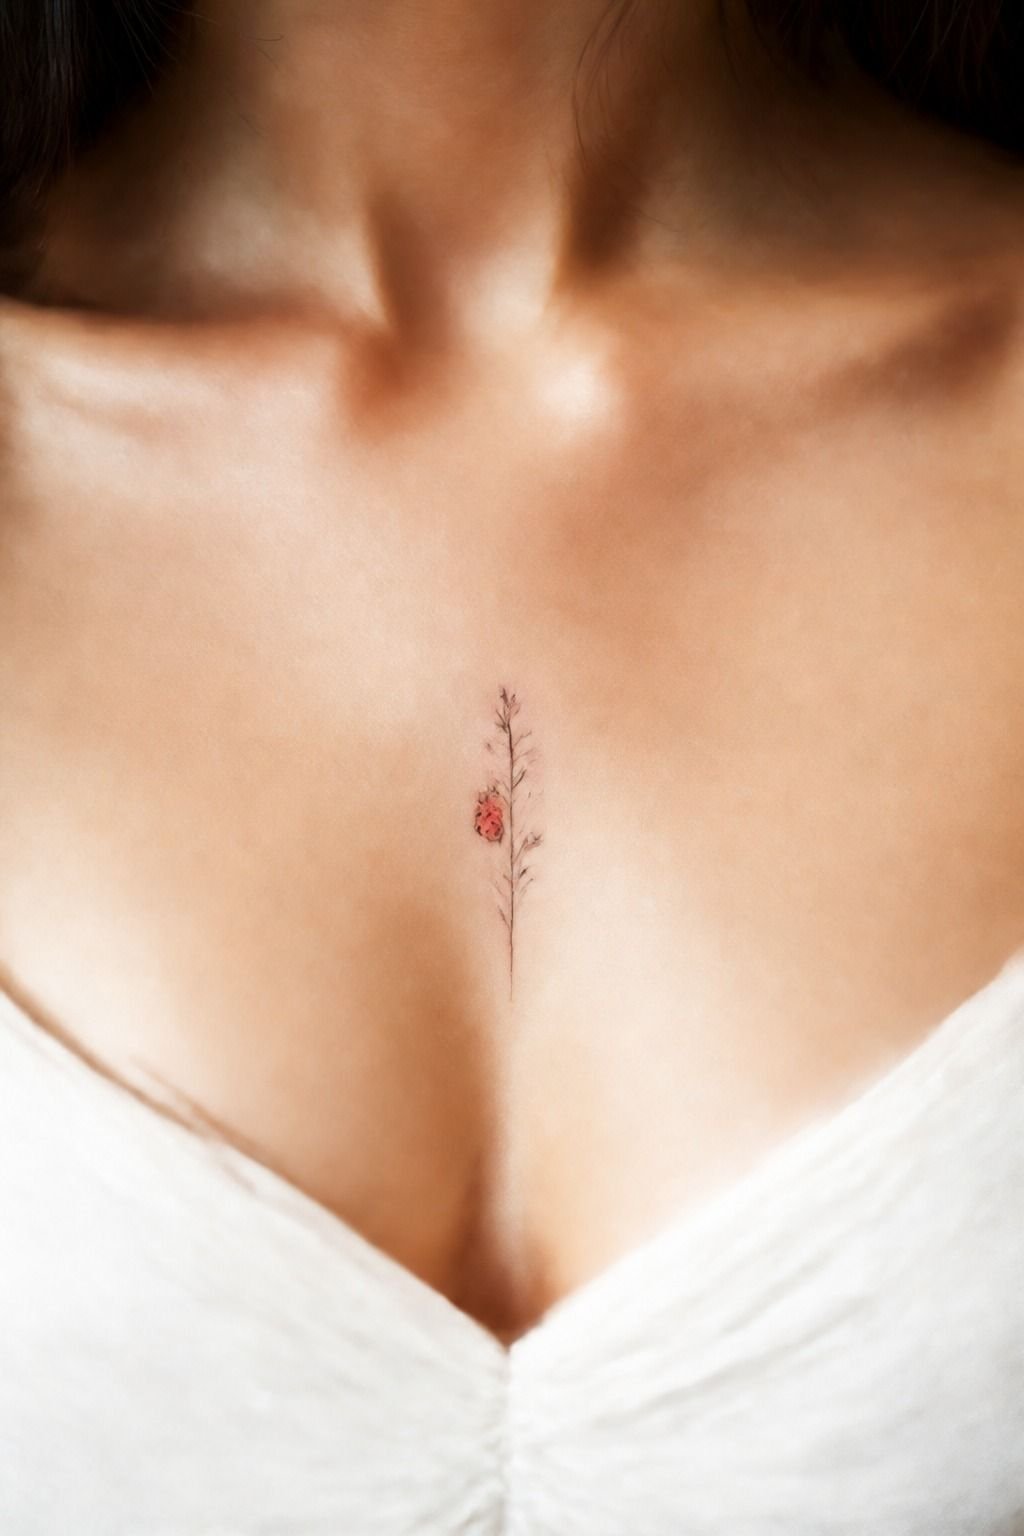
For a sternum piece, a ladybug with botanical details can feel refined without getting fussy. Use a small beetle at the center with two short sprigs opening outward, like the beginning of a symmetrical chest piece. Grey wash shading can make the leaves feel soft without crowding the insect.
The sternum is not a chill placement. Lines feel sharp there, and you should eat before your appointment. But if you want a private tattoo with a calm, balanced silhouette, it’s worth the spicy session.
Keep the design at least 3 inches wide so the plant details still breathe after healing.
9Simple Ladybug on the Inner Arm
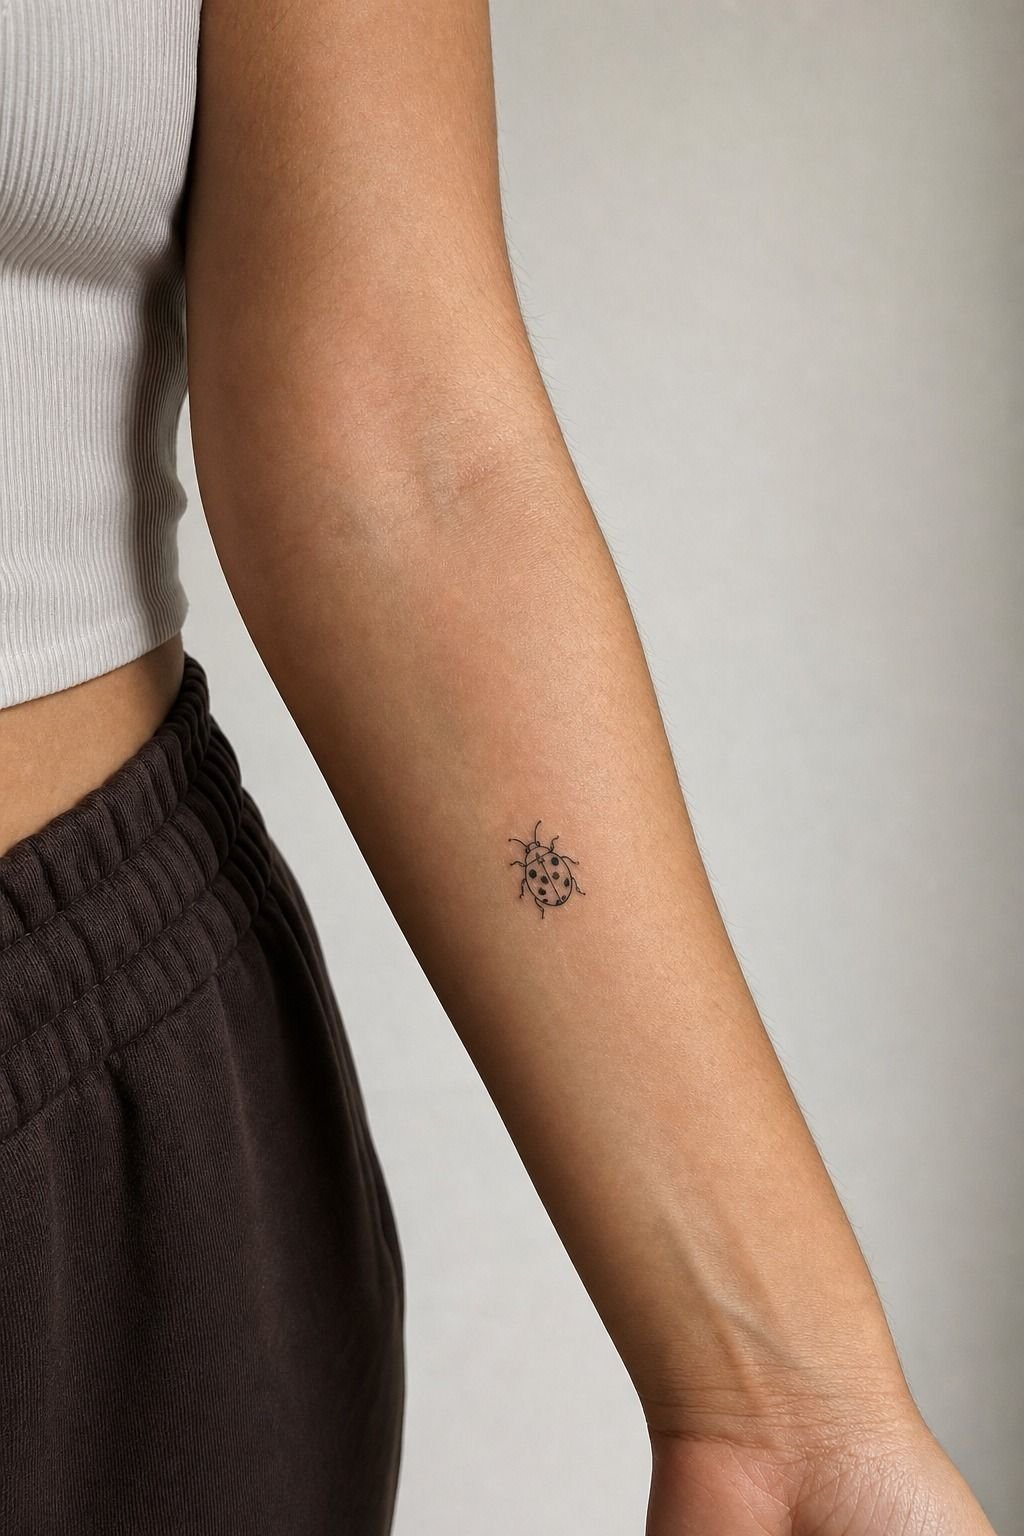
The inner arm gives a simple ladybug tattoo room to age cute on you. Put it a few inches above the elbow ditch, where the skin stays calmer and the design won’t fold every time you bend. Fine-line black ink works beautifully when the body shape is clear.
You can let a tiny dotted flight path curve toward the forearm, but don’t add five tiny bugs just because the space is there. One readable ladybug has more presence from across the room. If symbolism matters to you, pair it later with a yin yang tattoo meaning guide for a balanced sleeve story.
10Matching Ladybug Tattoos for Best Friends
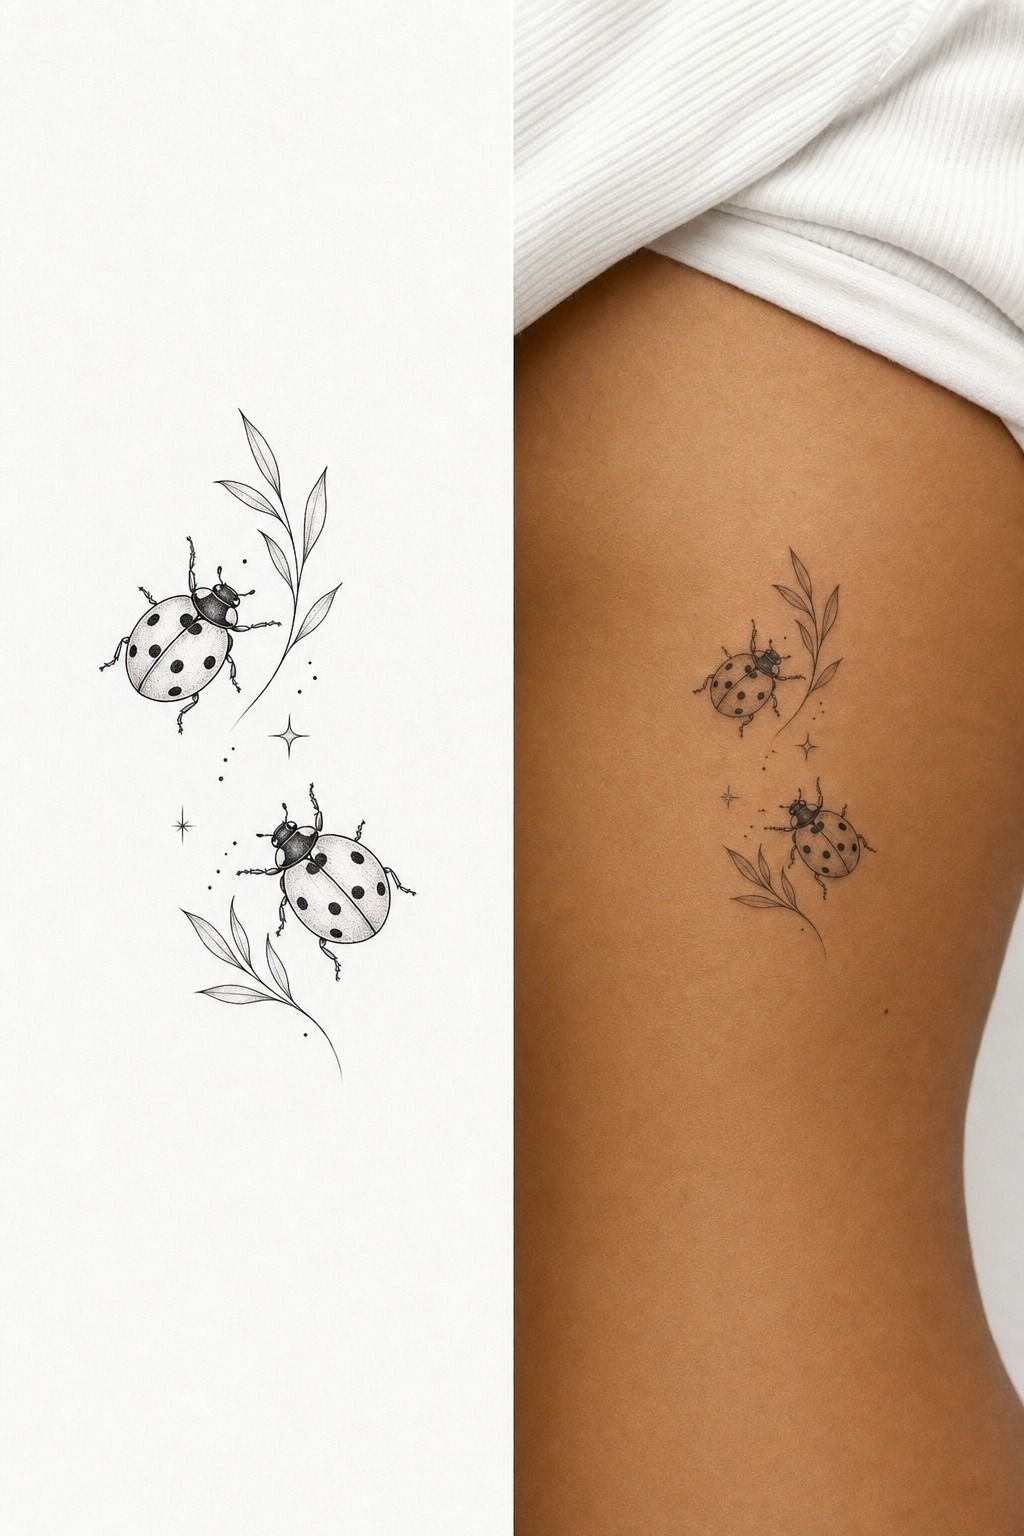
Matching ladybug tattoos work best when the design is shared but the placement is personal. One friend might wear it on the outer forearm while the other chooses an ankle.
The same stencil can look totally different once it follows your individual skin and body flow. Transfer stencil paper helps you compare size before anybody commits.
I’d make one small change between the pair: a different dot pattern, a tiny initial, or opposite flight direction. It keeps the match meaningful without turning it into a uniform.
And yes, pick an artist whose healed fine-line work is visible in their portfolio. Fresh photos can hide a lot.
11Ladybug With a Fine Crescent Moon
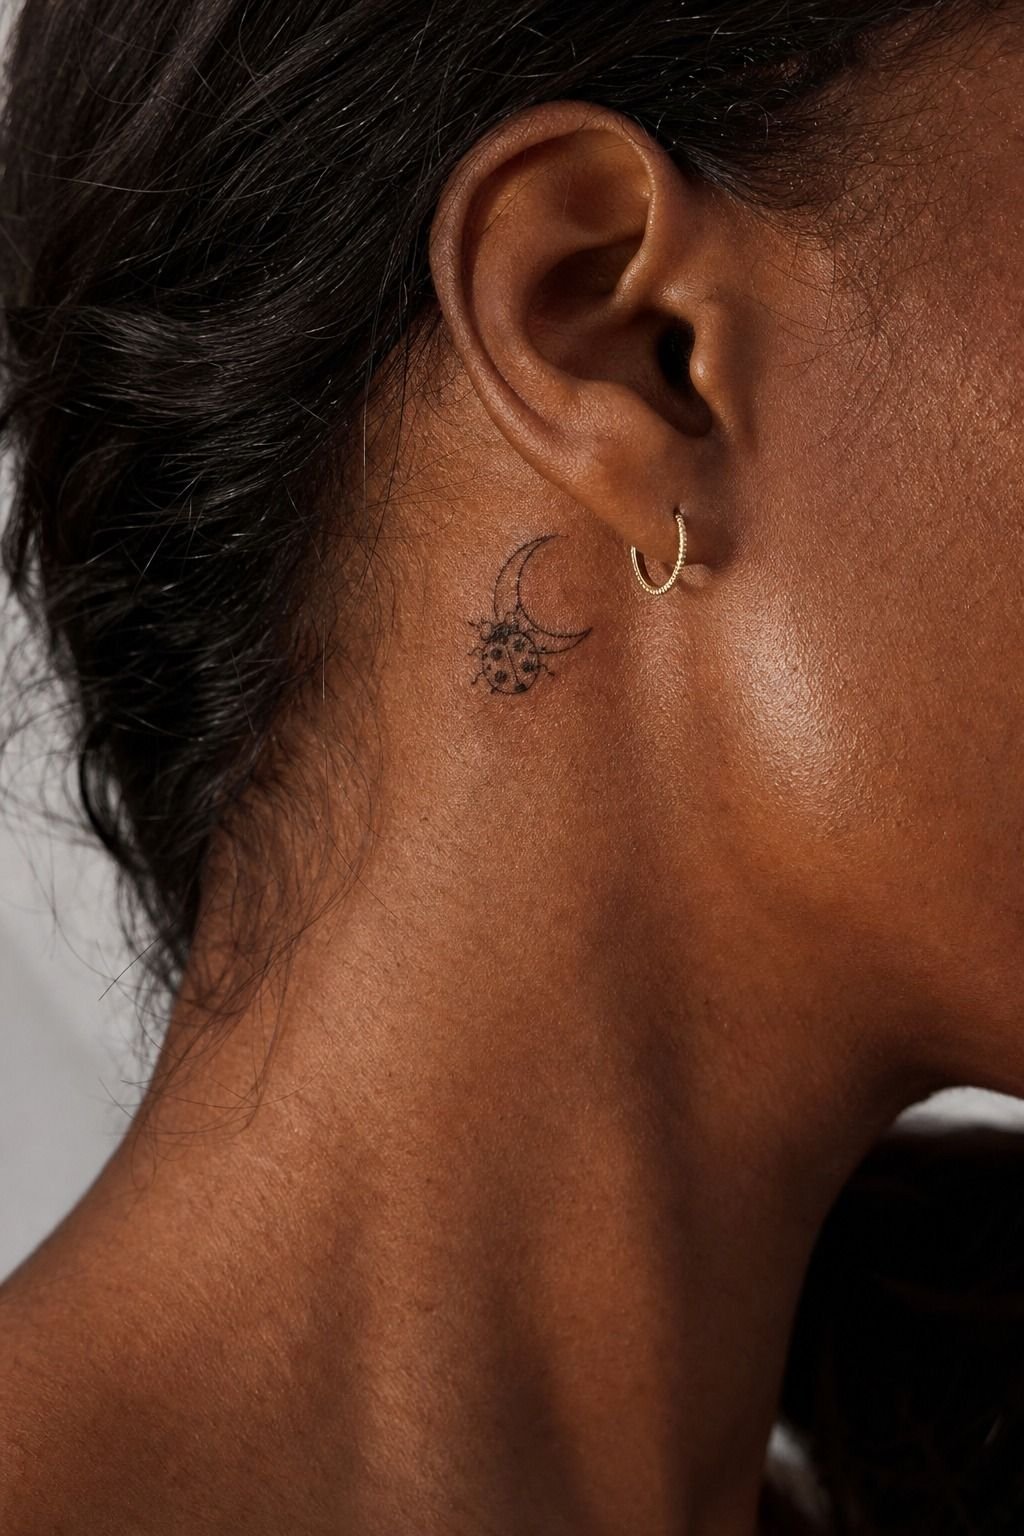
A fine crescent moon behind the ear gives a ladybug tattoo a quiet, dreamy little story. Put the moon behind the insect, not around it, so the shell stays the strongest shape. Fine-line crescent detailing should be open and simple, with no dense star field.
You’ll want a slightly larger tattoo than you think, around 1.25 inches tall. That size protects the negative space between the ladybug and moon. I’d skip white highlights because they often fade into the skin.
Black outline, one red shell, maybe the tiniest pepper shading. Enough already.
12Watercolor Ladybug With Crisp Linework
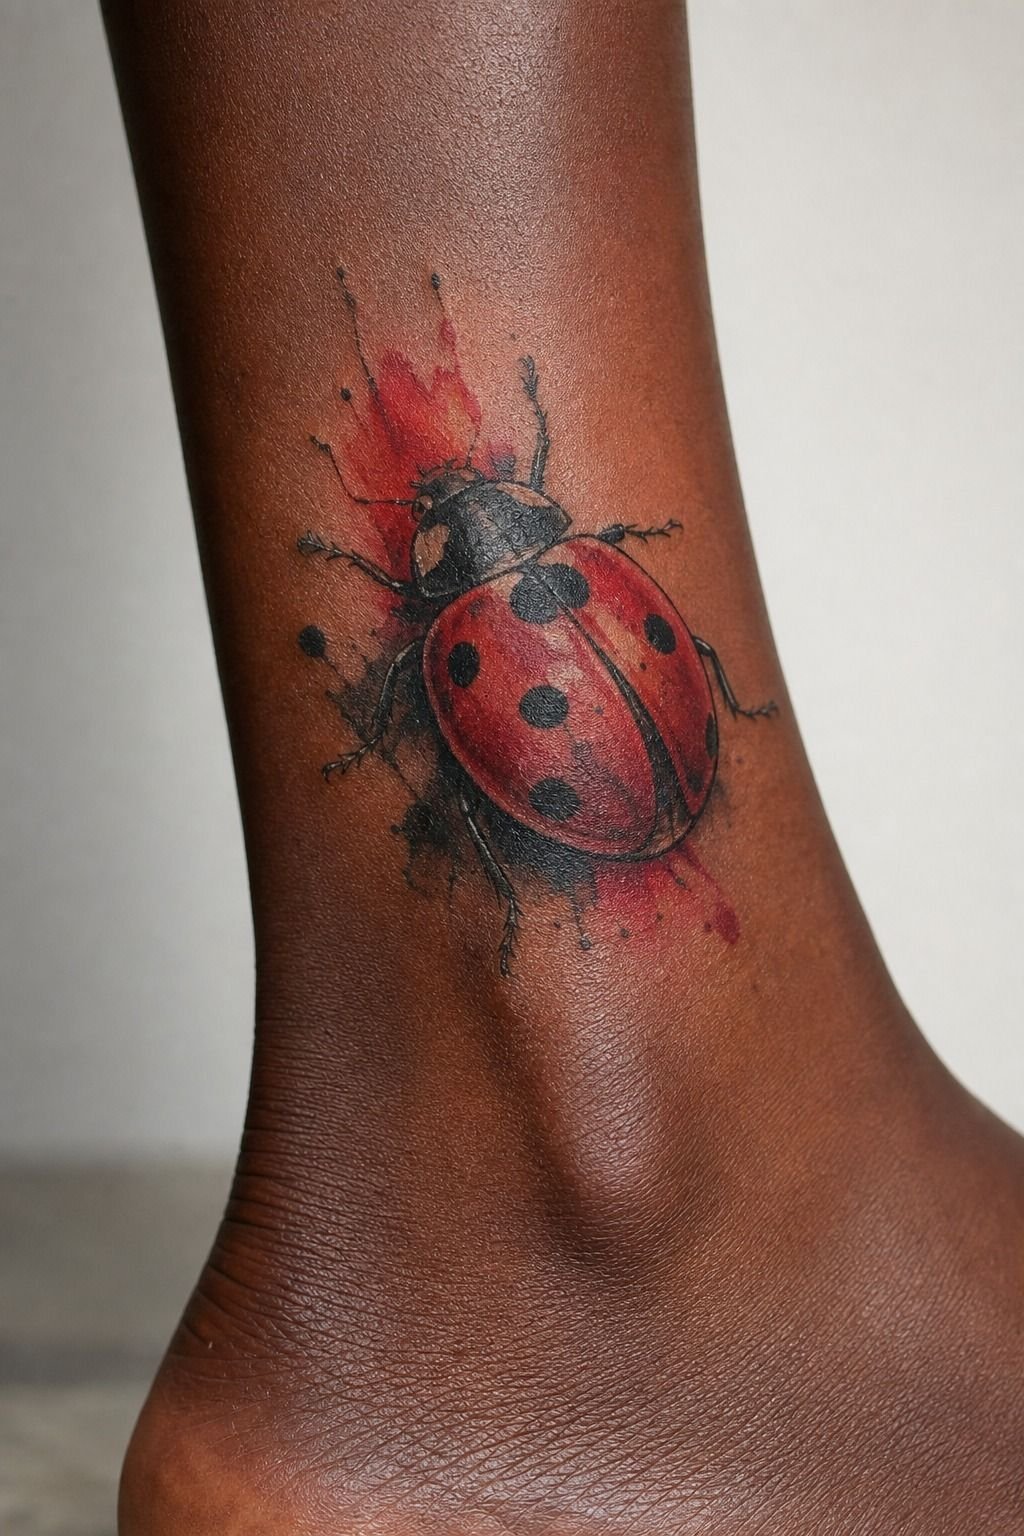
Watercolor ladybugs can look bright and playful, but watercolor needs to be anchored with line. Without that black structure, the red and orange wash may heal too soft and lose the bug shape. Eternal Ink red can give you saturated warmth without needing a huge color field.
On the ankle, I’d keep the color splash inside a 2-inch frame and leave the edges loose but controlled. Your artist should use a solid black shell outline, then add diluted red and orange around it with a light hand. Don’t let them overwork the skin trying to make it look painterly on day one.
13Ladybug Tattoo Between the Shoulder Blades
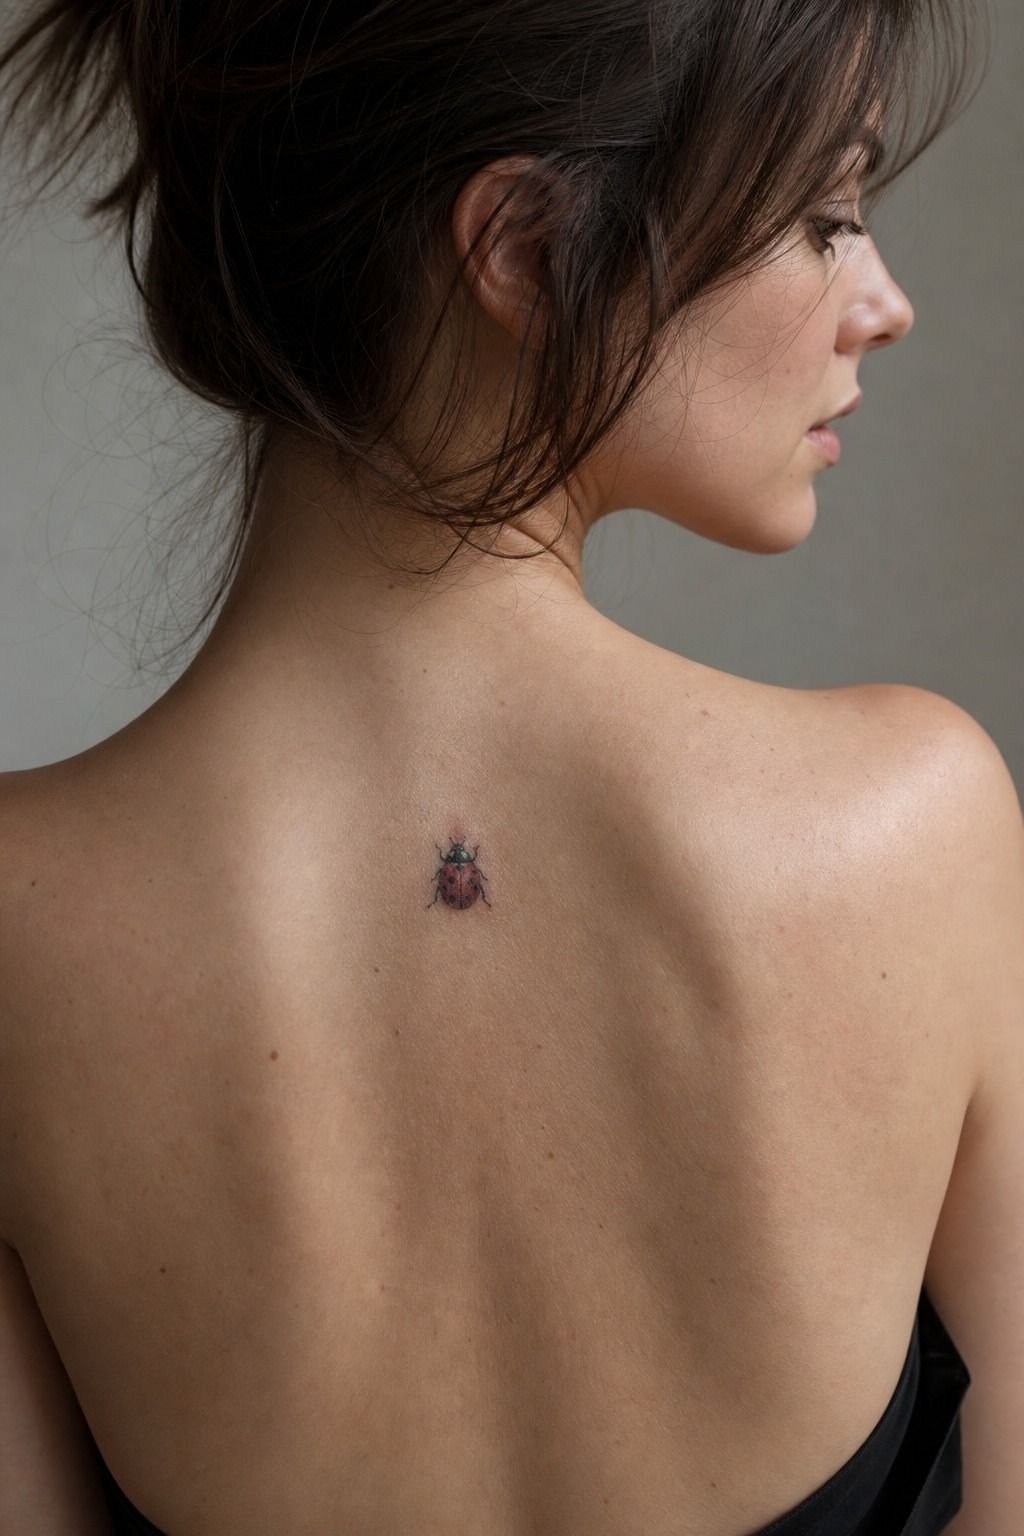
A ladybug between the shoulder blades feels a little more private and a lot more timeless than a tiny front-facing chest tattoo.
14Micro Ladybug Near the Hip
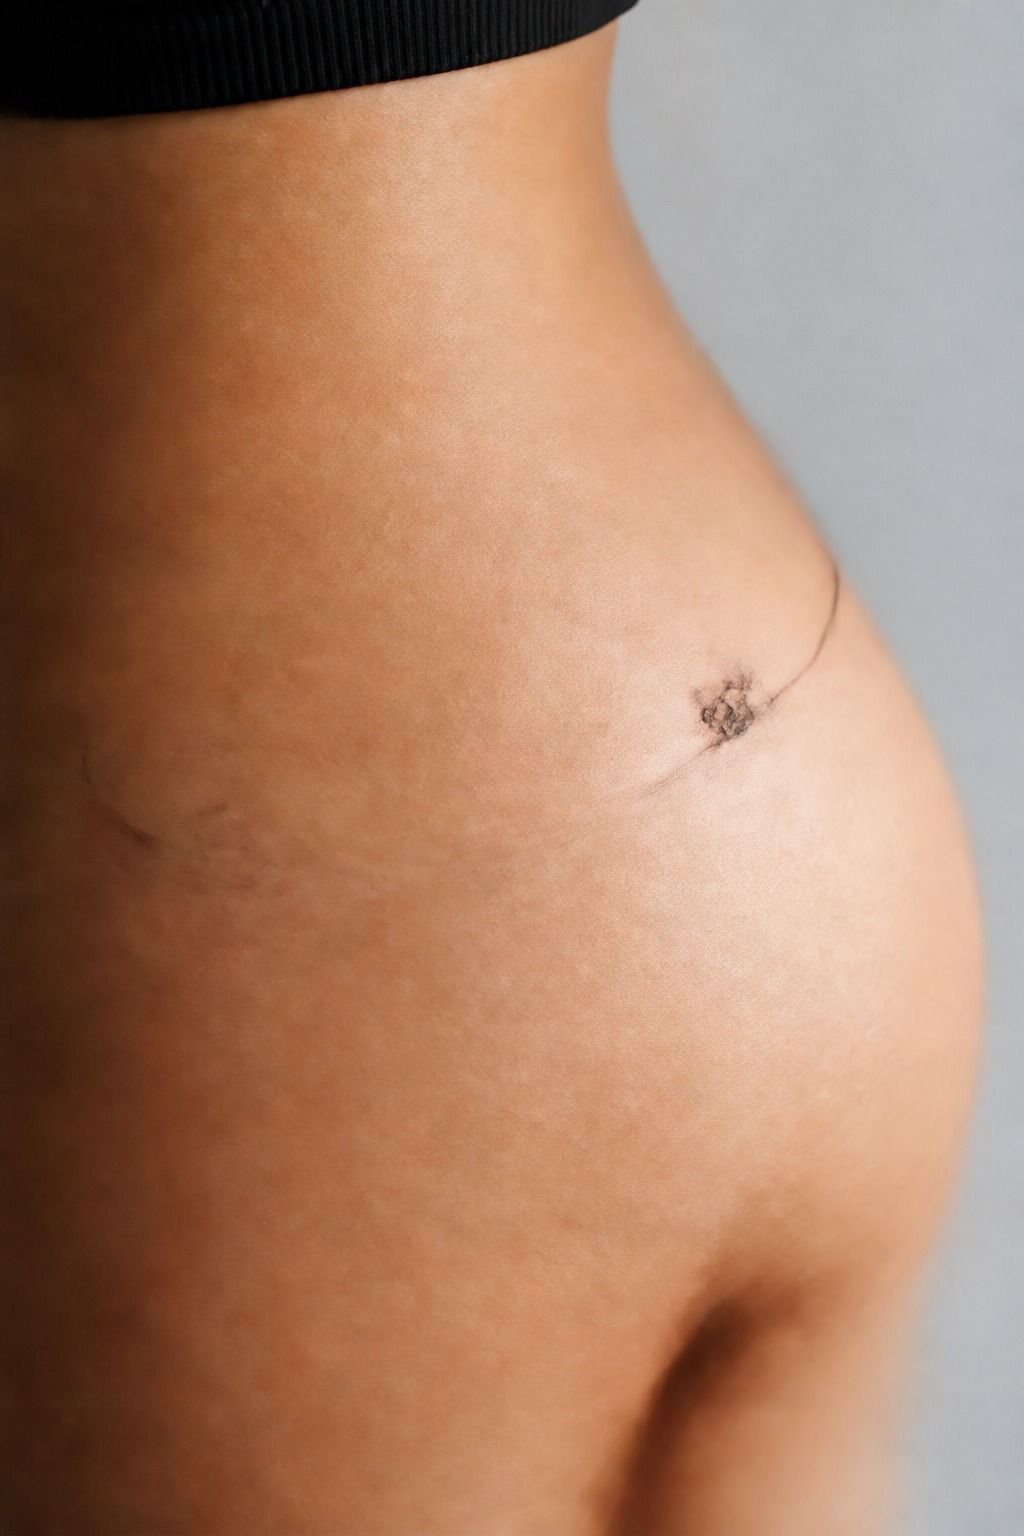
A micro ladybug near the hip can be intimate, subtle, and still readable if you don’t chase absurdly tiny detail. Aim for about 1 inch, with a clear shell split and two or four spots. Single-needle black linework is great here, but it still needs enough line weight to survive.
The hip has good flow for a ladybug that looks like it’s crawling upward. You’ll want soft waistbands and clean sheets while it heals, because denim friction is rude to fresh ink. I’d choose the upper hip over the waistband line.
Less rubbing, easier healing, better chance it stays crisp.
15Ladybug With Initials and Fine Lettering
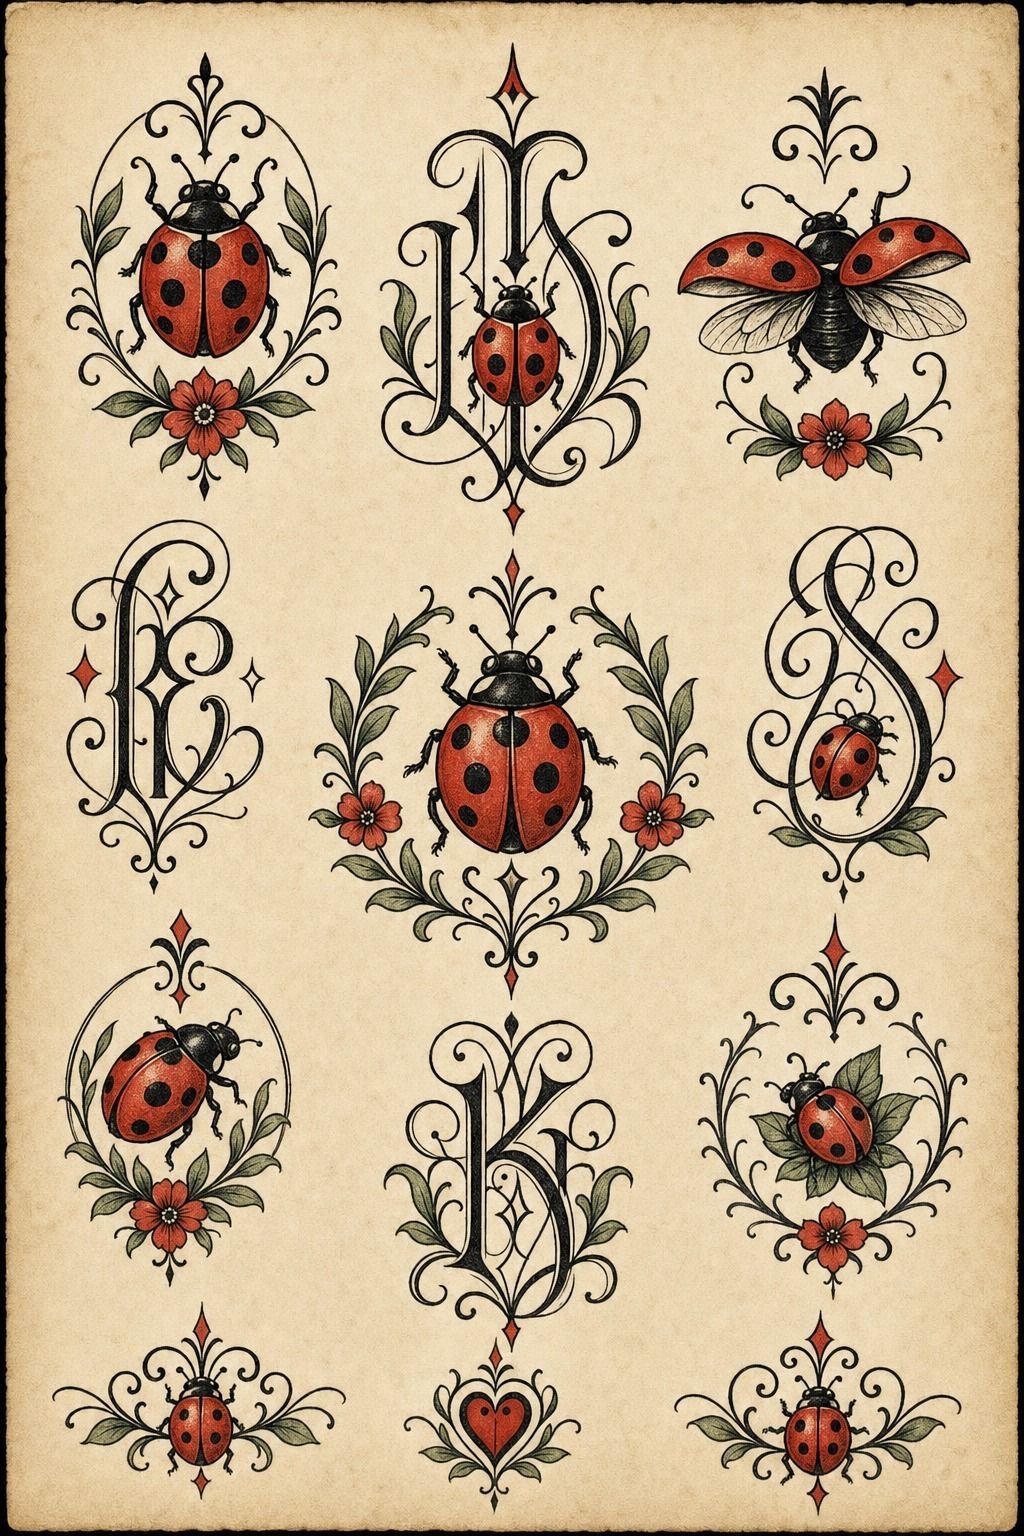
Initials can turn a ladybug tattoo into a real memorial or relationship piece, but fine lettering needs discipline.
16Side-Rib Ladybug With Subtle Shading
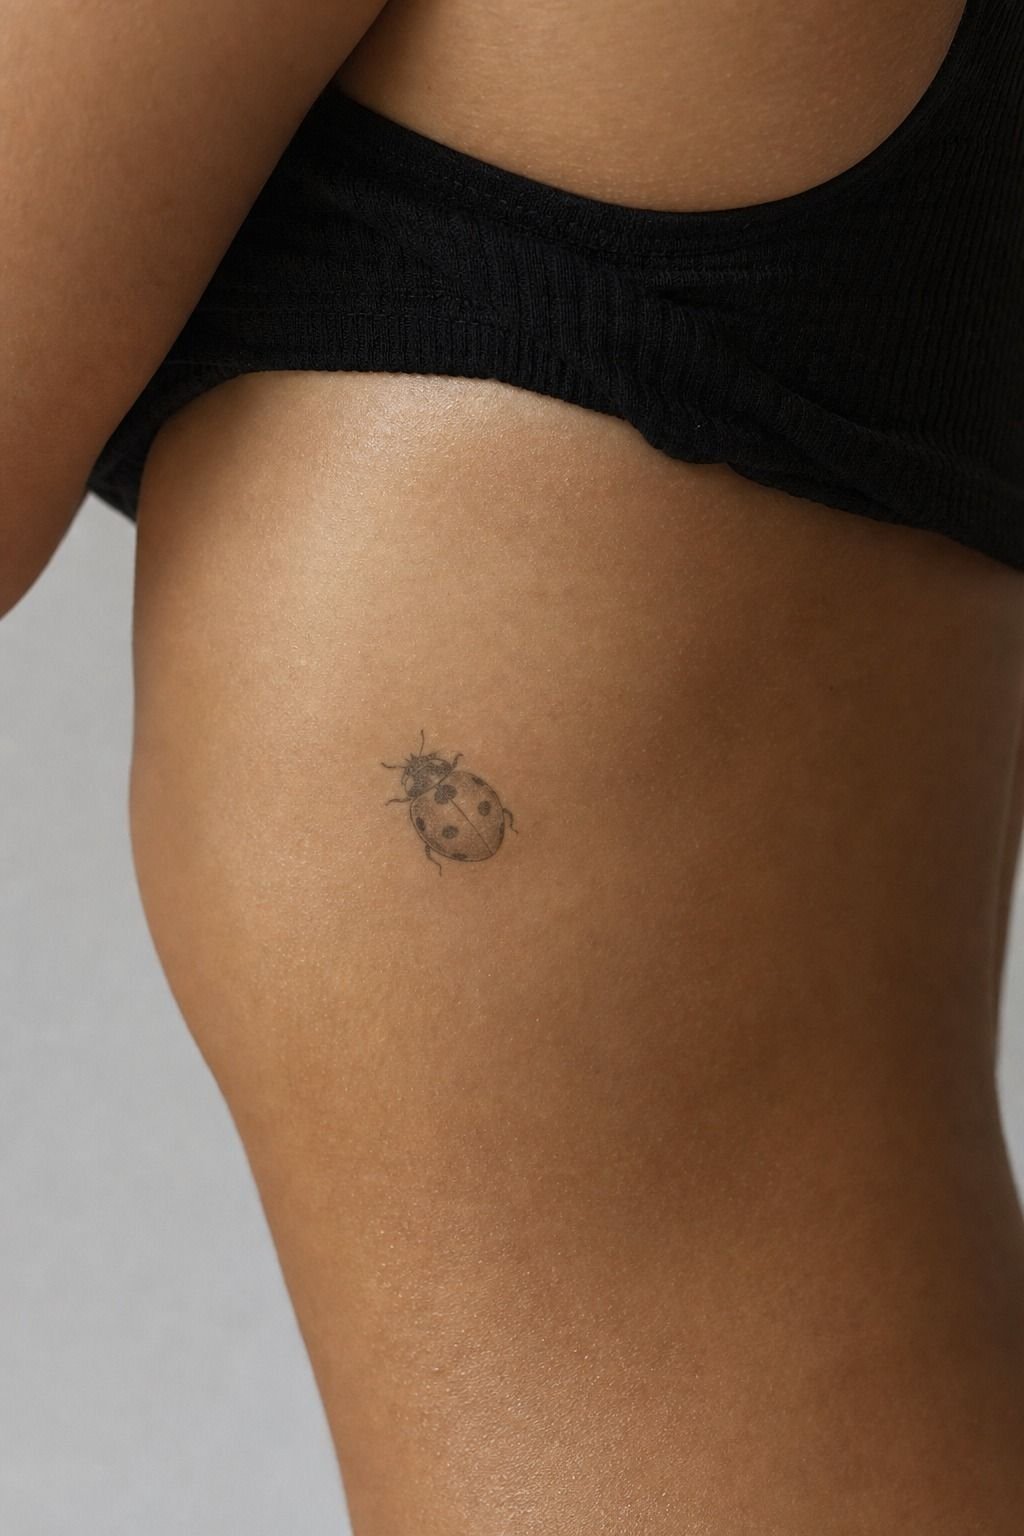
A side-rib ladybug with subtle shading looks elegant when it follows the natural rise of the ribcage. I like the insect angled slightly upward, with pepper shading under the shell to give it shape without making it heavy. Grey wash should heal velvety, not patchy.
Ribs are spicy. No way around that. Take breaks if you need them, breathe steadily, and tap out for five rather than pass out on me.
You’ll also want to avoid tight bras and gym friction during the early heal. The result is worth it if you want a design that feels personal instead of constantly on display.
17Ladybug and Four-Leaf Clover Design
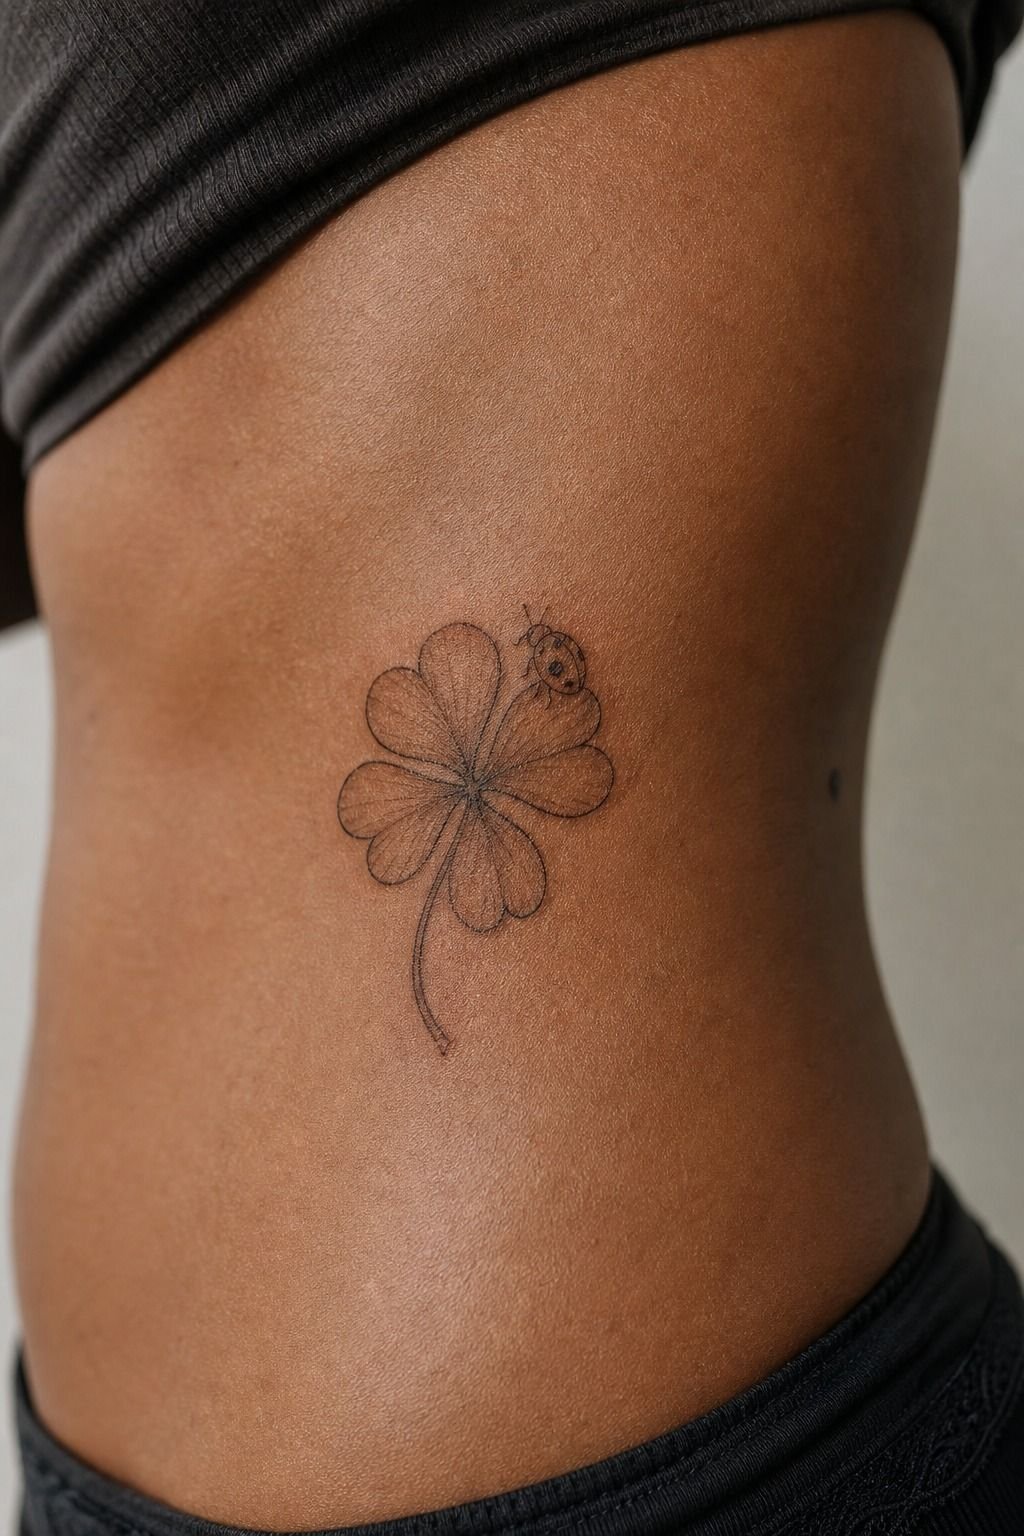
A ladybug and four-leaf clover design is obvious symbolism, sure, but it doesn’t have to look cheesy.
18Tiny Ladybug Trail Along the Forearm
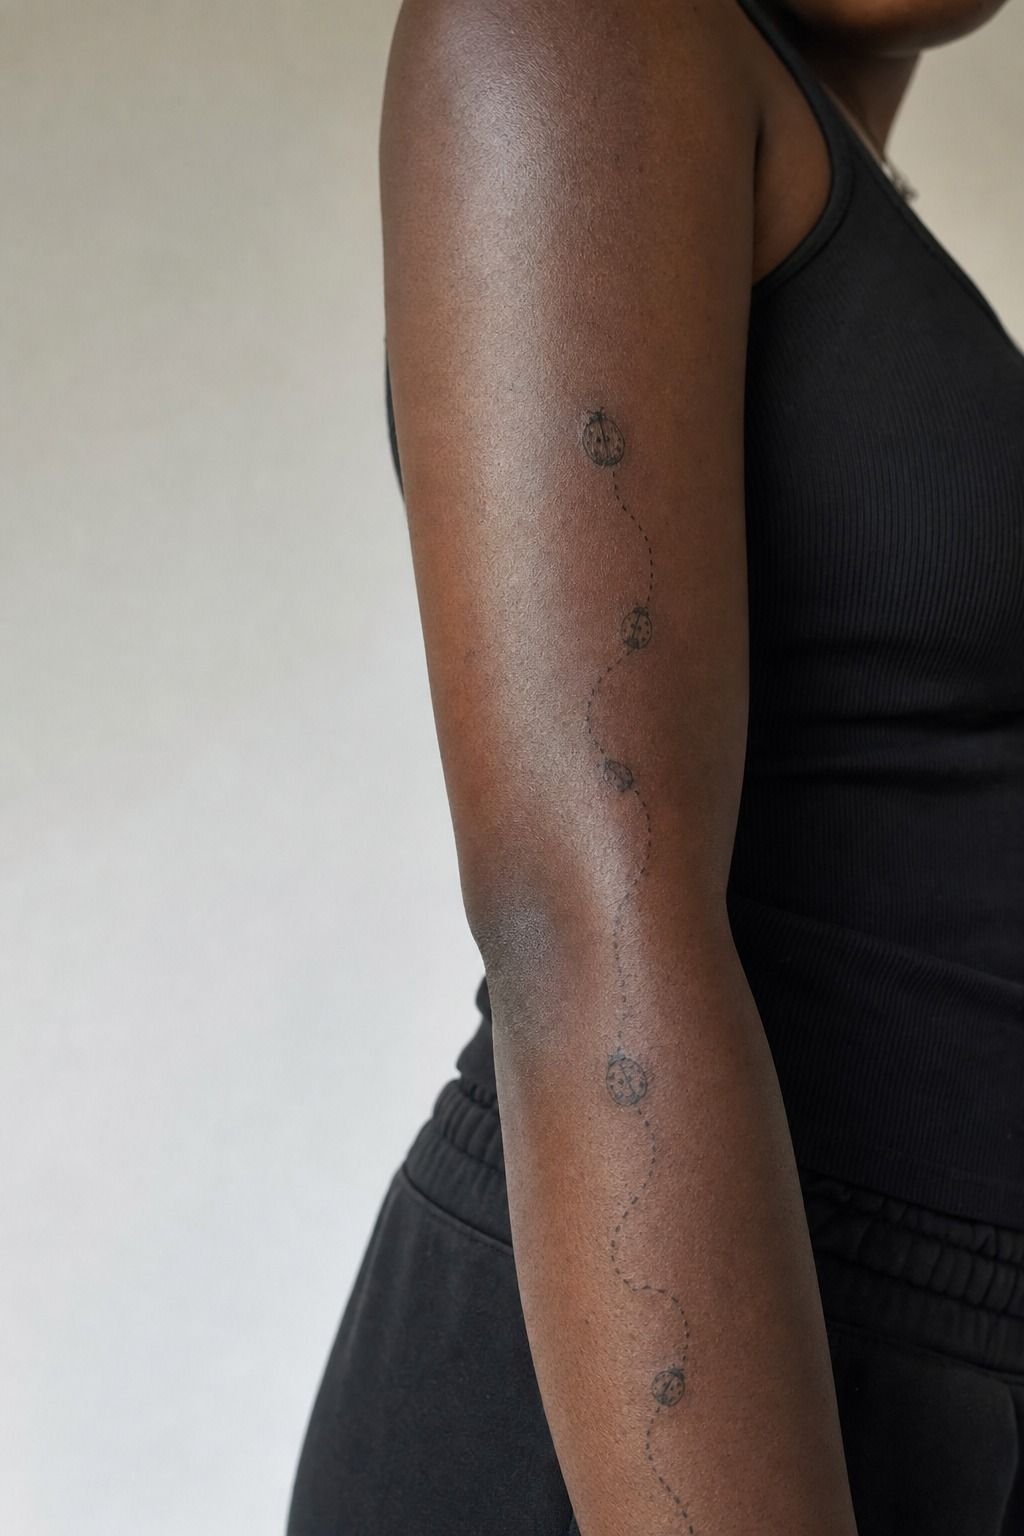
A ladybug trail along the forearm works because you can use the length without cramming everything into one spot. Start with one slightly larger bug near the wrist, then use two smaller dots or a second tiny ladybug farther up. Fine-line flight marks should curve naturally, not zigzag like a cartoon.
The forearm is one of the friendliest placements for first-timers. It’s usually more tolerable than ribs, hands, or feet, and you can keep an eye on healing.
But use sunscreen after the surface heals. Sun is brutal on fine line and red pigment, and you don’t want your warm little trail fading early.
19Meaningful Ladybug Tattoo With Red Accents
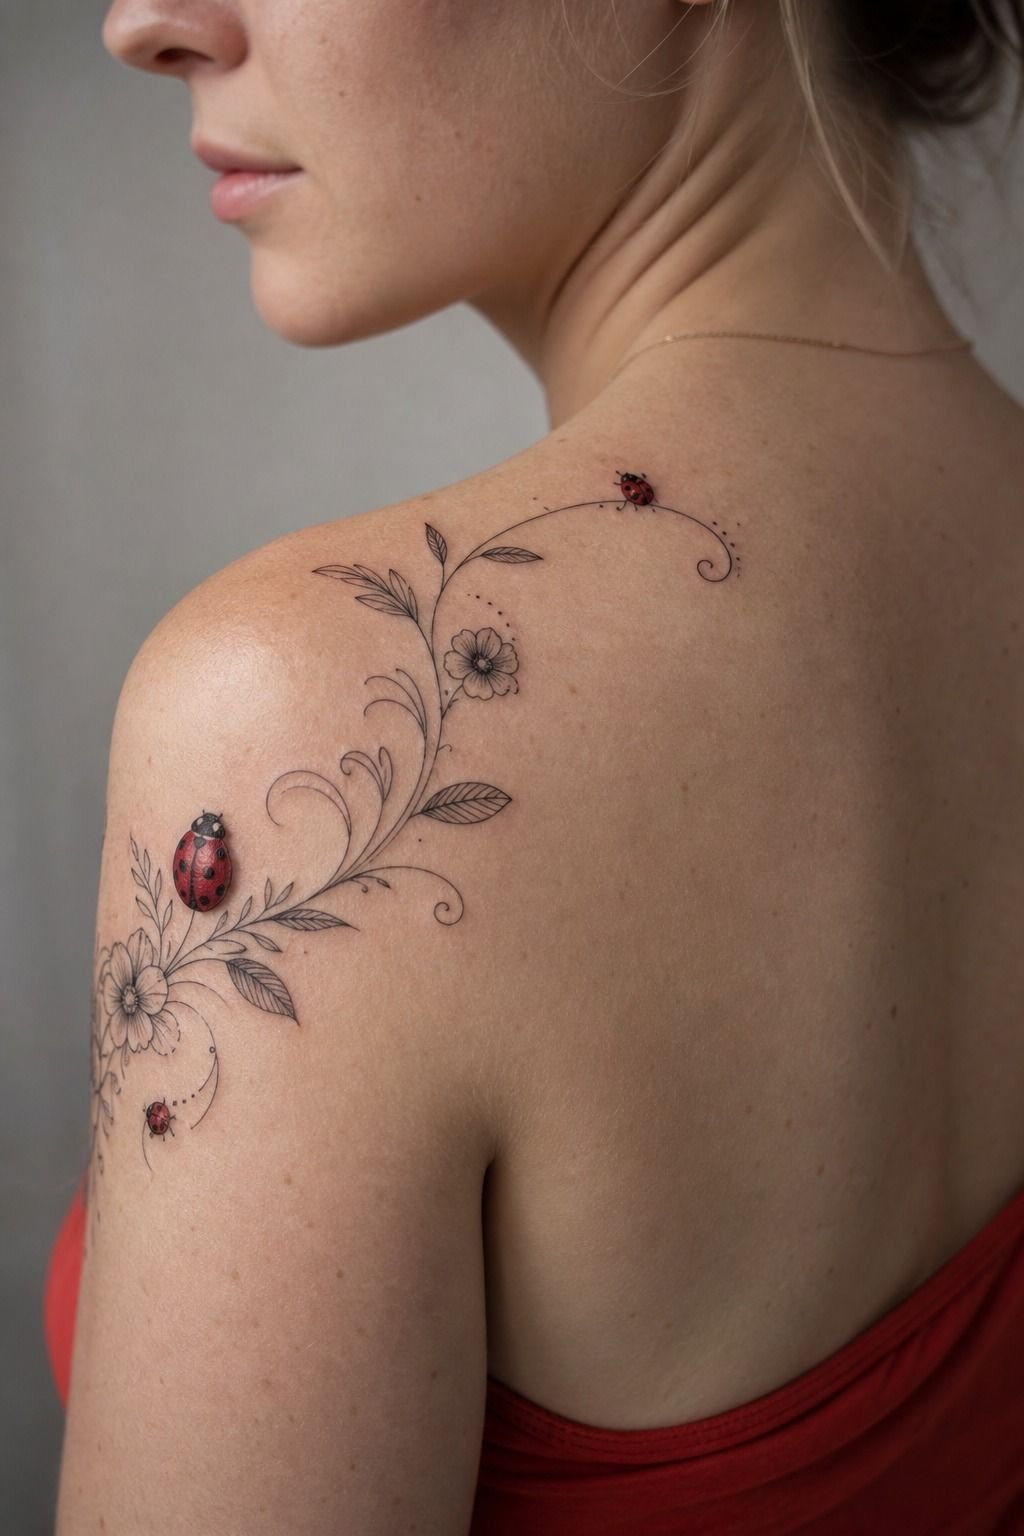
A meaningful ladybug tattoo with red accents belongs on the shoulder when you want visibility without committing to a full sleeve. Let the bug sit where the shoulder rounds, then add a tiny date, leaf, or subtle halo only if it means something to you. Red and black ink gives this placement enough contrast.
I’ve seen people over-explain a meaningful tattoo until the art gets crowded. Don’t.
Your ladybug can stand for luck, a new beginning, a person you love, or simply a season you survived. Why make it read like a résumé?
Keep the shape clear, the red saturated, and the symbolism yours.
The Clean-Line Rule I Give First-Timers
I’m Hazel, and here’s the part I wish more people heard before booking a dainty tattoo: small isn’t the same as delicate. A tattoo can feel gentle, intimate, and personal while still using line weights that hold.
The best ladybugs I’ve seen weren’t the tiniest ones. They were the ones where the artist knew what to leave out.
I’ve had clients arrive with a phone full of micro tattoos, all packed with little eyes, veins, sparkles, initials, dots, and six colors. It looks captivating on a bright screen.
On skin, that much detail starts competing before the tattoo has even healed. I’ll always tell you the truth if the design is headed for soup. That size on a wrist is gonna mush out, so bump it up the forearm where it breathes and ages nicer.
Your artist should be showing you healed work, not just glossy fresh tattoos under studio lights. Look for confident lines, smooth black fill, and skin that doesn’t look chewed up.
A good fine-line artist can pull a line once, cleanly, instead of scratching at the same spot ten times. That matters more than whether they have the biggest following.
And don’t choose your placement only because it looks good in a pin. Think about wear. Fingers, hands, feet, elbows, knees, and inner biceps are high-wear zones.
Outer arms, thighs, calves, shoulders, and upper backs tend to give you a calmer canvas. Your tattoo isn’t frozen in time.
It moves, sees sun, rubs against clothes, and heals through real life.
A Few Things Worth Answering
How much does a Dainty Ladybug Tattoo usually cost?
Expect about $100 to $300 for most dainty ladybug tattoos in the US. A clear, well-placed design is worth paying for because shop minimums usually run $50 to $100 and experienced artists often charge $100 to $250 hourly. Your region, color, and custom drawing time change the total.
Are Dainty Ladybug Tattoos a good idea for a first tattoo?
Yes, especially on your outer arm, shoulder, calf, or ankle. Simple shapes heal more predictably than a packed micro design, and you can choose a placement that isn’t brutally painful. Keep your first one readable, then build a bigger tattoo story later if you want.
How do I choose a tattoo artist for Dainty Ladybug Tattoos?
Look for healed fine-line photos, not only fresh work. Crispy healed lines matter most for this subject. You want a clean studio, consistent black saturation, and an artist who’ll tell you when your requested size is too small.
Browse their botanical and small-color tattoos too.
How much do Dainty Ladybug Tattoos hurt?
Outer arm, shoulder, calf, and thigh are usually more tolerable. Ribs, feet, hands, sternum, and fingers are spicier because the skin is thin or close to bone. Lines feel sharper, shading feels like a dull burn, and color packing can be the hottest part.
How long does a Dainty Ladybug Tattoo take to heal?
The surface usually heals in about 2 to 3 weeks, while full settling takes roughly 2 to 3 months. Gentle aftercare protects your color. Wash with unscented soap, use a thin layer of moisturizer, skip pools, and don’t pick flakes when it peels like a sunburn.
What’s the best placement for a Dainty Ladybug Tattoo?
Your outer forearm or shoulder is the best all-around call. Both placements age nicely because they’re lower-wear and give fine lines room to settle. If you want a more symbolic placement, use your collarbone or ribs, but expect more pain and more healing care.
Where I’d Start First
If I had to pick one, I’d start with the simple ladybug on the inner arm. It’s visible, low-wear, and gives your lines room to stay readable. Pin it for later and compare it with these ladybug tattoo design ideas.