*Ladybug tattoo design looks easy, but tiny bugs are where a lot of people get talked into lines that are too fine and vivid color that won’t stay put. I almost did that on an early wrist redraw. Now I keep these ideas clean, simple, and built for skin so you get something that heals nice, reads clearly, and still ages cute on you.
- ✓ Start With a Fine Line Ladybug Wrist Tattoo
- ✓ Keep a Tiny Red Ladybug Ankle Tattoo Simple
- ✓ Let a Ladybug Climb a Wildflower Stem
- Start With a Fine Line Ladybug Wrist Tattoo
- Keep a Tiny Red Ladybug Ankle Tattoo Simple
- Let a Ladybug Climb a Wildflower Stem
- Follow the Shoulder Blade With a Flying Ladybug
- Black Ink Against Open Skin for a Timeless Ladybug
- Tuck a Minimal Ladybug Behind the Ear
- Draw a Playful Dotted Trail Behind the Ladybug
- What Makes a Realistic Ladybug Hold Up?
- Anchor a Vivid Watercolor Ladybug With Line
- Pair a Sweet Ladybug With a Daisy
- Accept the Upkeep on Matching Finger Ladybugs
- Solid Ink Red Makes Lucky Seven Feel Personal
- Scale a Delicate Rib Ladybug for Clean Healing
- Choose a Fearless Blackwork Ladybug
1Start With a Fine Line Ladybug Wrist Tattoo
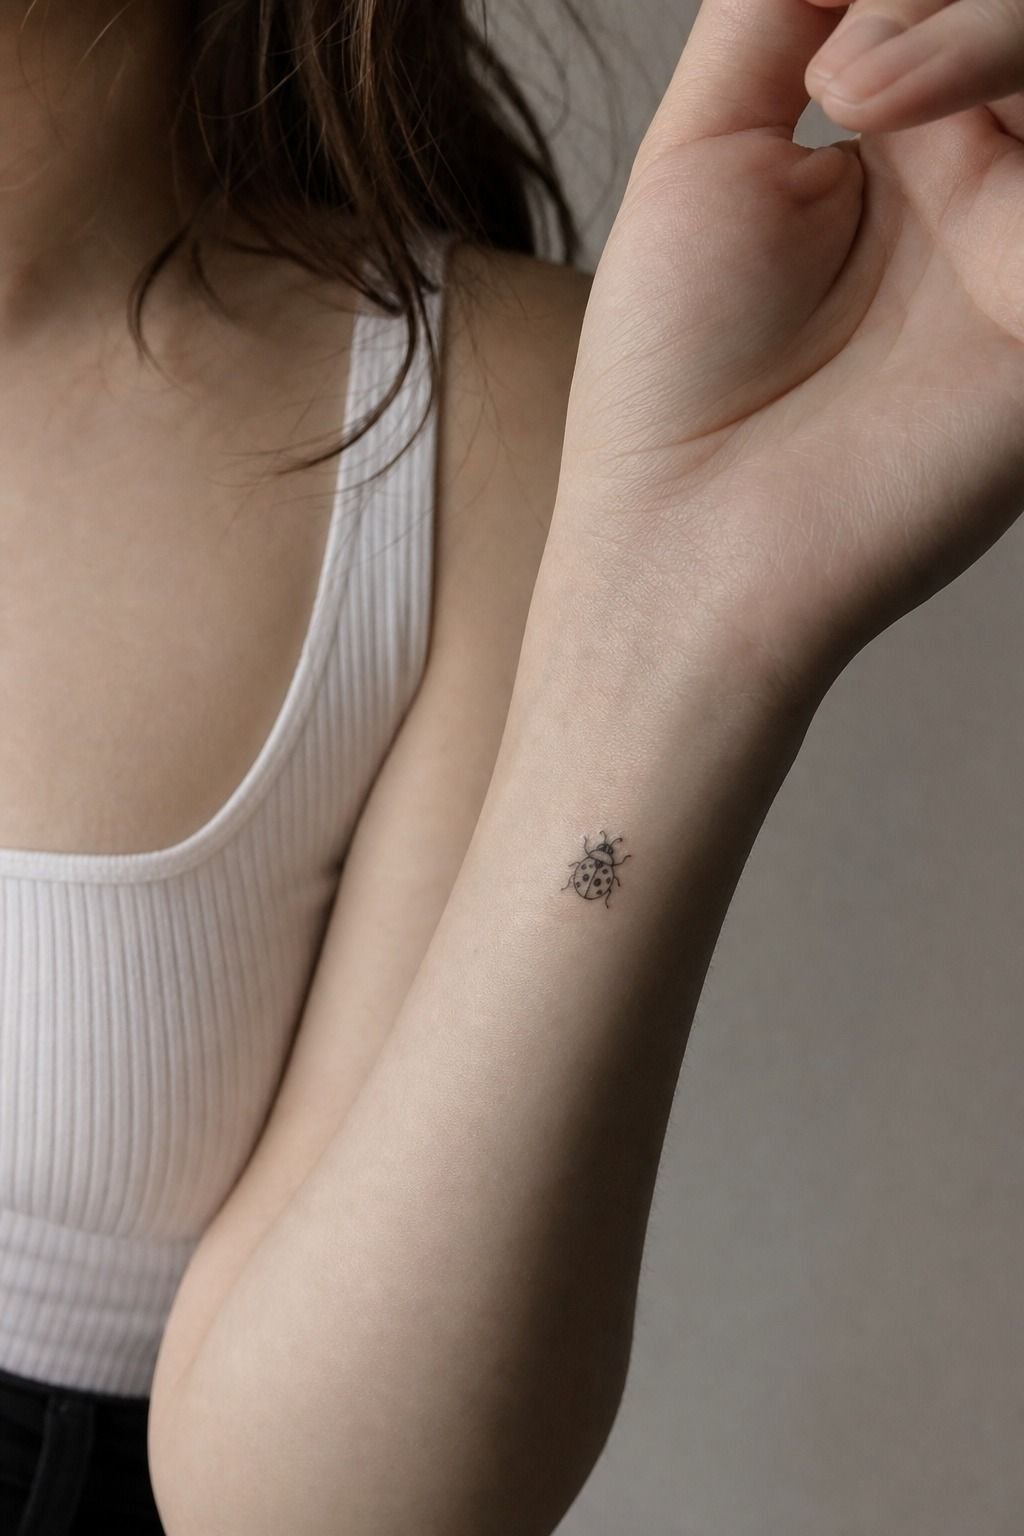
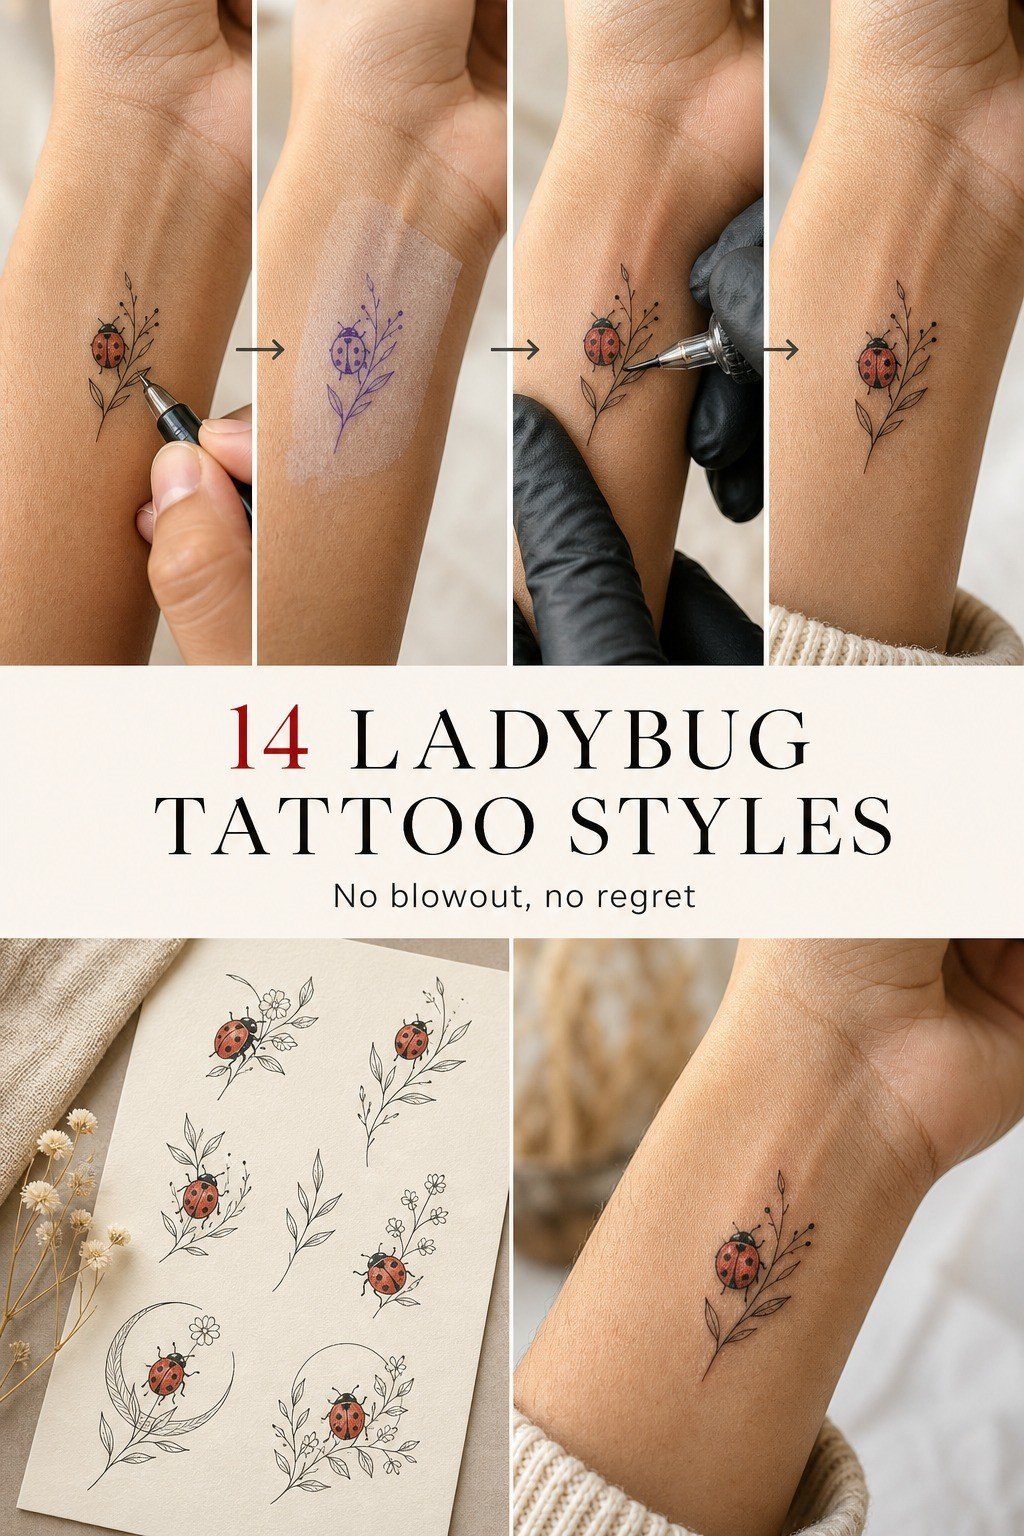
Start with a single-needle wrist placement that gives the bug enough breathing clearance on skin, not a cramped little stamp jammed into the bend. On a fair cool-pink wrist, I like the ladybug sitting slightly off center so you can see the dome, the split wing line, and two crisp antennae when your hand turns.
That clean wrist flow feels charming without getting precious. If you are collecting ladybug-tattoo-ideas for a first piece, this is one of the safest entries because the shape is simple and the wrist gives you daily visibility. I talk clients through shape first in my guide to how to design your own tattoo because placement does half the work.
Keep it around 0.75 to 1.25 inches wide and let the artist use a clean black outline with red packed in one solid pass. Too tiny, and the spots turn to soup later.
Too detailed, and your wrist gets chewed up for no payoff. You want crispy lines, open black dots, and enough untouched skin so the form stays readable after a few summers. But skip heavy white highlights here.
They fade first.
2Keep a Tiny Red Ladybug Ankle Tattoo Simple
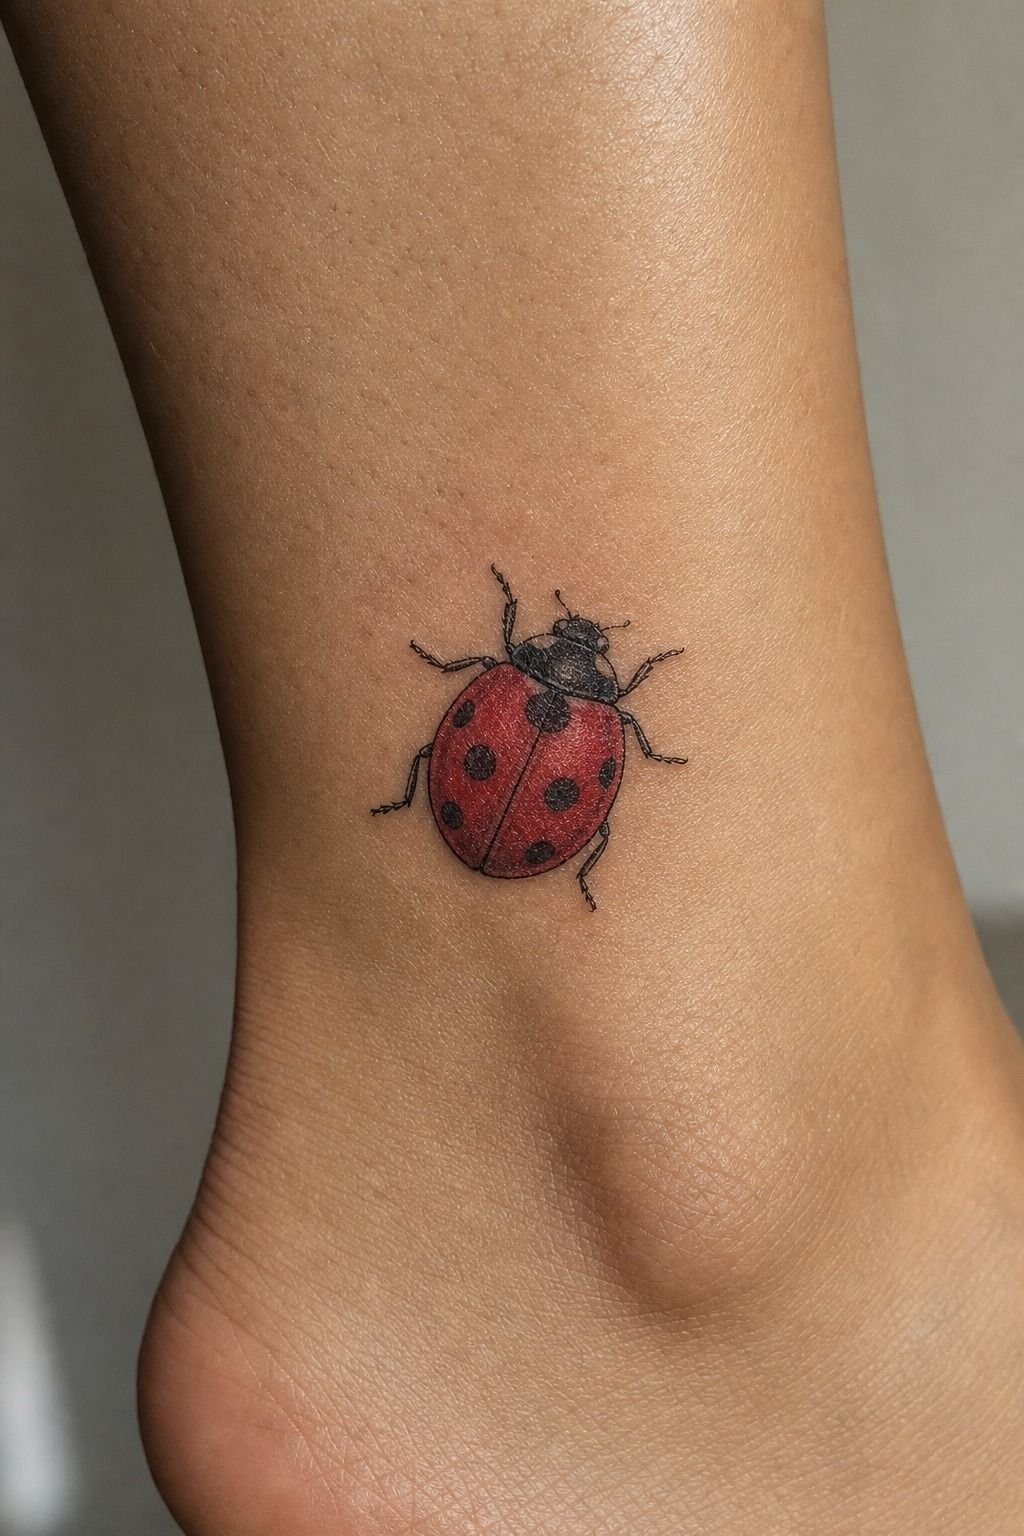
Go tiny, but not silly tiny. On an ankle with warm ivory skin, a micro red-fill tattoo can look soft and sharp at the same time if the shell stays simple and the legs don’t try to do too much. I usually keep the body slightly oval instead of perfectly round because that lively shape follows the ankle bone nicer and gives the red more surface to hold.
The oval ankle stencil is worth it when you want a bright tattoo with solid long-term value. If you’re comparing first concepts, my breakdown of the custom tattoo design process helps you sort flash from a true custom redraw.
But ankles are a high-friction zone, so you should expect a little extra babying for the first two weeks. Socks rubbing, sneaker collars, and summer straps can all irritate it. That is the part people miss!
Ask for solid black spots, one clean pull on the outer contour, and red from a brand your artist trusts like Solid Ink Red or Eternal Lipstick Red. I would not cram in leaves, sparkles, or lettering around it on day one.
3Let a Ladybug Climb a Wildflower Stem
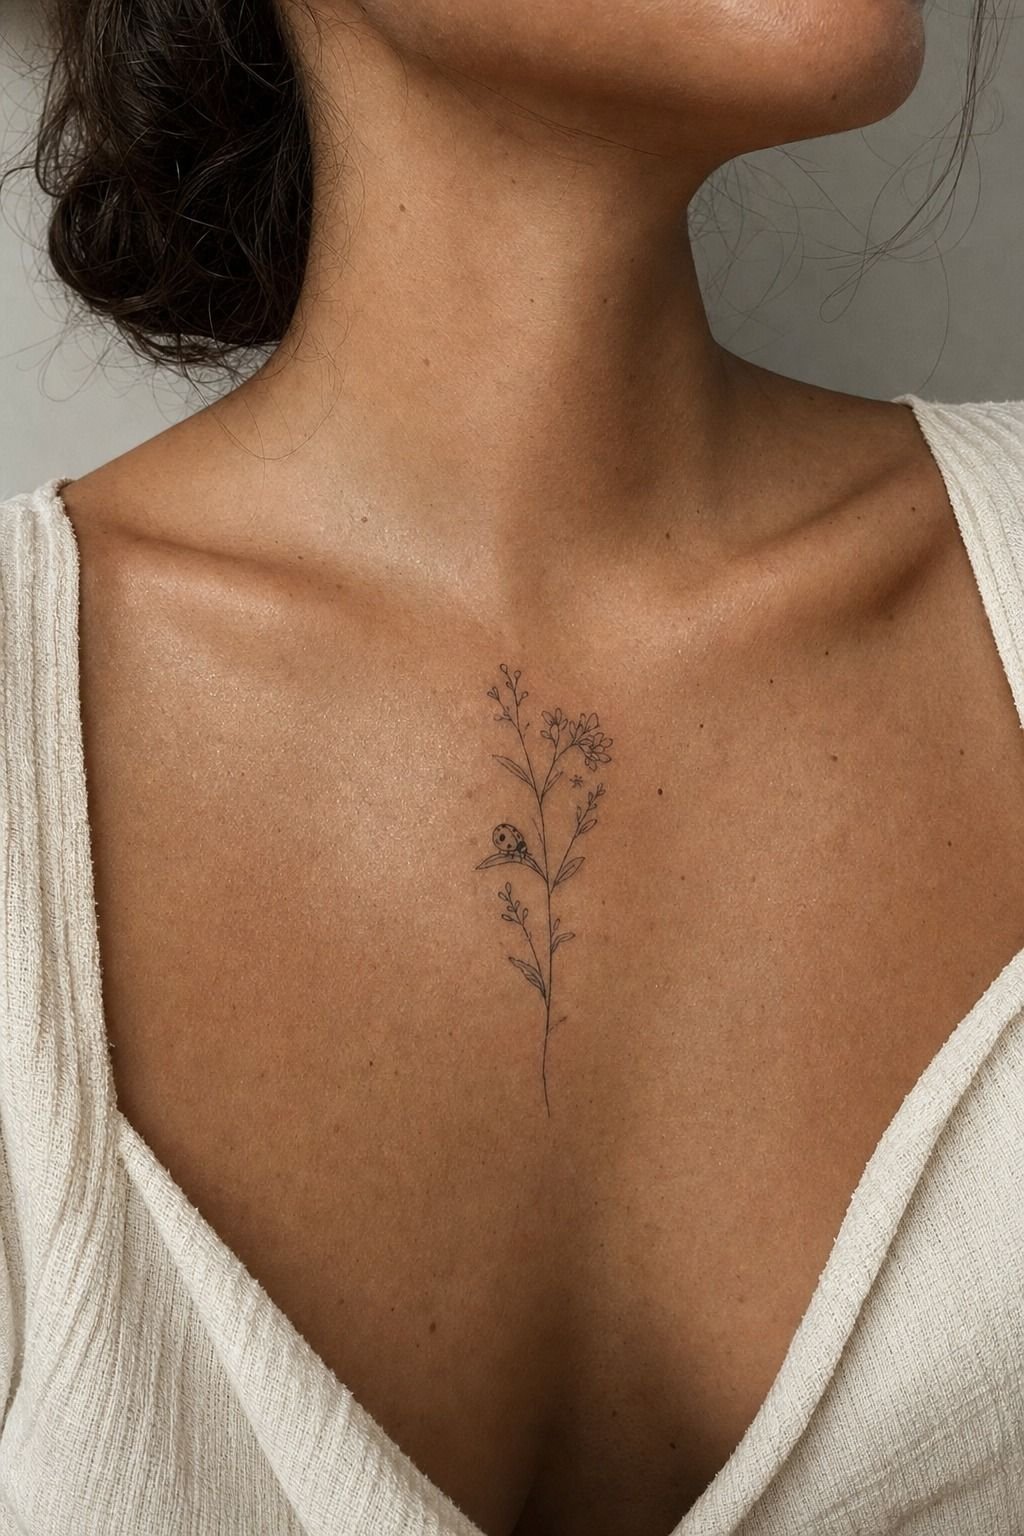
Anchor the bug to a fine-line botanical stem if you want the design to feel graceful instead of sticker-ish. On a healed sternum piece with olive skin, a wildflower stem gives you a natural vertical line that flatters the center chest and keeps the ladybug from floating there without purpose.
This is where a ladybug-on-flower-tattoo earns its keep because the graceful flower does more than look cute. It gives the eye direction.
A balanced floral silhouette looks tender and polished instead of busy. If you want to sketch your own vibe before your appointment, design tattoo online free is a decent planning tool.
Sternum skin is a little spicy, so I would keep the flower airy and the ladybug small enough that the session stays under 90 minutes. A clean 3RL liner for the stem, a slightly bolder line on the ladybug shell, and soft black stipple in the petal center will heal nicer than overworked shading.
And do not let anyone pile on ten petals just to fill width. One stem, one bloom, one bug.
Done.
4Follow the Shoulder Blade With a Flying Ladybug
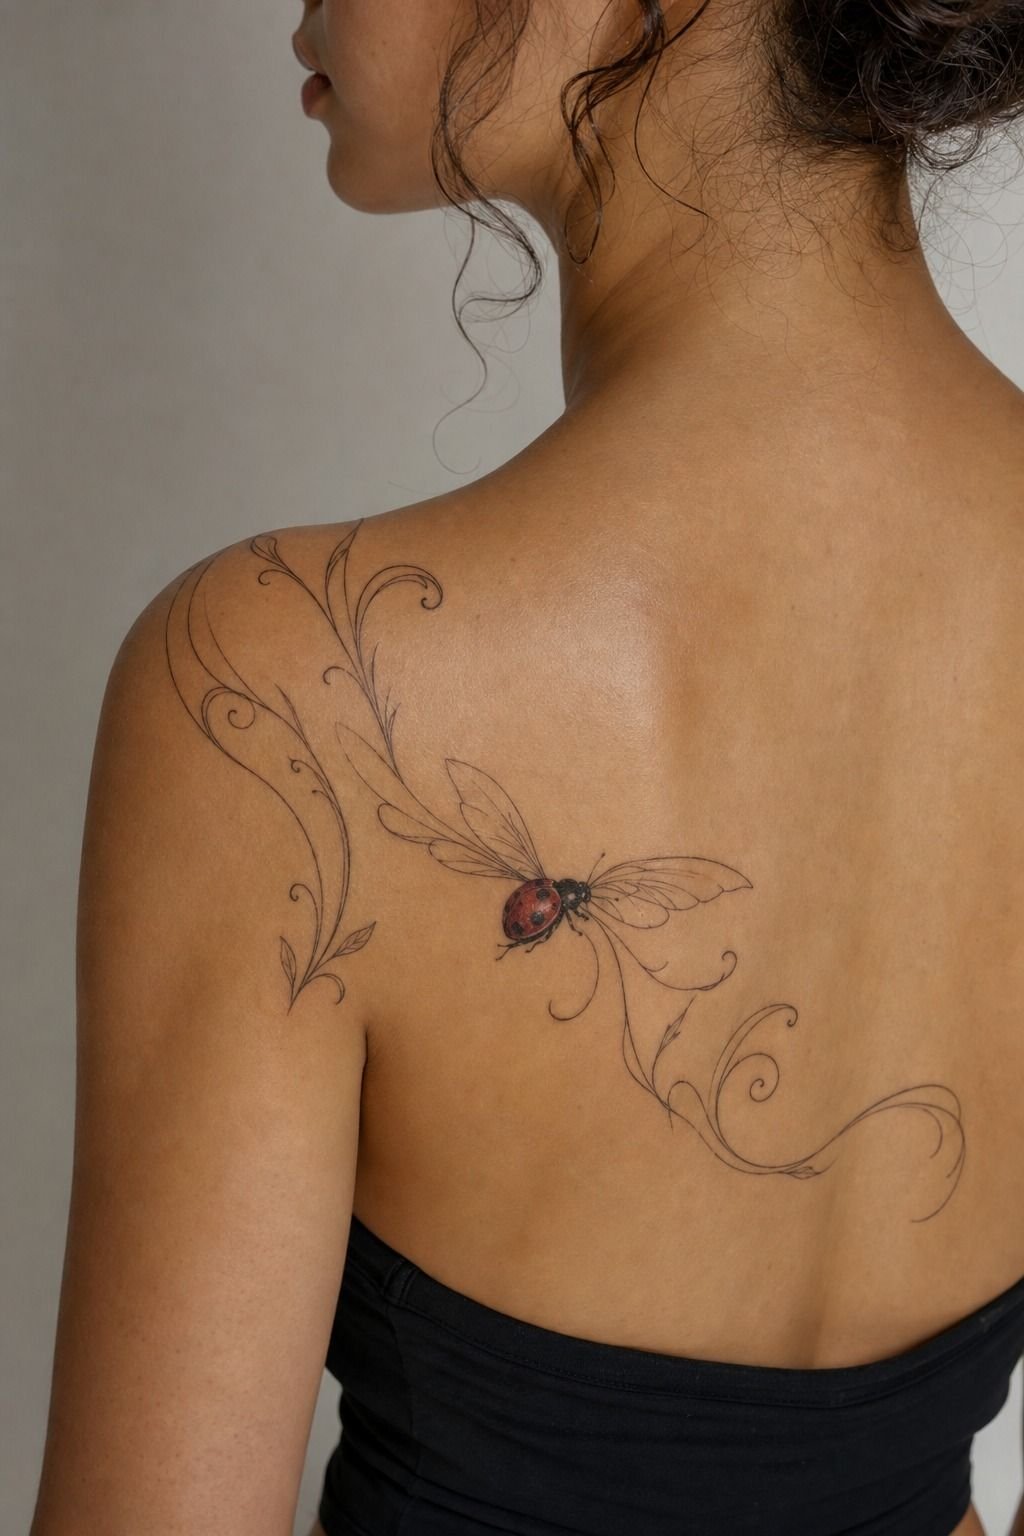
Let the placement move. A flying-ladybug-tattoo layout works best on the shoulder blade when the wings angle with your body instead of sitting flat like a sticker. I draw these to ride the scapula line so the bug looks in motion when you turn, and that little bit of anatomical flow keeps the tattoo from feeling pasted on.
Shoulder blade skin is one of the more chill areas too, which makes this an easy yes if you’re nervous.
A dynamic scapula placement gives you lively movement without a painful rate premium. For bigger placement planning, I like sending people to create sleeve tattoo design so they think about the whole arm and back story early.
Keep the dotted motion light and the wing split obvious. If the bug is under 1.5 inches, you do not need six extra motion marks to prove it is flying. You need contrast.
Black head. Saturated red shell.
Tiny open skin breaks between the wings and body so the shape does not flatten out. But I would skip glitter stars here because they date the piece fast and clutter a clean silhouette.
5Black Ink Against Open Skin for a Timeless Ladybug
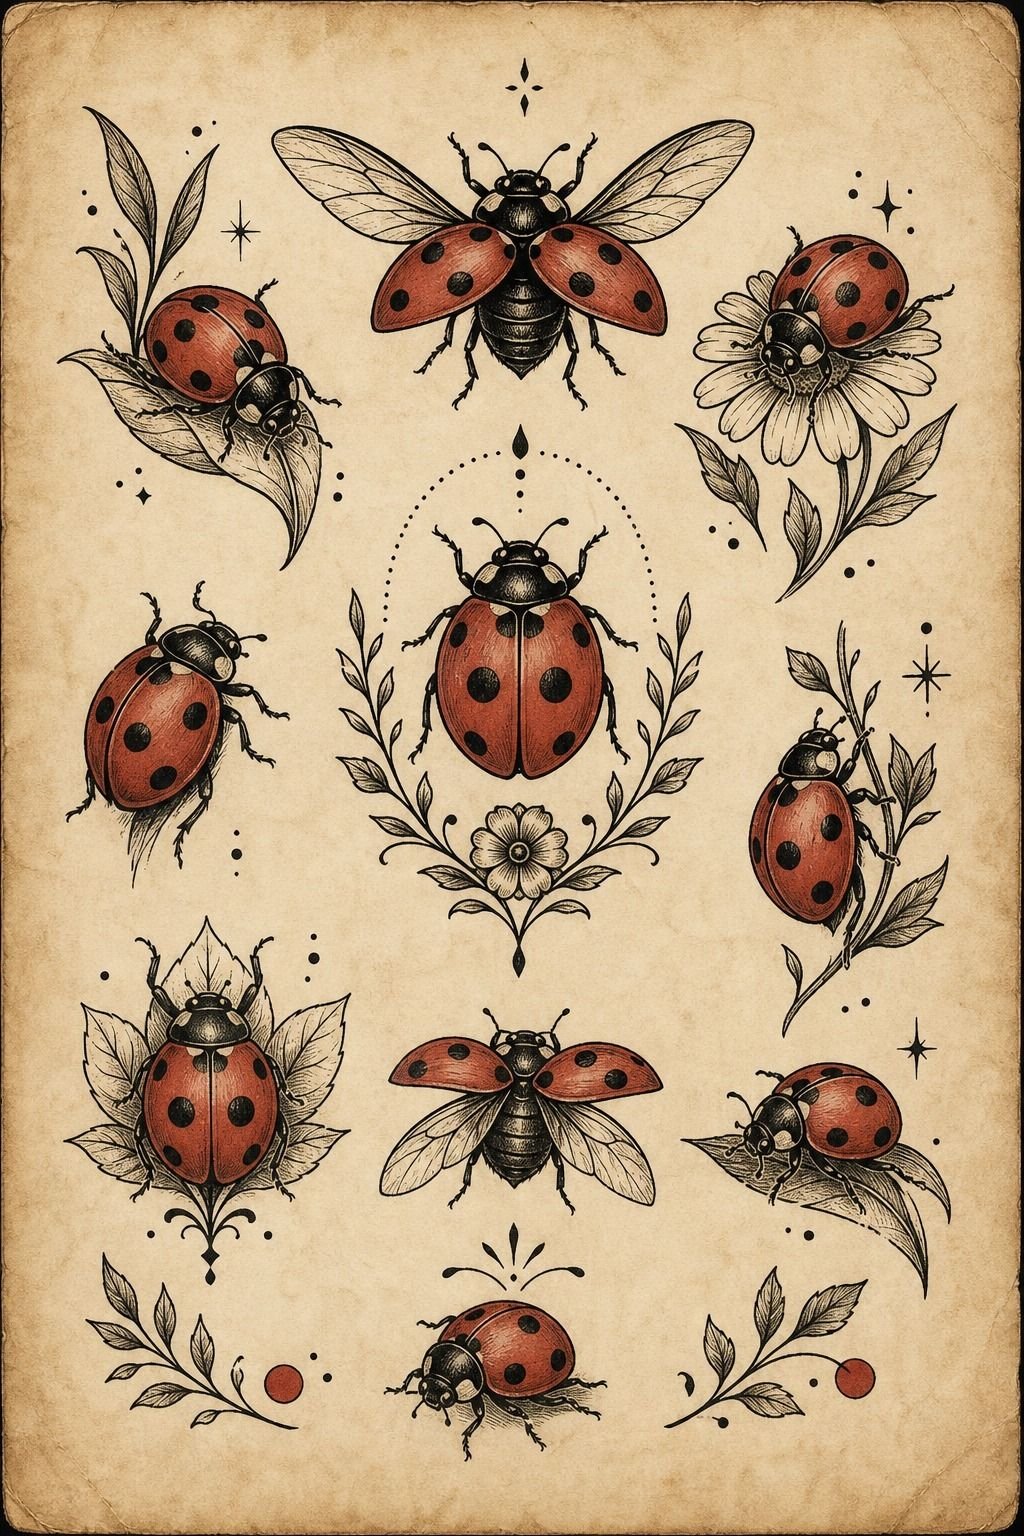
Strip it back and build a black-and-white ladybug flash when you want something timeless, affordable to execute, and easy to read in healed form. A solid shell, four open spots, and two confident antennae make a striking little design without fragile filler.
I’d choose black grey wash for soft wing depth, then leave a bright skin break down the center. It’s a smart budget option because you’re paying for clean execution, not piles of color. The result feels bold, graphic, and joyful, and the lower touch-up risk adds real value.
6Tuck a Minimal Ladybug Behind the Ear
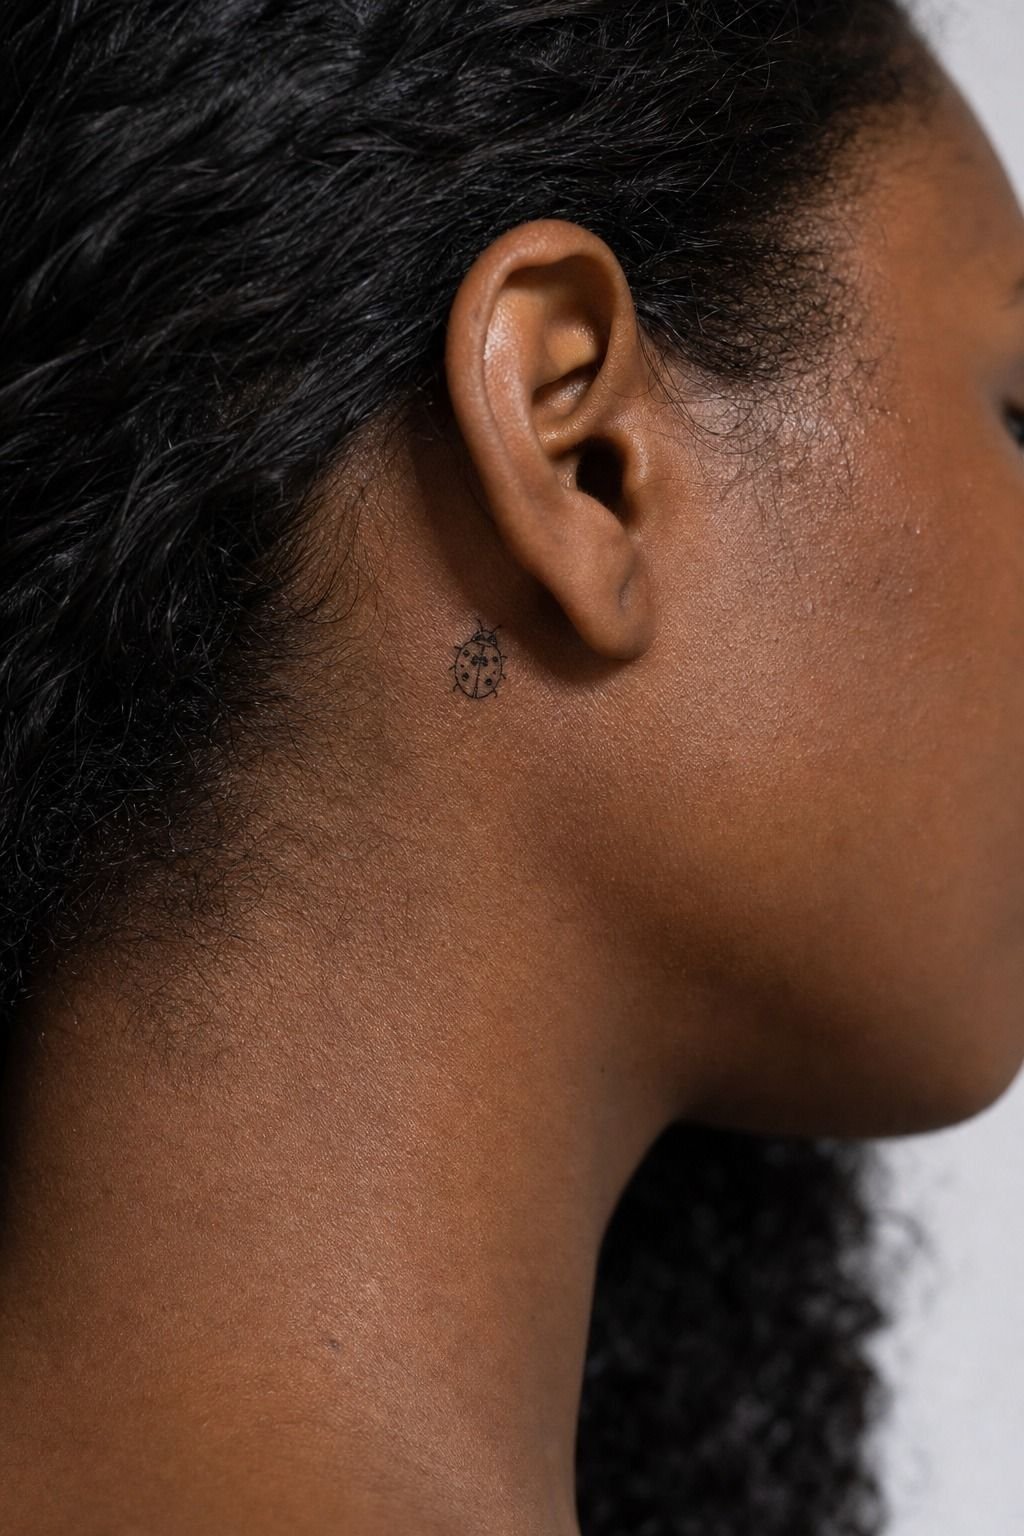
Shrink the idea and keep the outline confident. A behind-the-ear fine-line tattoo on deep ebony skin can look insanely clean when the ladybug is simplified to its best shapes and the black is pushed strong enough to heal with contrast. I like the body tucked just behind the ear curve, not too low on the neck, so you get that little flash when hair moves or a stud catches the light.
That hidden ear placement can feel subtle, surprising, and a little whimsical. If you are deciding between flash and custom, how to design your own tattoo lays out what reference photos can and cannot do.
Behind the ear is quick, but it is not a freebie. The buzzing feels sharp, and the skin there can swell fast if your artist keeps scratching at it.
Ask for a bold black outline over whisper-thin lines, even if the look is minimal. Black is your best friend for longevity.
And yes, tiny behind-ear work can age cute on you if the artist leaves enough open skin between the spots.
7Draw a Playful Dotted Trail Behind the Ladybug
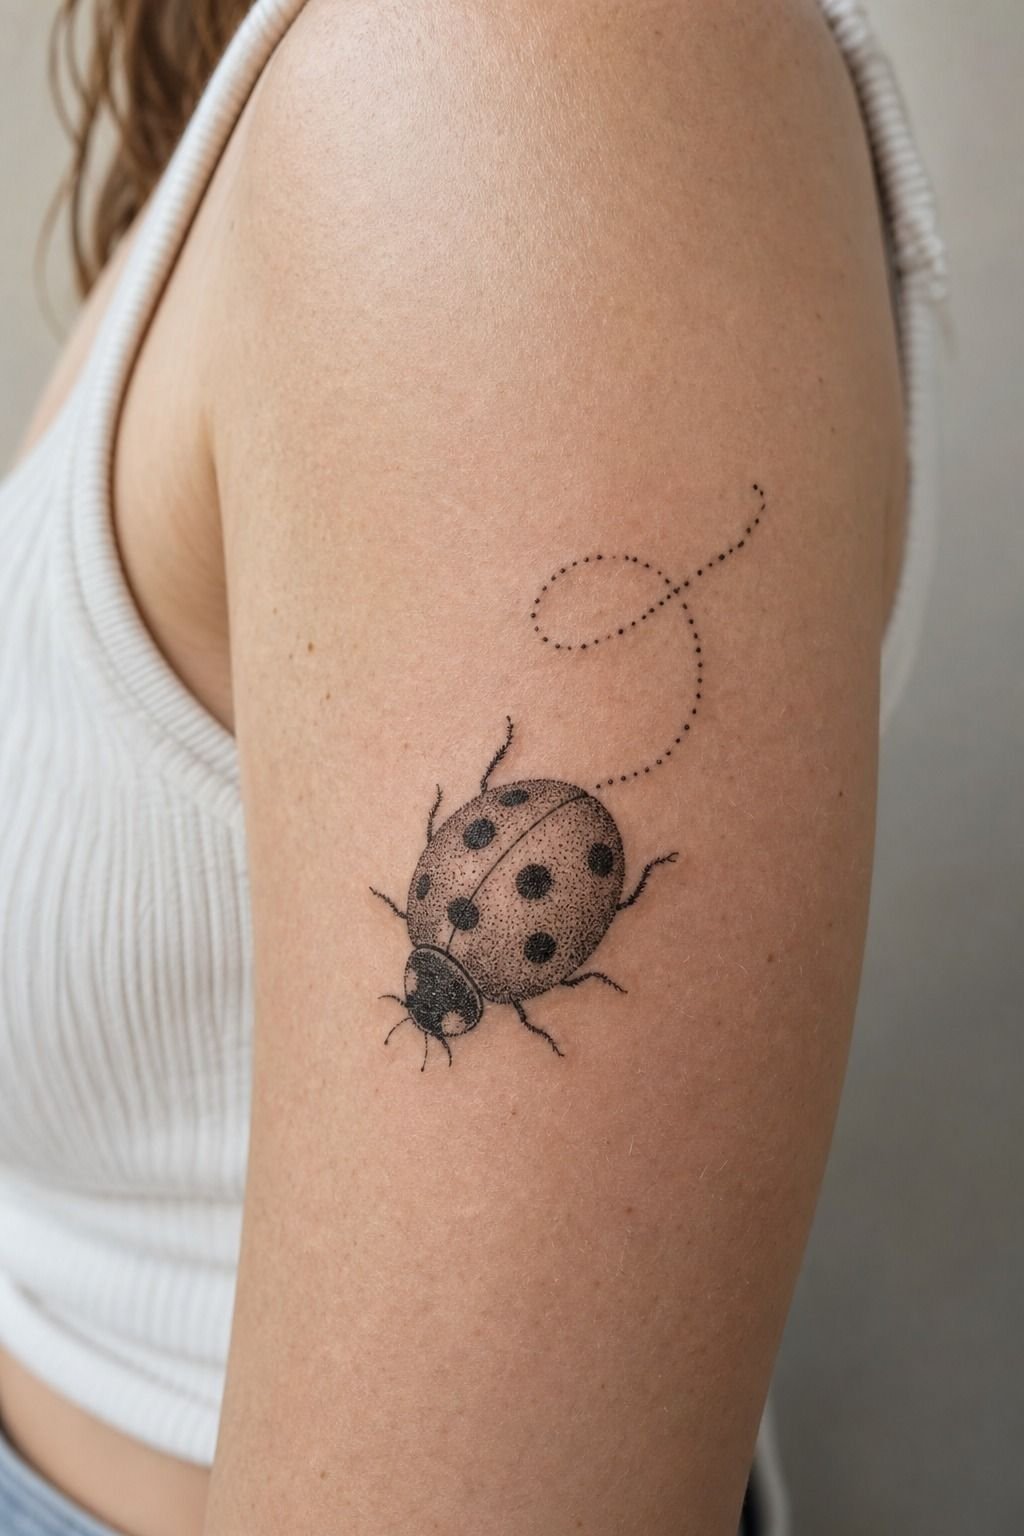
Build the movement with restraint. A dotwork upper-arm design can make a tiny ladybug feel playful without turning the whole tattoo into a cartoon.
On fair cool-pink skin, I like the dotted trail starting tighter near the bug, then opening up as it arcs away so your eye follows it naturally. This is one of those dainty-ladybug-tattoo ideas that works because the cheerful trail adds rhythm, not clutter.
The pepper-shaded trail should stay airy and playful. If you’re testing composition options, custom tattoo design process is useful for seeing how artists refine a simple idea.
Upper arm skin heals nice, which means you can get away with softer pepper shading or tiny dot clusters if you want them. But the trail should still be secondary. One bug.
One arc. Enough dots to suggest motion.
Not thirty random freckles. I tell clients that when the trail gets too long, the tattoo stops being a ladybug and starts being a punctuation mark.
8What Makes a Realistic Ladybug Hold Up?
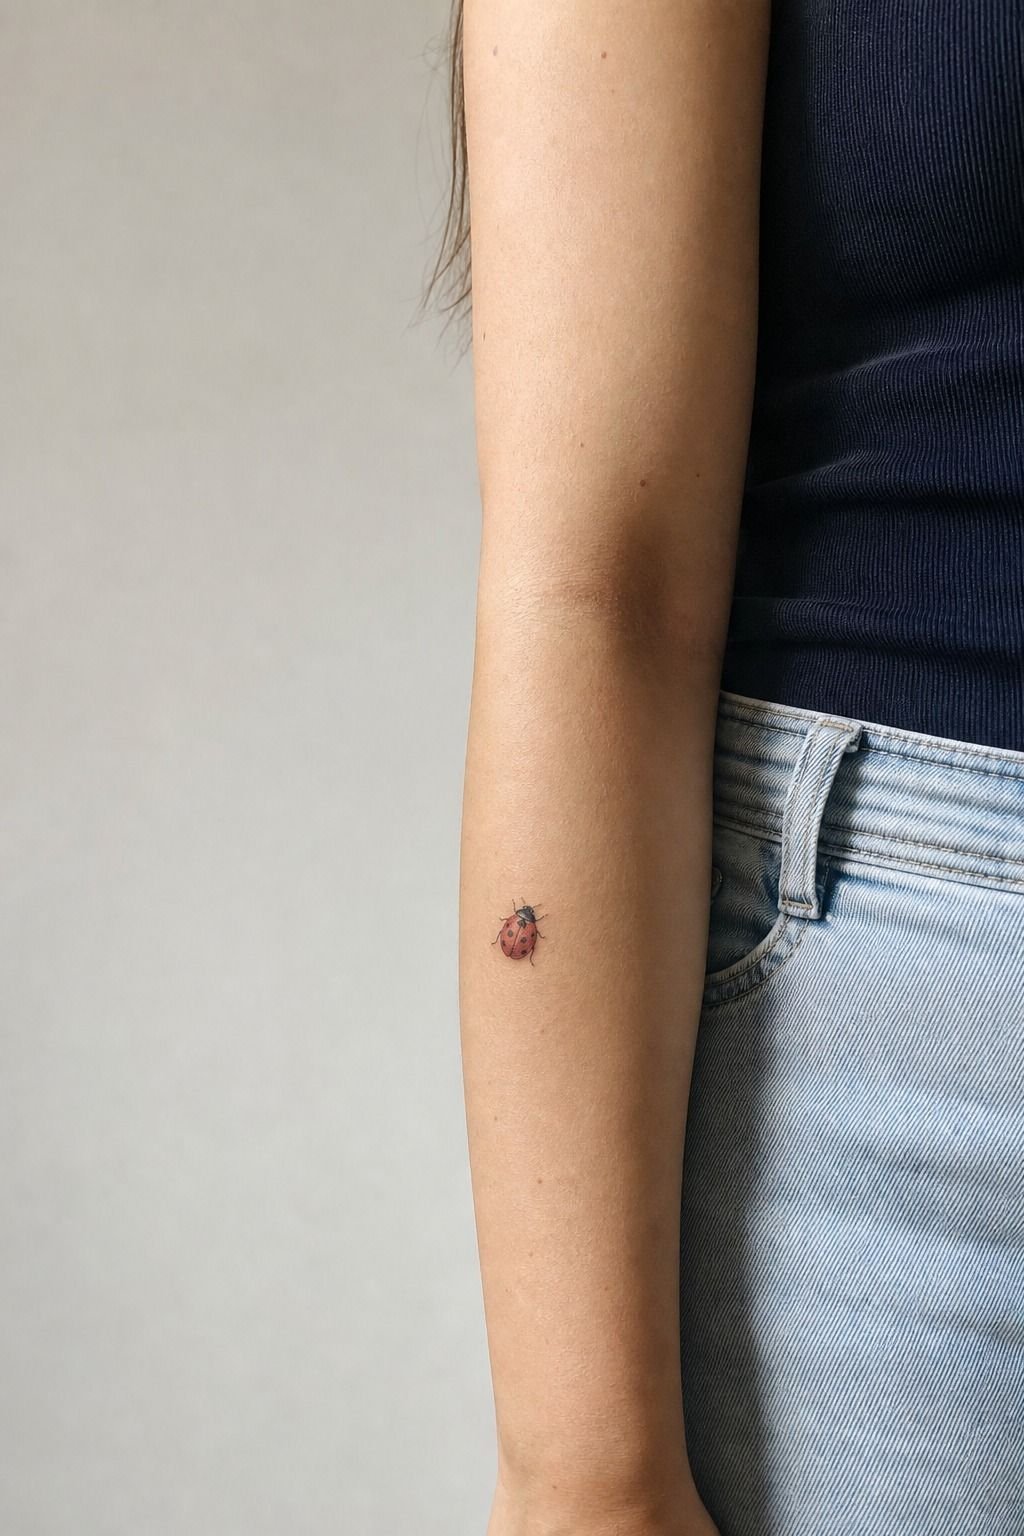
Push detail only if you have the skin and scale for it. A realistic forearm ladybug needs at least 2 inches for reflective shell highlights, tiny leg joints, and a convincing shadow. Smaller than that, the dramatic detail can heal flat.
Ask for black-and-grey realism under a saturated red shell, with a 3RL for the sharpest edges and a curved mag for velvety shading. I’d pay the higher rate for an artist who shows healed realism. It’s worth it because a weak micro-realism attempt can become muddy soup.
9Anchor a Vivid Watercolor Ladybug With Line
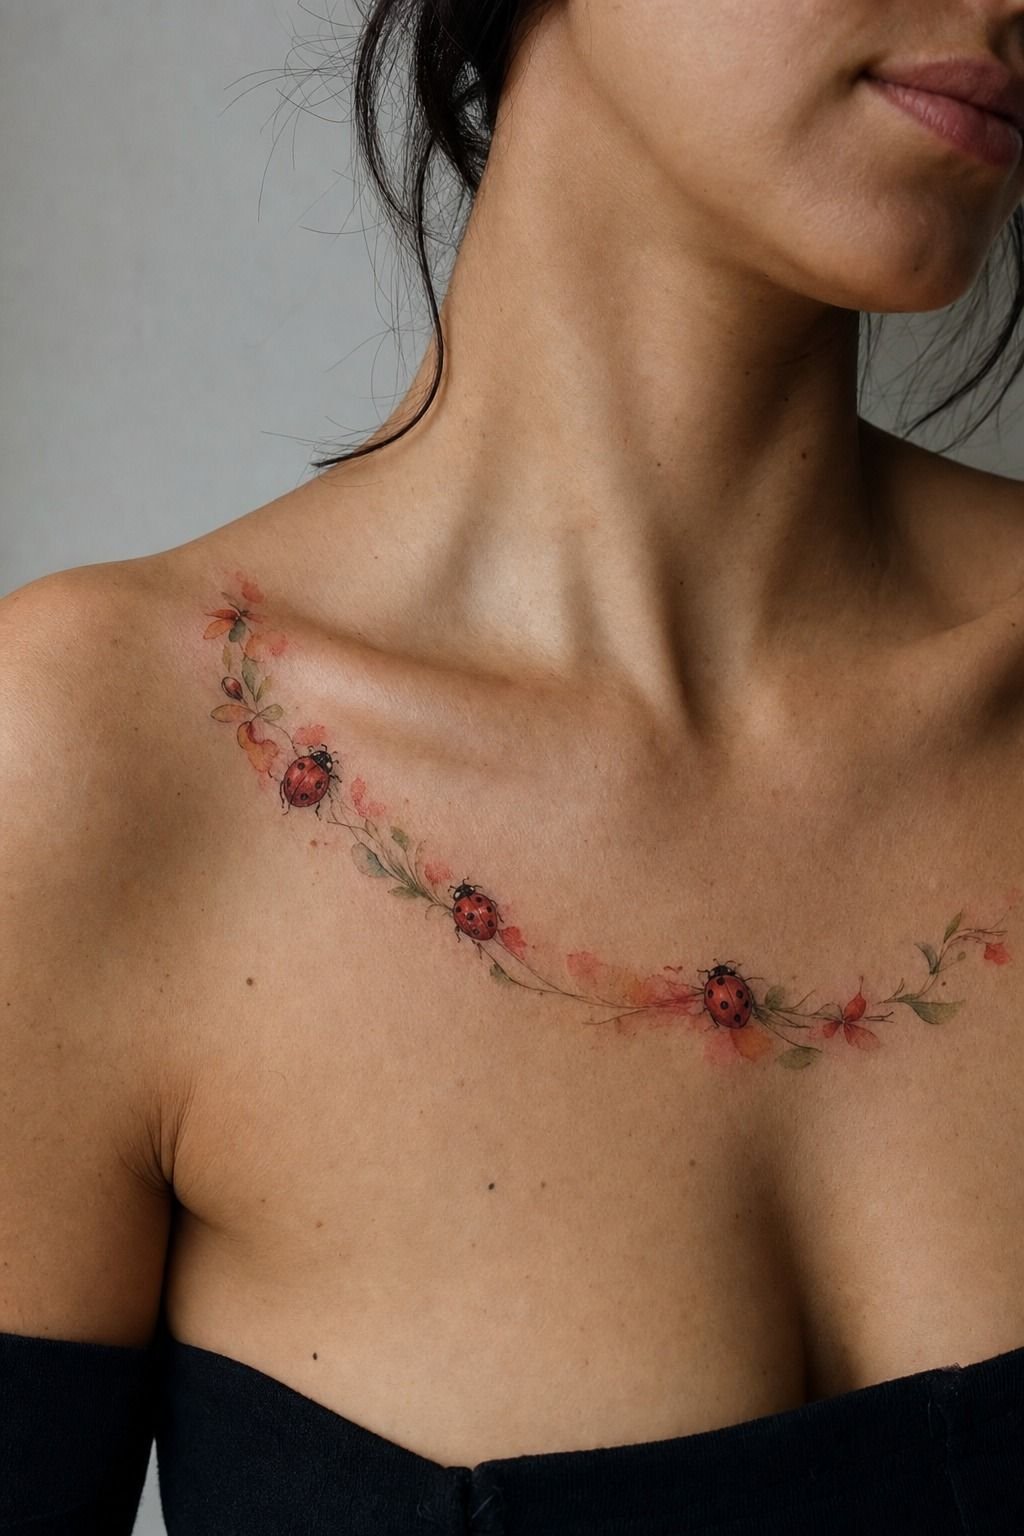
Anchor the color with line or do not do watercolor at all. A collarbone watercolor tattoo needs a real black structure first, then a light bloom of red and maybe a whisper of warm orange so the piece still reads once the wash softens.
Collarbone placements already have elegant flow, so you do not need an explosion of paint to make the tattoo feel special. If you are mapping a custom placement with your artist, design tattoo online free is not the move once you get serious.
I would switch to custom tattoo design process and let a pro redraw it for your anatomy.
This area can be spicy over bone, and a too-small watercolor cloud heals patchy fast. Keep the bug around 1.5 to 2 inches if you want the wash to breathe and settle softly.
But I wouldn’t let the color drift way past the shell edges. Watercolor should feel intentional, radiant, and expressive, not like somebody sneezed red ink across your clavicle.
That line-anchored color wash is what keeps the soft effect readable.
10Pair a Sweet Ladybug With a Daisy
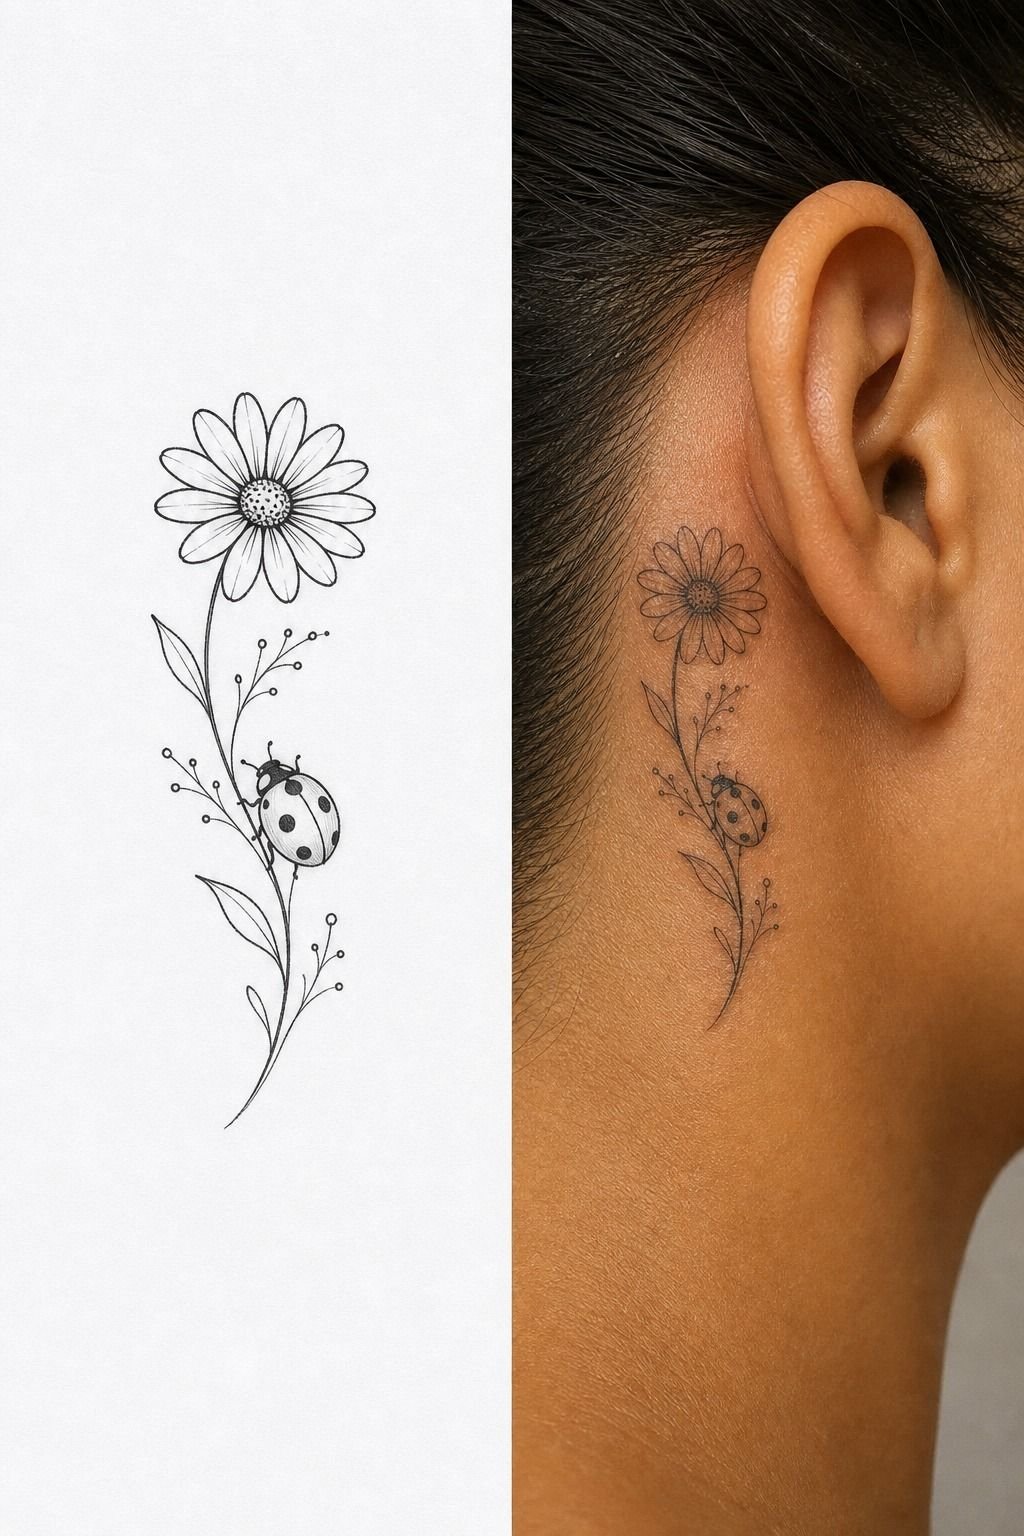
Pair the bug with a fine-line daisy companion when you want sweetness without losing structure.
11Accept the Upkeep on Matching Finger Ladybugs
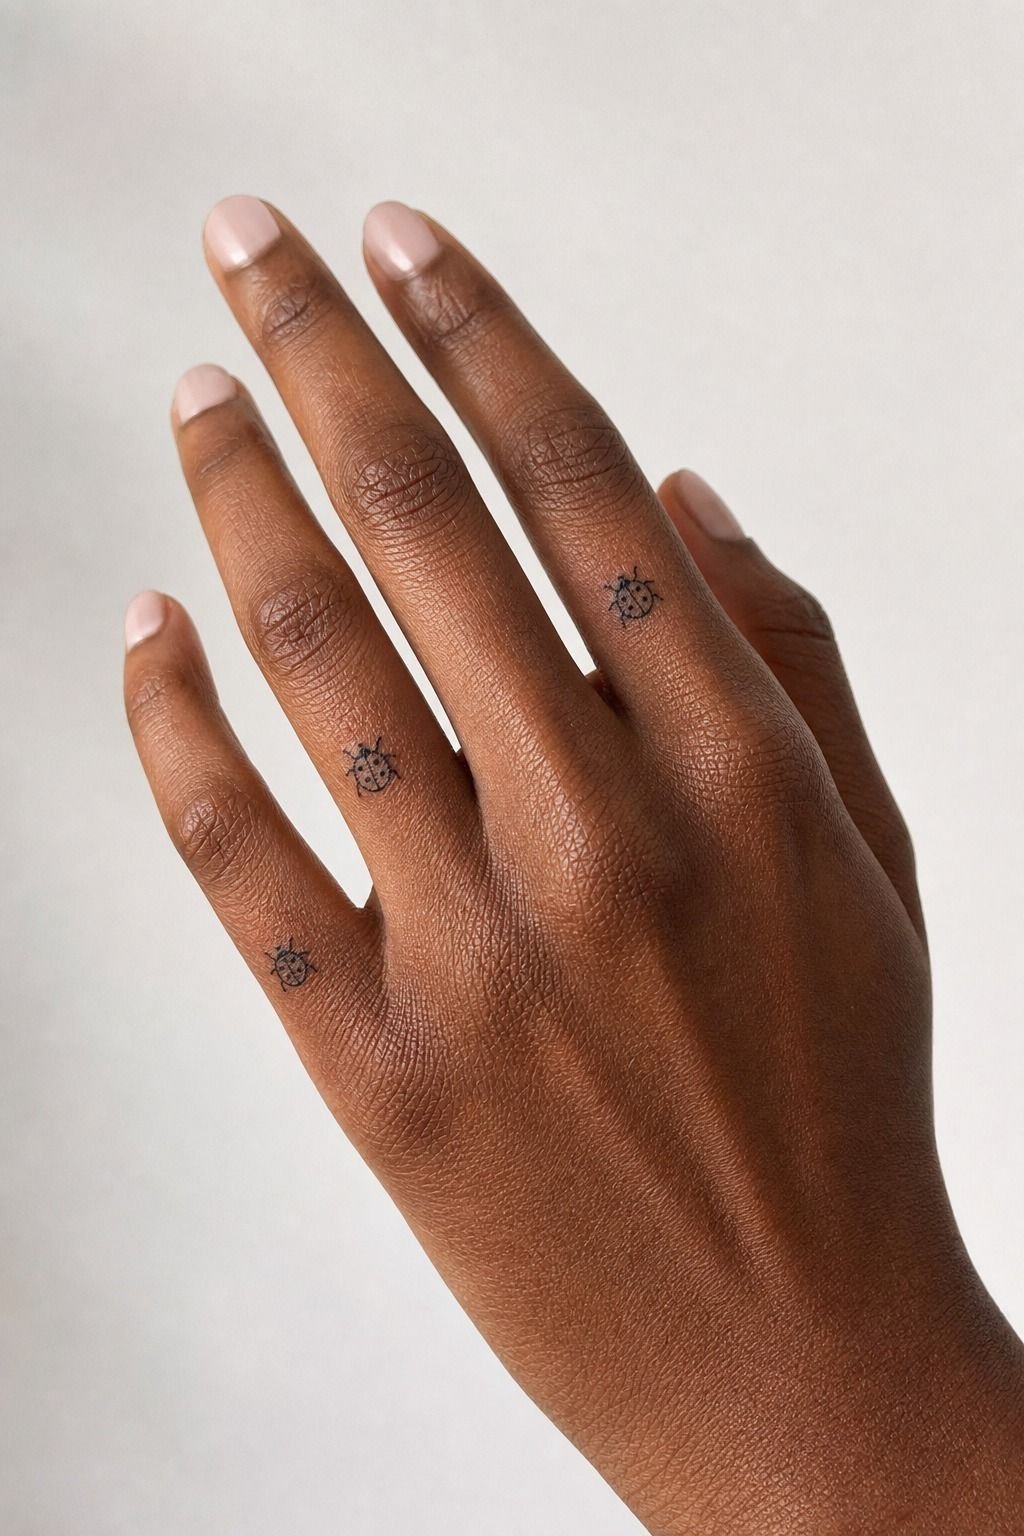
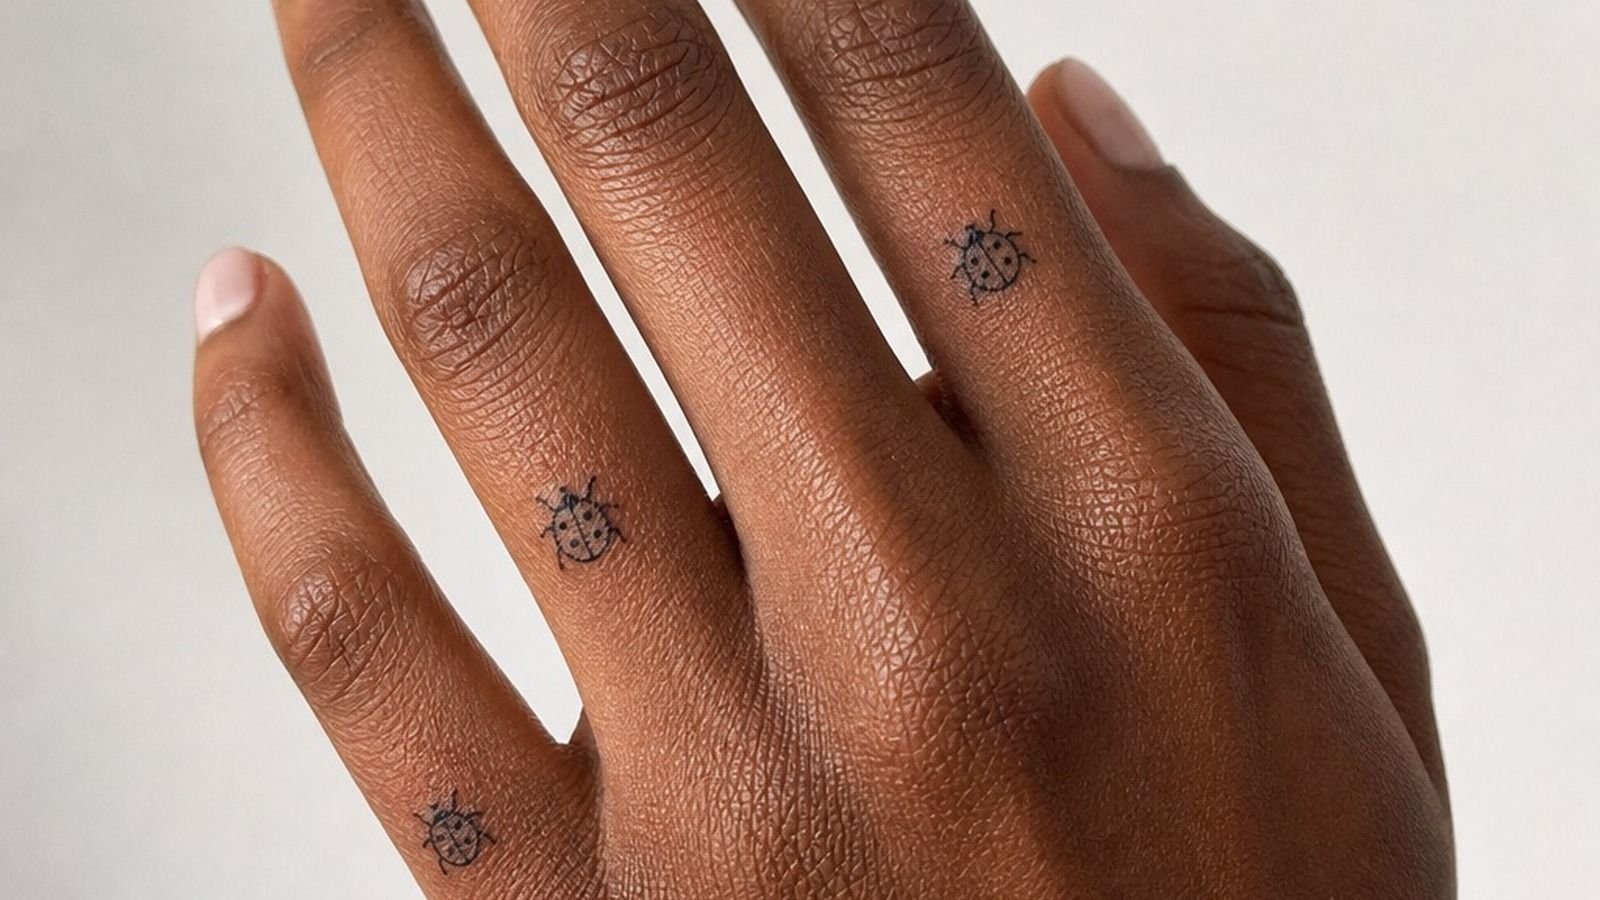
Treat finger tattoos like high-maintenance jewelry. Matching finger ladybugs on deep brown skin can be adorable and still make sense, but only if you go in knowing this is a touch-up-friendly zone.
Fingers fade. They blow out easier. They live in soap, sun, friction, and hand sanitizer all day.
I tell couples and best friends that matching pieces here are for people who accept maintenance without whining. If you’re weighing cost against upkeep, how much charge tattoo design gives a realistic starting point.
And design-wise, simple finger flash wins every single time! A round shell, two or three spots max, and a darker black outline than you think you need.
I would not do full red fills on side-finger placements because they can heal patchy from wear. But a top-of-finger ladybug with black structure and a tiny red pop can still read clean at a glance if you keep the scale honest.
12Solid Ink Red Makes Lucky Seven Feel Personal
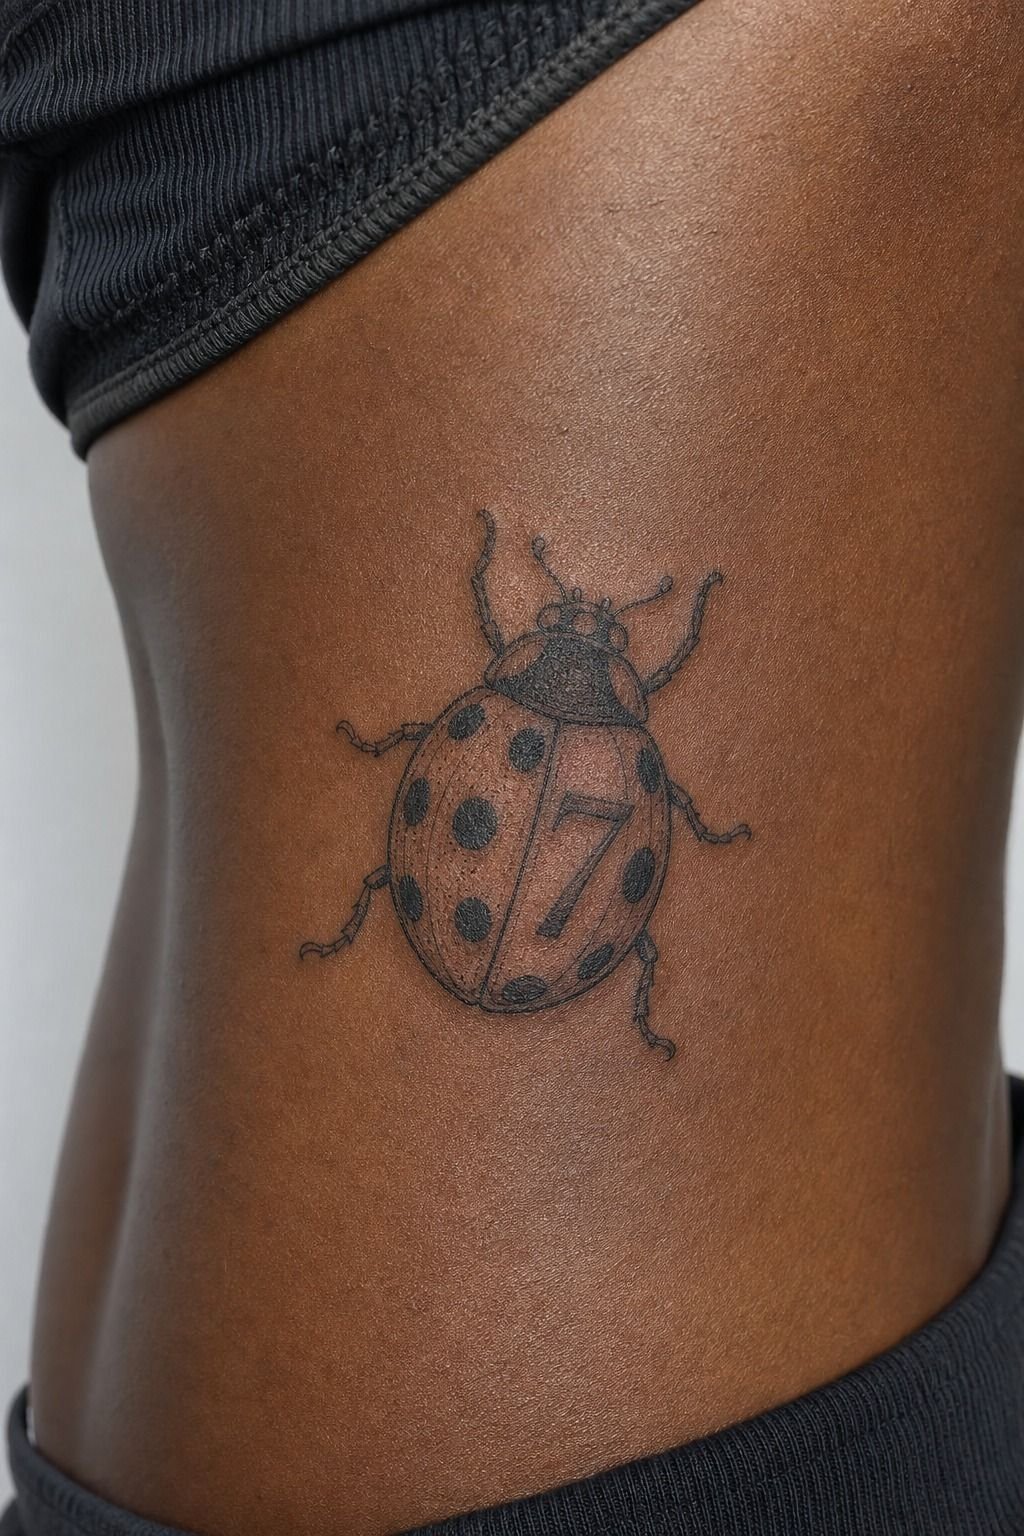
Add the number only if it means something and the hierarchy stays clear. I like a lucky-seven ladybug with the numeral tucked into one wing, large enough to stay crisp instead of turning into a nervous scratch. The idea feels personal, hopeful, and quietly sentimental.
Use Solid Ink Red for a rich shell and keep the seven black. Don’t add a date, initials, and stars too. You’ll get better value from one meaningful symbol that stays readable than four tiny details competing for attention.
13Scale a Delicate Rib Ladybug for Clean Healing
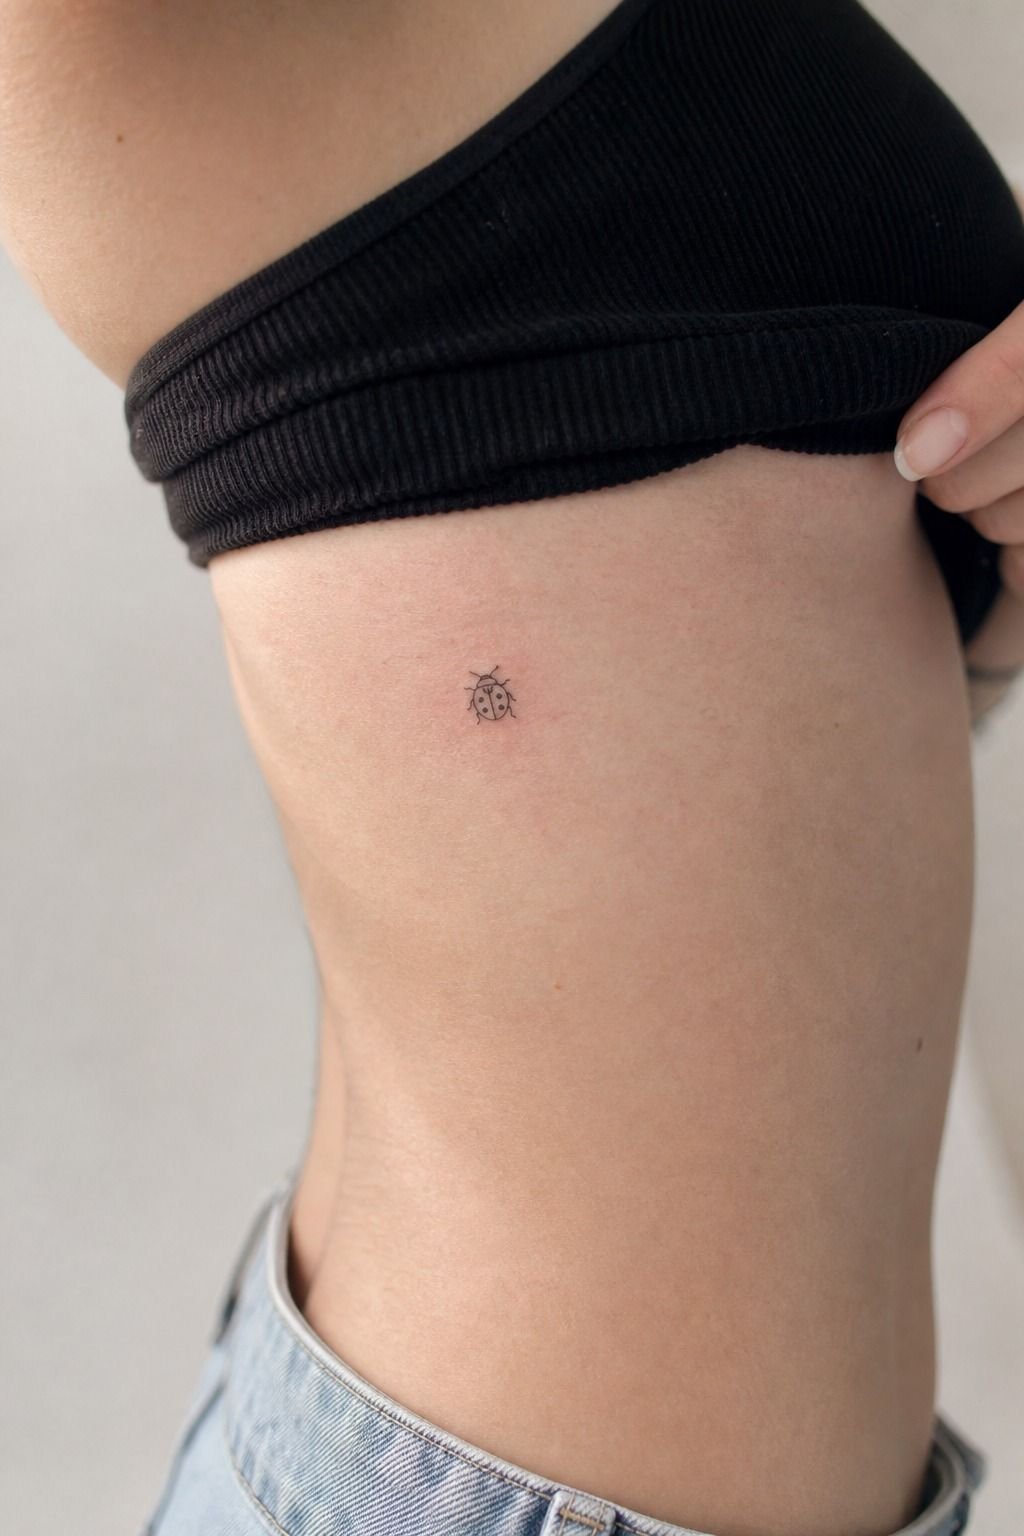
Scale back and let the skin breathe. A healed rib micro tattoo on fair cool-pink skin proves that tiny does not have to mean fragile if the artist edits hard before the machine even turns on. Micro pieces on ribs fail when people confuse small with delicate detail.
The ribcage moves, the skin stretches, and the session is already spicy enough. If you want a piece this small, custom tattoo design process matters because editing is the whole job.
I like one compact bug with a slightly thicker outer rib contour than you would expect and very few legs shown. Sounds boring?
It is not. It heals better, and you will still know exactly what it is in ten years.
And keep your aftercare tight here: gentle unscented soap, thin ointment, loose shirt, no gym-friction nonsense for the first stretch.
14Choose a Fearless Blackwork Ladybug
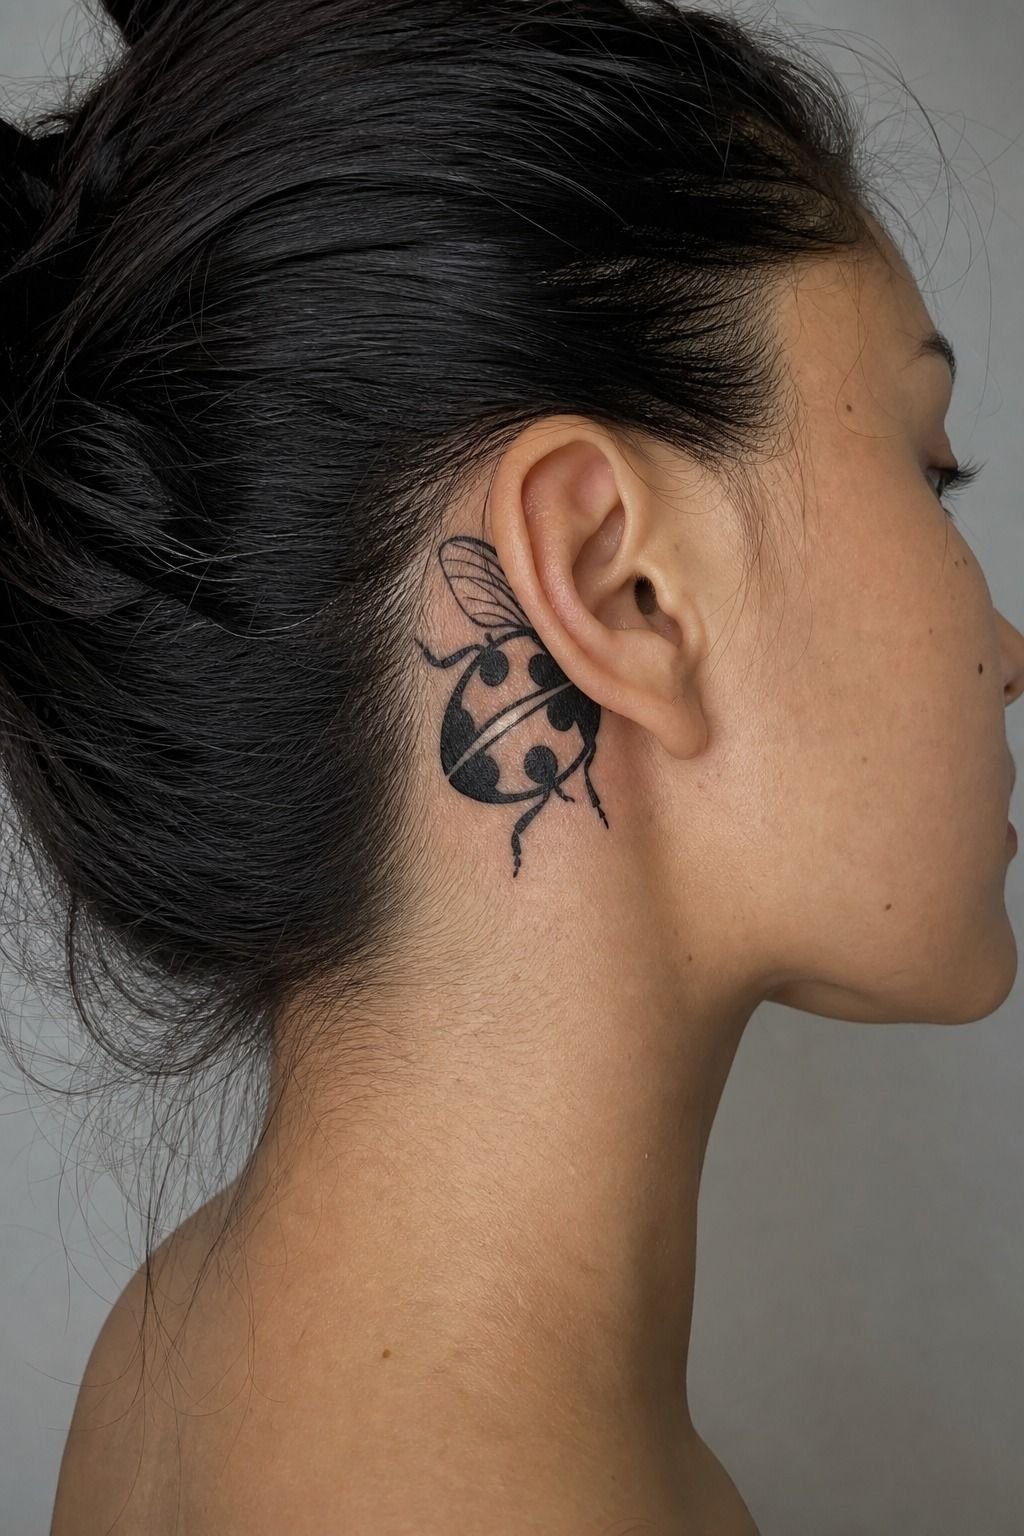
Choose contrast over fuss if you want the most durable version on this list.
Can the One-Inch Read Test Save a Tiny Design?
Here is the quick filter I use before I approve a tiny bug design: if the ladybug does not still read as a ladybug when I shrink it to about 1 inch on a screen or stencil print, it is not ready for skin. You need clear shell separation, clean spots, and enough untouched skin to keep the bug from turning muddy as the line settles. And yes, black holds longer than tiny fancy details.
Use My Clean-Heal Rule Before You Commit
I’ve redrawn more tiny ladybug tattoos than you’d think, and the same problem shows up every time. People bring a cute reference, then they ask for extra spots, a quote, a sparkle trail, maybe a birth year, maybe a flower, maybe a heart.
Suddenly the thing that was supposed to be light and sweet turns into a crowded little blob. Tiny tattoos don’t fail because the subject is bad. They fail because nobody edited.
My rule is simple. If the clean silhouette can’t read clearly from a few feet away on day one, it won’t read better after healing.
It will read worse. That’s why I keep telling people that bold will hold, black is your best friend for longevity, and a clean silhouette beats extra symbolism almost every time. You can make a ladybug feel personal through placement, scale, or one meaningful add-on.
You don’t need to cram your whole story into an inch and a half of skin.
I also care a lot about skin trauma control in the chair. One clean pull, not ten fuzzy ones. Solid fill, not fifty scratchy passes.
Soft shading only where it earns its keep. The first few days, it’s an open wound, and you should treat it like that.
Wash with gentle unscented soap. Pat it dry.
Use a thin layer of ointment, then switch to light moisturizer once your artist tells you to. Don’t suffocate it.
Don’t pick flakes. Don’t hit the pool. Don’t let gym friction chew it up.
Basic, but it matters!
And here’s the honest part: the best ladybug tattoos are usually the least desperate ones. The ones that don’t try to prove too much.
A tiny wrist bug with crisp black and clean red can beat a hyper-detailed rib piece every day because it heals nicer, ages nicer, and still feels like you. That’s the whole game.
What People Always Want to Know
How much does a Ladybug Tattoo Design usually cost?
Usually about $100 to $300 for a small clean piece, though some shops have a $50 to $100 minimum and stronger artists charge $100 to $250 an hour. Placement, color, and city change the number fast. Tiny doesn’t always mean cheap.
Are Ladybug Tattoo Design a good idea for a first tattoo?
Yes, if you choose a simple placement and clean linework. Wrist, forearm, shoulder blade, and outer ankle give you manageable scale, clearer healing, and an easy read. I wouldn’t make your first one a finger or rib piece unless you already know you’re good with spicy sessions.
How do I choose a tattoo artist for Ladybug Tattoo Design?
Pick someone whose healed linework looks crisp in real photos, not just fresh tattoos under bright lights. Look for clean circles, solid red packing, and simple designs that still read clearly. You can start by comparing how to design your own tattoo with a pro-led custom tattoo design process.
How much do Ladybug Tattoo Design hurt?
They usually hurt a little to moderate amount, depending on placement. Forearm, shoulder blade, and outer upper arm are pretty chill.
Ribs, sternum, ankle, and fingers feel sharper because the skin is thinner, bonier, and more active. Tap out for five rather than pass out on me.
How long does a Ladybug Tattoo Design take to heal?
Most small ladybug tattoos look surface-healed in 2 to 3 weeks and fully settled in 2 to 3 months. Wash gently, use a thin layer of aftercare, avoid pools and hard sun, and don’t pick peeling skin if you want the red and black to stay clean.
What’s the best placement for Ladybug Tattoo Design?
For most people, outer forearm or shoulder blade wins. You get good visibility, lower pain, and low-wear skin that helps fine details last longer. If you want something tiny and hidden, behind the ear can work too, but it needs stronger contrast than people expect.
Can I DIY a Ladybug Tattoo Design on a budget?
No, and I mean no for real. A cheap scratcher tattoo costs more once you cover it, rework it, or laser it later. Save for a clean studio minimum instead, then use design tattoo online free only to sort ideas before a pro redraws them.
Hazel’s Bold-Will-Hold Pick
If I had to pick one, I’d start with the Fine Line Ladybug Wrist Tattoo. That placement lets the shape stay clean without finger-level maintenance, and you get to see it every day. Pin it for later and compare it with how much charge tattoo design.