Yes, you can absolutely make a temporary tattoo at home that looks decent and stays put for a few days. I’ve had clients walk into my shop with DIY temporaries they want me to replicate permanently, and honestly, some of them were surprisingly clean. The key is using the right materials and understanding that skin is a tricky canvas, it moves, it sweats, it sheds. I’ll walk you through what actually works, what I’ve seen people try (and fail at), and how to get the best results without irritating your skin or wasting your afternoon.
What You’ll Actually Need
Skip the Sharpie-and-rubbing-alcohol tutorials that flood TikTok. I’ve seen too many people with angry red skin from that combo. Here’s what works in real practice:
- Printer paper or tracing paper, regular copy paper works fine for most methods
- Perfume or hairspray with high alcohol content, the cheap stuff, not the fancy conditioning kind
- Baby powder or translucent setting powder, helps matte down the image and adds staying power
- Sharp scissors, clean edges make or break the illusion
- Clear liquid bandage or liquid latex, this is your sealant, your top coat
- Design printed in reverse, mirror image, or it’ll come out backwards
Some people use eyeliner pencils for freehand drawing, and that works for simple line work. I’ve seen gorgeous hand-poked temporaries that looked like real stick-and-poke tattoos from three feet away. The trick is keeping lines thin and avoiding heavy shading, which always looks muddy on skin.
Where to Source Your Design
Google Images and Pinterest are obvious starting points, but I always tell friends to check actual tattoo flash sheets for proportions that read correctly on skin. A design that looks great on paper can turn blobby on a curved forearm. Look for bold lines, minimal fine detail, and high contrast. Tiny text? Forget it. It’ll blur into a gray smear by day two.
The Perfume Transfer Method (Best for Beginners)
This is the method I see most often, and when done right, it gives you two to four days of wear. Here’s the actual process:
- Print your mirror-image design on regular paper
- Cut it out close to the edges, leaving minimal blank paper
- Soak the paper thoroughly with perfume or hairspray, really drench it
- Press it firmly onto clean, dry skin and hold for 30 to 60 seconds
- Lift slowly from one corner; if the image hasn’t transferred, press and soak more
- Once transferred, let it dry completely (about 10 minutes)
- Dust lightly with baby powder, then seal with clear liquid bandage or hairspray
The alcohol in the perfume breaks down the ink just enough to transfer it. I’ve had friends get three days out of these, including through showers, though they’ll fade at the edges first. The inner bicep and upper thigh hold better than hands or feet, those areas shed skin faster and see more friction.
Common Mistakes I See
Moving the paper before it’s fully soaked. Peeking underneath. Using too much liquid so the ink bleeds. Not letting it dry before sealing. Patience is the ingredient no one lists.
The Liquid Latex and Marker Method (Most Convincing)
If you want something that actually looks like a real tattoo for a day or two, this is your method. I’ve seen this done in film and theater contexts, and it holds up to scrutiny.
- Draw your design directly on skin with a fine-tip permanent marker or alcohol-based body marker
- Let it dry completely
- Paint a thin layer of liquid latex over the design, extending slightly past the edges
- Let the latex dry clear (about 5, 10 minutes)
- Apply a second thin coat if you want more durability
The latex creates a slightly raised, matte surface that catches light like real healed skin. From conversational distance, it reads as genuine. The downside: latex allergies are common, and this will start peeling at the edges after a day or so. I’ve had it last through a full wedding reception on my own forearm, but I was careful not to pick at it.
For the marker, I prefer Prismacolor or Copics over Sharpies, the ink sits better and doesn’t have that slightly green undertone that cheap permanent markers get on skin. Test a small patch first. Some people react to the alcohol in these inks.
What to Skip (From Someone Who’s Seen the Failures)
I’ve watched friends and internet strangers try plenty of methods that sound clever but disappoint or damage skin.
- Colored pencil shavings mixed with water, creates a paste that cracks and flakes within hours
- Actual tattoo needles without training, this isn’t temporary, it’s just a bad, potentially dangerous tattoo
- Jagua gel from unverified sellers, often contains PPD (black hair dye) that causes chemical burns
- Sharpie directly on skin without sealant, transfers to clothes, fades patchy, and the ink isn’t meant for prolonged skin contact
- Printer ink with water or glue, smears, looks muddy, rarely dries properly
The henna cone from the Indian grocery store? That’s a real method with real cultural roots, but it’s not instant and it’s not what most people picture as a “temporary tattoo.” It also requires 6, 12 hours of paste sitting on skin, and the color develops over two days. Beautiful, but a different process entirely.
Making It Last and Look Real
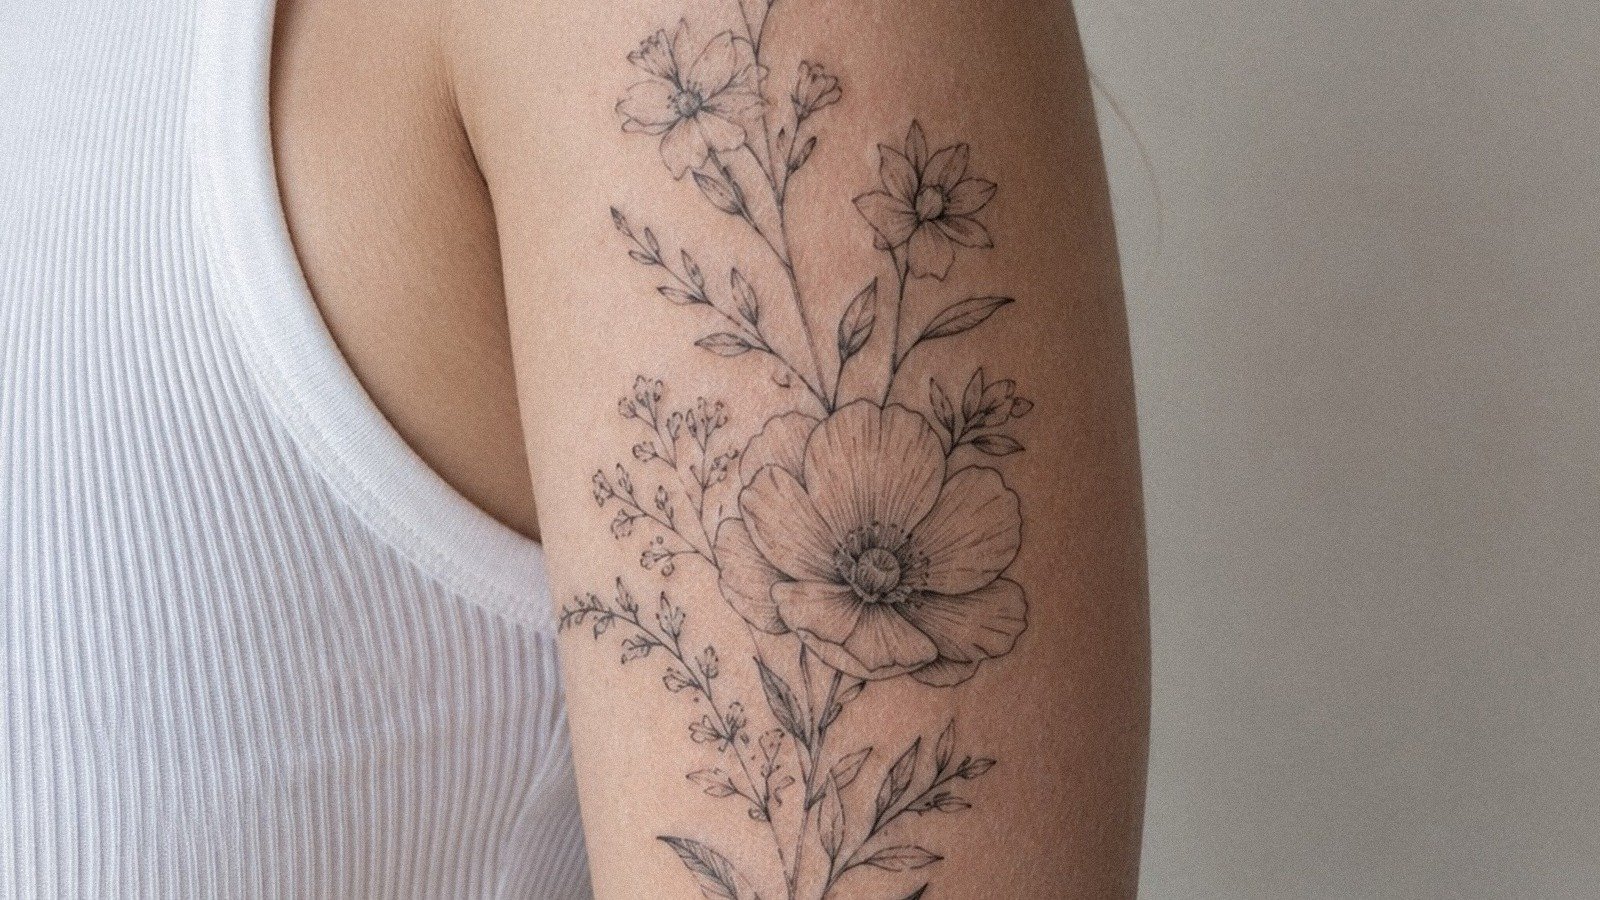
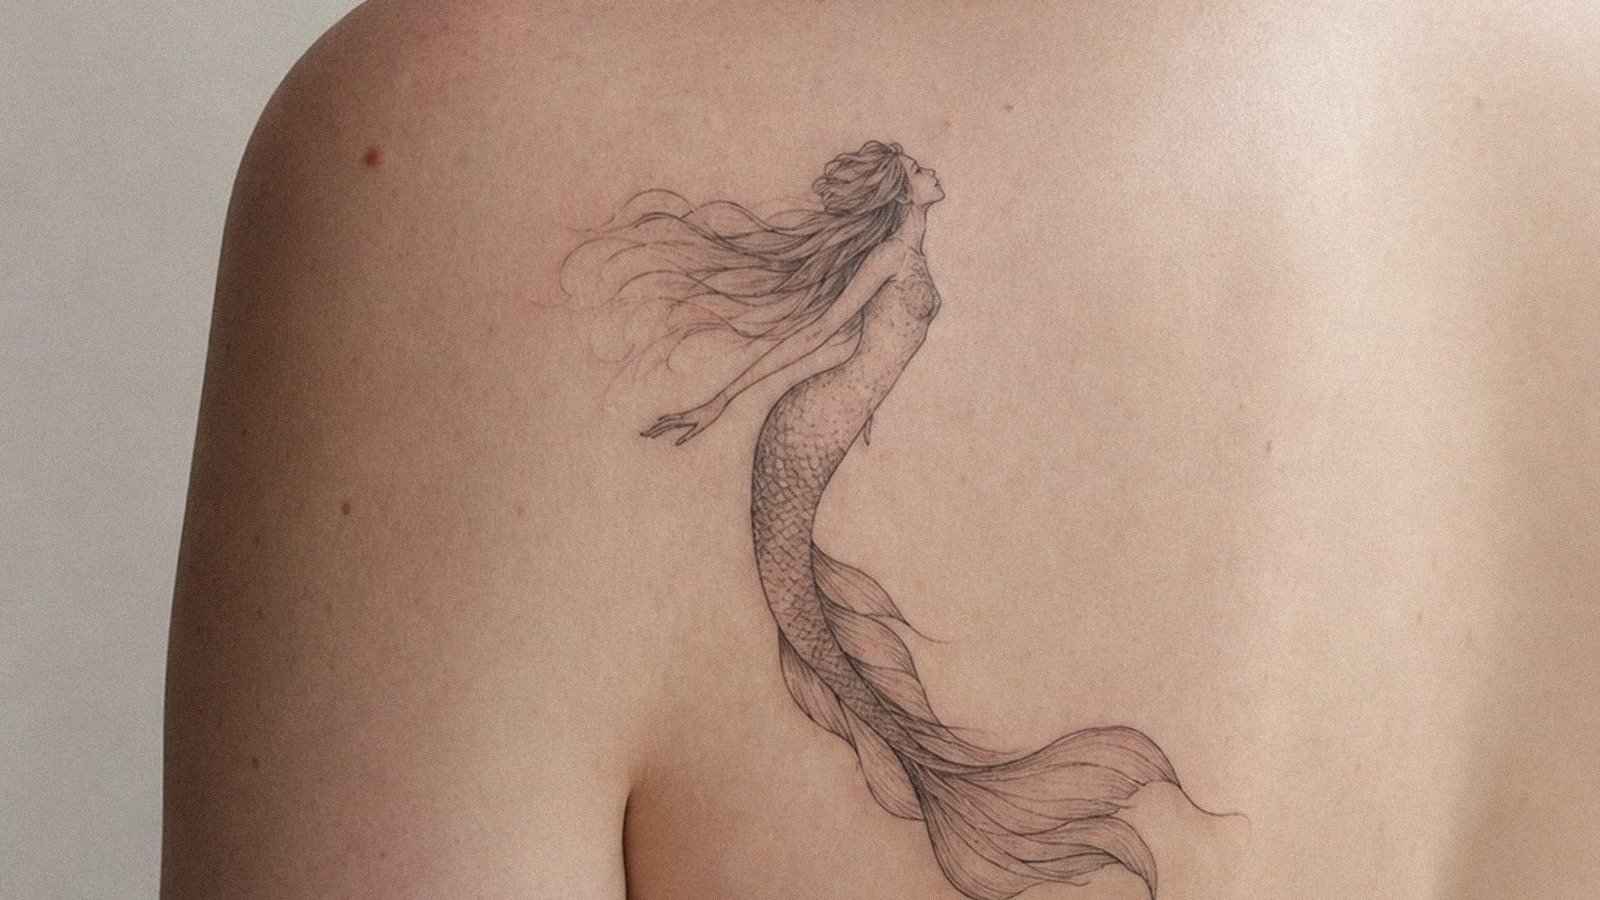
Placement matters more than most people think. I’ve tattooed thousands of people, and I can spot a fake immediately when it’s in a spot no professional would place, like the direct center of the palm, or a tiny detailed piece on a finger that would blow out in six months. If you want convincing, put it where real tattoos go: outer forearm, upper arm, calf, ribs, upper back. Avoid joints that flex constantly (inner elbow, back of knee) unless you want accelerated cracking.
- Exfoliate lightly before application, dead skin is what flakes off first
- Avoid lotion or oils on the area beforehand; they create a barrier
- After applying, keep it dry for at least an hour
- Pat dry after showering; don’t rub
- Touch up edges with matching marker if they start fading unevenly
The best fake I’ve ever seen was on a friend’s upper arm, she used the perfume transfer, then went over the lines with a fine brown marker to add variation, then sealed it. From three feet away, I thought she’d gotten tattooed without telling me. The slight imperfection in line weight actually sold it. Machine-perfect lines look fake; real tattoos have human variation.
How to Remove It When You’re Done
Don’t scrub aggressively. Baby oil or makeup remover breaks down the sealant and ink gently. I’ve also used plain rubbing alcohol on a cotton pad, pressing and holding rather than rubbing. Your skin will be slightly pink after, normal, not damage. Moisturize after removal.
When This Becomes a Real Tattoo Decision
I say this as someone who makes a living with a tattoo machine: wear your temporary for at least two weeks before you commit. Live with it. See it in the mirror every morning. Notice if you stop seeing it, or if you keep catching it and smiling. I’ve had clients sit in my chair absolutely certain, and others who realized during the stencil phase that they weren’t ready. There’s no shame in waiting. The design will still exist. Your skin will still be there.
Cost-wise, a small professional tattoo runs $100, $300 in most US shops, with minimums even for tiny work. A good piece by an experienced artist might be $150, $250 per hour. Pain varies wildly by placement, ribs and feet hurt, outer arm and calf are manageable for most people. Healing takes two to four weeks of careful aftercare: gentle washing, thin lotion, no sun, no soaking. Temporary tattoos let you rehearse all of this except the needle and the permanence.
Key Takeaways
- The perfume transfer method is the most reliable DIY approach for multi-day wear
- Liquid latex over marker looks the most convincing but requires allergy caution
- Print designs in reverse, choose bold high-contrast images, and place them where real tattoos naturally go
- Patience in application and drying beats any “hack” for speed
- Test materials on a small skin patch first, especially with alcohol-based products and latex
- Use temporary tattoos as a genuine trial period before committing to permanent ink
I’ve had my own temporary tattoos last through beach weekends and job interviews. The best ones fade gradually and naturally, like a memory loosening its grip. That’s the point, really. Temporary lets you hold something without having to keep it forever.
Frequently Asked Questions
Can I use a regular Sharpie for a temporary tattoo, or do I need special markers?
Regular Sharpies work in a pinch, but alcohol-based art markers like Prismacolor or Copic sit better on skin and don’t develop that greenish cast. Always seal with liquid bandage or latex, and avoid prolonged skin contact with industrial markers not meant for body use.
How long do DIY temporary tattoos actually last?
Most home methods give you one to four days depending on placement, sealant quality, and how much you sweat or shower. Inner arm and thigh placements last longest; hands and feet fade fastest due to friction and faster skin turnover.
Is there any risk of allergic reaction with these methods?
Yes, latex allergies are common, and some people react to alcohol in markers or perfume ingredients. Always test on a small area first. If you see redness, itching, or blistering, remove immediately and don’t use that product again.
Can I swim with a temporary tattoo made at home?
Chlorine and salt water both accelerate fading, and most sealants will break down with prolonged soaking. If you need it to last through water exposure, apply multiple layers of liquid bandage and pat dry immediately after. Even then, expect significant wear.