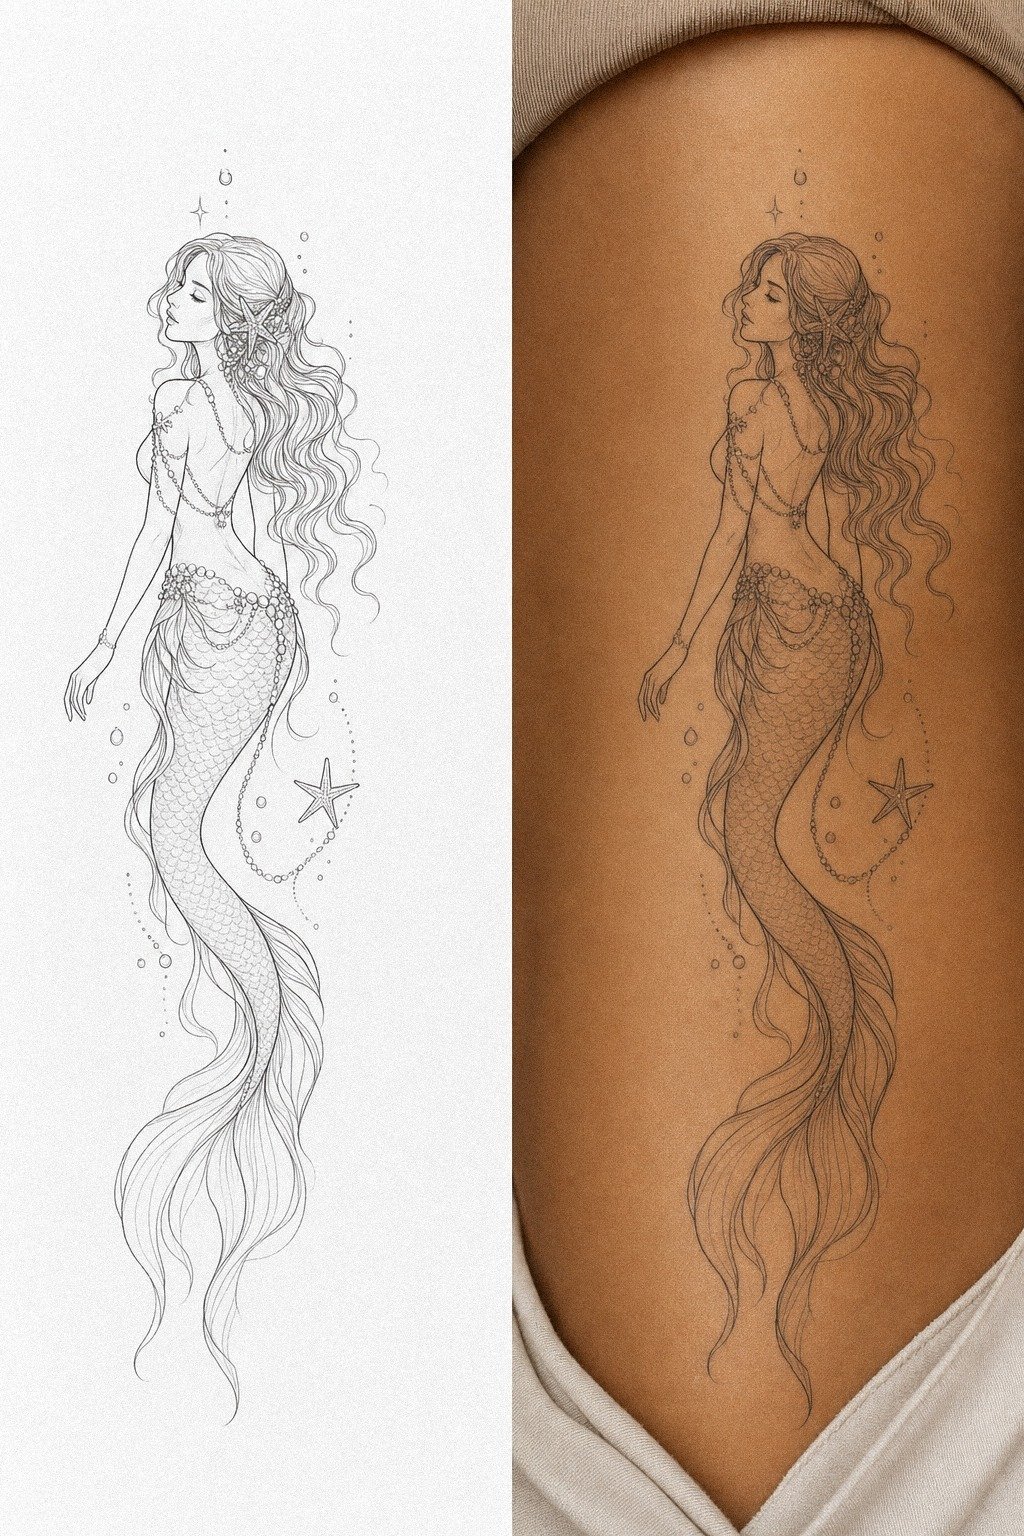
Mermaid tattoo advice gets messy fast. You see a tiny Pinterest reference, you love the vibe, and then nobody tells you how that same design heals on skin after the shine drops. I have talked more than one client out of a too-small siren because I knew the tail scales would melt together. You want something that still reads clean in a few years. That starts with shape, placement, and a little restraint.
Before You Start: What Does The Clean Read Rule Mean?
[IMAGE: Mermaid tattoo stencil on skin beside a healed fine line mermaid on outer shoulder, clear silhouette comparison, realistic tattoo reference photo]
Before you book anything, use what I call The Clean Read Rule. If you cannot make out the mermaid shape from two or three feet away, the design is already too fussy for the size you picked. You need a silhouette first, details second, and a line weight that won’t heal into soup.
Think in skin terms, not screenshot terms. A 3 inch shoulder tattoo gives you more clean margin than a 1.5 inch wrist piece, and that changes what your artist can pull in one clean pass. If your budget is tight, a strong simple piece still beats a tiny overworked one every single time.
Here’s a realistic cheat sheet you can bring to your consult.
- Start With A Fine Line Mermaid Tattoo
- Pick A Whimsical Mermaid Tattoo Silhouette
- Place A Mermaid Tattoo Along The Rib
- Choose An Ocean Wave Mermaid Tattoo
- Plan A Siren Goddess Mermaid Tattoo
- Keep A Tiny Mermaid Tattoo Simple
- Build A Mermaid Tattoo With Shell Details
- Ask For Soft Shaded Mermaid Hair
- Try A Mermaid Tail Ankle Tattoo
- Match Mermaid Tattoo Placement To Pain
- Save Healed Mermaid Tattoo References
- Protect Your Mermaid Tattoo While Healing
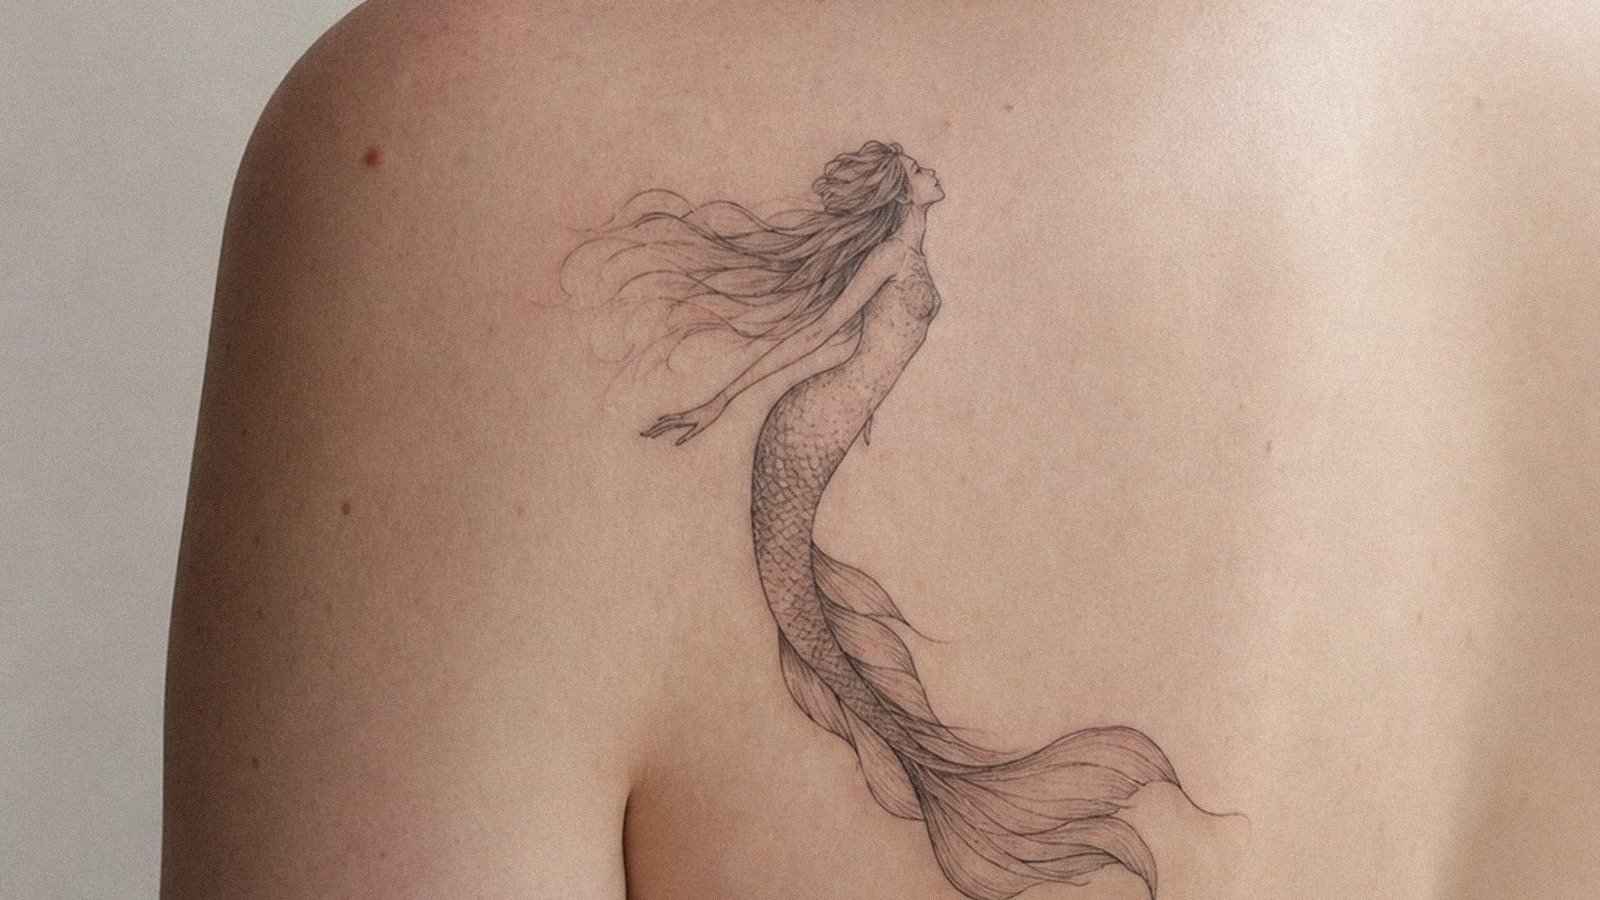
1Start With A Fine Line Mermaid Tattoo
[IMAGE: Fine line mermaid tattoo on outer shoulder, healed black linework, clean silhouette, airy flow on skin]
Start with shape, not decoration. On a cool pink shoulder, a fine line liner setup can look clean and airy because the curve of the deltoid gives the mermaid enough clean flow to breathe. If you begin with scales, bubbles, hair strands, and jewelry all at once, you lose the body read before the tattoo even heals.
I tell clients to squint at the stencil. If the torso, tail bend, and hair mass still read when your eyes blur, you’re on the right track. If not, strip it back to the bones of the design and rebuild from there.
Shoulder placement is forgiving, too. It’s a lower-wear zone, you can hide it when you need to, and the skin there usually takes black linework without getting chewed up. That matters if this is your first mermaid piece.
And keep the size honest. I would rather see a 4 inch mermaid with crispy lines than a 2 inch one packed with ten ideas. If you’re still choosing symbolism, look at this guide to mermaid tattoo meaning before you lock the pose, then compare it with your saved mermaid tattoo meaning notes.
2Pick A Whimsical Mermaid Tattoo Silhouette
[IMAGE: Whimsical mermaid tattoo stencil with playful tail curl and simple outline, realistic shoulder placement reference]
Now zoom closer and ask one question: does the outline feel playful before you notice any detail? In a macro shoulder shot, a single needle silhouette shows you the truth fast. A whimsical mermaid works because the tail flick, chin tilt, and hair sweep carry the mood on their own.
This is where a lot of people go wrong. They ask for a cute mermaid, but what they really hand the artist is a pile of tiny extras that crowd the outline. A shell bra, five stars, moon dots, lace fins, pearls, and script all fighting for the same inch count.
Why do that to a good silhouette?
Pick one hero move. Maybe it’s a floating tail curl. Maybe it’s a bent wrist and a face turned upward.
That one gesture should do most of the storytelling, then your artist can tuck in light texture with grey wash instead of hard clutter.
But keep whimsy readable. If the silhouette can’t stand by itself, the tattoo won’t age cute on you. For more idea sorting, I like pairing the symbolism notes in this mermaid meaning breakdown with saved healed references.
3Place A Mermaid Tattoo Along The Rib
[IMAGE: Vertical mermaid tattoo flowing along ribs, healed black and grey linework, elegant side-body placement]
Rib placement looks beautiful because the mermaid can follow the side body instead of sitting flat. On medium olive skin, a healed rib tattoo usually shows you exactly why placement matters more than trend. The vertical sweep gives the tail length, and the curve of the body keeps the figure elegant without needing extra filler.
You do need to earn it. Ribs are spicy.
Lines feel sharper there, and even soft shading can feel like a hot scrape once you hit the bony sections. If you know you get shaky, ask your artist to build the design for a two hour window, not a marathon.
This is also a place where size helps longevity. I’d start around 5 inches for a full mermaid figure, sometimes a little more if you want hair movement or an ocean accent. Too small on ribs can blur fast because the detail gets squeezed into a high-motion zone.
I like ribs for collectors who want something intimate and fluid, not for people chasing the tiniest version possible. They can be worth it, but only if you give the design enough room to breathe. If you’re comparing meaning-first placements, this article on mermaid tattoo meaning gives you a solid base before your consult.
4Choose An Ocean Wave Mermaid Tattoo
[IMAGE: Small mermaid tucked into ocean wave tattoo behind the ear, simple black linework, realistic skin placement]
Behind the ear is tiny real estate, so let the ocean wave do part of the work. A behind the ear placement with a mermaid tucked into a wave arc reads cleaner than a full body figure fighting for inches. The curve of the wave can echo the ear line and make the tattoo feel intentional instead of crammed on.
This is where I’d skip heavy facial detail. You won’t see it from normal distance, and your artist will have to overwork the skin to fake complexity in a tiny zone. One clean pull around the wave, a soft tail bend, and a couple of open pockets will hold better.
Think of this step like editing. You’re choosing what the eye catches first: wave, tail, hair. Pick one.
Then let the rest be implied with open skin and two or three selective lines.
And remember the wear. Hair products, sun, and phone friction can all beat up a small tattoo near the ear. If you love ocean tattoos but want easier healing, move that same concept to the shoulder or outer forearm, then save one more mermaid tattoo meaning reference before you book.
5Plan A Siren Goddess Mermaid Tattoo
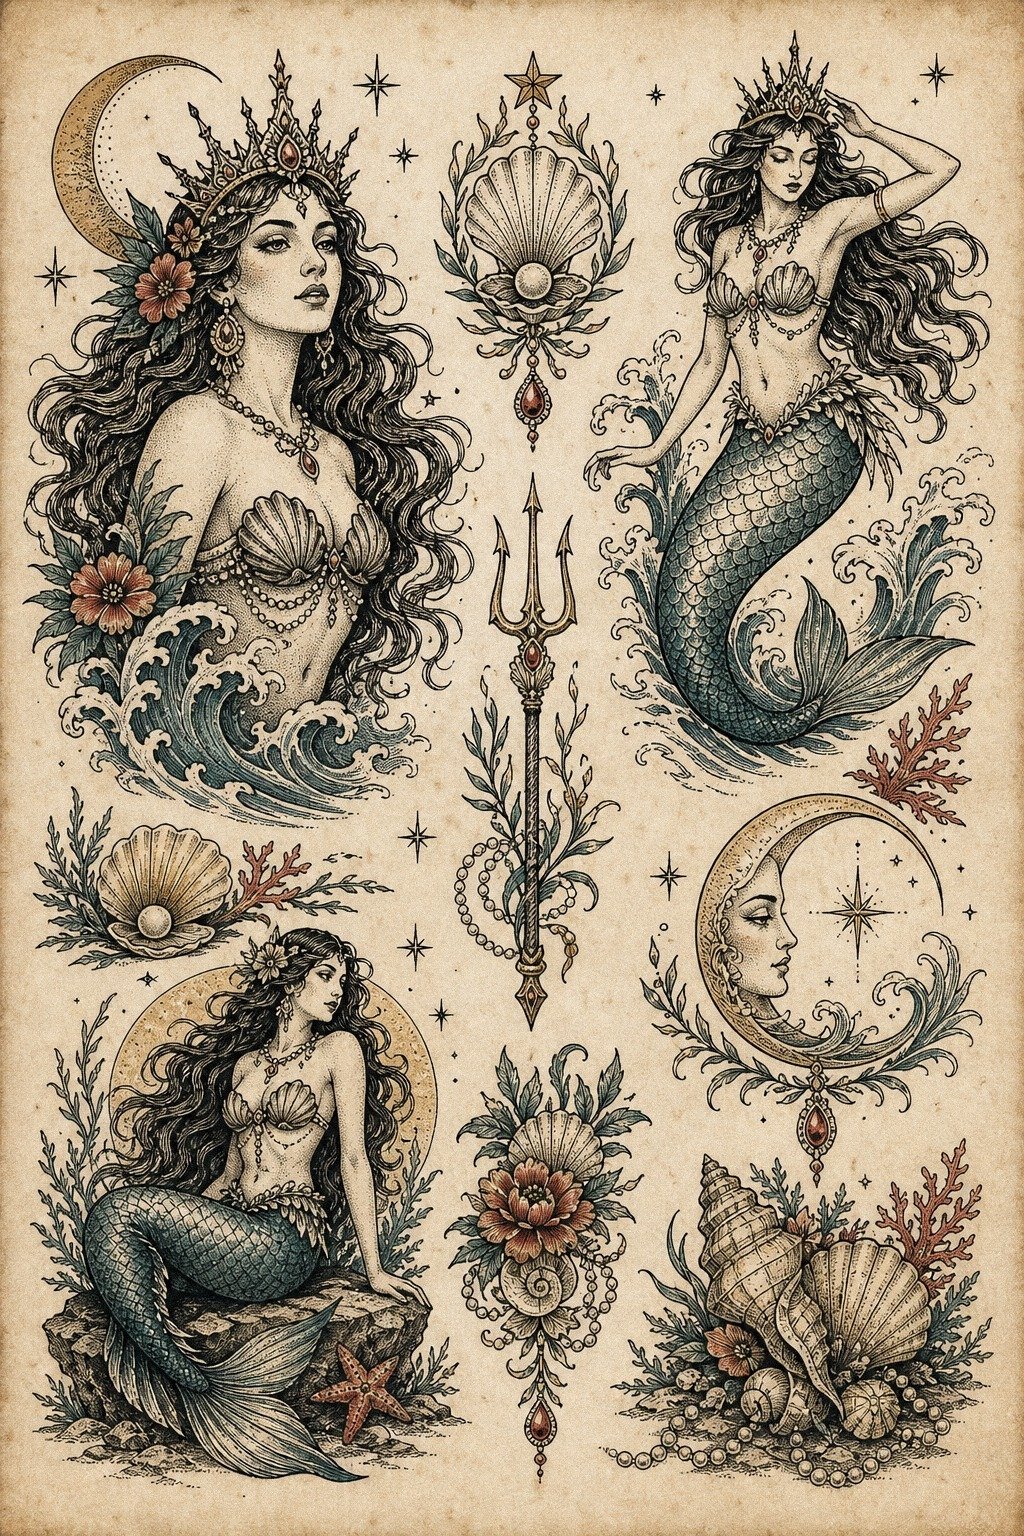
[IMAGE: Mermaid flash sheet with siren poses, black ink linework, bold posture options, realistic tattoo studio setup]
When you’re staring at a flash sheet, slow down. A sheet full of black ink flash on off-white paper tells you more than a polished digital mockup because you can see whether the artist understands balance, line confidence, and repeatable shapes. Flash also keeps you from over-customizing a clean design into mush.
For a siren or goddess angle, look for posture and hierarchy first. Bigger hair mass.
Stronger chin line. Fewer tiny props.
A goddess-tattoos approach works best when the figure feels iconic, not busy.
This is a great time to ask whether the design is flash, custom, or get-what-you-get. I’m blunt about this: if you want Pinterest-exact, I’m probably not your artist. Bring references for vibe only, then let the artist build a custom redraw so it fits your body and their line style.
But use the flash sheet smart. Flash can be a better call than a full custom redraw if you are trying to keep the process simple. I’d start with mermaid tattoo meaning and, if you like myth-heavy pieces, even glance at zeus tattoo meaning to see how power symbols get simplified.
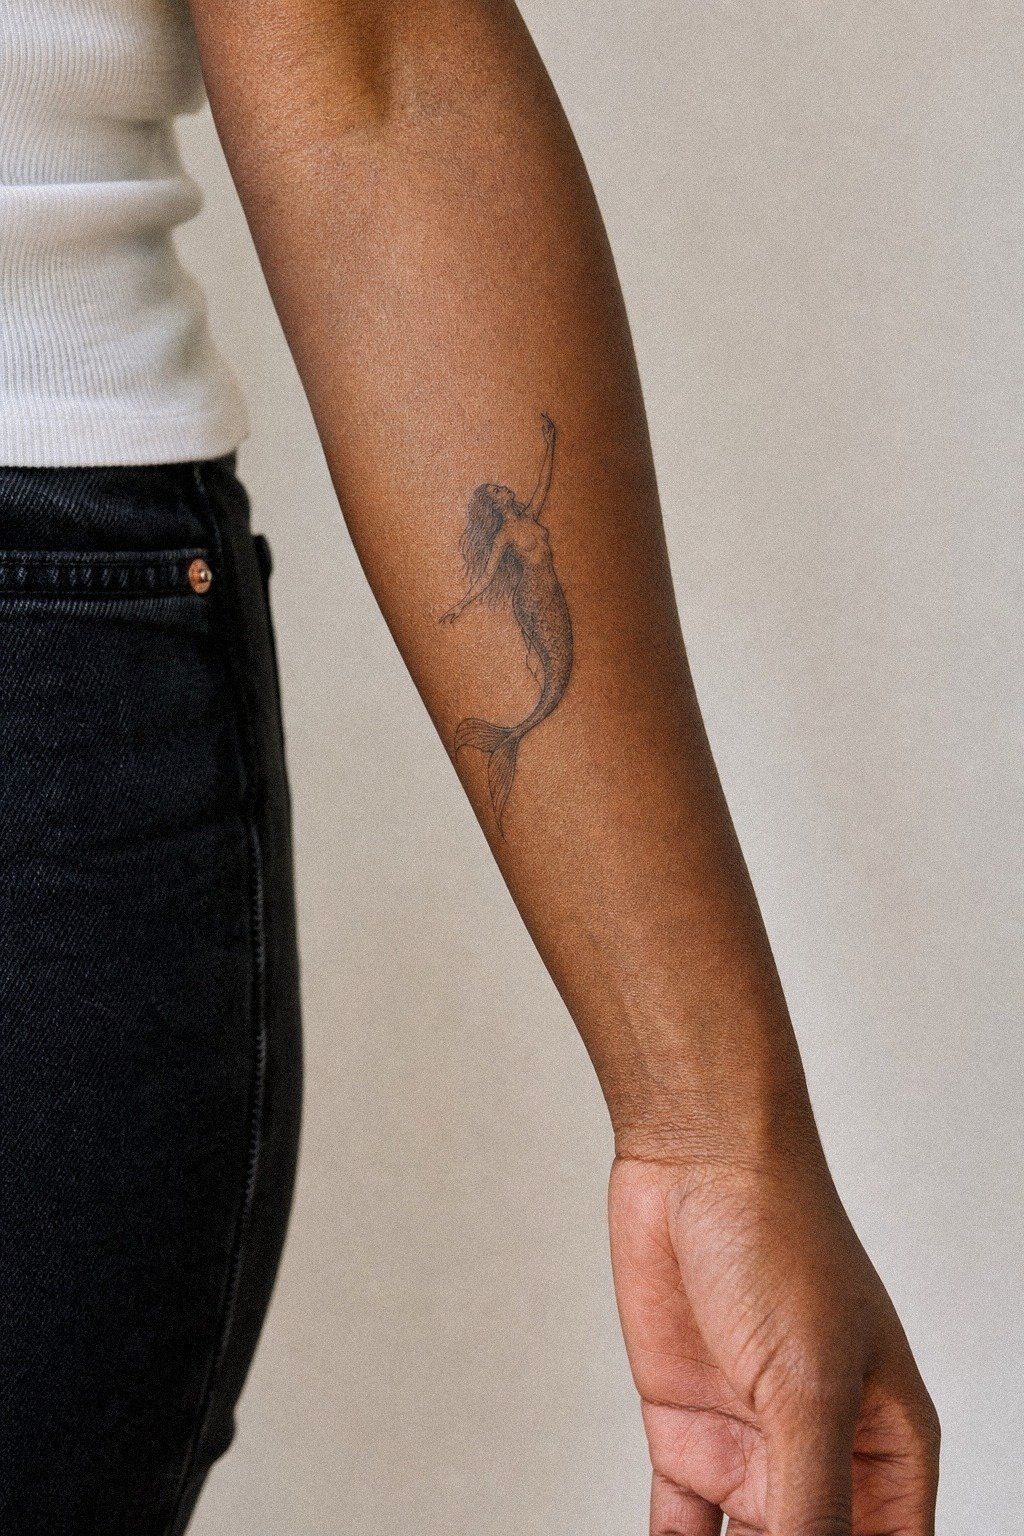
6Keep A Tiny Mermaid Tattoo Simple
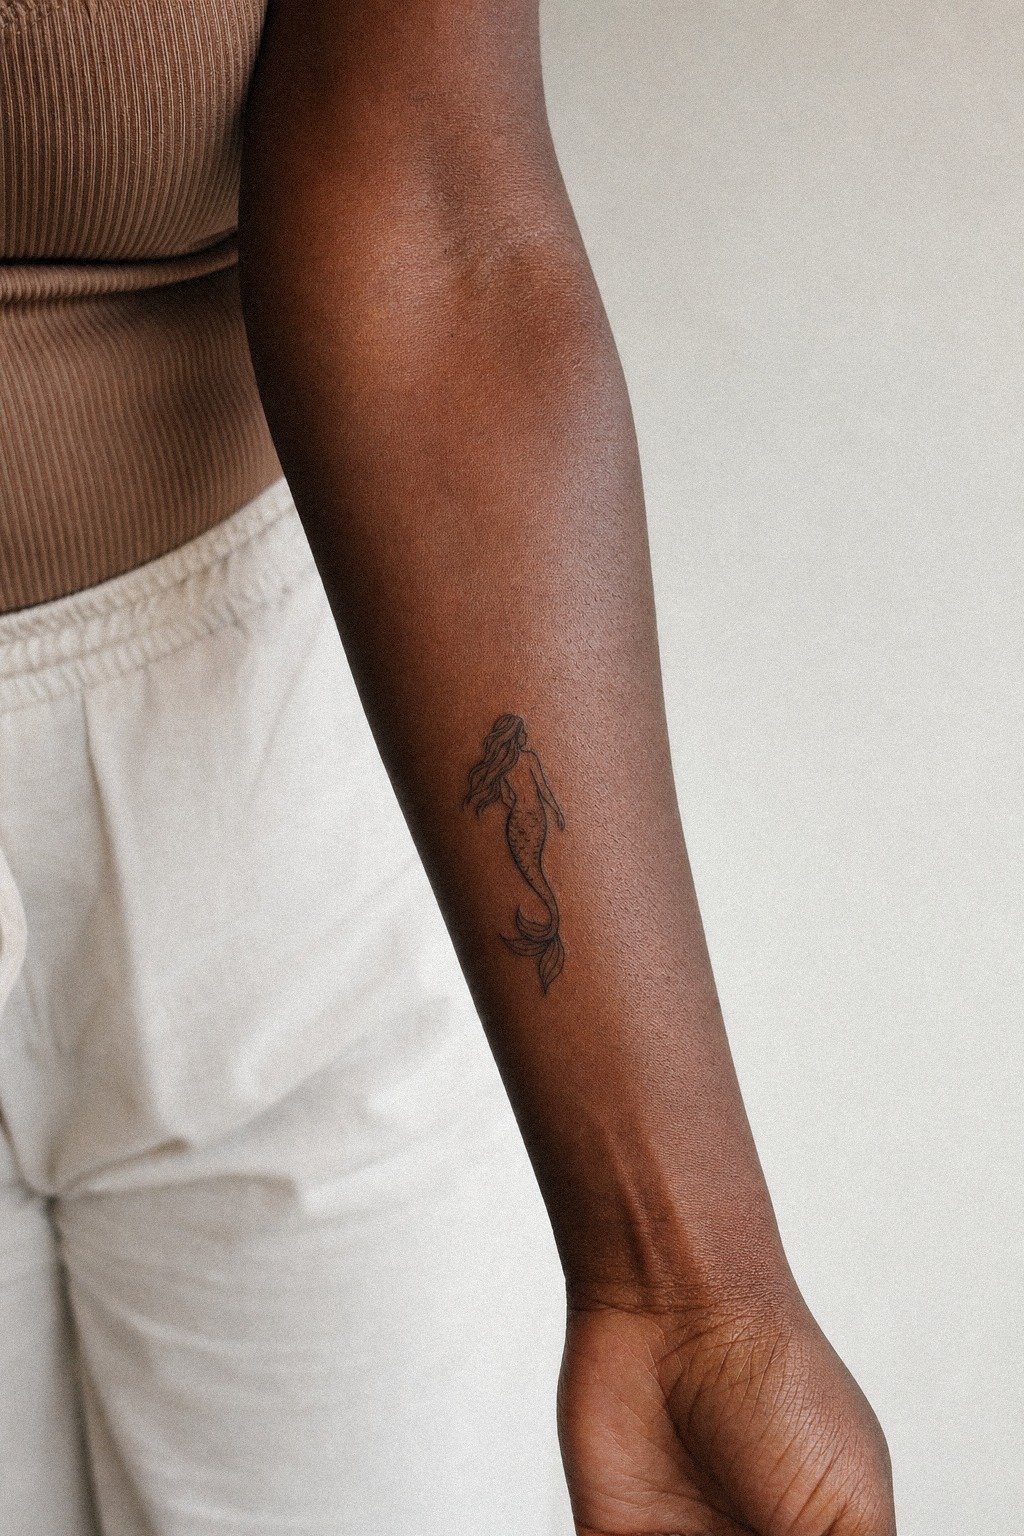
[IMAGE: Tiny mermaid tattoo on outer forearm, healed fine line design with open skin and simple silhouette]
Tiny tattoos can be sweet. They can also turn to soup faster than anything else on the menu. On a deep ebony forearm, a tiny forearm tattoo can look so clean because the artist respected the scale and kept the idea simple enough to heal crisp.
This is the rule: if the mermaid is under about 2.5 inches, choose one clear body line, one tail shape, and minimal face information. No micro scales.
No tiny necklace. No six separate hair ribbons.
Small pieces need air around them or they lose themselves.
Forearm is a smart call for first-timers because it’s more tolerable than ribs, hands, or feet, and it’s easy for you to watch heal. That makes aftercare simpler. You can wash it gently, keep a thin layer of unscented ointment on it, and notice quickly if you’re over-moisturizing.
I’d take simple over precious every time. Tiny does not always mean less maintenance once you factor in touch-up risk, and it rarely pays off if the design gets too fussy.
If you want more story, add a second tattoo later instead of forcing every idea into one tiny silhouette. That call saves regret.
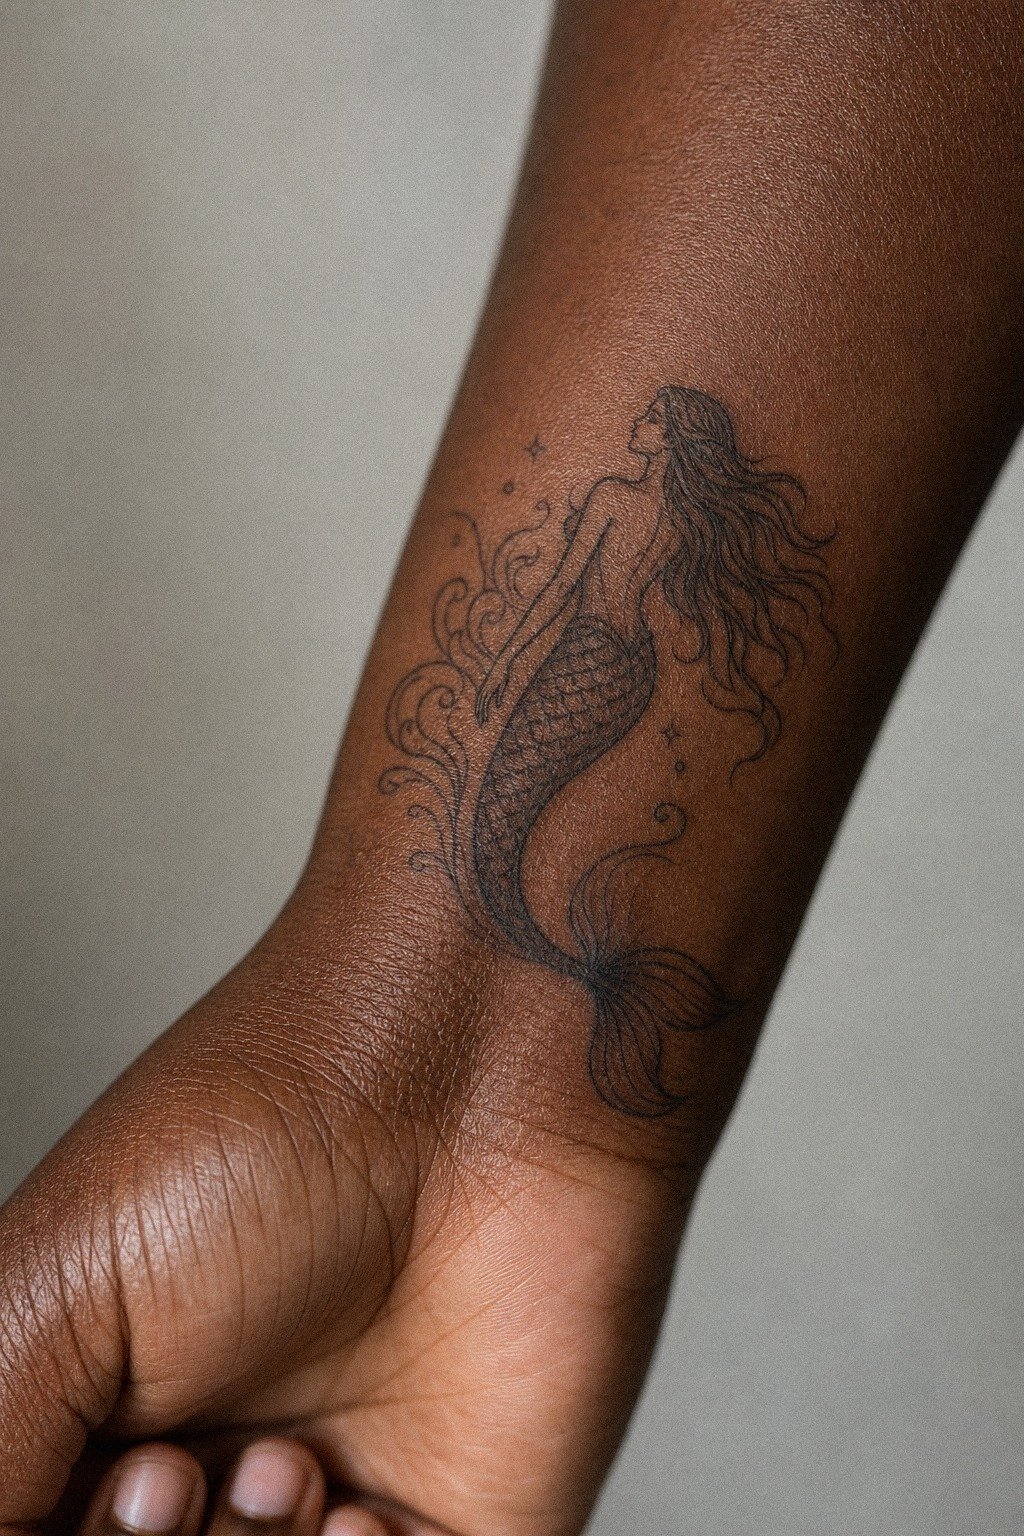
7Build A Mermaid Tattoo With Shell Details
[IMAGE: Mermaid tattoo with subtle shell accents at hip and hair, black and grey shading, shoulder placement]
Details should support the main figure, not hijack it. In a close shoulder macro, shell details work best when they act like punctuation. One shell at the hip, a subtle shell comb in the hair, or a couple of tiny shells near the tail root can add texture without choking the outline.
What you’re looking for is contrast in scale. A bigger shell shape beside a clean body line will read.
Five little shells scattered everywhere won’t. That’s the difference between ornamental and scratchy.
I also like shell details when they echo the line weight of the body instead of going thinner and fussier. Ask for matching line confidence, then let the artist soften the secondary parts with light grey wash or tiny black fills so the figure still leads.
And be picky with placement. Shoulder gives shell details the best chance to heal nice because it’s low-wear and broad. If you’re building mermaid tattoo designs around symbolism, tuck a natural link to mermaid tattoo meaning into your research folder before the consult and keep a backup mermaid symbolism tab open.
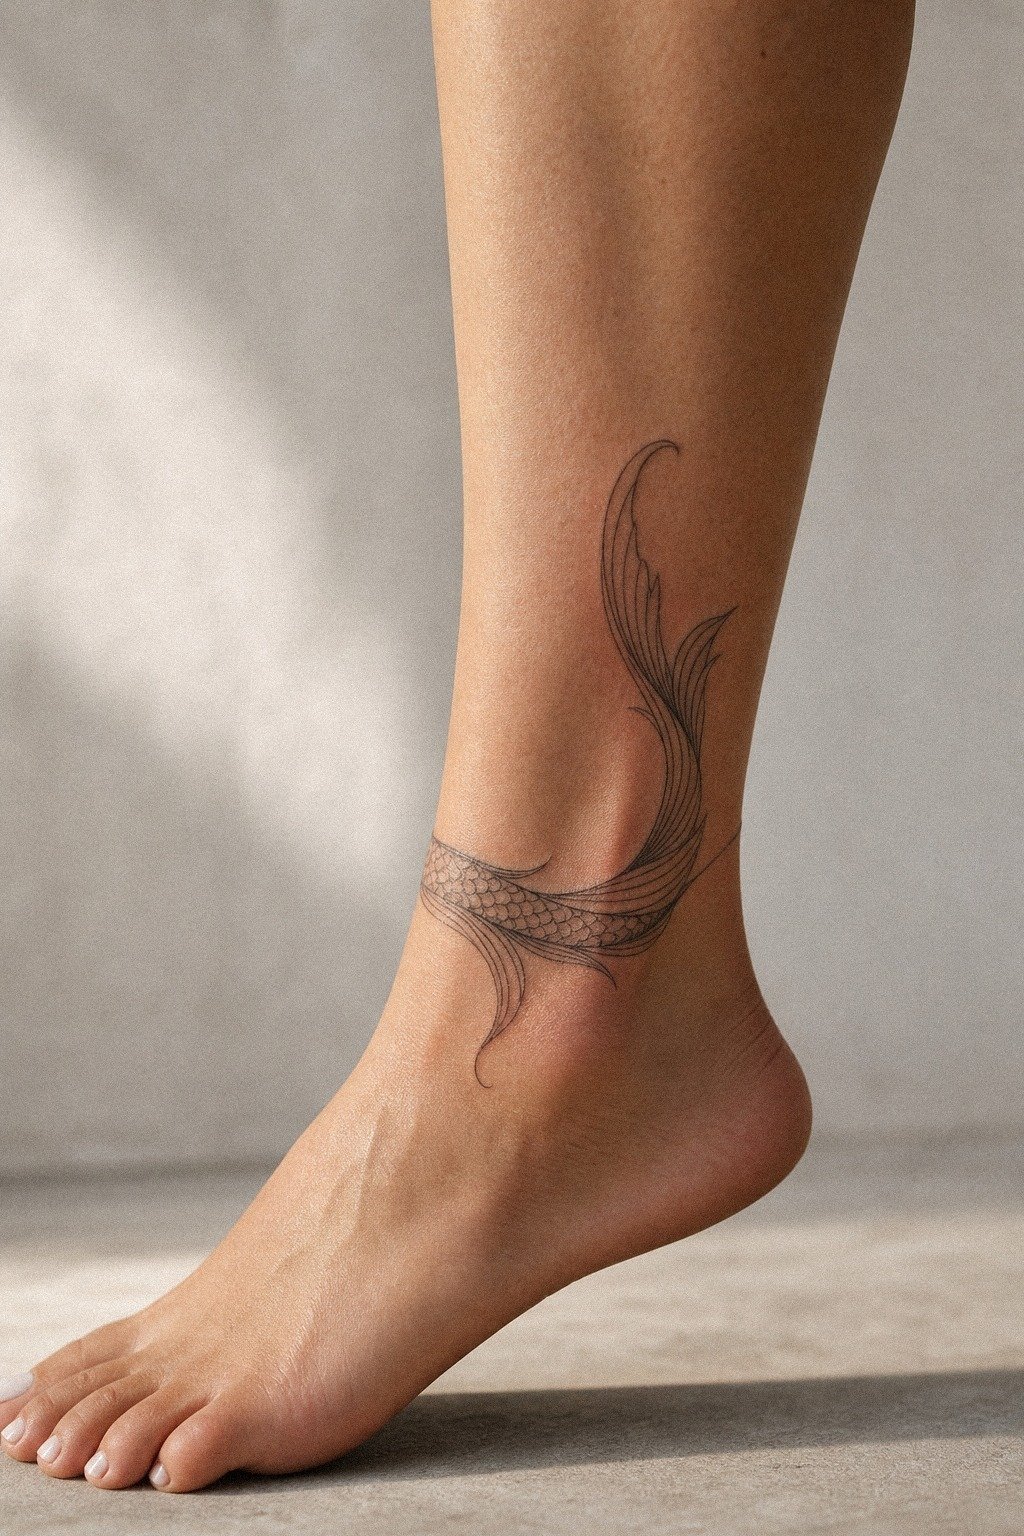
8Ask For Soft Shaded Mermaid Hair
[IMAGE: Mermaid ankle tattoo with soft grey wash hair, healed black and grey shading, realistic tattoo close-up]
Hair can save a mermaid tattoo or ruin it. On a healed ankle piece, soft grey wash hair looks richer than a bunch of tight parallel lines because the shading creates movement without shredding the skin. You want the hair to feel velvety after healing, not patchy and overworked.
This is where wording matters in the consult. Don’t just say soft.
Ask for soft shaded hair with contrast pushed at the roots and eased out through the ends. That tells the artist you want readable motion, not a cloud of mid-tone mush.
Ankles are small and bony, so I’d keep the hair mass connected to the body and avoid wild flyaway strands. Those flyaway strands tend to blur or disappear first. A trad mermaid tattoo can get away with bolder chunks, while fine line needs even more restraint.
But healed references matter here more than fresh ones. Fresh tattoos always look tighter than they settle.
Save healed ankle work with hair you still love at six months, then show that. It keeps everyone honest.
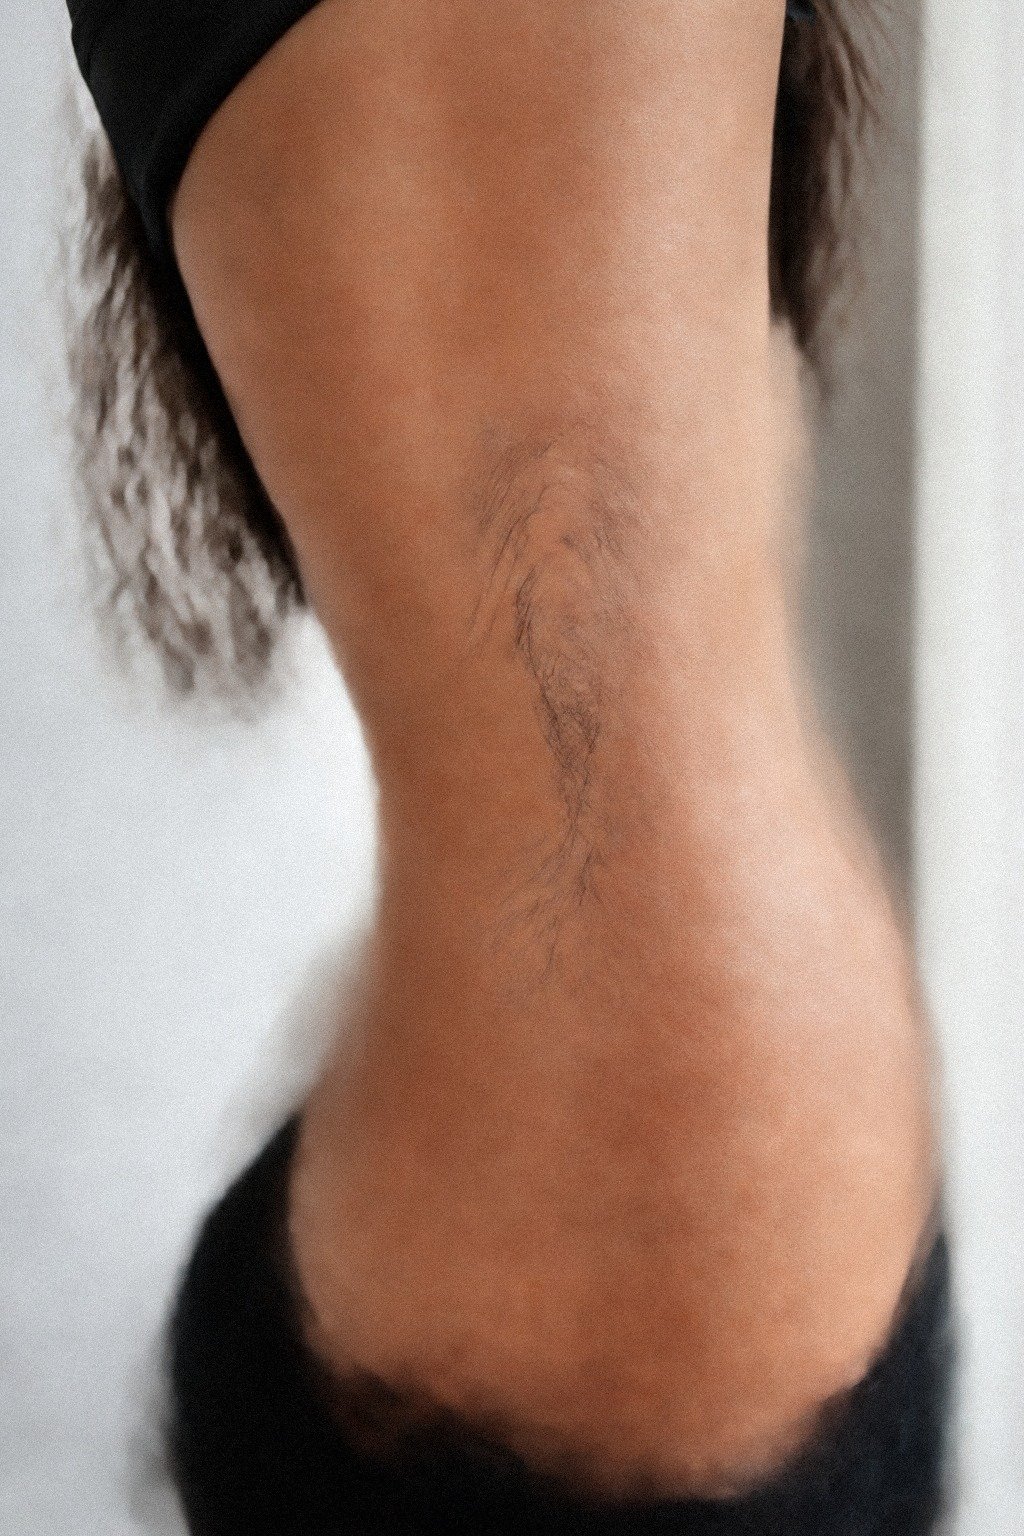
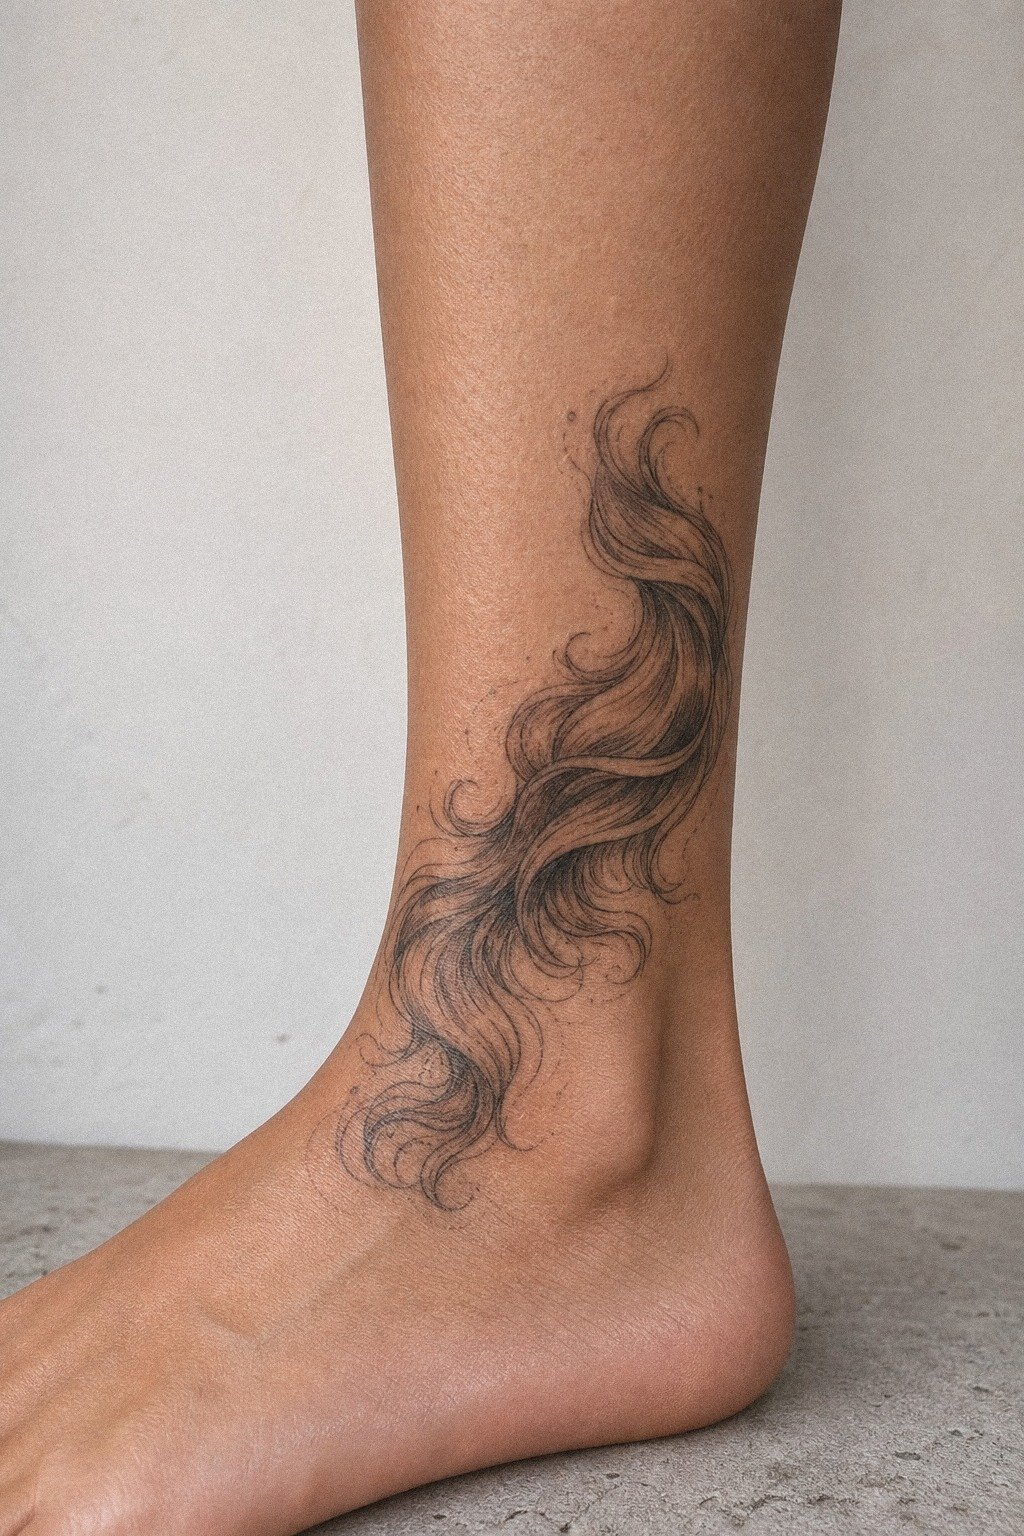
9Try A Mermaid Tail Ankle Tattoo
[IMAGE: Minimal mermaid tail tattoo wrapping the ankle, clean black linework, small realistic placement on skin]
If you love the ankle but don’t want a whole figure, let the tail do the talking. A mermaid tail tattoo gives you the movement people want from the theme without forcing a face, torso, hair, shell details, and water effects into a tiny high-wear zone.
That makes it a strong simplified option. A tail-only design is often easier to place around the ankle bone and more likely to stay readable when the skin settles. If your budget is tight, this is one of the smartest ways to keep the theme without paying for detail that won’t last.
I’d keep the tail broad at the fin and simple through the spine. Maybe one scale cue. Maybe a little whip shade.
That’s enough. The ankle is already spicy, and it gets friction from socks, shoes, and gym movement, so the cleaner plan usually heals nicer here.
10Match Mermaid Tattoo Placement To Pain
[IMAGE: Side-by-side tattoo reference showing forearm mermaid and rib mermaid placement, stencil and healed comparison]
Pain should shape the plan, not scare you out of it. A split image with stencil on one side and healed ribs on the other makes the point perfectly: placement planning is half the design. The same mermaid feels very different on ribs than on outer forearm, both during the session and three months later.
Here’s my simple map. Outer arm, shoulder, and forearm are usually chill to medium.
Ribs, ankle bone, hands, feet, and sternum are spicier. Lines feel sharper, shading feels like a dull burn, and color packing is usually the part people start bargaining with me over.
Use that reality to size the appointment. If you want ribs, simplify the design and cap the first session around two to three hours.
If you want more detail, pick a calmer zone with more skin and less movement. Your nervous system will thank you.
But do compare fresh to healed. The fresh stencil fantasy can talk you into a placement your nervous system hates. A healed photo tells you whether the pain tradeoff was worth it and whether that placement still made sense six months later.
11Save Healed Mermaid Tattoo References
[IMAGE: Healed mermaid tattoo reference board on different skin tones, forearm and shoulder examples, crisp healed linework]
Fresh references are useful, but healed ones are gold. On a deep brown forearm, a healed fine line tattoo shows whether the lines stayed crispy, whether the black settled evenly, and whether the design still reads without the fresh-shine filter. That’s the stuff you need before picking an artist.
Make yourself a tiny folder with three categories. Healed at three months.
Healed at one year. Healed on skin close to yours in tone and undertone. Skin matters, and you deserve references that show you how that tattoo will sit on real bodies, not just one complexion.
I also tell people to save what they dislike. Blowout near the wrist.
Hair that healed flat. Tiny facial features that disappeared. That negative reference board can be just as useful as the dream board.
And use your saved folder to guide questions in the consult. Ask why one line set looks cleaner than another. Ask what needle grouping built that result.
If you’re comparing symbolism too, cross-check mermaid tattoo meaning with yin yang tattoo meaning when balance is the theme.
12Protect Your Mermaid Tattoo While Healing
[IMAGE: Fresh mermaid tattoo healing on forearm with clean peeling stage, ointment nearby, realistic aftercare reference]
Healing is where a good tattoo either stays clean or gets wrecked by impatience. First few days, it’s an open wound, so treat it like that. Wash with gentle unscented soap, pat it dry, and use a thin layer of aftercare ointment so the skin stays comfortable without getting suffocated.
Then the peeling starts. It’ll flake like a sunburn. Don’t pick it.
Don’t hit it with hard gym friction. Don’t soak it in pools. Those little choices are what keep linework clean instead of chewed up.
If you ignore them, the touch-up cost later is on you.
I also tell clients to dress for healing, not for the mirror. Loose sleeves.
Clean sheets. Zero direct sun.
A mermaid with soft shading and open skin is absolutely worth it, but only if you let it settle through the full two to four week surface-heal window before you start testing it.
Shape Over Ornament: The Bold Will Hold Rule
[IMAGE: Healed mermaid tattoo with strong silhouette and open skin, black and grey design showing bold shape over detail]
If you want my honest studio rule, bold will hold is not about making every mermaid look heavy. It’s about respecting what skin does over time. Fine line can hold beautifully, but only when the design starts with a silhouette that still makes sense after the edges relax a little.
That’s why I keep coming back to shape over ornament.
I’ve watched people chase the most delicate version of a mermaid because the fresh photo looked ethereal on their phone. Then six months later they’re frustrated that the face softened, the shell cluster merged, and the tail texture isn’t doing what they imagined.
The artist didn’t fail them. The plan failed them.
Skin is alive, it moves, and it never keeps a razor-fresh screenshot forever.
The part that works is simpler than most people expect. Bigger shape.
Fewer micro details. Placement that gives the design low-wear skin when possible.
A line weight the artist can pull confidently in one pass. If you want softness, build it with grey wash shading and open skin, not by shaving every line down to almost nothing.
This is also where choosing the right artist matters more than choosing the perfect reference. You want someone whose healed fine line work still looks clean, whose black is solid, and whose portfolio shows the same design language on different bodies.
If I’m choosing between a flashy fresh portfolio and a quieter portfolio full of healed photos, I take the healed work every time. You should too. Your mermaid does not need more extras.
It needs a cleaner plan, a smarter size, and an artist who knows when to stop.
The Questions Worth Answering First
How much does a Mermaid Tattoo usually cost?
A mermaid tattoo usually costs from shop minimum to a few hundred dollars, with typical US rates around $100 to $250 per hour. Bigger ribs or custom goddess pieces can run higher.
– Shop minimum, often about $50 to $100 – Small fine line piece, often about $100 to $300 – Larger custom work, based on hours and region
Are Mermaid Tattoo a good idea for a first tattoo?
Yes, mermaid tattoos can be a strong first tattoo if you keep the design readable and the placement smart. Outer shoulder or forearm usually heals easier than ribs or ankle and gives fine line work a better shot. I also like sending first-timers to mermaid tattoo meaning so the design feels personal.
– Lower-wear zones – Clean silhouettes – Easier aftercare access
How do I choose a tattoo artist for Mermaid Tattoo?
Pick an artist whose healed work proves they can pull clean linework, soft shading, and readable small figures. Healed portfolio photos matter more than flashy fresh posts. If the artist also handles myth-heavy work well, compare how symbolic clarity reads in yggdrasil tattoo meaning.
– Crispy healed lines – Fine line specialty or illustrative strength – Clean studio setup
How much do Mermaid Tattoo hurt?
Mermaid tattoos hurt more on ribs, feet, hands, sternum, and ankle bone than on outer arm, thigh, or shoulder. Placement changes everything.
– Ribs and feet, spicy – Shoulder and forearm, more tolerable – Longer sessions, harder mentally
How long does a Mermaid Tattoo take to heal?
Surface healing usually takes about two to three weeks, while full settling can take two to three months. Simple aftercare makes the biggest difference.
– Gentle unscented soap – Thin ointment layer – No pools, picking, or hard sun
What’s the best placement for Mermaid Tattoo?
The best placement is usually outer shoulder or forearm if you want fine lines that age nicer and feel less brutal to sit through. Low-wear skin gives you the cleanest long game. And yes, save one more mermaid tattoo meaning guide while you compare placements.
– Shoulder for flow and coverage – Forearm for visibility and healing checks – Ribs for drama, but more pain
The One Step I’d Start With: The Shape Over Extras Rule
If I had to pick one step to start with, I’d start with the silhouette. A clean mermaid shape survives healing, tiny extras do not. Nail the outline first, then save mermaid tattoo meaning and let the details earn their place!