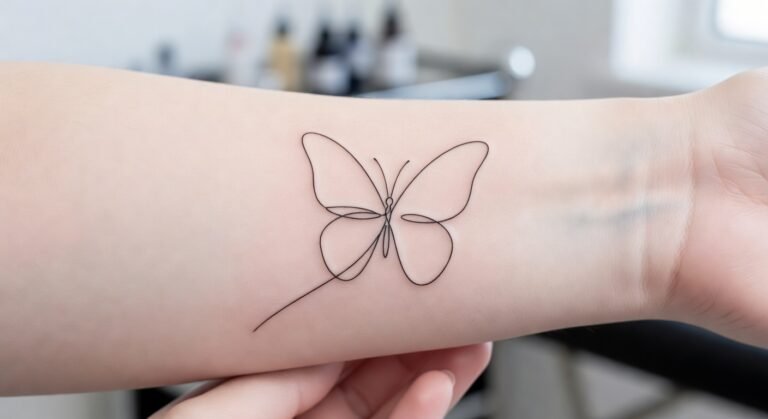
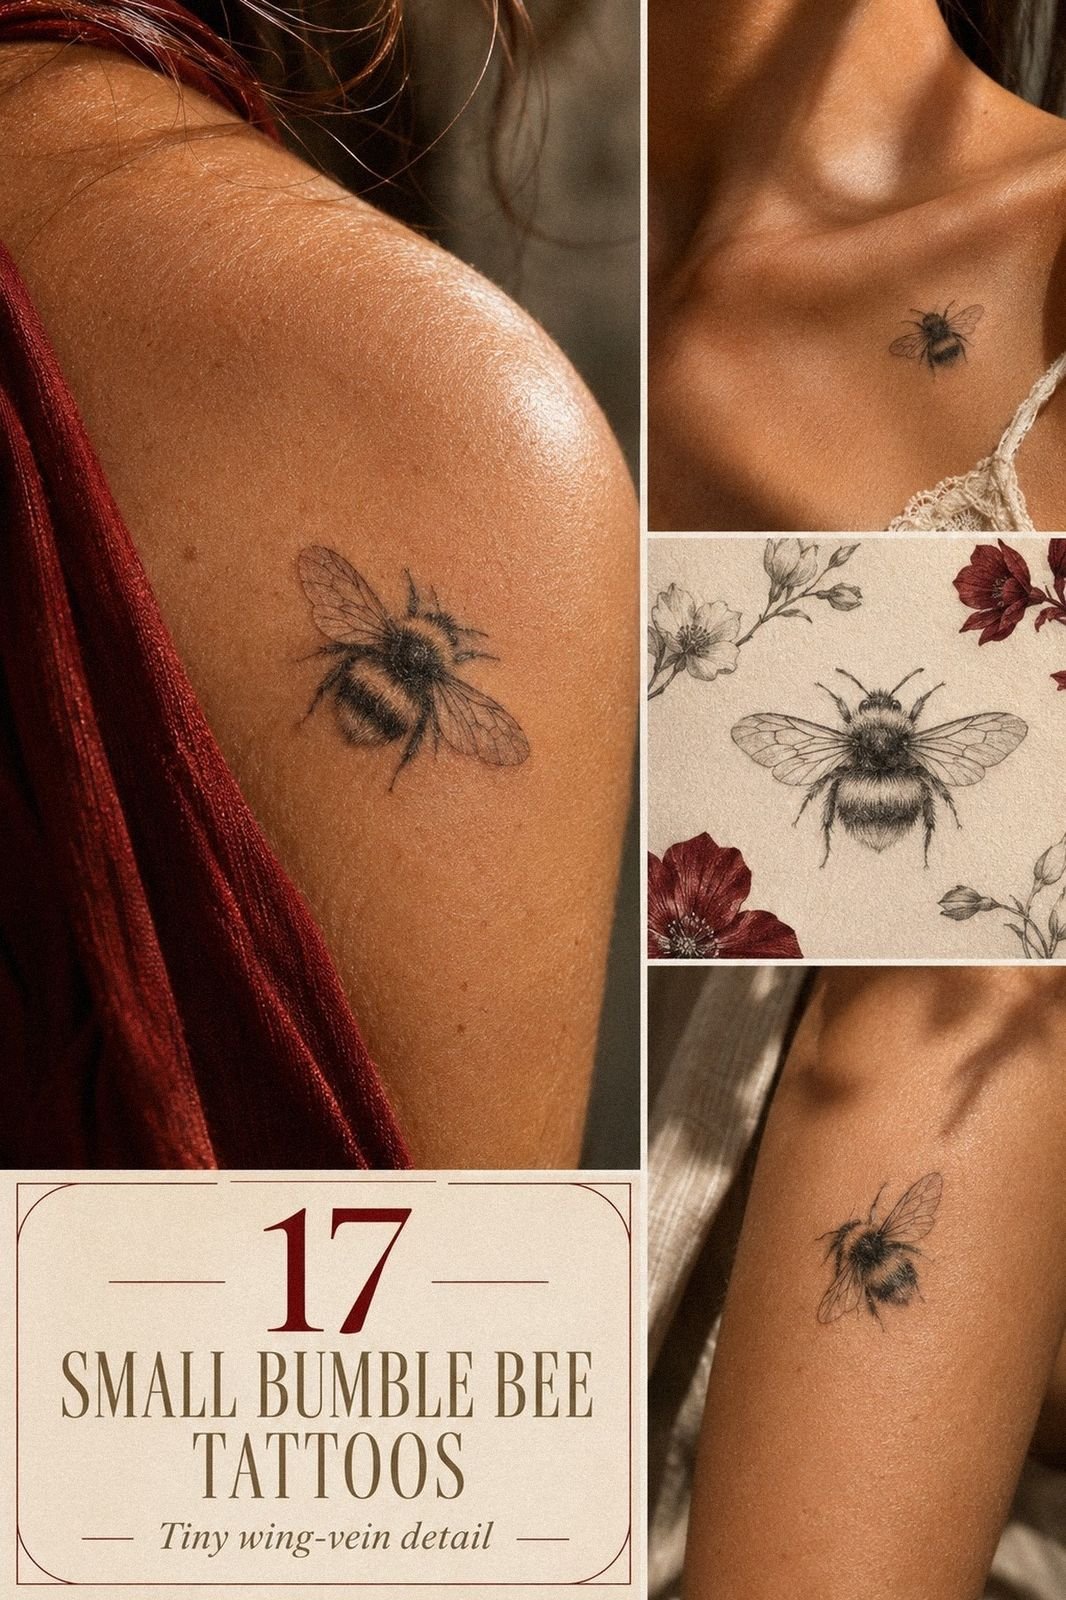
I kept my small bumble bee tattoo hidden for six months, even in short sleeves. I’d chosen a delicate design, but I wasn’t sure it still felt like me.
Then the healed lines settled, and I finally stopped covering it. The decision became personal before it became visible.
Here’s what it looked like before:
Before the appointment, I had a clear patch of skin and too many saved sketches. I’d stare at my wrist, ankle, and forearm, wondering whether a bee would feel meaningful or merely decorative.
Your first tattoo can carry more pressure than its size suggests. I wanted something minimal, but I wasn’t ready for everyone to notice it.
I kept wearing longer sleeves, even on warm days, because I hadn’t decided whether I was ready to be seen with it. That hesitation lasted longer than I expected.
I Chose a Tiny Bumble Bee Outline
I started with a tiny bee outline because I wanted the shape to read before the details did. My sketches were about 1 to 2 inches wide, with a rounded body, two wings, and enough open skin between the lines to keep the design recognizable.
The first sketch looked too ornate. It had extra flowers, dots, and curls that made the bee feel less personal. I chose the quieter version instead, and the result felt understated rather than busy.
I asked for single-needle linework around the body and wings, but I didn’t ask for every tiny hair to be copied. That would’ve made the bee fragile on paper and confusing on skin.
Your artist needs space to make each mark age with clarity, not just look impressive on appointment day. I read through these bumble bee tattoo meaning ideas before choosing my final sketch.
The bee symbolism felt right. A bee can suggest effort, community, patience, and a life built one small action at a time. I wanted something meaningful, not a design I’d forget after a year.
I Tested Fineline Wings Against My Wrist
I tested the wing shape against my wrist before the stencil went on. The narrow area made the wings look longer than they appeared on paper, so I softened the curves and left a clean pocket of negative space under the body.
That adjustment made the design feel graceful and less crowded. Your wrist moves constantly, which means you’ll see the tattoo from several angles every day.
I held my hand normally, turned it palm-up, and checked the placement while wearing a watch strap. The position looked sleek when my arm was relaxed, but the first version sat too close to the strap and felt cramped.
I chose a fine-line bee tattoo with a slightly thicker body contour and lighter wing lines. If every line is equally delicate, the design can lose its center as it settles.
I’d skip a perfectly uniform outline here because your wrist needs a visual anchor. These small wrist tattoo ideas helped me compare scale, orientation, and visibility. It was a striking compromise for such a small piece!
I Sketched Stripes Around The Rounded Body
I drew the stripes around the rounded body instead of copying a flat cartoon bee. The rounded center needed bands that followed its curve, so I used clean, confident lines with slightly uneven spacing.
That gave the design a more expressive quality, as if it were moving rather than sitting still. The stripes were the part I nearly overworked.
I wanted the bee to feel bold, but too much black would’ve swallowed the small scale. Your artist can preserve the shape by leaving a thin gap between the bands and the outer contour.
The filled version looked heavier and more fierce, but it didn’t suit the light wings or my reason for choosing a tiny bee. I went with black bands and one open band, which gave the body a sharper rhythm.
If you’re drawn to texture, look at these small dotwork tattoo examples before your appointment. Dotwork can add detail, but I didn’t want it competing with the wing lines.
Your best version may be more raw and gritty, or it may be cleaner than mine. The right choice depends on how much visual weight you want at a small scale.
I Added Fine Line Texture To Each Wing
I added wing texture with short, controlled strokes rather than a shaded wash. The marks followed the wing direction and stopped before the outer edge, leaving a pale border.
That choice made the wings feel intricate without turning them into a dark blur. I liked how the design looked delicate from close range but still readable from a few steps away.
The marks stayed uneven. Perfectly repeated strokes can look mechanical, especially on an organic subject. One wing had fewer lines than the other, and that slight difference made the bee more playful.
I’d choose that over rigid symmetry every time. Your tattoo doesn’t need every possible detail to feel finished.
You should also ask how the artist expects the marks to settle. Fine lines can spread slightly as they age, so an overly dense wing may lose its lightness.
I saved a few small watercolor tattoo references for movement and softness, but I stayed with black linework because it looked timeless.
I Placed The Bee Above My Ankle
I tested the ankle placement with a paper stencil first. The bee sat above the ankle bone, not directly on it, and the position looked balanced when I stood and walked.
That distinction mattered because your ankle bends, rubs against socks, and catches sunlight more often than you might expect. The upward angle also made the design feel like it was moving forward.
That tiny direction gave the tattoo an empowering feeling without adding text or extra symbols. Your artist can adjust the tilt by a few degrees, and that small change can alter the whole impression.
I chose a clean black outline with a few crisp wing marks and no decorative border. The ankle already creates a narrow visual boundary, so extra framing would’ve made the bee feel boxed in.
If you’re considering a traditional variation, compare these small trad tattoo ideas for heavier outlines and stronger color blocks. I decided against that route because the compact ankle area looked better with a sharp, understated design.
The bee still had presence without becoming the loudest thing on my leg.
I Compared Forearm And Collarbone Placement
I compared the forearm with the collarbone because both placements gave the bee visibility without making it feel permanent in every outfit. The forearm placement looked more practical, while the collarbone felt more feminine and personal.
I kept changing my mind for nearly a week. Your forearm gives a flat surface and a more predictable viewing angle.
The forearm also made the black lines easier to monitor during healing. If you’re choosing a first visible tattoo, that convenience has real value.
The collarbone had more emotional pull, though. A bee there would feel intimate and slightly sacred, almost like a private reminder that happened to be visible.
I rejected the placement because I didn’t want clothing friction to make the early healing stage harder than necessary. You can compare similar scale choices through these small tattoo ideas for women, while remembering that your skin and daily habits matter more than any category.
I chose the forearm because it felt powerful without feeling exposed.
Black Ink Worked Better Than Color
I considered a yellow-and-black bee, but color would’ve changed the mood. It might have felt more classic, while black linework kept the design quieter and slightly edgy.
The black ink gave the body a clear center without asking the wings to compete. I also liked knowing that the design would remain simple if I changed my clothing style later.
A color tattoo can be worth the extra cost when the palette is central to the idea. For me, the value was in the silhouette, not in recreating every detail of a real bumblebee.
I asked about a yellow accent, then decided against it. The final choice felt more vibrant in its restraint than the colored version did on paper. That small choice mattered!
What Did My Artist Check Before Starting?
My artist checked the stencil size, the direction of the wings, and the distance from the wrist crease. We also discussed how the design might settle over time.
The artist’s stencil needed to show the body clearly without making the wings look disconnected. I rotated my arm, relaxed my hand, and checked it in several positions.
We talked about line weight, skin movement, and how much detail would remain readable. That conversation gave me more confidence than staring at another saved sketch.
A good consultation should make the price easier to understand, too. You’ll know what the quote covers, how long the appointment time may be, and whether the design needs a small adjustment before work begins.
I Chose A Symbolic Honeybee Meaning
I wanted the bee to stand for a work ethic that doesn’t always look dramatic from the outside. That meaning felt romantic, but not sentimental in a way that would embarrass me later.
I chose the honeybee because it suggests persistence, cooperation, and a kind of quiet courage. The honeybee symbol gave me a reason to return to the design whenever I doubted it.
I wrote three words beside the stencil: patience, effort, and return. The exercise made the idea feel more empowering.
I didn’t need a quote beneath the bee. The insect already carried enough symbolism, and adding lettering would’ve made the small design feel crowded.
You can read more about bee tattoo meaning if you’re still deciding what the subject represents. I also compared it with a small butterfly tattoo, but the bee felt more iconic and less expected.
Bumble Bee Symbolism Made Sense to Me
The bee’s meaning became clearer when I stopped trying to find one perfect definition. It could represent persistence, community, work, or a private promise.
That flexibility made the small bee symbolism feel more honest. I didn’t need everyone else to understand it in exactly the same way.
Some days, the tattoo feels like a personal reminder to keep going. Other days, it’s simply a subject I’ve always liked. Both readings can exist together.
The idea also has a slightly haunting quality because the bee is tiny, but its meaning keeps returning. If you prefer a softer direction, the small butterfly tattoo comparison helped me see why I wanted wings without choosing a butterfly.
I Checked The Design Under Natural Light
I checked the stencil beside a window before approving it. Studio lighting can make black ink look stronger than it will outdoors, so I wanted to see the actual spacing in natural light.
The bee’s body remained readable, and the wings didn’t disappear into my skin. The negative space around each mark also looked more elegant in ordinary light than beneath the studio lamps.
I rotated my arm and checked whether the bee still looked balanced when my shoulder movement changed. The wings shifted slightly from each angle, but the body kept its center.
That was the flowing quality I wanted, a design that moved with me instead of looking fixed in one position. I asked the artist to adjust one stripe before we began.
It was a tiny change, but it made the abdomen look more polished and less crowded. You should never feel awkward asking for that final correction. A calm pause before the needle can save you months of wishing you’d spoken up.
I Let The Stencil Sit For A Day
I didn’t rush from choosing the stencil to approving the tattoo. I looked at it while standing, sitting, reaching, and wearing the clothes I usually wear.
The stencil placement looked right from several angles, which mattered more than liking it in one mirror view. I also checked whether I could cover it easily when I wanted privacy.
That extra day helped me notice that the bee sat slightly too close to my usual watch position. Moving it a little higher made the placement more comfortable and easier to protect during healing.
If you’re still comparing locations, revisit these small wrist tattoo ideas and pay attention to movement, friction, and visibility. A few minutes of planning can protect your budget from an avoidable redesign.
I Prepared For The Needle’s Sharp Sting
I prepared by eating beforehand, drinking water, and wearing clothing that wouldn’t press against the placement. The appointment was short, but I didn’t assume that meant zero discomfort.
The needle preparation was simple. I brought water, avoided arriving hungry, and left enough time afterward so I wouldn’t need to rush.
The sharp sting was repetitive, especially around the thinner skin near the wrist. It wasn’t unbearable, and the forearm felt more tolerable than the foot, ribs, hand, or sternum.
Your experience can differ, but those bony areas are commonly more painful than the forearm, thigh, or shoulder. A small tattoo can still feel intense for a few minutes.
I expected the first few minutes to feel dramatic, then my body adjusted. The artist worked carefully, and the machine sound became background noise.
I’d bring water and a quiet playlist next time. That preparation made the appointment feel less intimidating. It was worth it!
The design stayed minimal because the artist didn’t rush to fill every gap. If you’re nervous, ask how the artist handles delicate lines and whether they’ll pause when you need one.
A clean stencil should guide the session, but you still get to make decisions during it.
I Protected The Crisp Ink During Healing
The fresh tattoo looked darker and slightly shinier than it did after settling. Your first reaction shouldn’t be based only on newly finished skin.
Surface healing usually takes about 2 to 3 weeks, while complete settling can take roughly 2 to 3 months. I washed the area gently, used a thin layer of aftercare product, and avoided picking or soaking it.
The healing timeline was easier once I stopped checking the tattoo every hour. The healed black ink looked less intense, but the bee stayed readable.
I avoided swimming and direct sun while the skin was recovering. Once it was fully healed, sunscreen became part of my routine because ultraviolet exposure can soften fine lines over time.
Your tattoo may age differently, but careful placement, solid black accents, and sun protection give the design a better chance. I also resisted comparing my skin with someone else’s.
The tattoo looked crisp at first, then slightly softer, then clearer again as the surface settled. If you’re worried about every tiny change, take a weekly photo instead of checking it constantly.
That calmer approach helped me see the timeless shape returning. These small dotwork tattoo examples also helped me understand how spacing affects long-term readability.
I Admired My Bold Little Bumble Bee
I finally stopped hiding the tattoo when a friend noticed it and asked why I’d kept it covered. I didn’t have a dramatic answer.
I’d simply needed time to see the bee as part of me instead of as a decision I was still defending. I could finally stop hiding it!
My own tattoo is small, but it doesn’t feel timid. The rounded body, open wings, and two dark stripes give it a fierce center.
I’d skip extra flowers, dates, and decorative text if your goal is a clear bee that will still read years from now. Your artist should design for your skin, placement, and chosen scale.
The skin-specific design matters more than copying another person’s result. A piece can look completely different on two bodies and still be equally successful.
If you’re collecting small pieces, these small dragonfly tattoo ideas show how a simple winged subject can carry movement without becoming busy. My bee feels vibrant and expressive, but it still feels completely mine.
How Much Did It Cost?
My working budget was $300, which gave me room for a typical small tattoo without treating the lowest quote as the only option. In the United States, a piece of this size often falls around $100 to $300.
The exact cost depends on the artist, region, placement, style, and shop minimum. Here’s the breakdown I used when comparing value:
The final quote was easier to understand once I compared artists without choosing based only on price. I looked for healed examples, consistent line quality, and strong hygiene practices.
A reputable studio can cost more than a casual shortcut, but your skin is a poor place to gamble for a small saving. The lower quote isn’t always the best value.
The final quote should come from your artist after they see the design and placement. Your tattoo may cost less than my planning cap, or it may reach the upper end if the artist has a higher minimum.
I’d rather adjust the size than ask for rushed work. The price felt reasonable because I understood what the consultation and artist’s time covered.
What I Learned Before I Stopped Hiding It
I used to think confidence would arrive before the tattoo. It didn’t. I chose the design while I was still uncertain, then let the finished piece teach me what I’d actually wanted.
The best decision was leaving space in the design. I wanted a delicate outline, but I didn’t ask the artist to squeeze every reference detail into a tiny area.
The bee became clearer when I removed things. That’s a lesson I’d carry into any future tattoo. More detail wouldn’t necessarily have created more meaning.
I also learned that visibility and privacy aren’t opposites. My forearm placement means people can see it, but I can cover it whenever I want.
Your choice doesn’t need to announce a permanent personality. It can simply mark a season, a promise, or a quality you’re trying to practice. That made the decision feel more daring than permanent.
The hardest part was admitting that I cared what people would think. I’d expected myself to be fearless, but I wasn’t.
The tattoo became honest and raw because I had to move through that hesitation. Once I stopped performing certainty, I could enjoy the ink.
If I had chosen a larger piece, I might have felt pressured to explain it. The visibility choice gave me room to grow into the decision.
It’s understated, but it still catches my eye when I reach for a sleeve or turn my wrist in sunlight. For me, that was enough.
The Questions Worth Answering First
How much does a Small Bumble Bee Tattoo usually cost?
A small bumble bee tattoo usually costs about $100 to $300 in the United States, though shop minimums may run around $50 to $100 and hourly rates may fall near $100 to $250. Your artist’s region, experience, and minimum charge will shape the final quote.
Is a Small Bumble Bee Tattoo a good idea for a first tattoo?
Yes, especially if you choose a tolerable placement and a design with clear spacing. A small, crisp outline can feel manageable while still carrying meaning. Your forearm, thigh, or shoulder may feel easier than the ribs, foot, hand, or sternum.
How do I choose a tattoo artist for a Small Bumble Bee Tattoo?
Review healed work, not only fresh tattoos, and look for consistent line quality across different skin tones. Ask about the artist’s specialty, hygiene practices, and approach to fine lines. A healed portfolio should make you feel informed, not pressured.
How much do Small Bumble Bee Tattoos hurt?
Pain varies, but the forearm, thigh, and shoulder are often more tolerable than the ribs, feet, hands, or sternum. Placement affects comfort as much as size. Your appointment may feel sharp and repetitive rather than deeply painful, especially for a short session.
How long does a Small Bumble Bee Tattoo take to heal?
The surface usually heals in about 2 to 3 weeks, while complete settling can take roughly 2 to 3 months. Wash gently, moisturize as advised, and avoid swimming and direct sun during early healing. Simple aftercare protects clarity while your skin recovers.
What’s the best placement for a Small Bumble Bee Tattoo?
The forearm is a practical choice because it’s visible, relatively tolerable, and easy to protect during healing. The thigh and shoulder can offer more privacy. Your wrist or ankle can look stylish, but movement, friction, and sun exposure deserve extra consideration.
Where I’d Start First
If I had to pick one, I’d start with the forearm placement. It gave me enough flat skin for clear stripes, less discomfort than the sternum, and easy visibility without forcing me to show the tattoo every day.
For a second opinion on related winged designs, I’d browse these small dragonfly tattoo ideas and compare how much detail feels right at a small scale.
Pin the idea for later, set a realistic budget, and choose the bee that still feels like you. The small bee tattoo doesn’t need to explain your entire personality. It only needs to mean enough for you to keep choosing it.