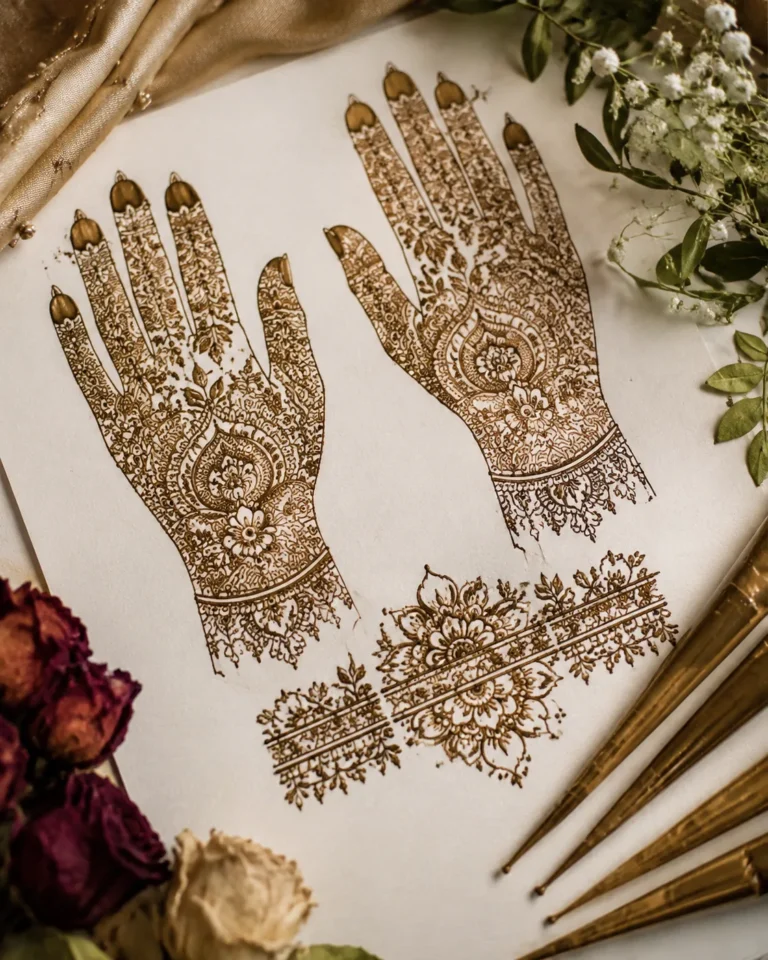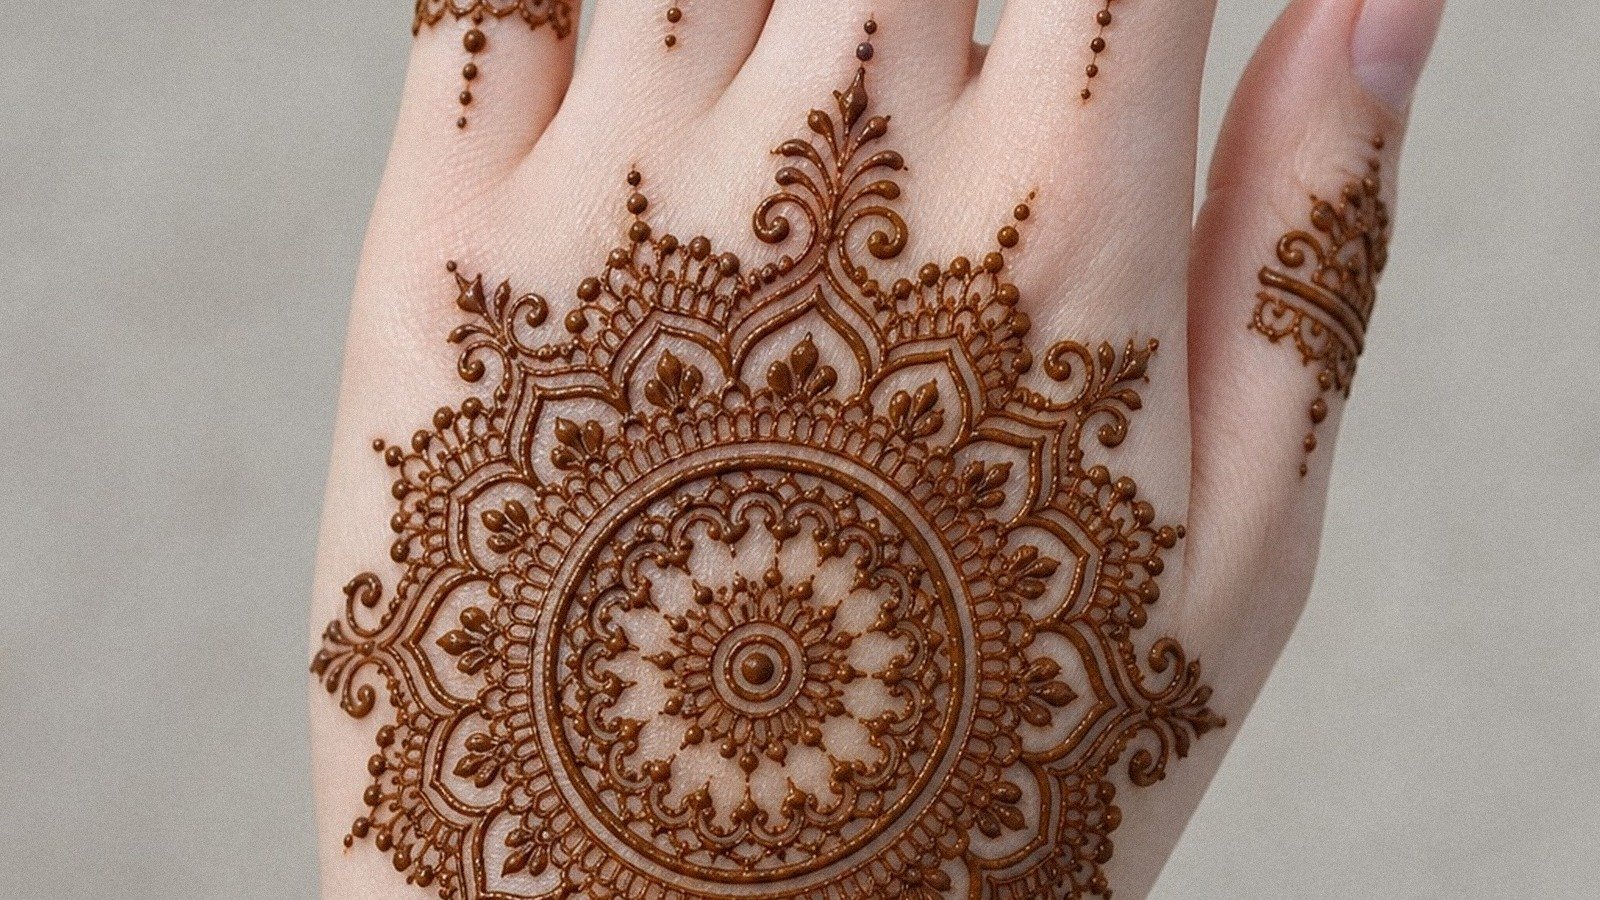
*Clean palm henna is worth it when it stays readable on skin, not when it tries to prove how much detail a mehndi artist can cram into one pass. I learned that the hard way with an early design I packed too tight through the center of my hand, and by day three it looked busy instead of elegant.
- ✓ Start With a Simple Center Palm Henna Mandala
- ✓ Why Do Minimal Mehndi Lines Across Fingers Read So Clean?
- ✓ Use Unique Negative Space Palm Henna
If you want palm henna designs that still feel rich, the fix is simple: better spacing, smarter flow, and shapes that’ll let your stain breathe. Reddish-brown henna paste always looks stronger when your eye gets one clear focal point first. Henna is not a tattoo, and that temporary quality makes it a playful way to test a meaningful motif before committing to anything permanent!
- Start With a Simple Center Palm Henna Mandala
- Why Do Minimal Mehndi Lines Across Fingers Read So Clean?
- Use Unique Negative Space Palm Henna
- Mughal Florals Versus Bare Skin Balance
- Layer Fine Dotwork Palm Henna With Intent
- Let an Arabic Vine Trail Cross the Palm
- Should You Cap Every Fingertip?
- Keep a Tiny Lotus Palm Mehndi Accent
- Bauhaus Grid Energy for Geometric Palm Henna
- Scale Paisley Filled Front Palm Mehndi With Intent
- Tiffany Bracelet Flow From Wrist to Palm
- What Keeps a Clean Bridal Palm Mehndi Layout From Looking Busy?
1Start With a Simple Center Palm Henna Mandala
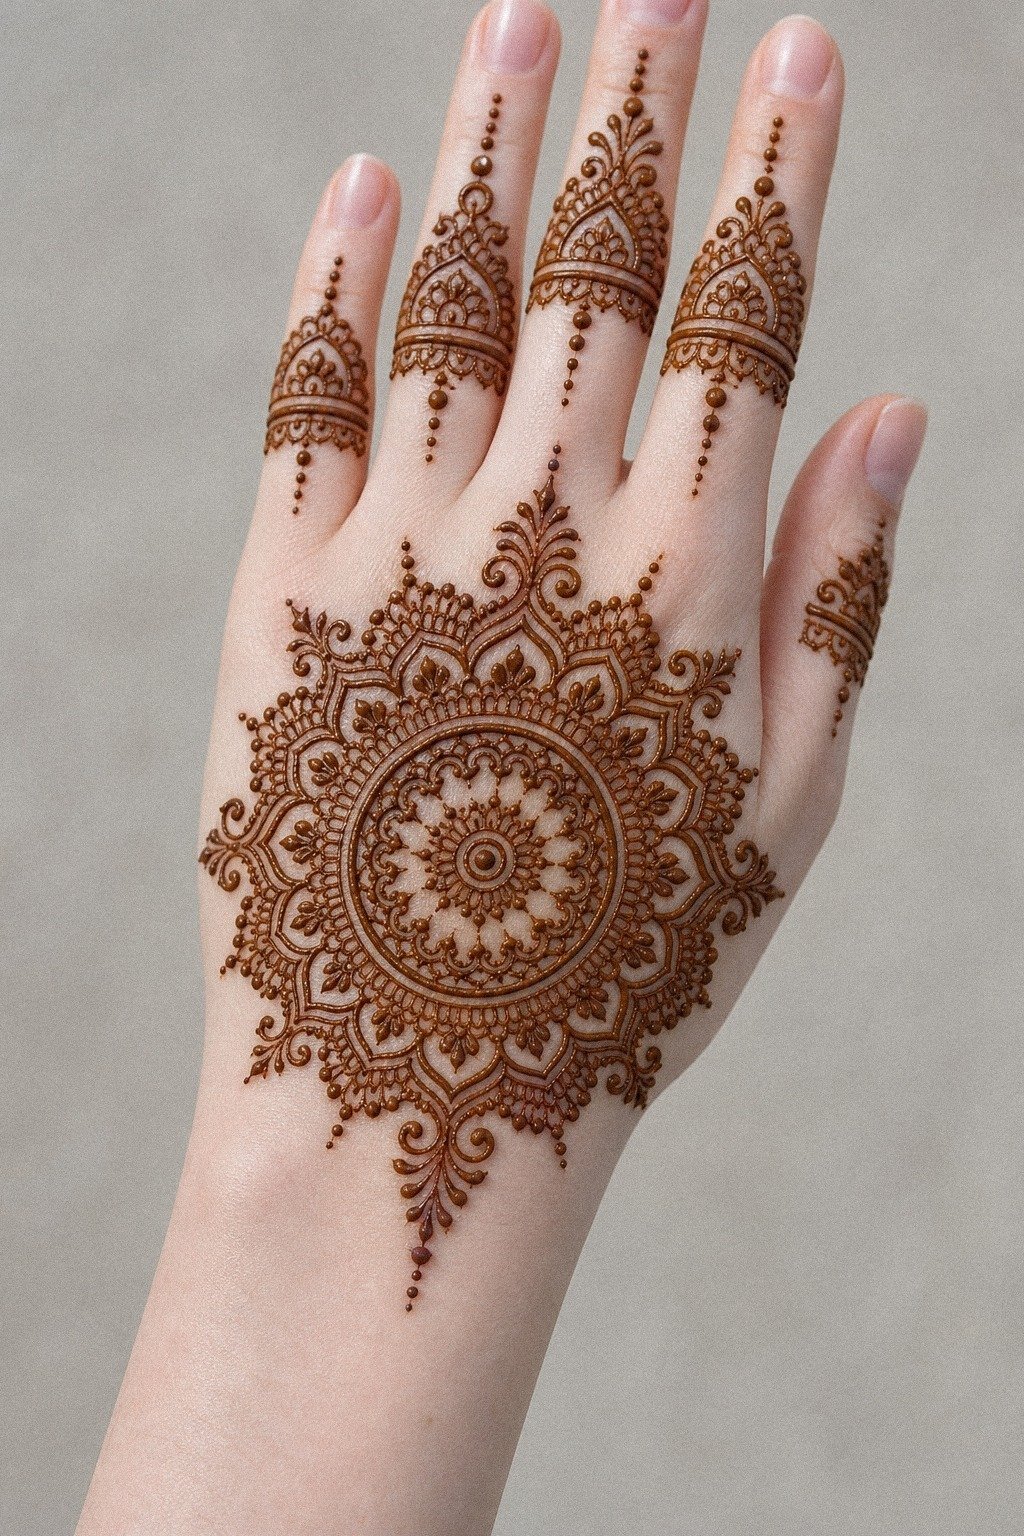
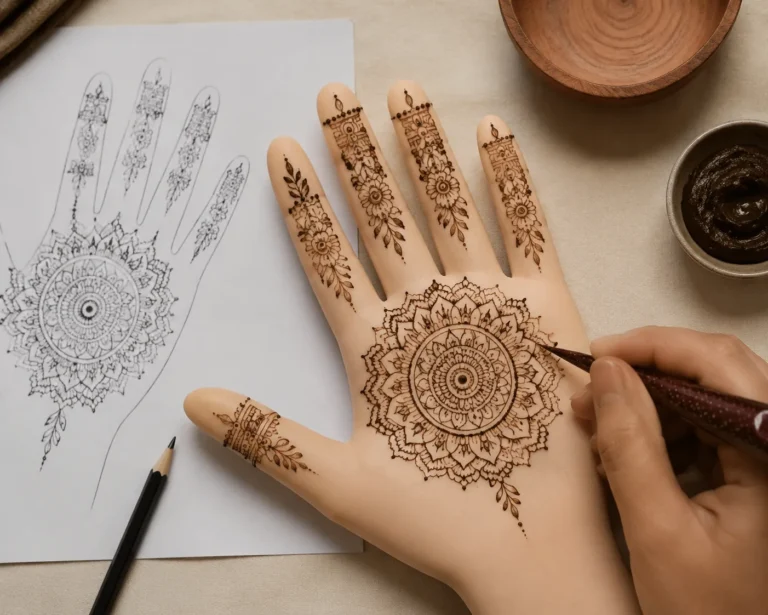
Start with one centered focal point and let everything else support it. This center palm mandala sits right in the middle of the hand, then the fingers carry lighter detailing so your eye lands where it should. If you love front-palm-mehndi-designs-simple, this is usually the cleanest place to begin.
I like a palm mandala around 2 to 3 inches wide because that size reads clearly without swallowing the whole hand. Fine henna cone lines look best here when the rings are evenly spaced and the petals aren’t fighting each other for attention. If you want more practice before you go denser, simple henna designs for beginners is a solid place to study flow.
But here’s the trap: people keep stuffing extra dots and lace into the outer palm because blank skin makes them nervous. Open outer-palm skin keeps the design elegant, especially on fair cool-toned skin where every line shows fast. Leave that lane alone and you’ll get a cleaner result every time, with a striking finish in photos and up close!
[IMAGE: Centered palm henna mandala with delicate finger detail, clean reddish-brown stain, open skin around the outer palm]
2Why Do Minimal Mehndi Lines Across Fingers Read So Clean?
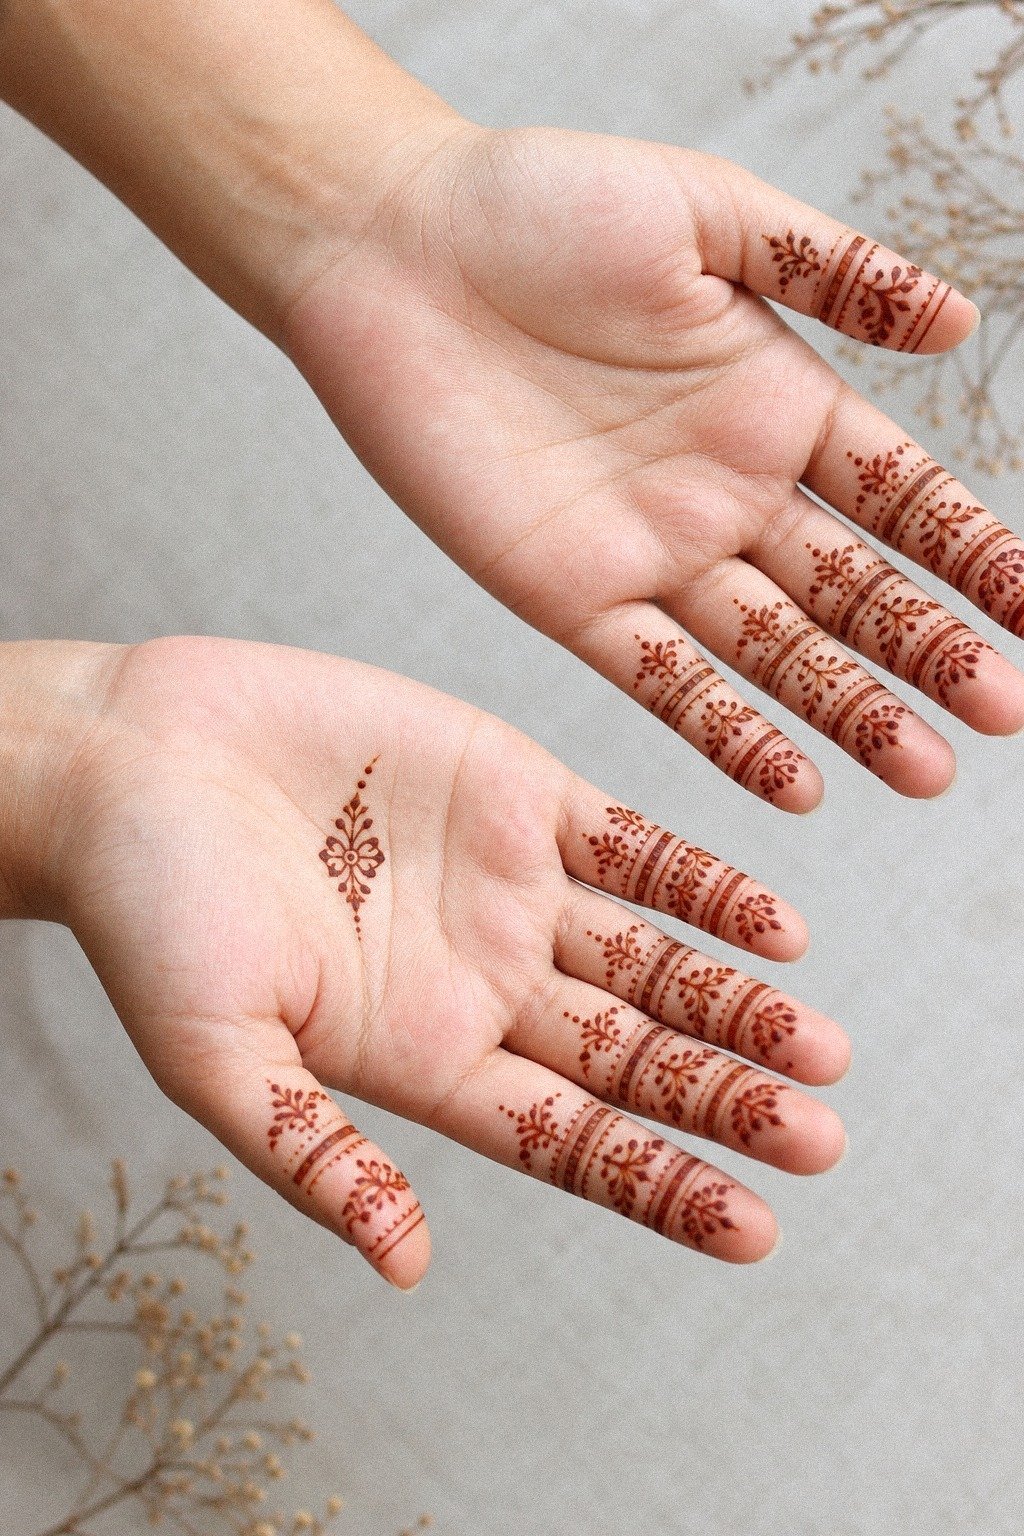
Use the fingers like rails, not like tiny canvases. This finger-line layout works because the palms stay open while the bands and lines travel horizontally and diagonally with purpose. For minimal-mehendi-designs, that is the whole point.
I’d keep these lines thin but not hairline thin. Single-cut finger bands hold their shape best when each band gets one confident pass and enough gap between rows that you can still read skin between them. If you already know you love sparse layouts, 24 simple henna designs to practice before going bold shows the same clean-read logic in easier forms.
And yes, finger work is the spicy part of a mehndi application because hands are high-wear, but with henna the issue is visual wear, not pain. High-wear hand placement can look fussy fast if you stack too many tiny marks, and you’ll see that the second your photo zooms in. A stripped-back layout is usually more polished than a dense fingertip cap!
[IMAGE: Minimal finger-line mehndi with slim bands and crisp gaps across the fingers, open palm kept mostly bare]
3Use Unique Negative Space Palm Henna
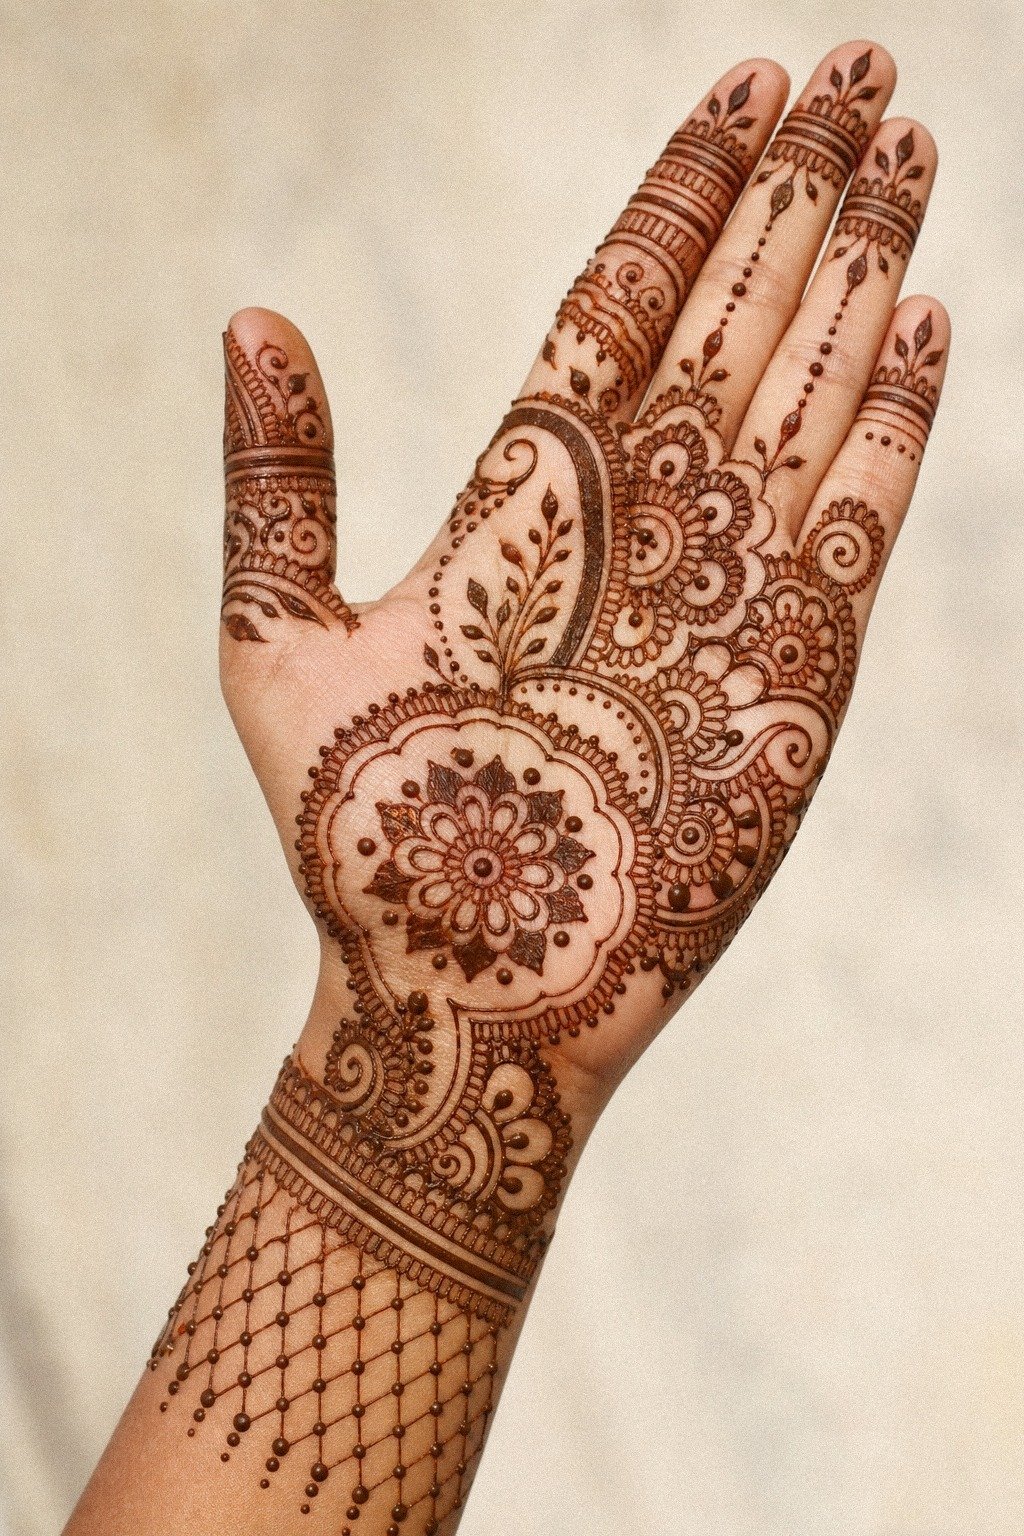
Let the untouched skin do some of the work. Intentional negative space makes even a bold motif feel understated, and the contrast gives your palm a graceful rhythm as the stain deepens over the first two days.
4Mughal Florals Versus Bare Skin Balance
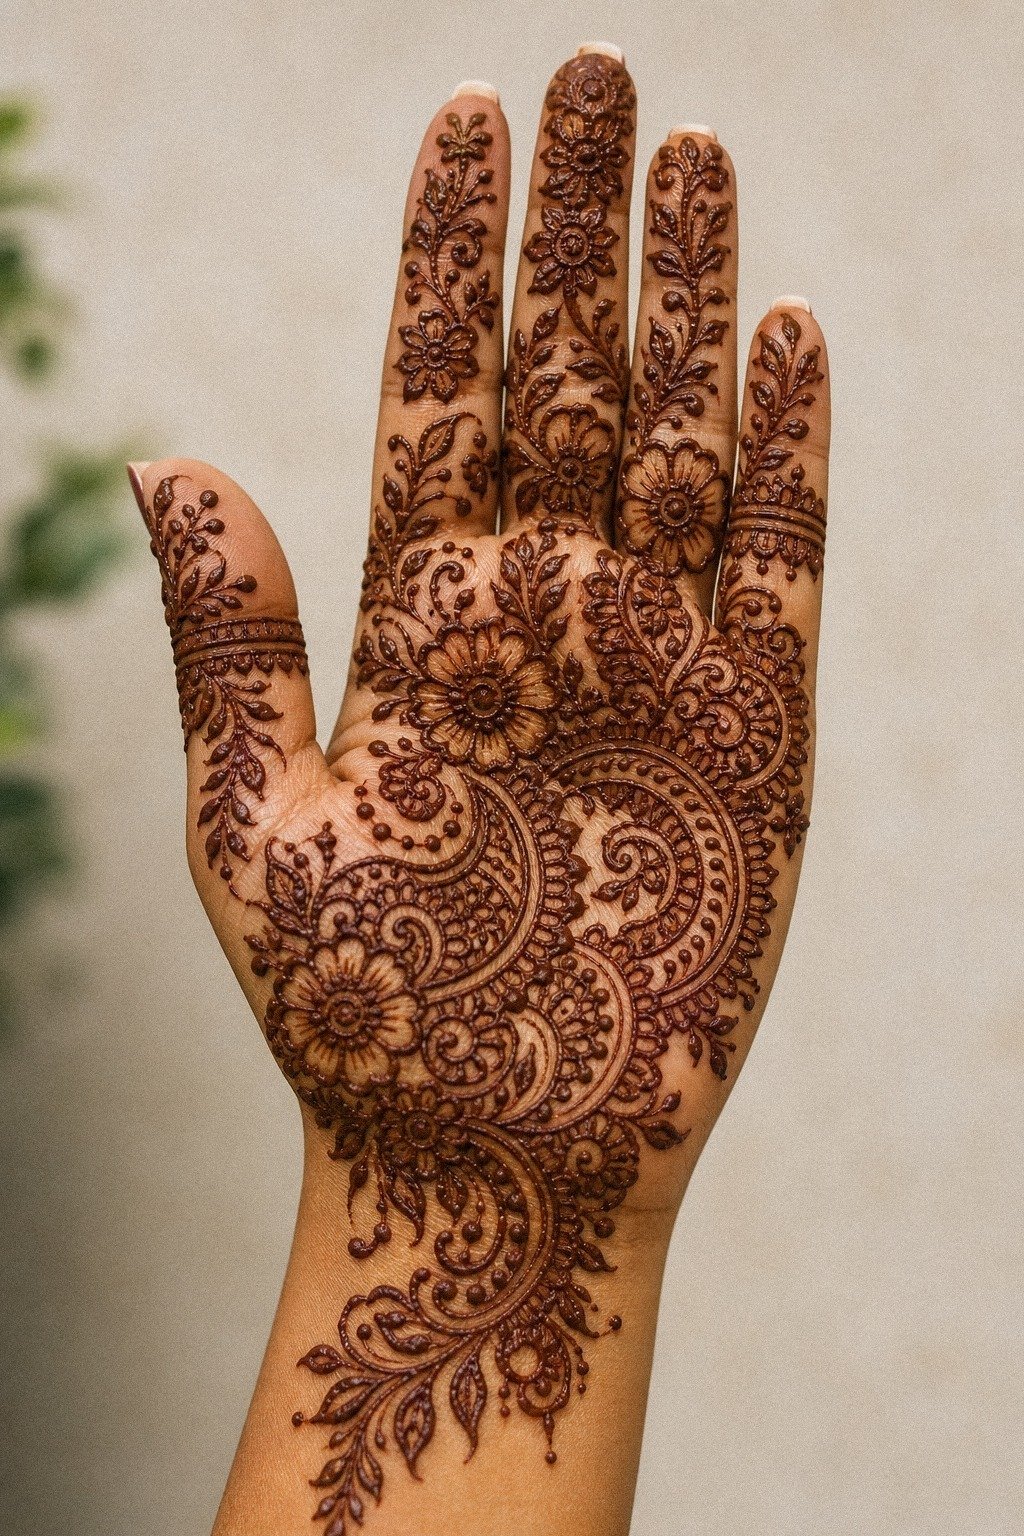
Build your flowers with a clear hierarchy so the palm doesn’t flatten out. This floral front-hand layout feels lush when one bloom stays dominant, two smaller petals echo it, and the rest of the hand gets quieter support instead of frantic filler.
I like floral palm work best when the biggest flower sits a little off center. Soft petal clusters look more graceful when the leaves taper outward and the dots stay secondary, not bossy. If every bloom is the same size, the whole thing loses impact because your eye can’t tell where the design wants to lead you.
And here’s my honest take: floral work only looks polished when the mehndi artist respects bare skin. Open floral breathing lanes keep this style romantic instead of muddy, especially on medium golden skin where every curve can either sing or stack up fast.
[IMAGE: Floral palm henna with one hero bloom, delicate leaves, and open negative space between petals on the front hand]
5Layer Fine Dotwork Palm Henna With Intent
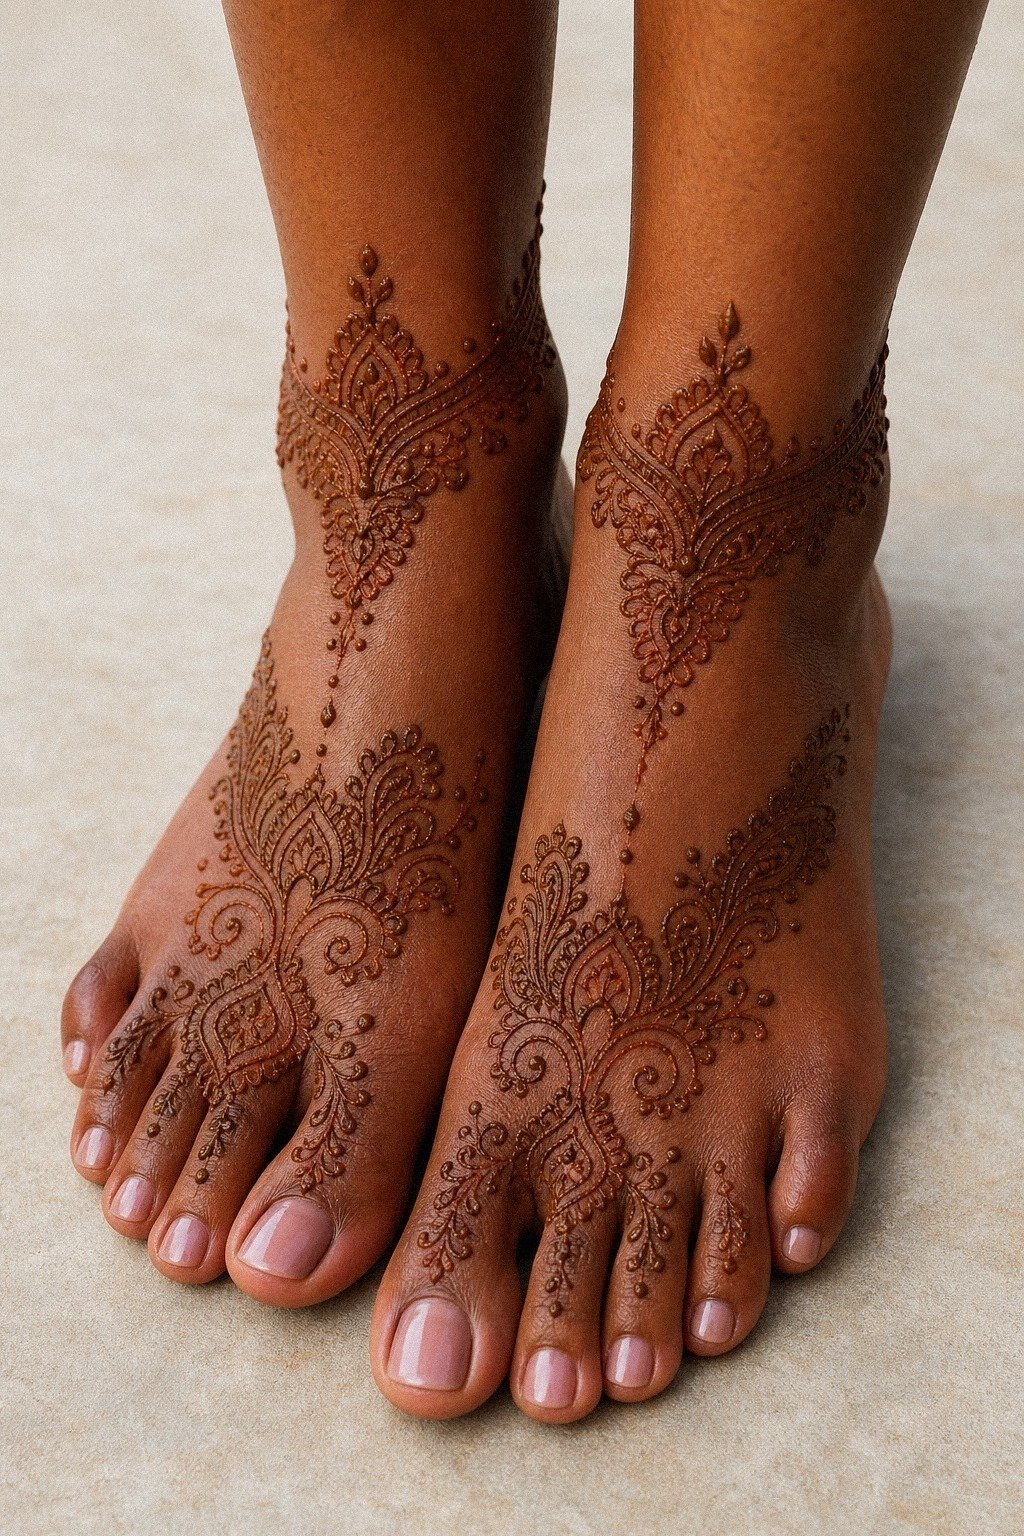
Treat dotwork like texture, not filler. This dot-led pattern reads beautifully because the dots support the main lines instead of replacing them, even though the photo carries the design down onto feet and ankles. The same rule still applies on skin anywhere: dots should soften the rhythm, not clutter it.
When I use dot-heavy layouts, I keep the main shapes big enough that the dot clusters have something to orbit. Micro dot mehndi looks vibrant on deep brown skin with warm undertones because the warm stain pops, but the spacing has to stay honest. If you want more controlled beginner-friendly layouts, 15 easy henna designs to practice before the real thing is a smart save.
And here’s the no-nonsense part: if your dots start replacing structure, the piece goes soft fast. Clean anchor lines should come first, then the texture, and you’ll feel the difference right away. That’s the part that gives the design lasting visual value instead of cheap busy noise!
[IMAGE: Fine dotwork palm henna with bold anchor lines, clustered dots orbiting larger shapes, warm stain on deep brown skin]
6Let an Arabic Vine Trail Cross the Palm
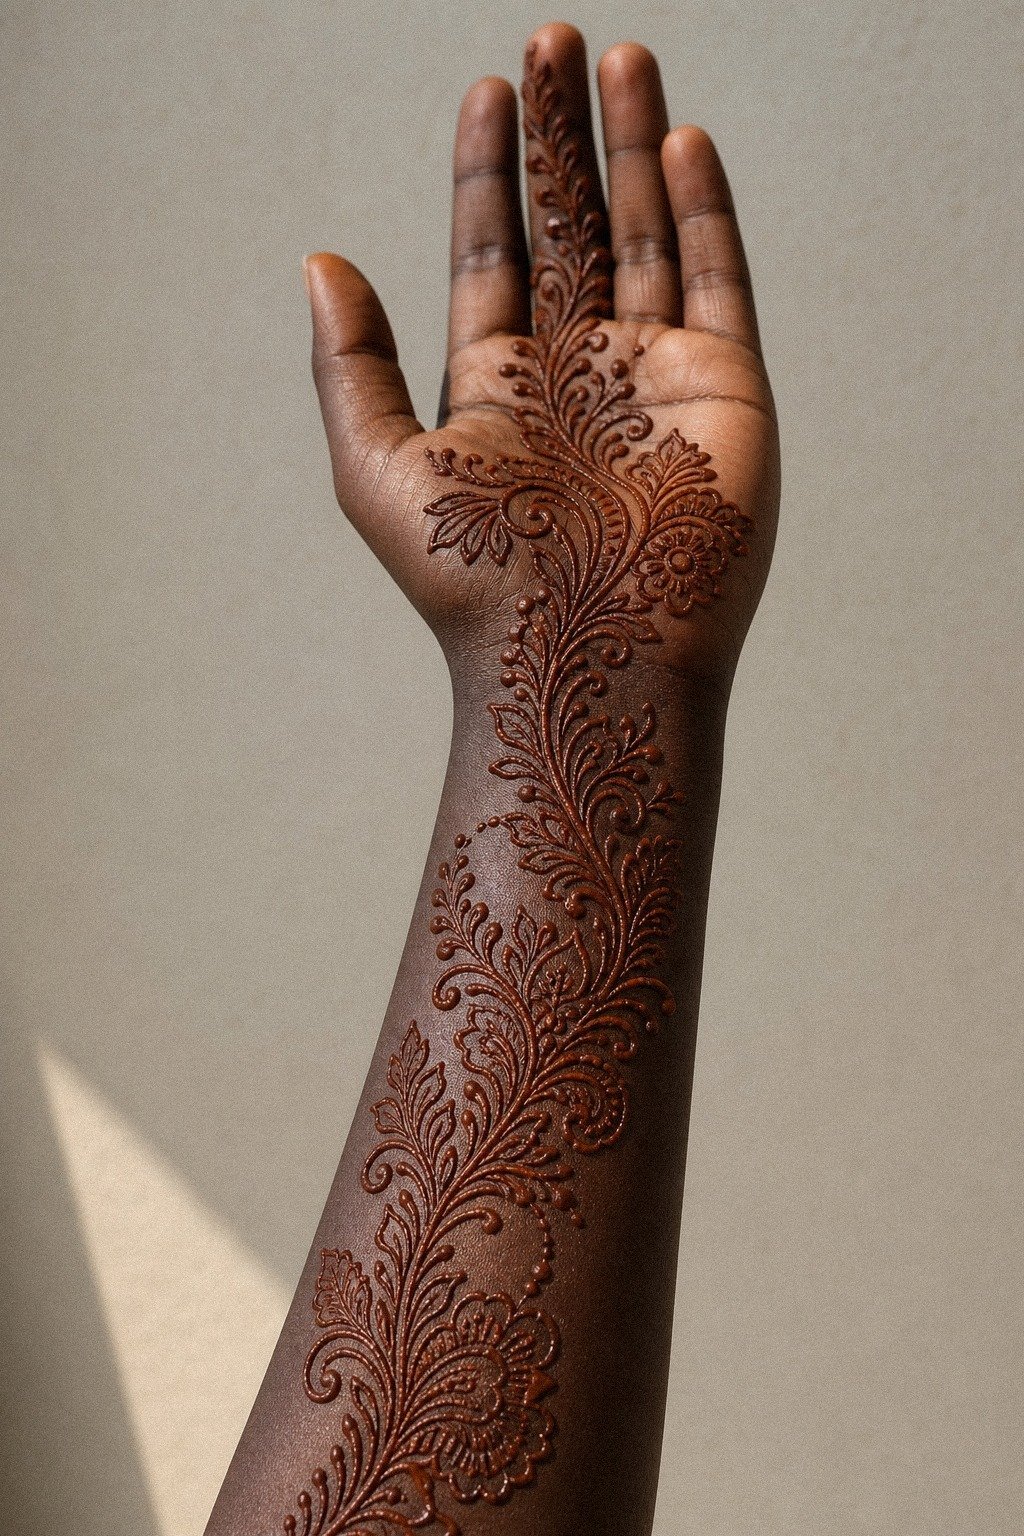
Pull the eye in one direction and keep it moving. Flowing Arabic vines can cross the palm from wrist to fingertip, with pointed leaves and delicate curls that leave enough skin visible for the stain to read clearly.
7Should You Cap Every Fingertip?
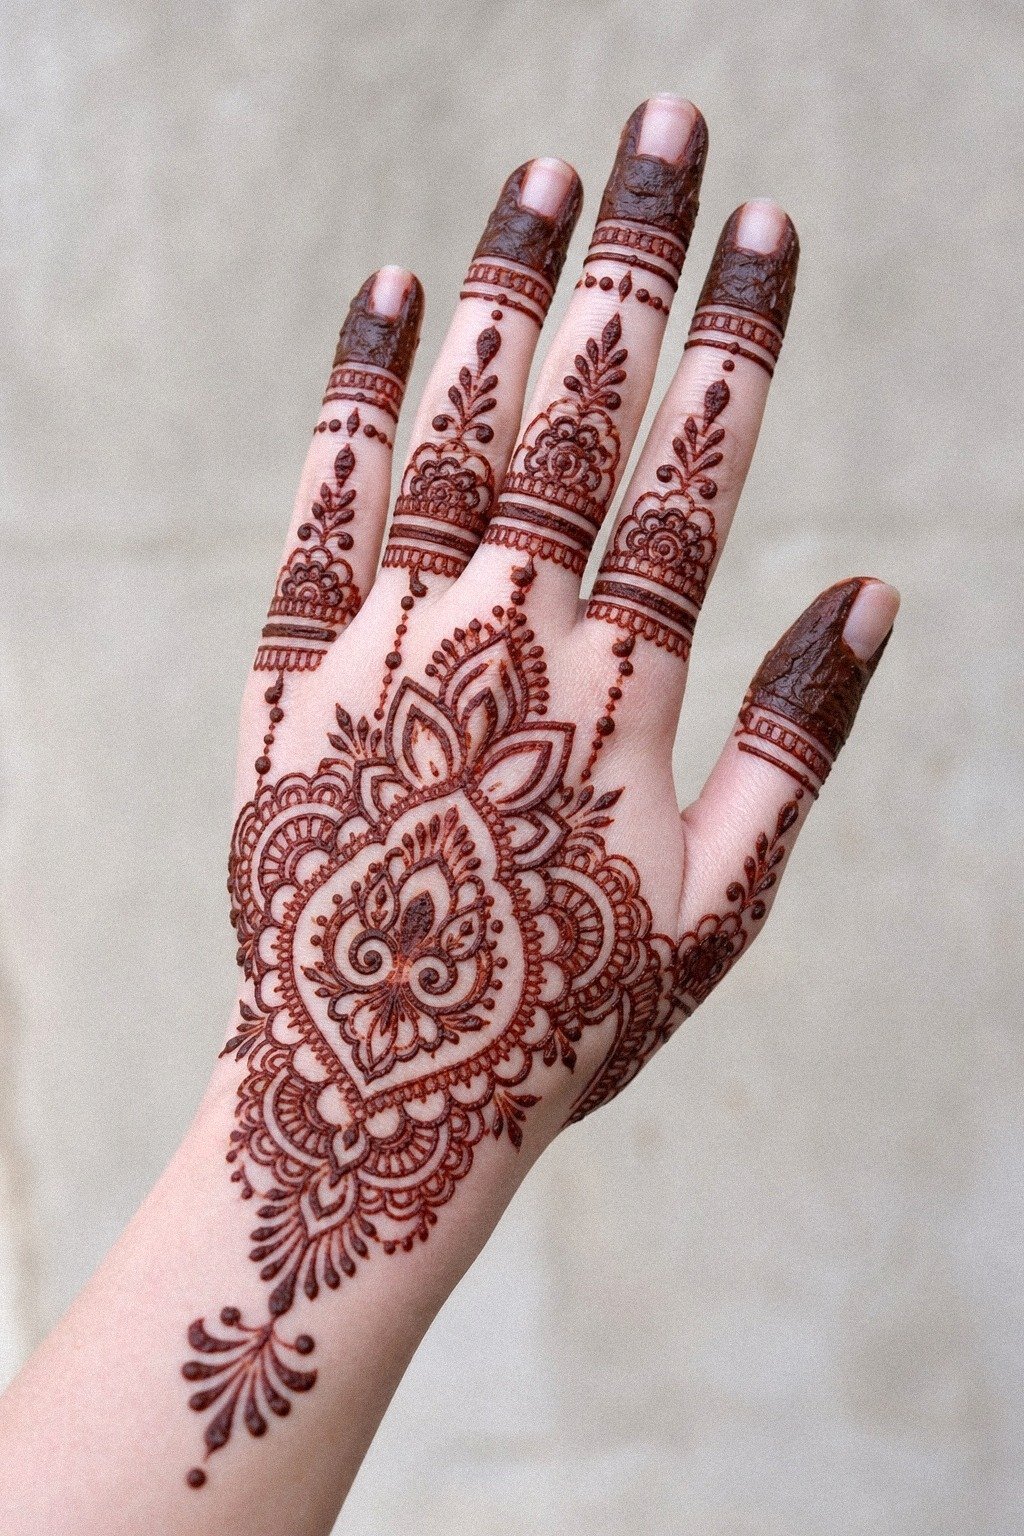
Cap the fingertips on purpose or leave them alone. This fingertip cap design looks bold when the darkened tips match the weight of the palm motif, but it turns heavy fast if the center of the hand is already dense.
I treat fingertip caps like expressive punctuation. Deep fingertip staining gives you dramatic contrast, especially on lighter skin, but it needs breathing room underneath or the whole hand starts to feel visually crowded. If you want a strong photo without paying for extra detail, capped fingers plus a simpler palm is often the smarter value call.
But if your center motif is already ornate, I’d back off. Bare middle phalanges keep the hand from reading like one solid glove, and that softer break is usually what makes the whole layout feel sleek instead of crowded.
[IMAGE: Bold fingertip henna caps paired with a simpler palm motif, strong contrast at the tips and open skin through the middle fingers]
8Keep a Tiny Lotus Palm Mehndi Accent
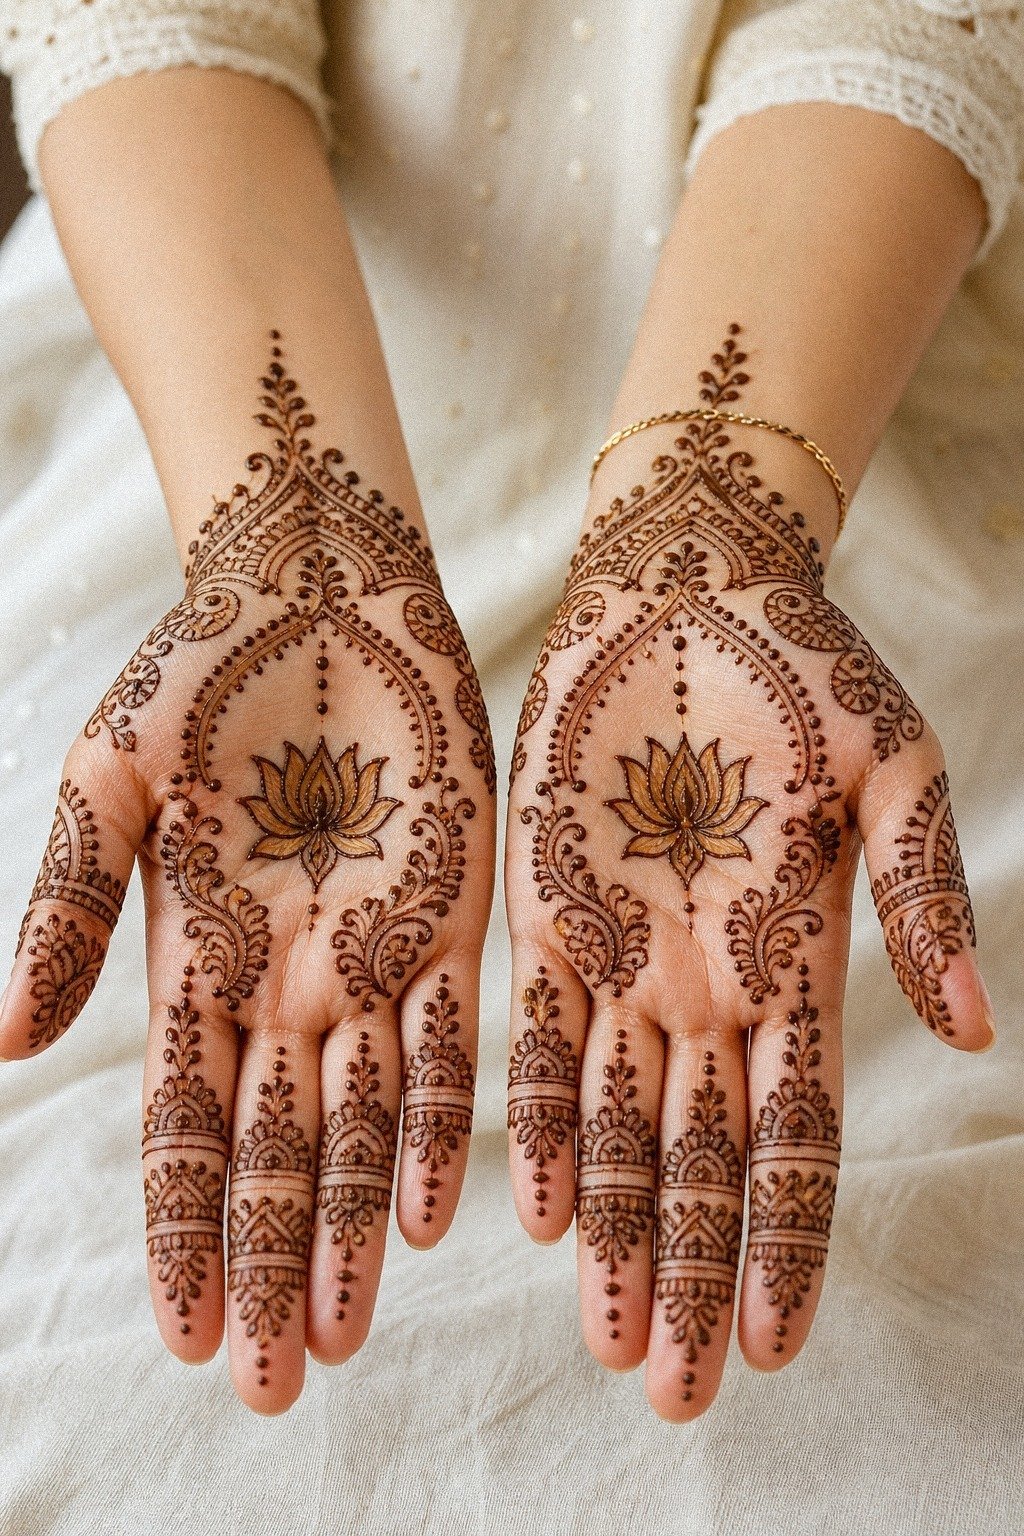
Scale down the focal point, then protect it with open skin. This tiny lotus accent works because the lotus stays small and centered while the surrounding hand stays mostly clean, giving the symbol a quiet kind of power. For palm-mendhi-simple references, that is often smarter than forcing a full-hand layout.
A tiny lotus should still be large enough to read its petals clearly in a phone photo. Lotus line petals around 1 to 1.5 inches across usually give you enough shape without asking the mehndi artist to fake detail that will blur visually. If you want more low-density practice ideas, kids henna designs is useful because simple layouts expose weak composition fast.
And honestly, this is the one I recommend to people who say they want something meaningful but hate clutter. Centered lotus symbolism stays clear, and you’ll never need fake extra detail to sell it. Clean, soft, and dainty on you!
[IMAGE: Small centered lotus henna on the palm with clean petals, wide open surrounding skin, and delicate finger accents]
9Bauhaus Grid Energy for Geometric Palm Henna
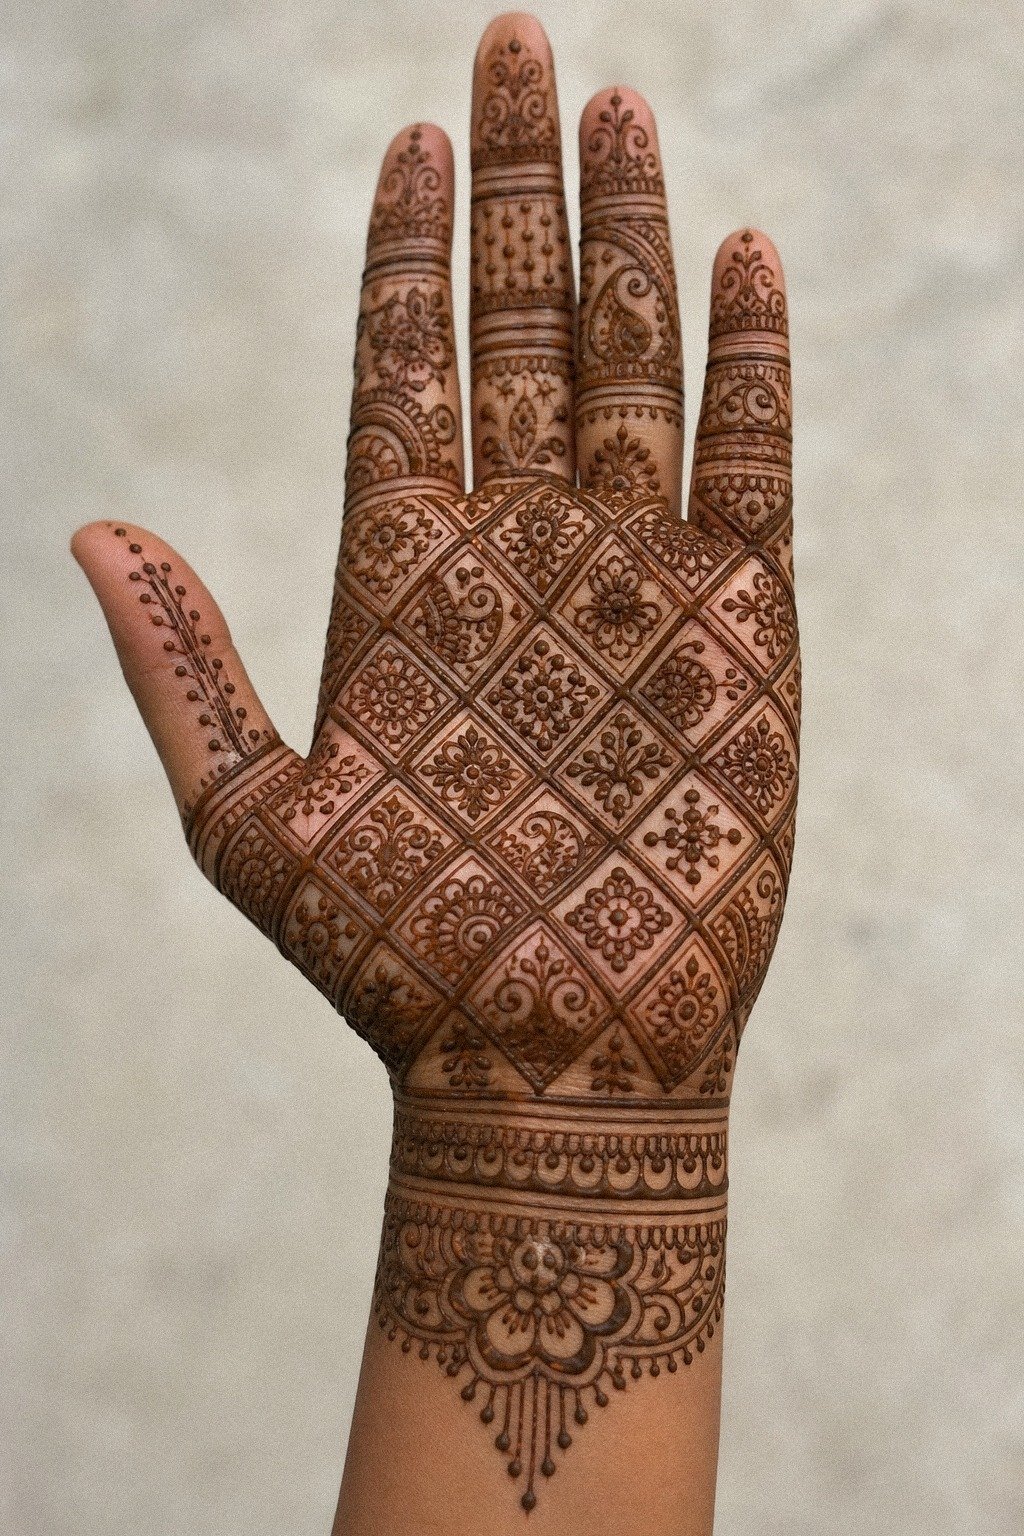
Use repetition with discipline or don’t use it at all. This geometric palm grid works because the shapes repeat in a controlled way across the hand and wrist, but the mehndi artist leaves enough gap between lines that the geometry stays readable. That’s what makes rigid patterning feel sharp instead of stiff.
Geometric work lives or dies on spacing. Diamond grid lines need even lanes, matched angles, and one clear scale choice, because mixing tiny and chunky shapes without a plan gets messy fast. If you like structured layouts, 24 henna designs that reward a steady hand shows why steady geometry is less forgiving than floral work.
But here’s my hot take: geometric palm work looks better when one area breaks the pattern. Offset grid breaks keep your hand from feeling repetitive, and you’ll get a smarter read when one lane stays open. That’s where the real value is, because controlled contrast reads crisp from across the room and on your camera roll!
[IMAGE: Geometric palm henna grid with diamond lanes, one intentional open break, and crisp repeating lines across the hand]
10Scale Paisley Filled Front Palm Mehndi With Intent
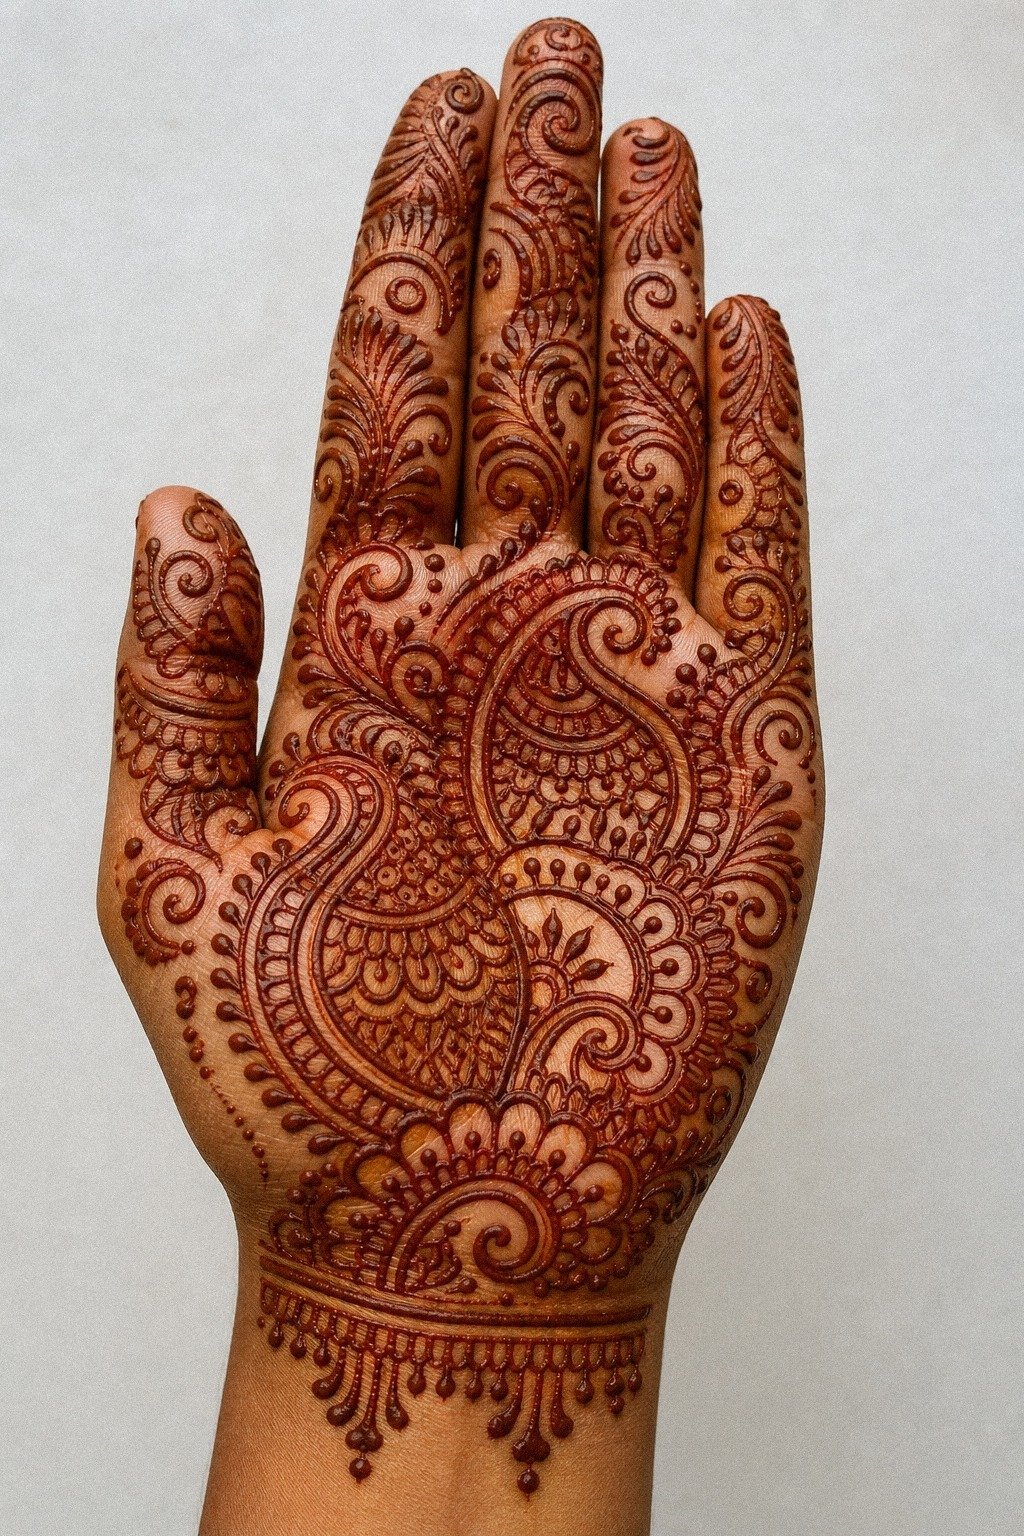
Layer your paisleys by size so the palm feels rich, not flat. Expressive paisley shapes can hold dots, curls, and leaf marks while the largest teardrop remains the visual anchor.
11Tiffany Bracelet Flow From Wrist to Palm
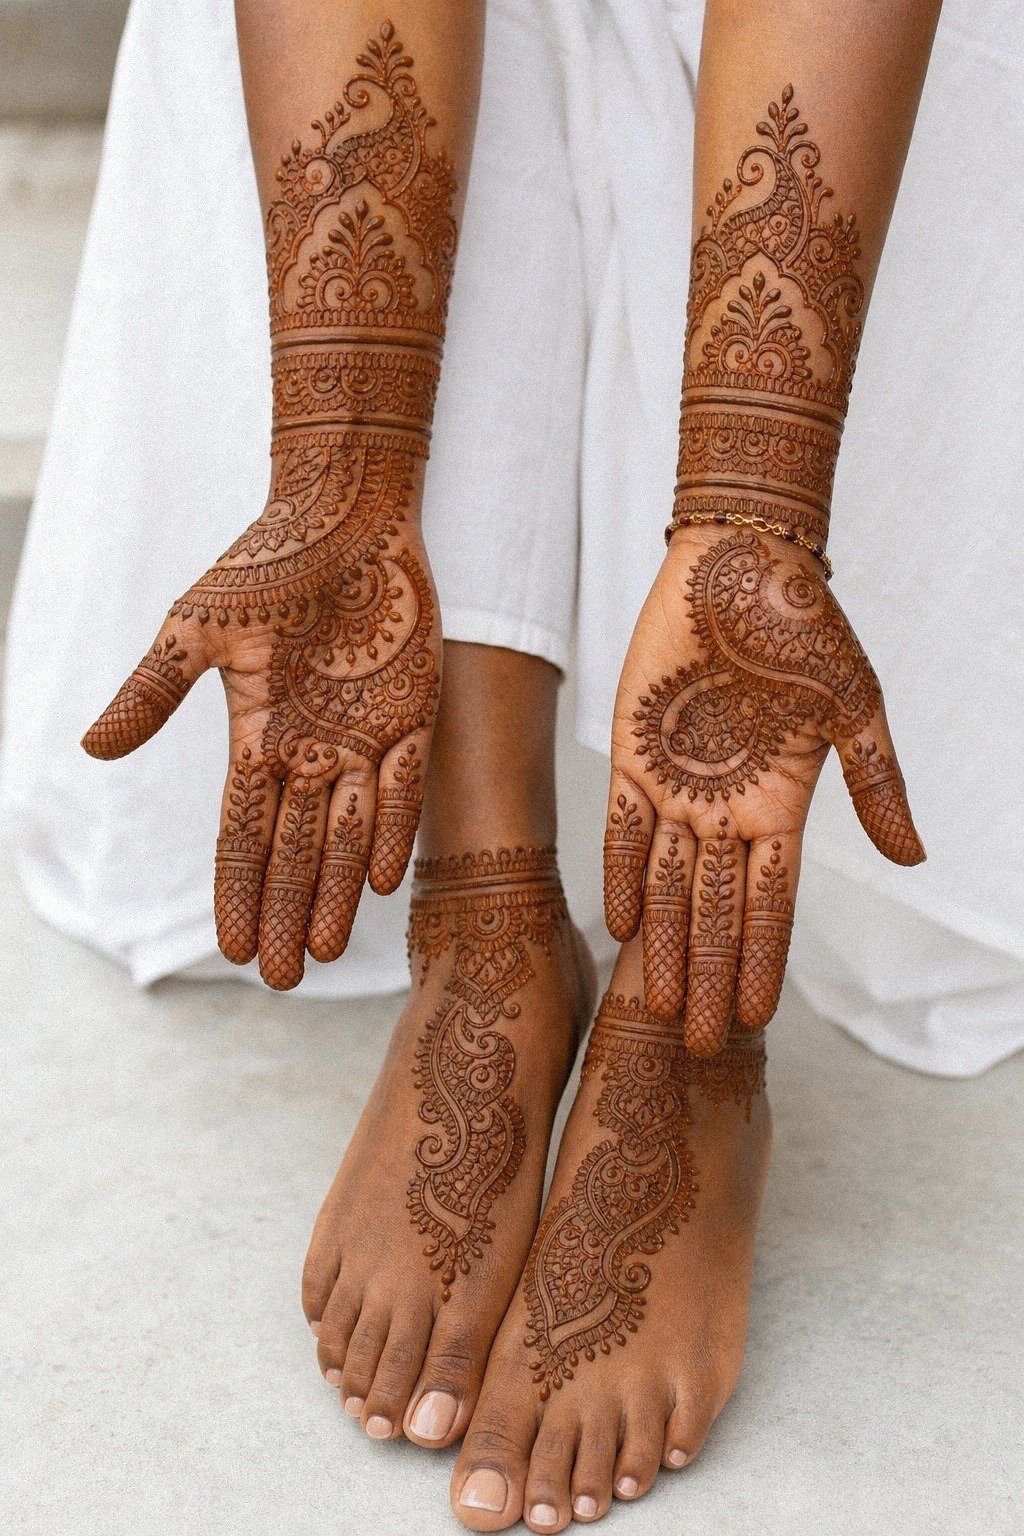
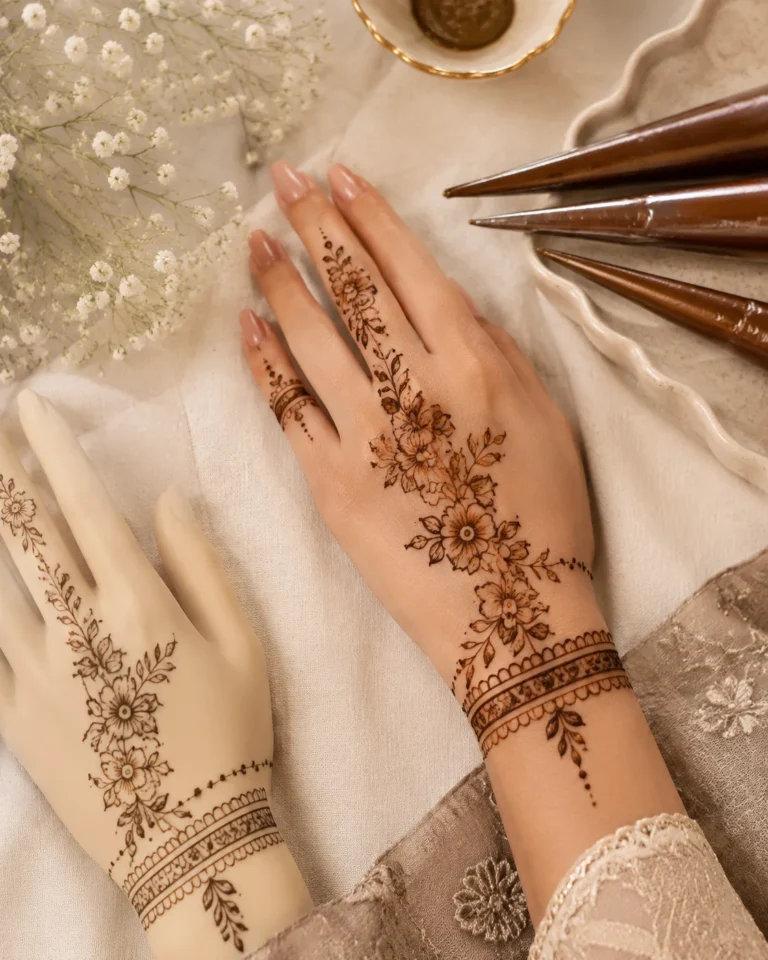
Anchor the design at the wrist, then let it climb. This bracelet-to-palm flow reads well because the bracelet section feels like jewelry while the linework traveling onto the foot and ankle in the photo still keeps that same chained rhythm. On a hand, the same structure gives you elegance without needing a full palm takeover.
Bracelet compositions work best when the band has one dominant edge and one softer edge. Cuff-style mehndi bands around 0.5 to 1 inch wide usually give enough presence to feel finished, while the connector lines toward the palm keep everything from sitting like a hard sticker. If jewelry-inspired structure is your thing, simple henna designs for beginners has cleaner layouts worth borrowing from.
And don’t make the band too thick unless you want a much heavier look. Light connector lines keep it fluid, and you’ll hold onto that elegant jewelry feel when your transition stays lighter than the band. That’s one of the best value plays in this whole list because it looks polished without using a huge amount of paste.
[IMAGE: Wrist-to-palm bracelet henna with cuff-style band, slim connectors, and jewelry-inspired flow climbing into the hand]
12What Keeps a Clean Bridal Palm Mehndi Layout From Looking Busy?
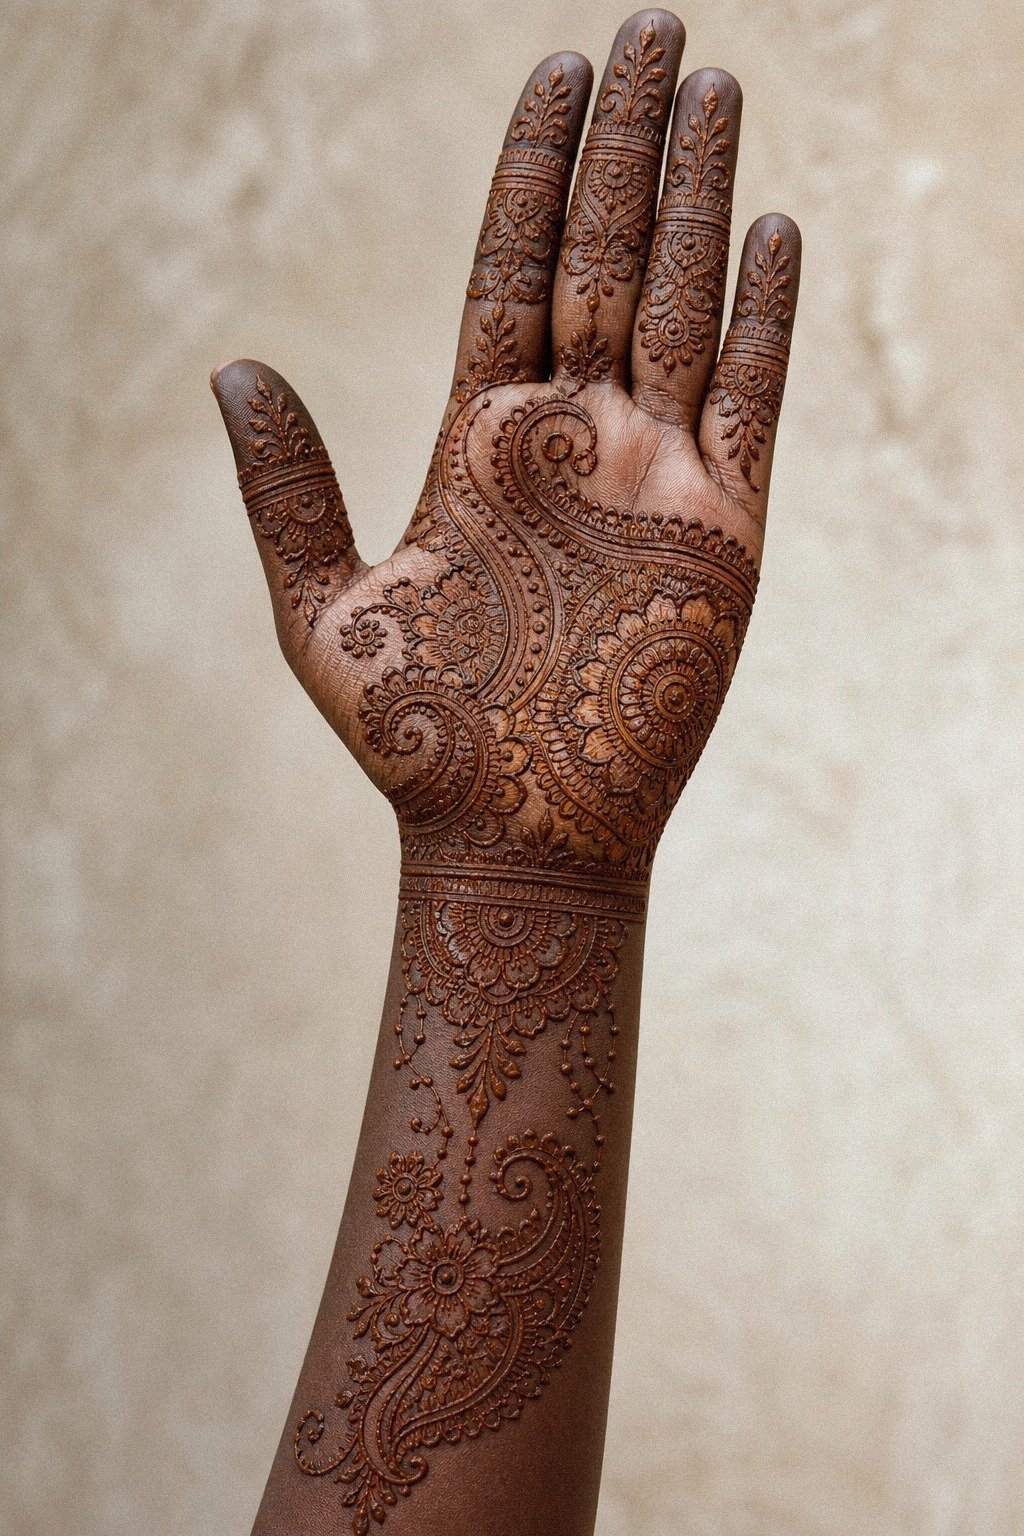
Go detailed, but keep the hierarchy obvious. This bridal palm layout feels ornate because the forearm, wrist, and palm all connect through repeated motifs, yet the mehndi artist still leaves enough separation that each zone reads on its own. That is exactly how bridal work stays intricate without feeling chewed up.
Bridal henna can handle more density than a casual design, but it still needs focal control. Bridal lattice detailing should frame hero motifs instead of swallowing them, and I like repeating one or two shapes through the whole arm so the design feels intentional from forearm to fingertip. For bridal-adjacent balance, 15 henna designs that earn their place beyond the festival gives a strong sense of where detail still stays tasteful.
But the cleanest bridal layouts are never random. Repeated bridal motifs give you one clear rhythm, and you’ll feel that order right away instead of seeing chaos. If you’re weighing the cost of a larger bridal booking, this is where the value shows up most: consistent flow, strong contrast, and a finish that still reads luxurious in every close photo.
[IMAGE: Bridal palm mehndi with repeated motifs from forearm to fingertips, clear separation between zones, and ornate but readable lattice detail]
The Breathing-Line Rule
Here’s the thing: the best palm henna follows the same truth I give anyone planning a detailed design. Readable skin contrast matters.
When a design stays clean, it is not because the mehndi artist did less work. It is because they knew where to stop.
I made that mistake early on with my own sketching. Tiny filler nets kept sneaking into everything because I thought more detail meant more skill.
The result looked impressive up close for about ten seconds, then the whole thing collapsed into one busy patch. Once I started pulling back and letting the skin show, the linework suddenly looked more confident.
If you’re saving palm henna references now because you may want to explore a permanent design later, this still matters. High-wear hand placement can lose visual crispness faster than the forearm, while henna itself naturally fades as skin sheds.
A design that reads at 2 to 4 feet usually has the right bones, so I’d rather see you test a motif in henna first than guess your way into regret. If you want low-density references, 24 simple henna designs to practice before going bold is worth saving.
Here are the real-world benchmarks I use when someone wants to plan a palm henna application and decide whether the design is worth the time and price:
And yes, aftercare still matters. Lemon-sugar sealant can help keep the paste attached longer after it dries, while gentle oil helps protect the stain from excessive water.
Avoid scrubbing, chlorine, and heavy friction during the first day, then let the color deepen naturally. The paste should flake away rather than being peeled off early.
If you want a reference set, 24 henna designs that reward a steady hand is a smart save.
The Steady-Hand Rule
Palm henna is having a moment because people want detail that still feels light. Clean-lane composition is showing up everywhere now: fewer overloaded fills, more calm rhythm, and more layouts that understand the hand instead of fighting it. That’s a smart move, especially when you’re using henna to test a future permanent motif.
But trend or not, the winners are the same. Clear focal hierarchy keeps the design elegant on day one and through the final stain, and you’ll see that same rule in 15 arabic henna designs that flow with the hand. Save the ones that breathe.
The Questions I Get Asked Most
How much does a Palm Henna Designs usually cost?
If you mean a palm henna design, expect about US palm henna prices around $15 to $100, with larger bridal work costing more depending on detail, location, and the mehndi artist. DIY cones can cost much less, while a custom appointment for a festival, wedding, sangeet, Eid, or Diwali may carry a higher minimum. If you’re comparing density, 15 easy henna designs to practice before the real thing gives you cleaner references.
– Small motif. About 20 to 40 minutes of application. – Dense hand placement. Higher price, longer drying time.
Are Palm Henna Designs a good idea for a first henna application?
Yes, especially if you keep the design clean and choose a mehndi artist or DIY pattern that matches your comfort level. Simple cone linework is easier to apply evenly, and trying the motif on your palm first can show you whether the pattern really feels personal. If you’re unsure, simple henna designs for beginners is a good gut check.
– Small center motif. Easier first attempt. – Full palm design. More detail, more drying time.
How do I choose a mehndi artist for Palm Henna Designs?
Pick someone whose dried-paste and finished-stain photos prove they can create crisp lines, not just someone with one pretty fresh application. A strong mehndi portfolio tells you far more about consistency, hygiene, paste quality, and whether the design deepens evenly. You can also compare their style instincts with 15 henna designs that earn their place beyond the festival.
– Fine cone work. Even lines and balanced spacing. – Calm application habits. Clean setup and careful placement.
How long does a Palm Henna Designs application take?
A small palm motif can take about 20 to 40 minutes, while an intricate bridal layout may take one to several hours depending on coverage. Application time depends on the pattern, paste consistency, drying conditions, and whether you are working with a mehndi artist or doing it yourself.
– Small palm motif. Quick application and simple drying. – Full bridal coverage. Longer appointment and more careful aftercare.
How long does a Palm Henna Designs stain last?
A palm henna stain usually lasts about one to three weeks, with the deepest color arriving around the second day. It begins orange, deepens toward reddish-brown, and gradually fades as the outer skin sheds. Wash frequency, friction, chlorine, skin type, and paste quality all affect the timeline.
If you want more low-density references, kids henna designs can help you spot what still reads clean.
– Gentle washing. Helps preserve the stain. – Frequent friction. Makes fading happen sooner.
What’s the best placement for Palm Henna Designs?
If you want the clearest stain, I’d start with the center palm or the back of the hand, depending on the occasion and how often you wash your hands. Fingers and palms can fade faster because of friction, while the forearm and ankle may hold a design more evenly. For more movement-first references, 15 arabic henna designs that flow with the hand is a strong compare.
– Low-friction zones. Easier stain longevity. – Palm and fingers. Striking look, faster fading.
The One-Palm Pick
If I had to pick one, I’d start with the Tiny Lotus Palm Mehndi Accent. It keeps the symbolism clear without forcing fake detail, and that’s exactly why the price feels worth it. Pin that one for later and compare it with 15 easy henna designs to practice before the real thing.