Forest tattoo design works best when you give the trees room to breathe. I once tried to cram a whole trail, moon, deer, and six pines into a tiny sketch. It would’ve healed into soup. These 13 ideas keep the mood, use skin-smart placement, and hold their contrast for years.
- Pine Forest Silhouette Across the Forearm
- Botanical Forest Linework on the Ribcage
- Moonlit Woodland Scene on the Upper Arm
- Pine Forest Silhouette Across the Forearm
- Botanical Forest Linework on the Ribcage
- Moonlit Woodland Scene on the Upper Arm
- Tiny Evergreen Forest Behind the Ear
- Blackwork Forest Sleeve with Mountain Layers
- Watercolor Forest Tattoo Anchored with Linework
- Forest Path Tattoo Along the Calf
- Minimalist Tree Line Across the Collarbone
- Realistic Redwood Forest on the Thigh
- Forest and Wildlife Scene on the Shoulder
- Japanese-Inspired Cedar Forest Tattoo
- Geometric Forest Landscape on the Outer Arm
- Fine Red Ink Forest Tattoo on the Wrist
1Pine Forest Silhouette Across the Forearm
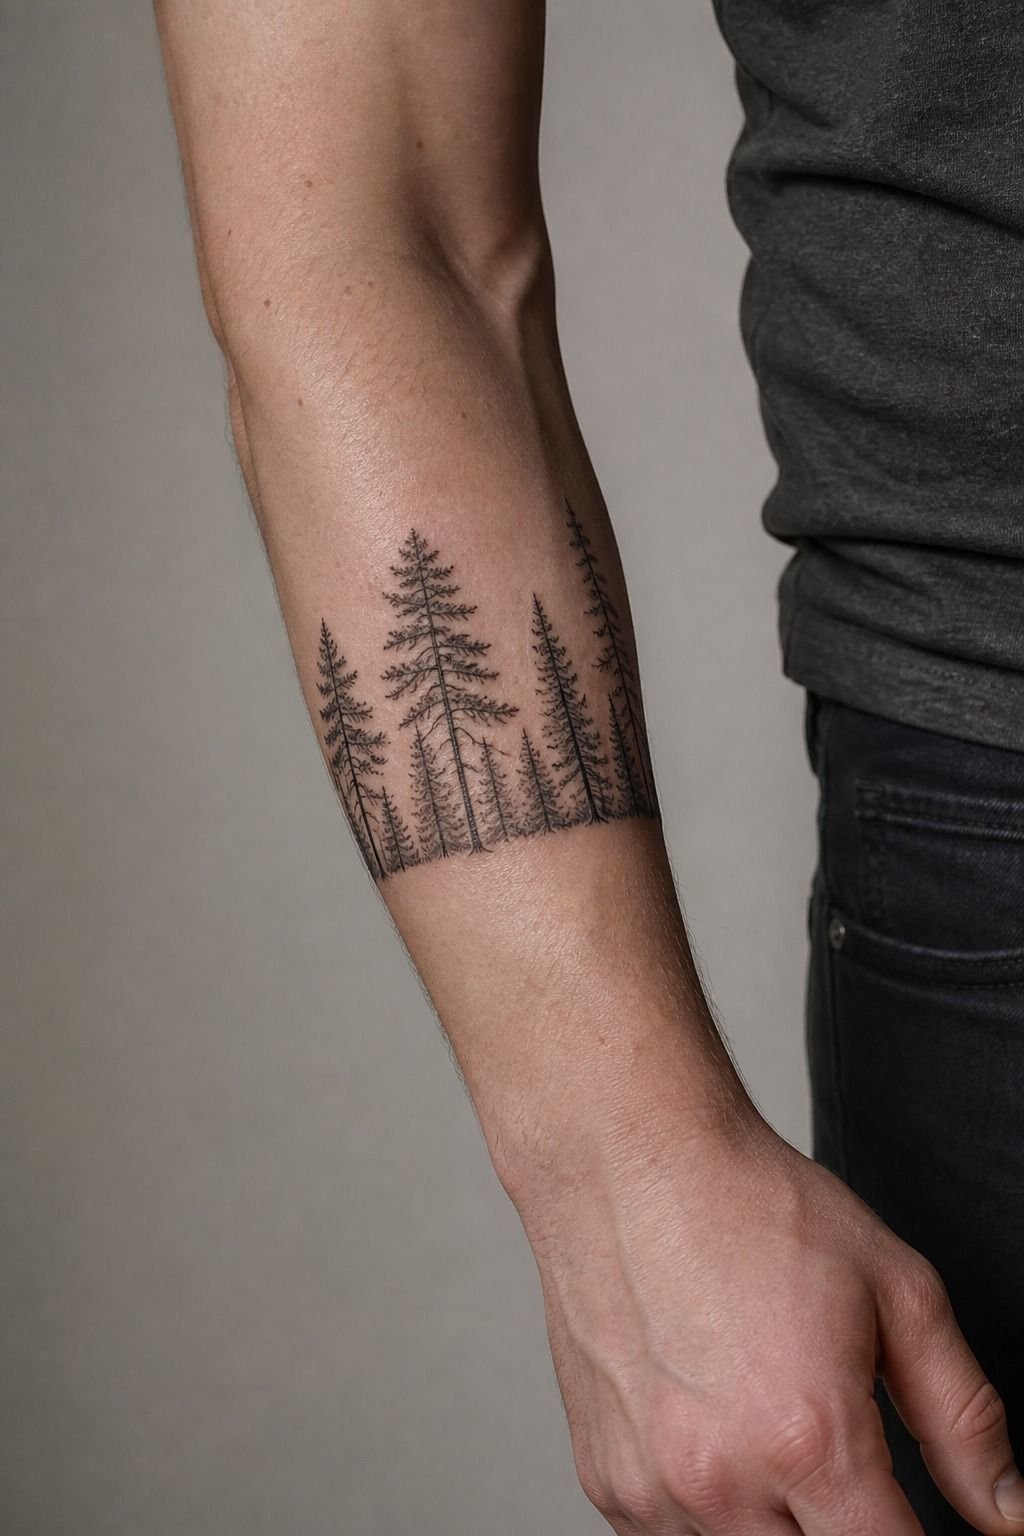
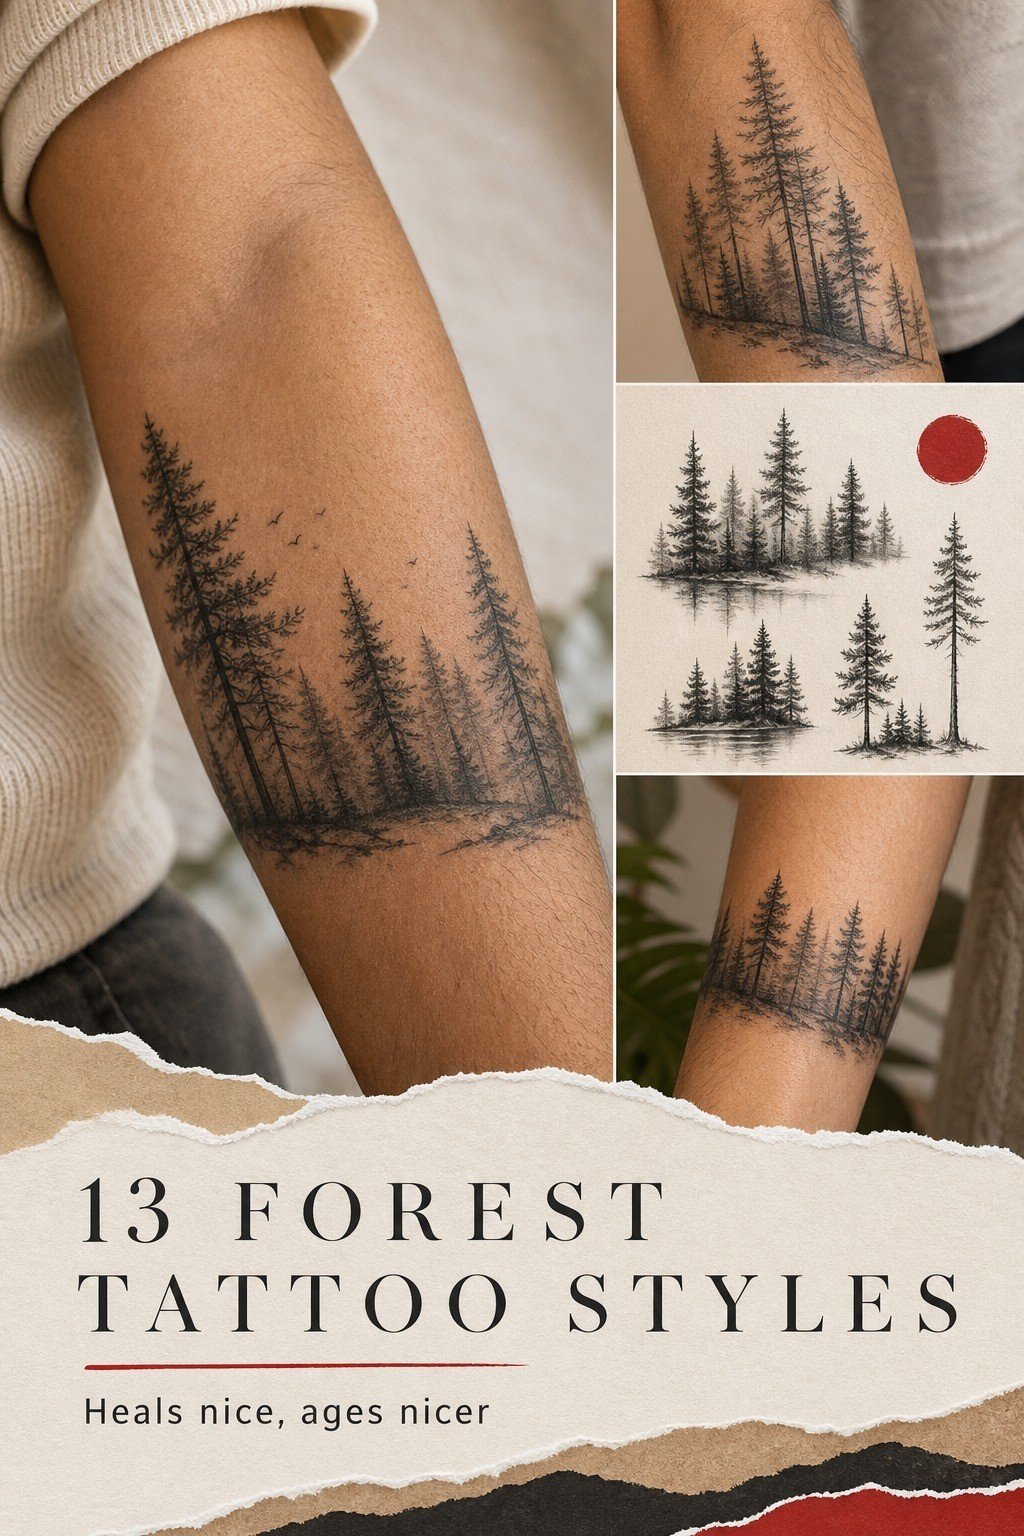
A pine silhouette across your forearm is one of the cleanest forest tattoo ideas you can get. You’ve got a long, low-wear canvas, and the wrist-to-elbow flow lets each tree read separately instead of becoming a dark smudge.
Keep the pines around 2 to 3 inches tall, with open gaps between trunks and a simple black horizon. I’d skip tiny individual needles here. Your artist can suggest branch clusters with single-needle black ink and still keep the skyline airy.
You’ll want the tallest tree near the outer forearm, then let the line taper as it approaches your wrist. That gives your arm movement. A straight row of identical pines looks like a fence, and nobody wants that.
Bring a few references, then let your artist redraw the shape for your body. If you’re gathering reference images first, this tattoo design website ideas guide can help you sort vibe from copy-paste.
2Botanical Forest Linework on the Ribcage
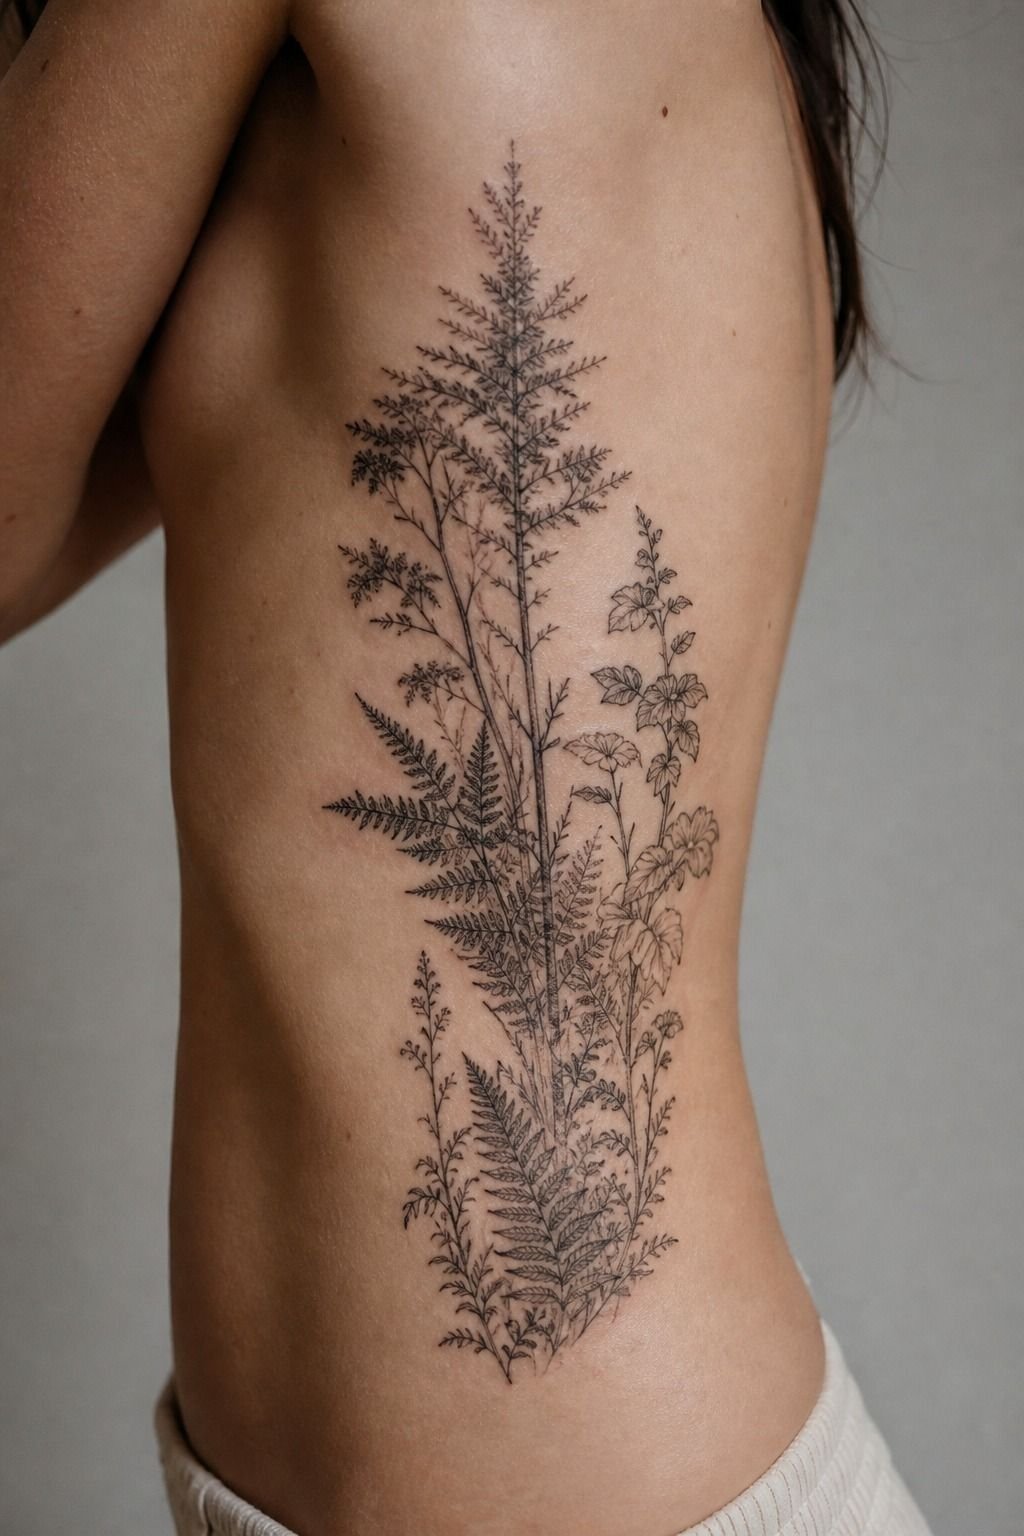
Ribcage woodsy tattoos should follow your breathing lines, not fight them.
3Moonlit Woodland Scene on the Upper Arm
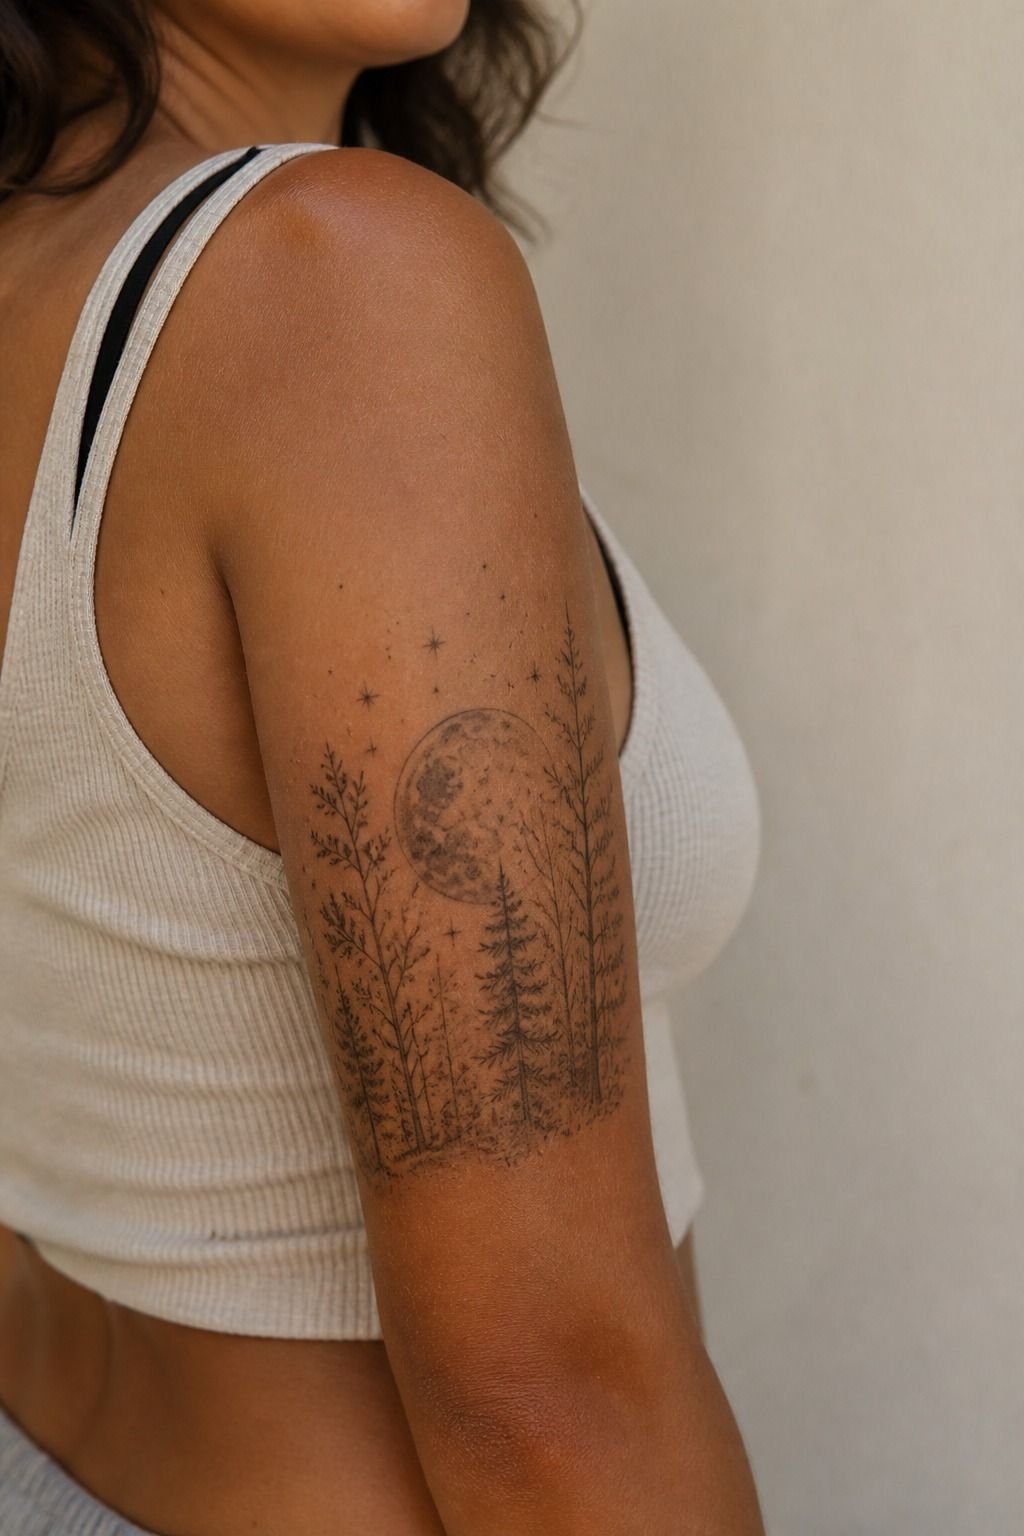
For an upper-arm woodland scene, build the moon first and let the trees frame it. That circular moon gives your eye a landing spot, while the pines can rise around it in a calming, moody crescent.
You’ll get better aging from a soft grey wash moon than from a fully packed pale circle. Add a few darker foreground trunks, then keep the far trees lighter. Push the contrast so it doesn’t heal flat.
The upper arm is chill for most people, especially compared with ribs or sternum. You can usually sit comfortably through a 2 to 4 hour session, depending on size and how much shading you want.
I’d skip an oversized wolf face in the moon. It’s a popular add-on, but it chews up the clean night-sky feeling fast.
And don’t make every branch symmetrical. Real woods aren’t tidy, which is exactly why this placement feels organic once it heals.
4Tiny Evergreen Forest Behind the Ear
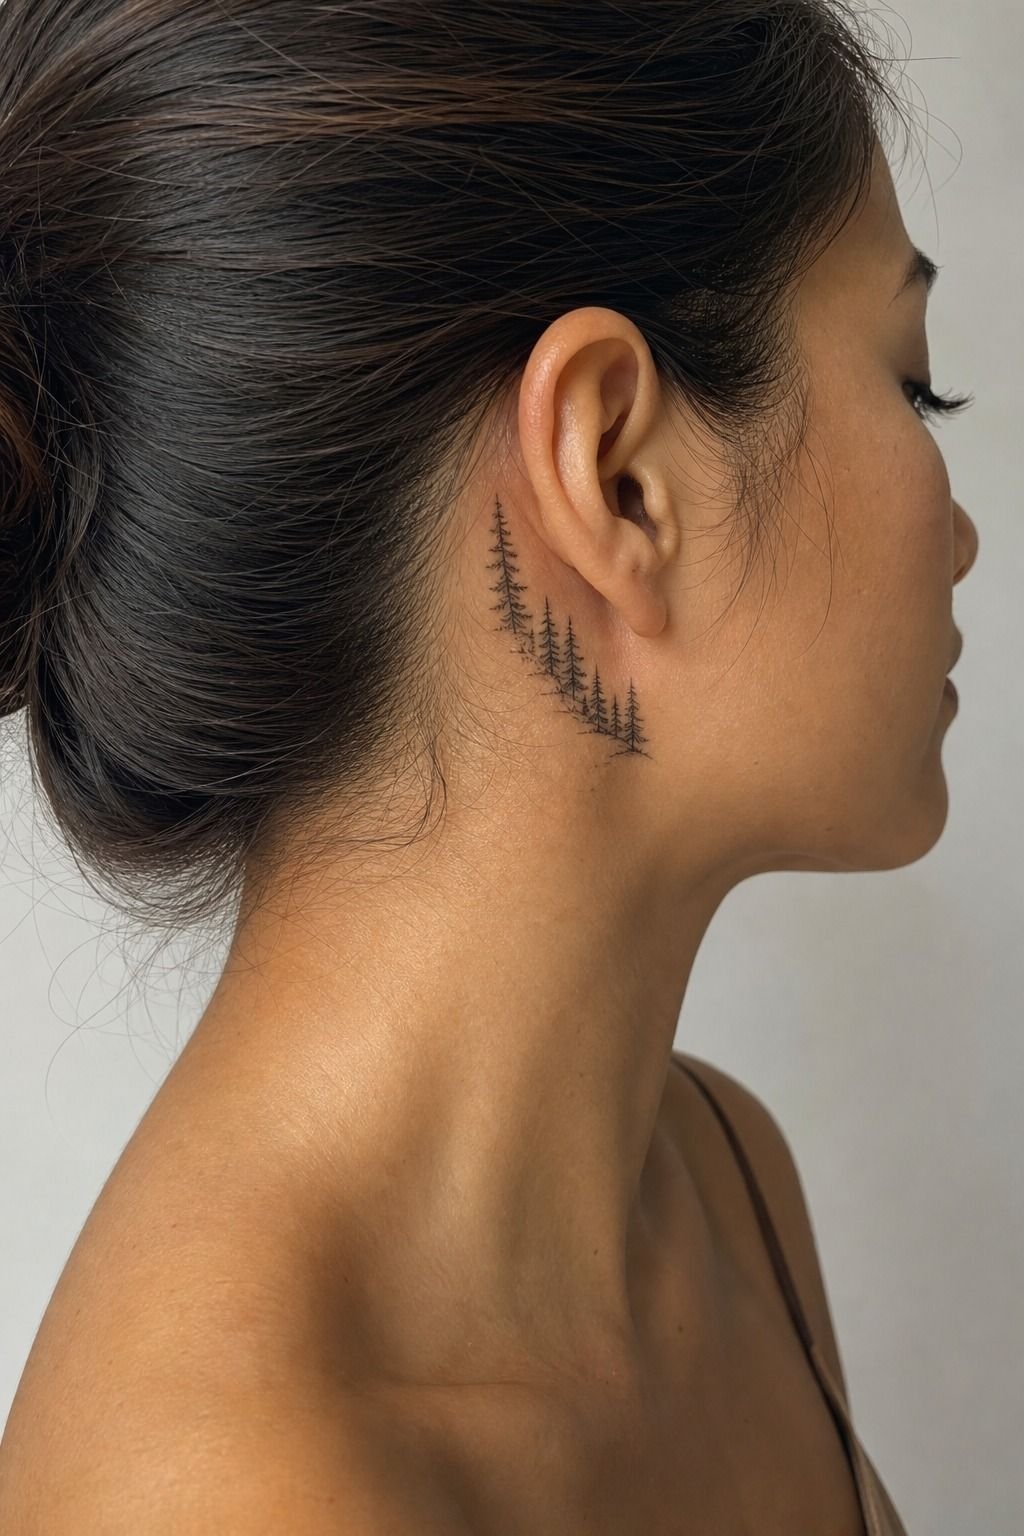
A tiny evergreen forest behind the ear can be charming, but only if you accept the scale limit. You’re working with a small curve of skin, so three to five simplified pines will age far better than a full enchanted forest tattoo scene.
Use fine line black ink with short trunks and triangular branch masses. Your artist should leave visible skin between the trees. If the trees touch in the stencil, they’ll likely touch even more after years of natural line spread.
Behind-the-ear work is quick, often under an hour, but that doesn’t mean you should choose it casually. This is a high-visibility spot. You’ll see it in profile photos, and your hair can rub against it during the first few healing days.
But I’d skip micro lettering tucked beneath the pines. It’s too much information for one little area. Let the forest stand alone, then it stays subtle and readable.
5Blackwork Forest Sleeve with Mountain Layers
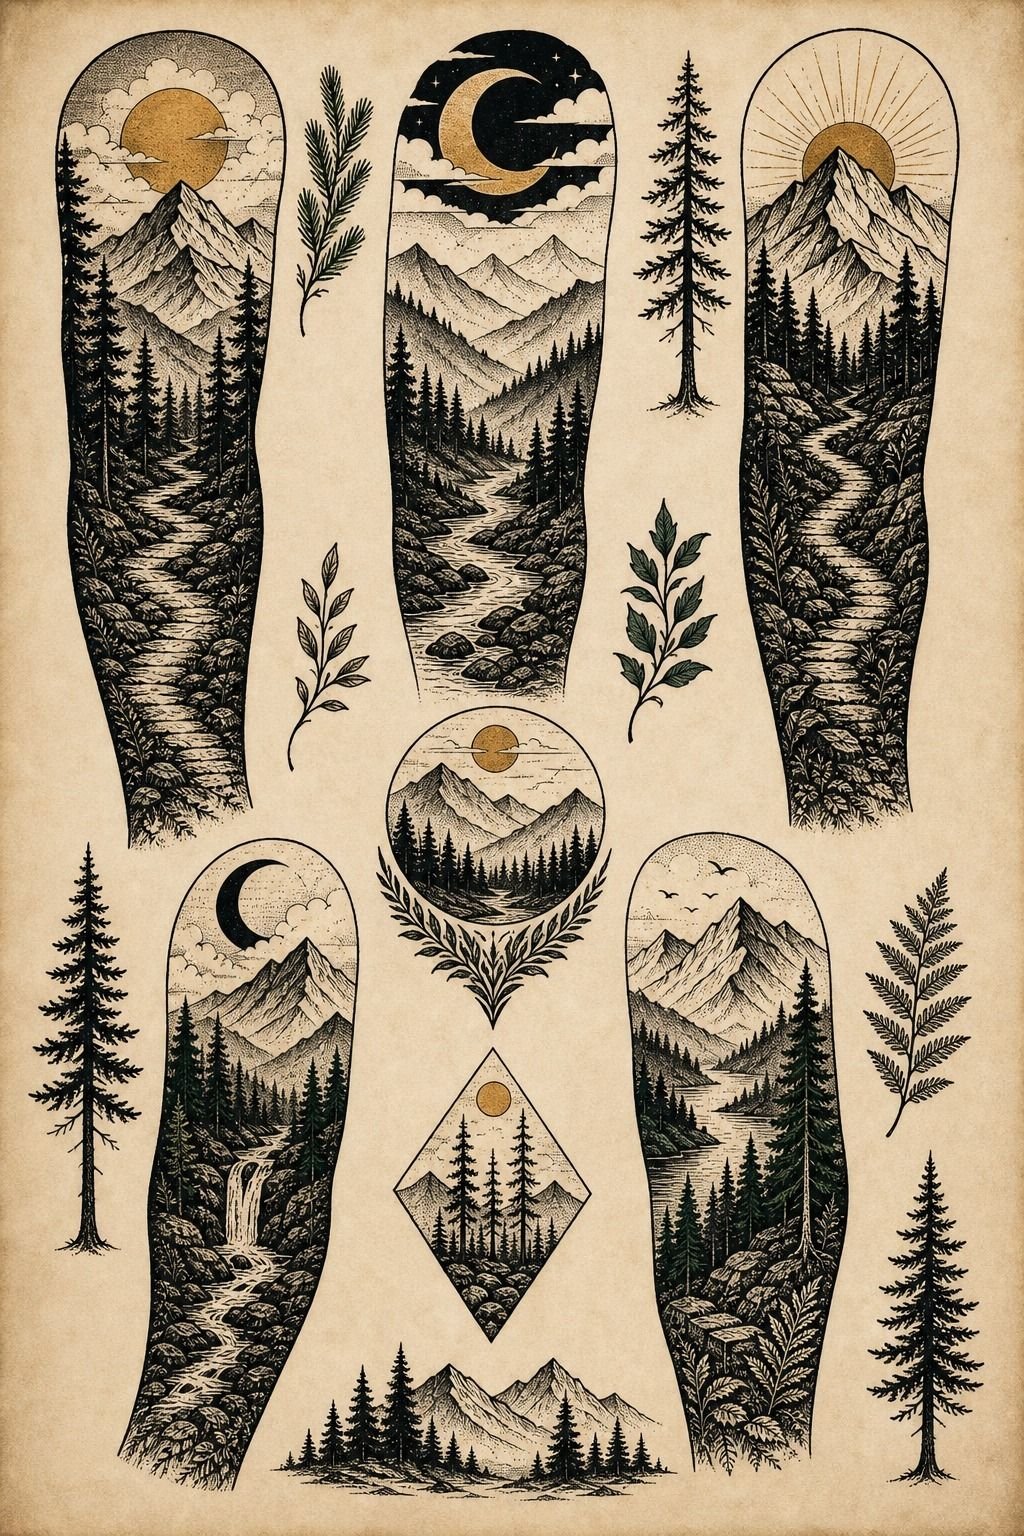
This blackwork forest sleeve works best as a plan, not a random pile of tattoos. The flash-sheet approach in the image is a smart start: mountains, tree bands, sun discs, and heavy black shapes that can become one solid arm story.
Build your woodland tattoo sleeve with bold blackwork, smooth grey shading, and intentional negative space. Start with the mountain layers, then use pine silhouettes as a dark frame.
Bold will hold. Tiny texture everywhere will not.
Here’s the honest part: a sleeve is a commitment. You’ll likely need several sessions, and your artist should map the entire arm before doing the first finished section. A clear sleeve flow beats a collection of disconnected patches every time.
– Heavy mountain ridge – Open-skin fog band – Saturated pine foreground – One crisp sun circle
If you want to sketch the whole route before booking, use this how to design your own tattoo guide. You don’t need to design the tattoo yourself, but you do need to know what you want the sleeve to say.
6Watercolor Forest Tattoo Anchored with Linework
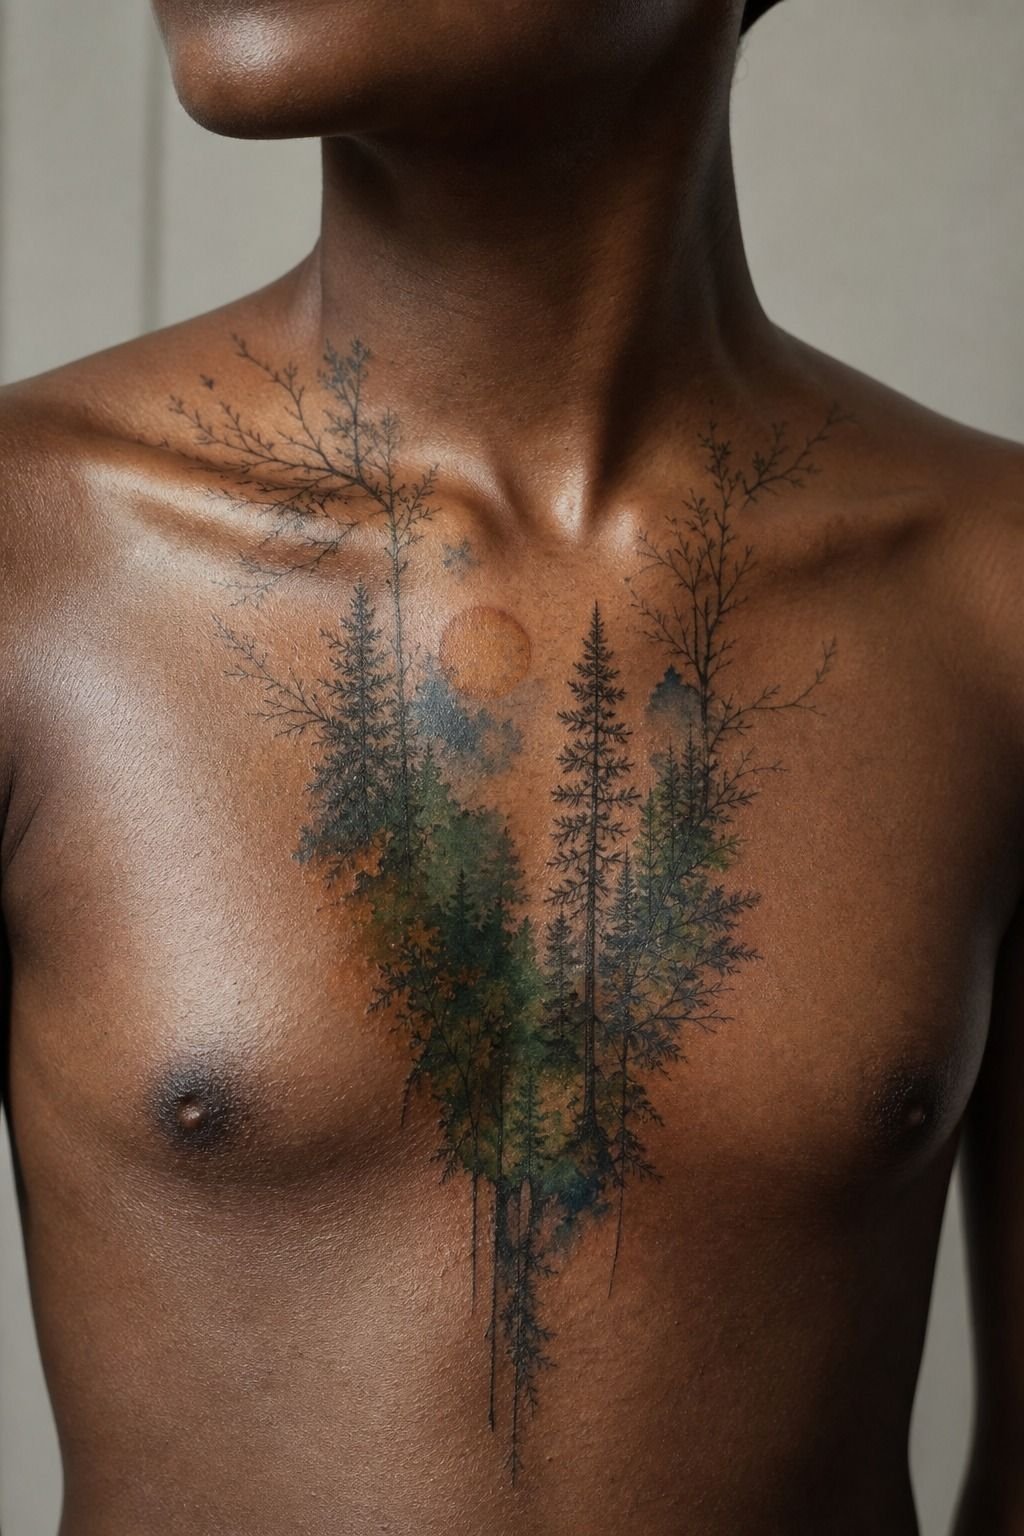
Watercolor forest tattoos need linework underneath them. Period. The sternum piece in the photo works because the blue-green wash has a black tree structure holding it together, so the color reads bright instead of floating away.
On deep skin, ask your artist to show you how the pigment will sit against your undertone. Deep teal ink, muted blue, and a strong black outline often give you more lasting contrast than a pale watercolor wash.
Color is spice. Black is your best friend for longevity.
The sternum is a sensitive placement, especially close to bone. You’ll feel the vibration, and color packing is usually the spiciest part. Keep the composition narrow enough that it follows your centerline instead of sprawling into an awkward chest panel.
I’m picky about this style because unanchored watercolor can heal patchy. For more examples of color held together by structure, look through our watercolor tattoo design ideas.
7Forest Path Tattoo Along the Calf
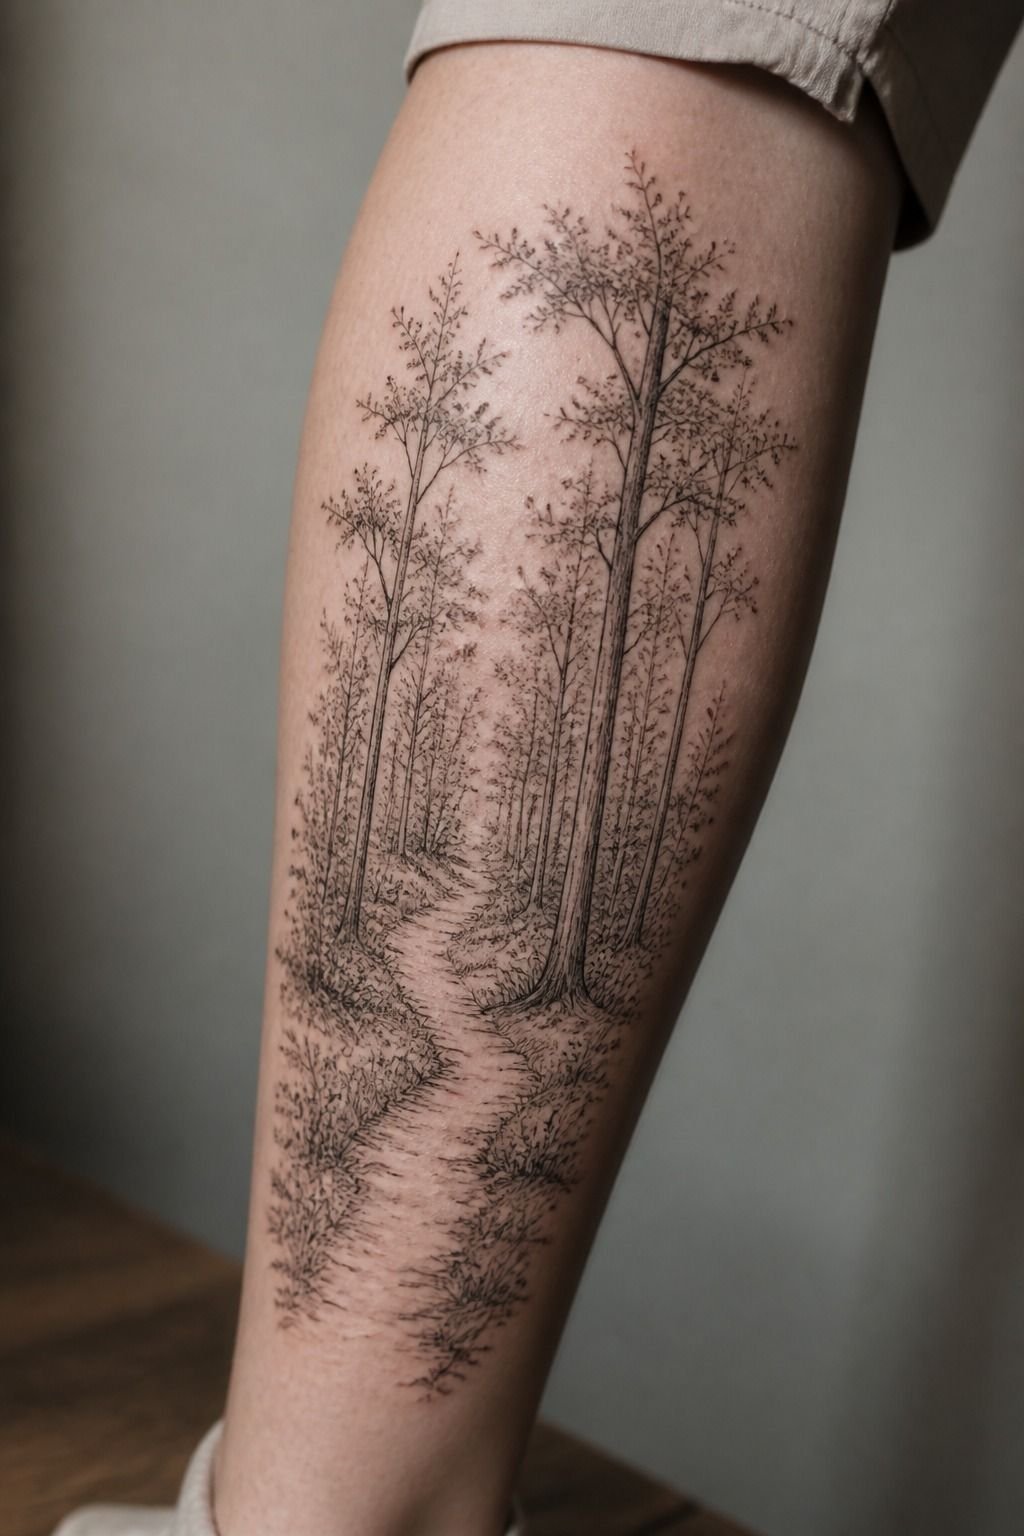
A forest path tattoo on the calf gives you depth without needing a huge piece. Put the path low in the design, let it narrow toward the distance, and use taller pines at the edges to create a picturesque tunnel.
Your calf can handle a vertical composition well, and it’s generally more tolerable than the foot or knee ditch. I’d give this design at least 4 to 6 inches of height. Any smaller, and the path turns into a skinny grey stripe with no clear destination.
Use whip-shaded pine shadows along one side of the trail, then leave the center path mostly open. That open skin is the light source. It makes the design feel inviting without forcing in a sunbeam or a dozen tiny stars.
And don’t overwork the background. You only need two depth layers: dark foreground, soft distance. That’s enough to make the path pull your eye up the leg.
8Minimalist Tree Line Across the Collarbone
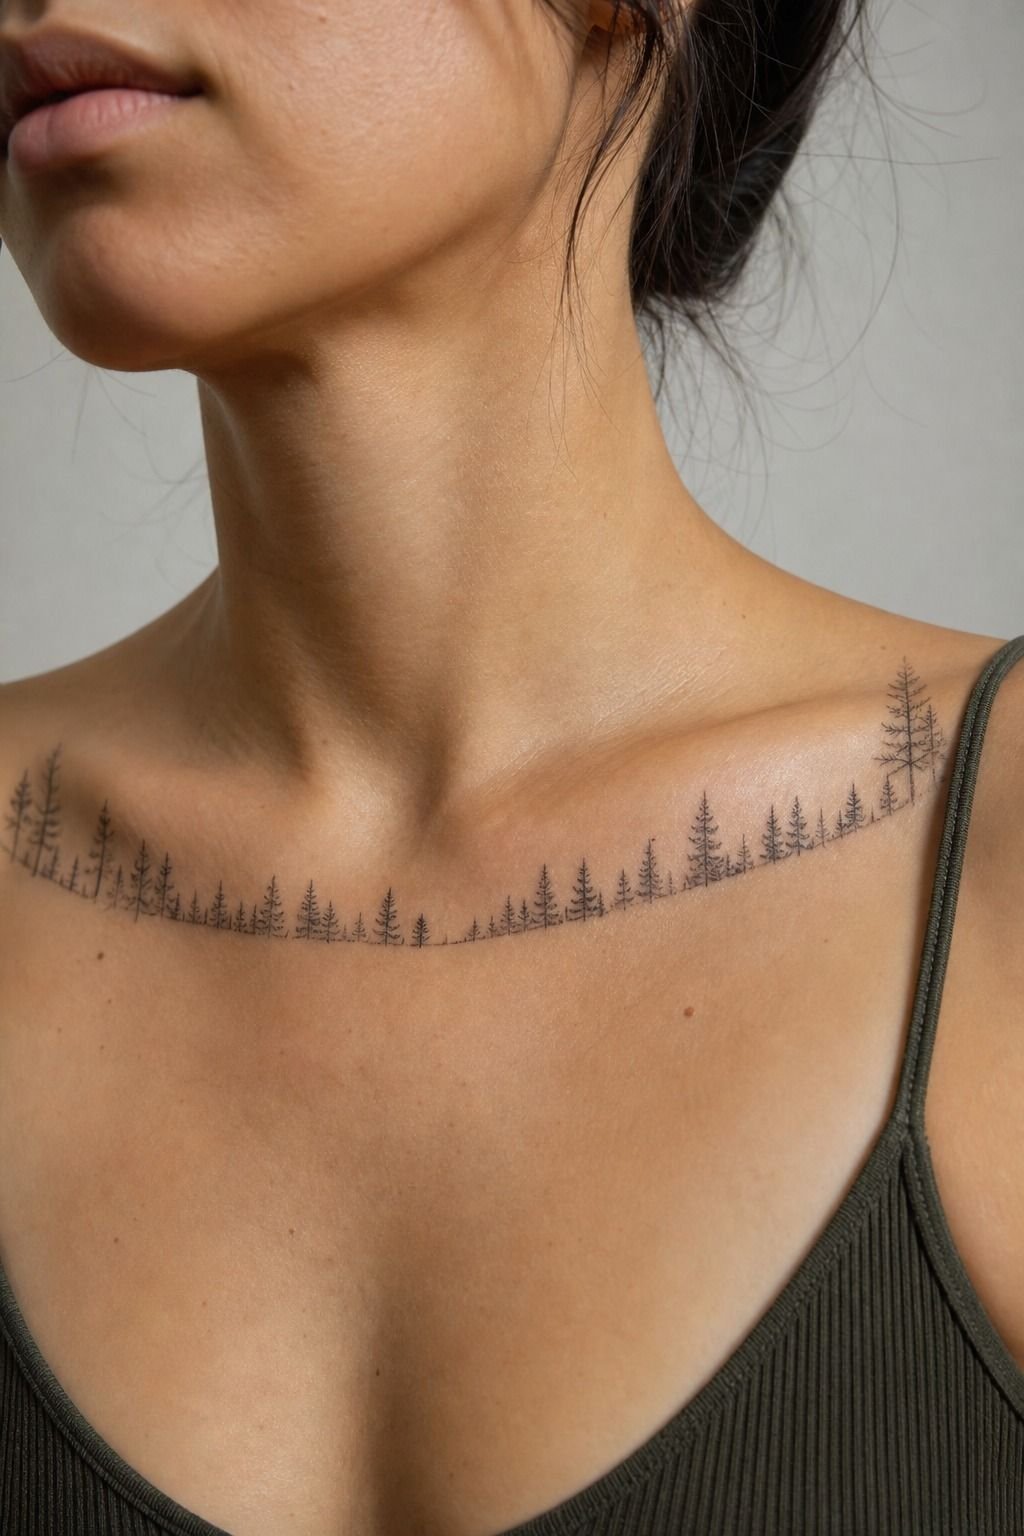
A collarbone tree line looks refined when it respects the bone instead of sitting like a ruler across your chest. Let the trees dip slightly at the center, then rise toward the shoulder ends so the line follows your anatomy.
You’ll want crispy single-needle linework with a few varied pine heights. One clean pull, not ten fuzzy ones. I’d avoid a perfectly straight mountain baseline here because collarbones move, and that hard geometry can look oddly stiff when you lift your arms.
This spot is visible, soft, and a little spicy near the bone. Keep the tattoo narrow, around 1/4 inch at its thickest points, but don’t make it thread-thin. Fine line still needs enough ink to survive.
A minimalist trees tattoo design ages cute on you when it stays simple. Your body is already doing half the visual work. Let it.
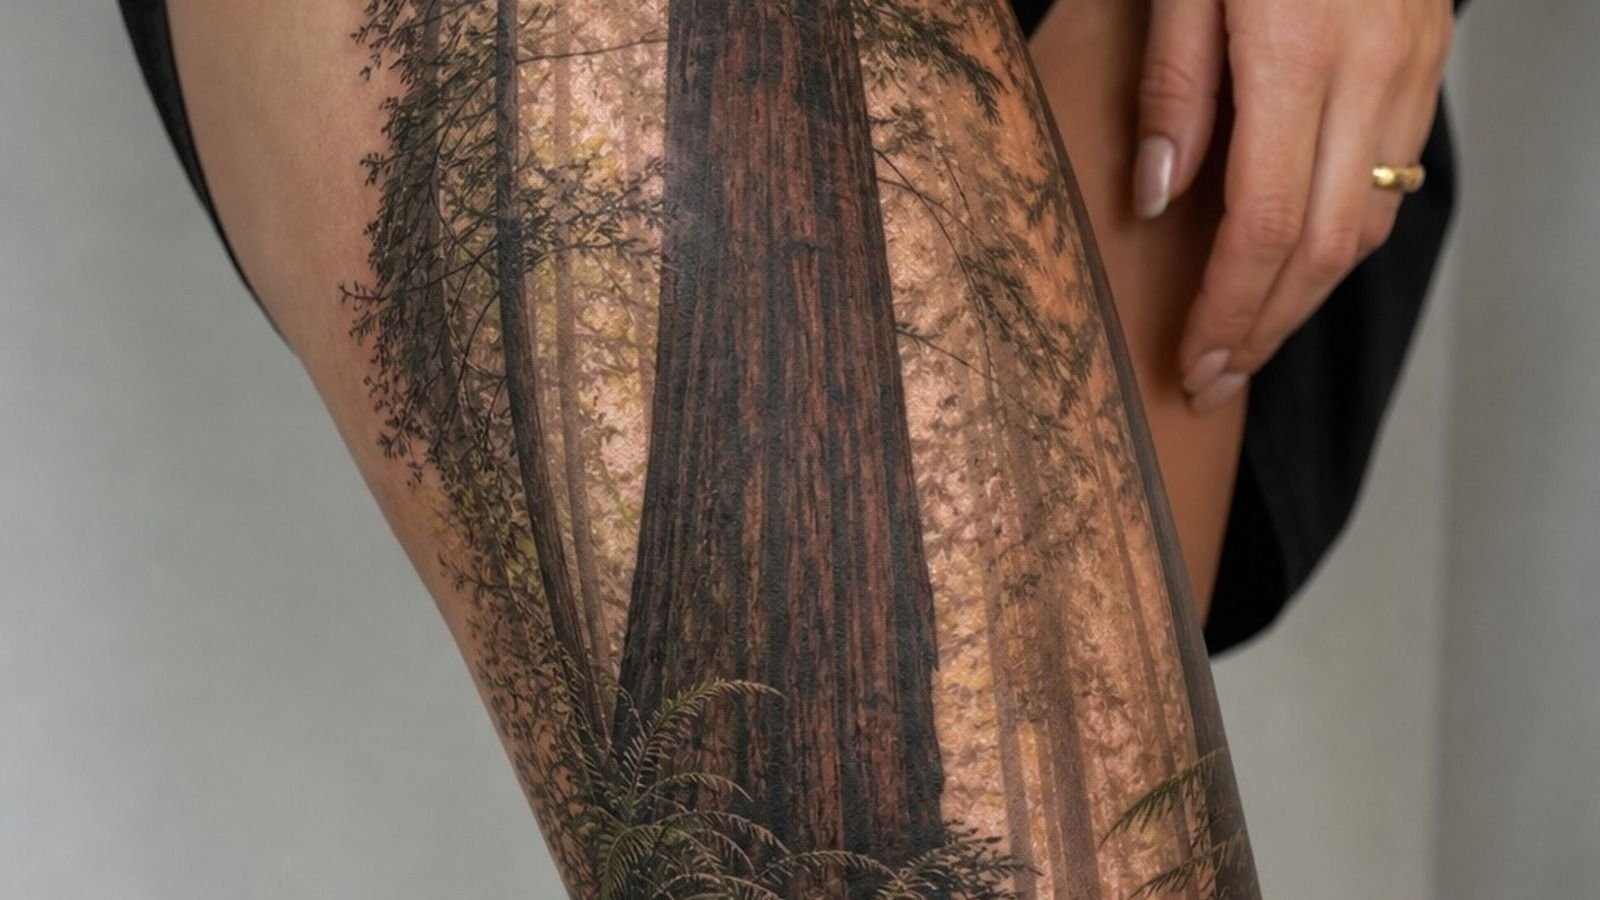
9Realistic Redwood Forest on the Thigh
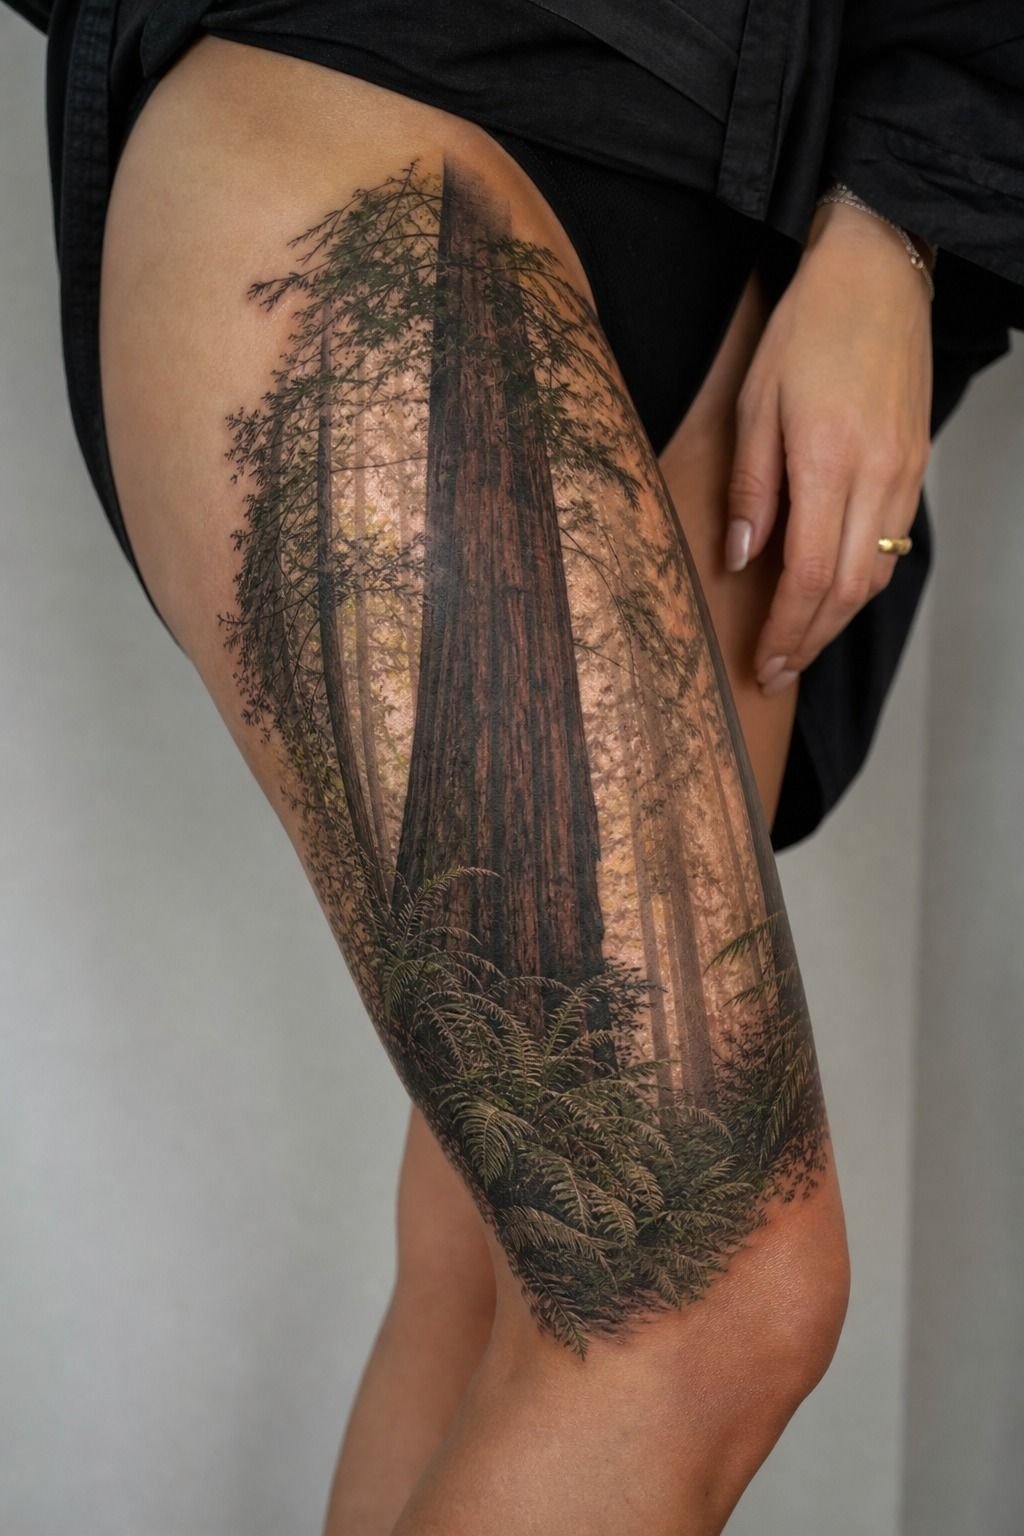
A realistic redwood forest belongs on a thigh if you want bark texture, scale, and that deep, tranquil vertical pull.
10Forest and Wildlife Scene on the Shoulder
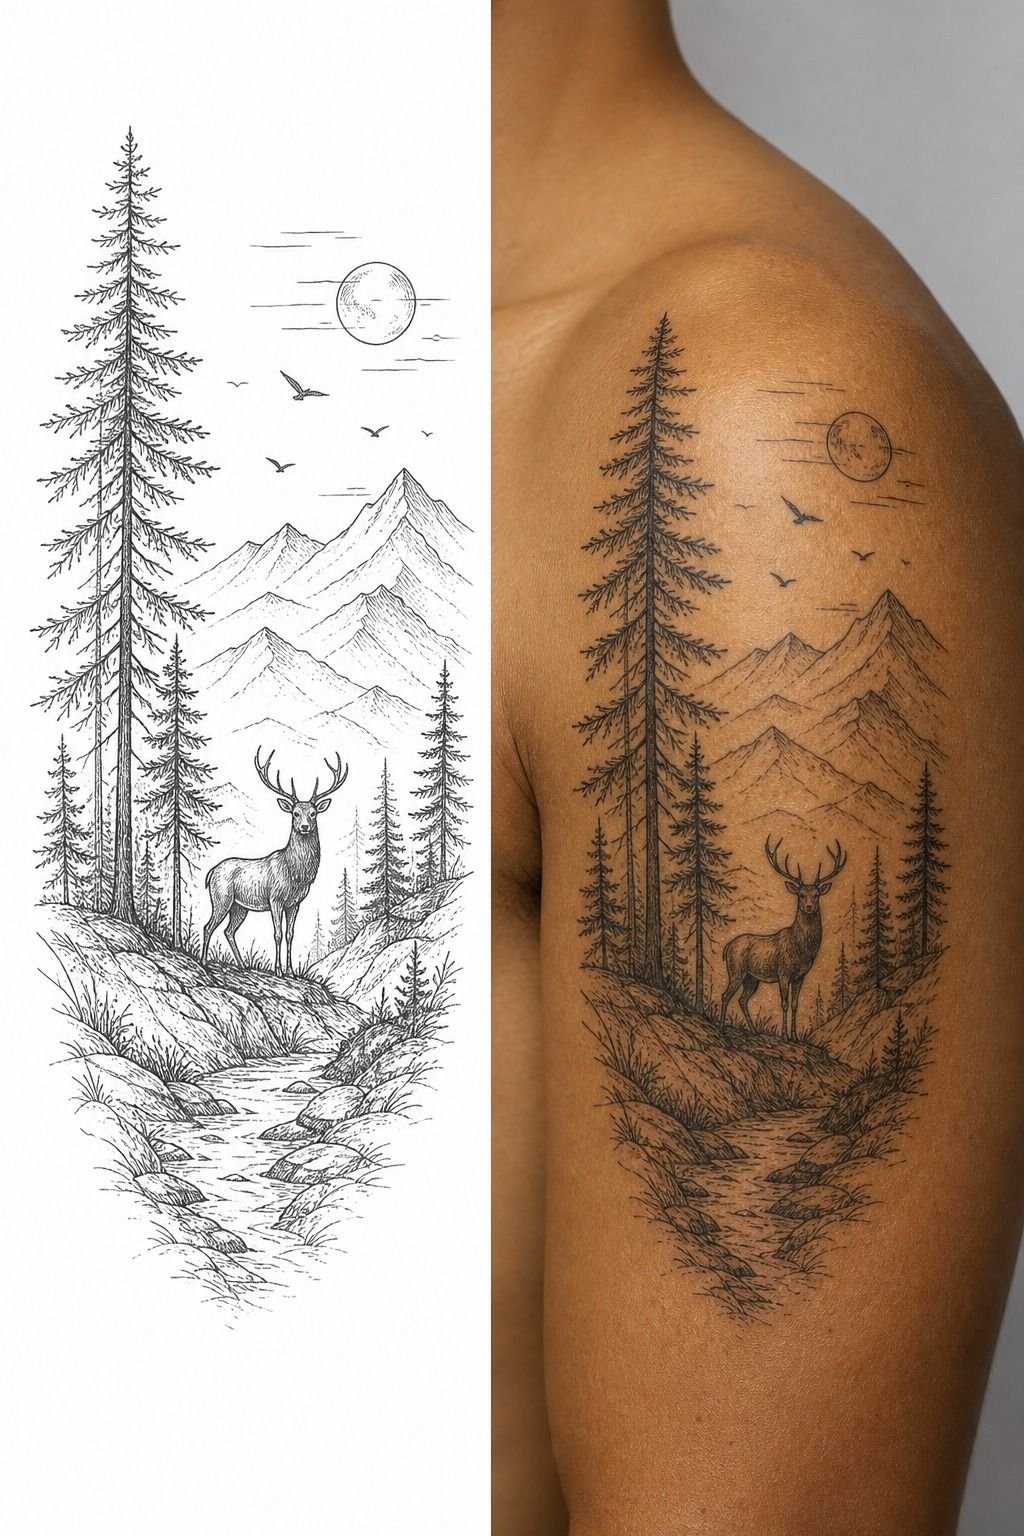
A shoulder forest scene can carry wildlife without turning into a wildlife collage. The stencil-to-healed comparison matters here because you should ask to see both versions of an artist’s work. Fresh tattoos are easy to photograph.
Healed work tells you whether their lines stay clean.
Put one animal in the scene, not four. A deer silhouette, a raven, or a small bear shape can sit against layered black pine trees and still read from across the room.
I’d choose the raven over a detailed deer face. Its shape is stronger, and it won’t need tiny facial features.
Your shoulder gives the design a natural rounded frame. Keep the tallest trees close to the outer shoulder cap, then fade the lower tree line into your upper arm. That way, the tattoo moves with you rather than looking stamped on.
For planning references, a tattoo design book can help you compare silhouettes before you commit. You’re looking for a solid shape first, details second.
11Japanese-Inspired Cedar Forest Tattoo
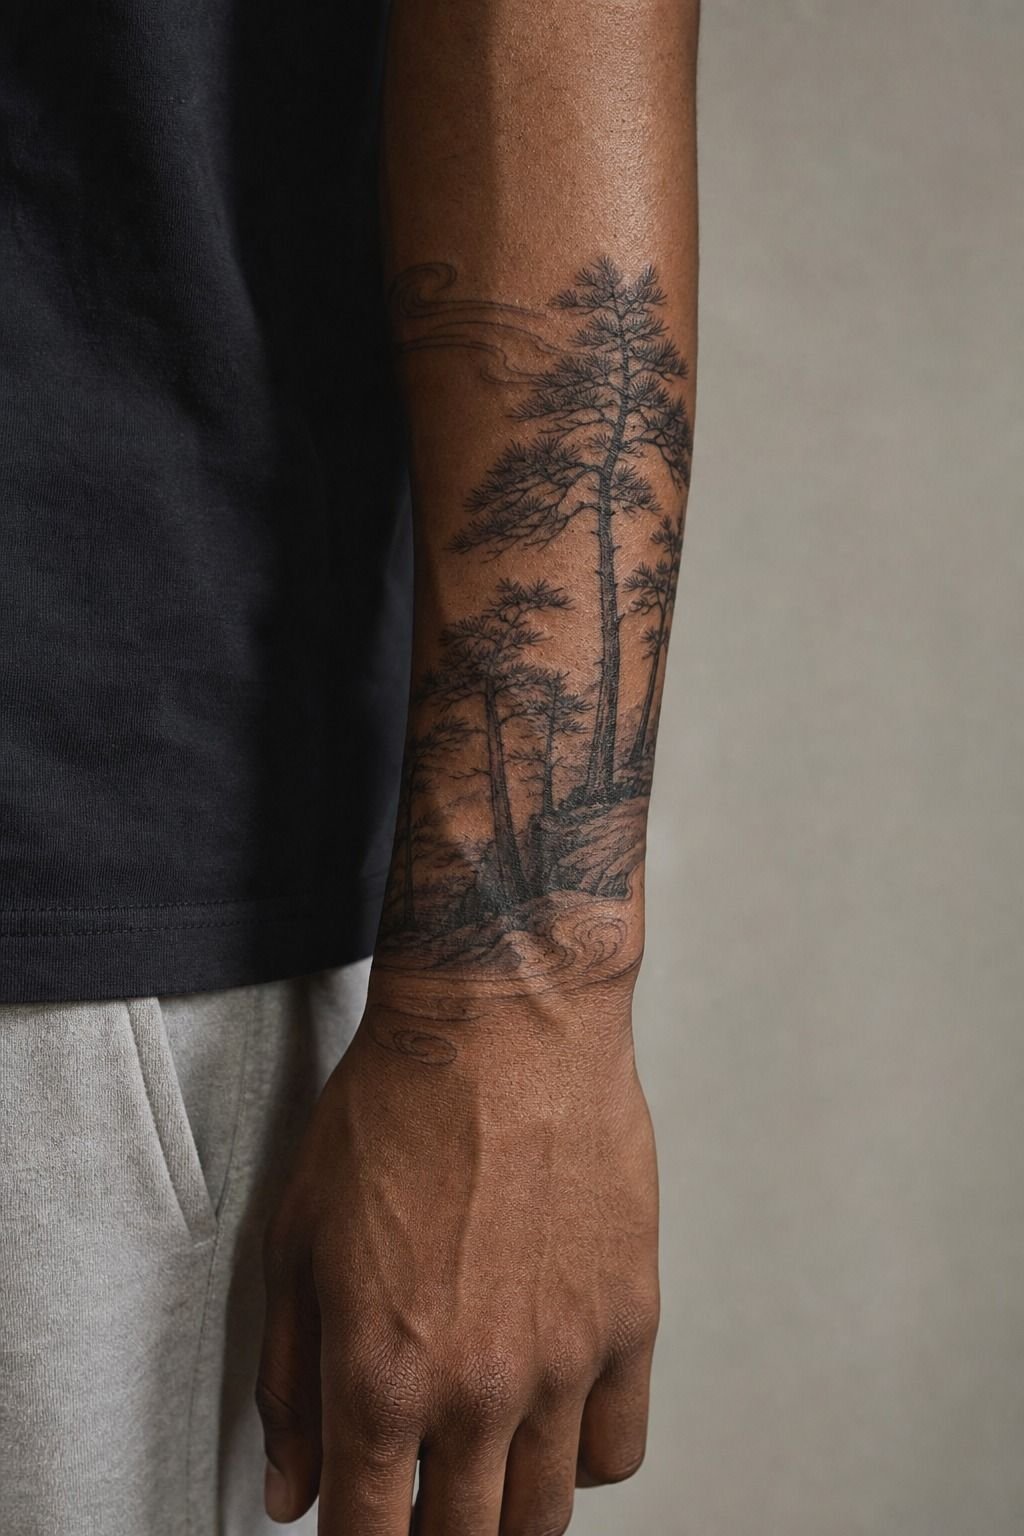
Japanese-inspired cedar forest work needs restraint and respect for the source style.
12Geometric Forest Landscape on the Outer Arm
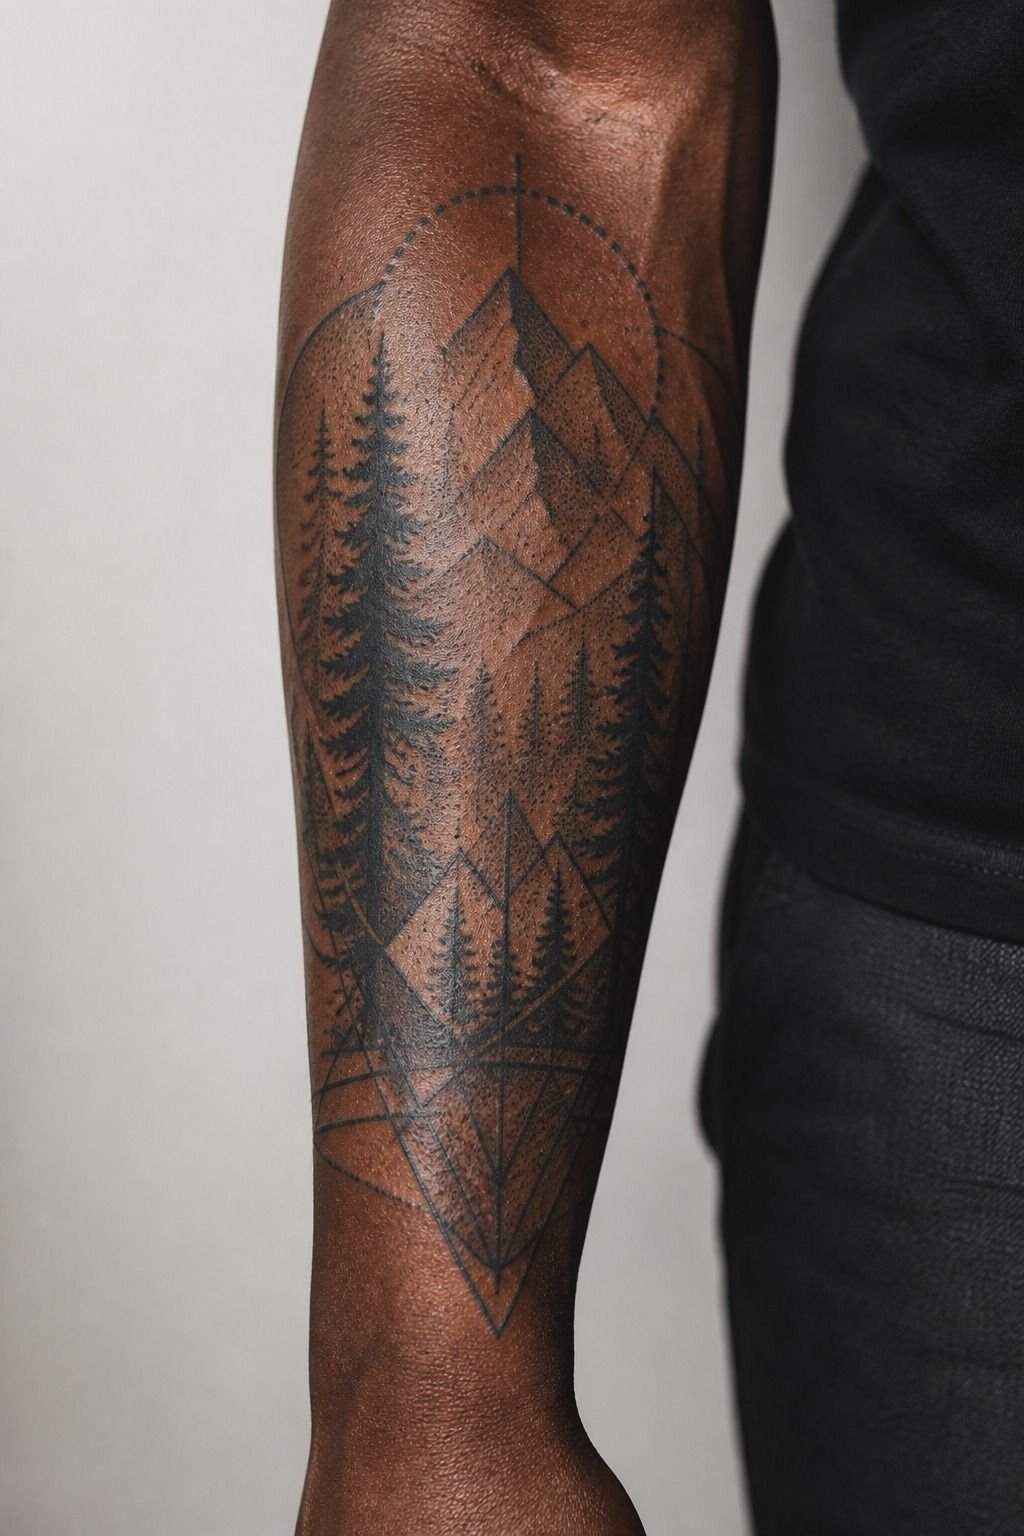
The Negative-Space Frame Method is my favorite way to make a geometric forest feel modern without making it cold. Build a circle, diamond, or angled frame first, then let the tree line break one edge. That interruption keeps the geometry from feeling like a logo.
On the outer arm, use solid black triangles, clean mountain planes, and a soft grey field behind them. You can add a small moon, but it should sit in open skin. If every shape is filled, the tattoo loses its calm rhythm.
Your artist should stencil this carefully from more than one angle. Geometric lines need to stay straight when your arm hangs naturally, not only when you twist for a mirror photo. This placement is low wear and generally easy to heal, which makes it a strong first larger tattoo.
Want a cleaner starting point for the visual language? Browse tato design tattoo ideas and save shapes, not exact finished pieces. References for vibe only.
13Fine Red Ink Forest Tattoo on the Wrist
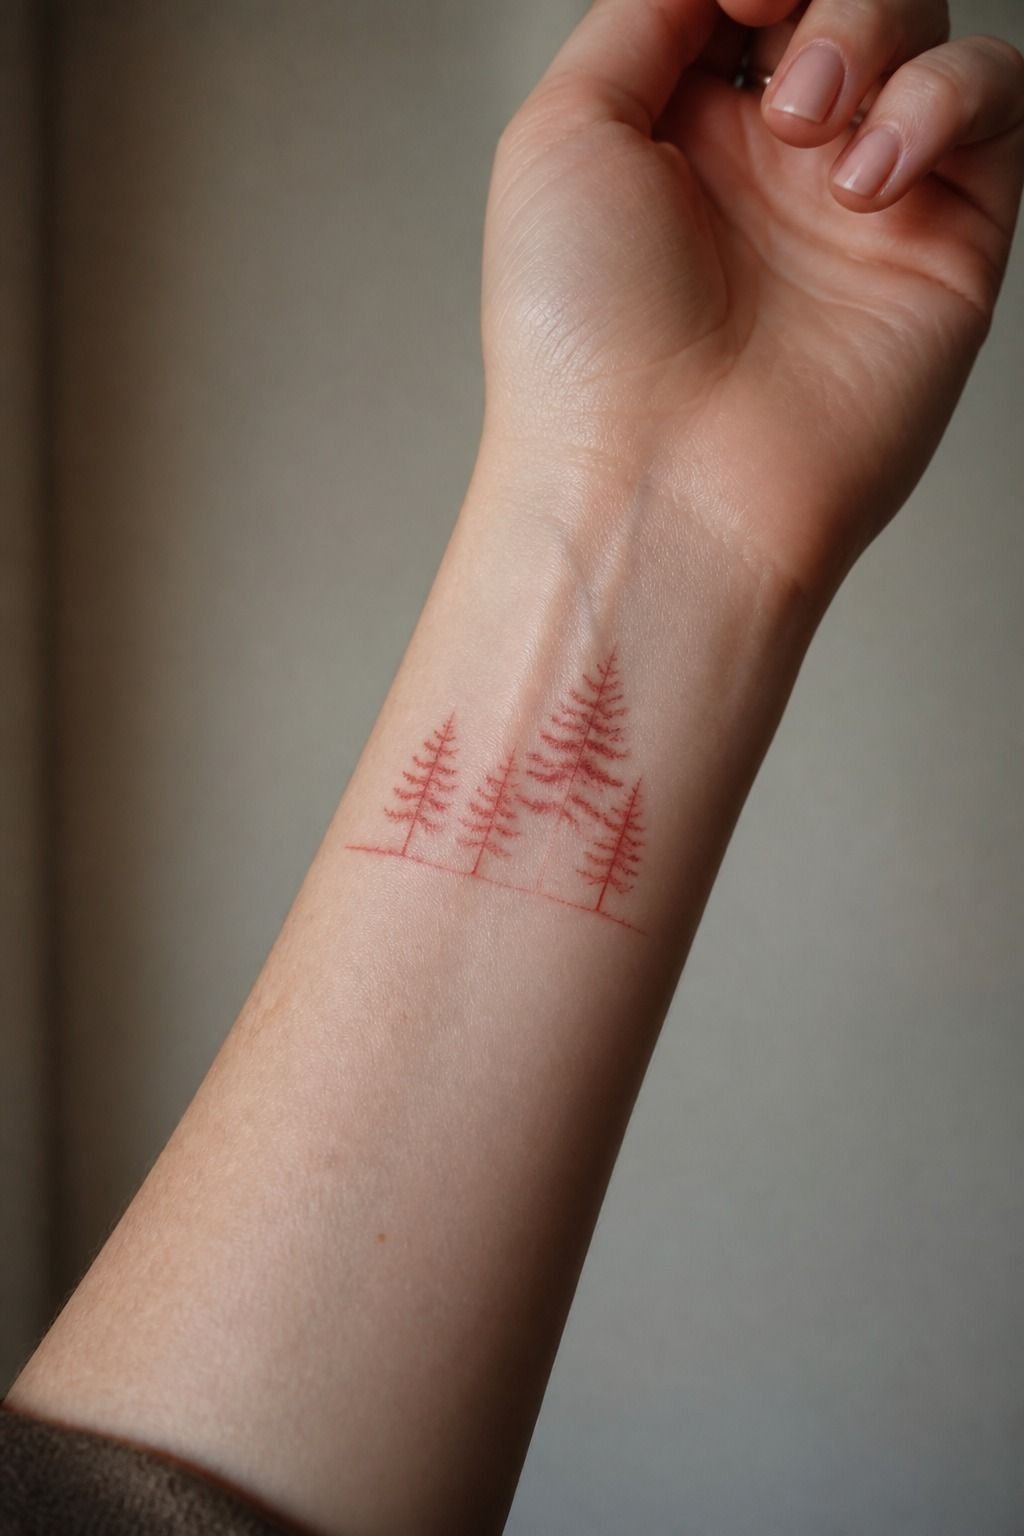
Fine red ink forest tattoos can look soft and distinctive on the wrist, but you need to treat them like a maintenance choice. Red linework can be gorgeous, especially against fair cool-pink skin, yet wrists take sun and friction every day.
Keep the forest to three or four red-ink pine silhouettes with a little empty skin between them. I’d use a richer brick-red or crimson tone over a pale pink-red. The darker pigment has more visual weight, and it won’t disappear the second you step outside.
This is not the place for a detailed landscape. That size on a wrist is gonna mush out, so bump it up the forearm if you want mountains, a moon, and trail texture. Your artist isn’t being difficult.
They’re trying to save you from a future touch-up.
And sunscreen matters once it’s healed. Sun is rude to every tattoo, but fine red lines can look especially washed out after a few hard summers.
The Forest Tattoo Decision I’d Make in the Chair
I’ve watched people get stuck choosing between “minimal” and “meaningful,” as if a tattoo can only be one. It doesn’t work like that. A few pines can carry a whole memory if the placement, scale, and contrast are right.
You don’t need coordinates, a quote, a compass, and a wolf tucked into every forest piece to prove it matters.
The mistake I see most is treating Pinterest like a tattoo menu. You save one rib tattoo, one thigh tattoo, one tiny wrist piece, then ask an artist to combine every favorite part.
That’s how you end up with a design that belongs nowhere on your body. Your references should tell the artist what you like: soft grey wash, tall pines, open negative space, a moon that feels quiet.
They shouldn’t become a tracing request.
I’d decide placement before style details. It’s boring advice, but it saves tattoos.
A large thigh forest can carry realistic redwoods and mist. A wrist forest can carry a clean silhouette.
Put the thigh design on the wrist and it’ll become soup. Put the wrist design on the thigh and it may feel lonely unless you build it out.
Think about wear, too. Hands, fingers, feet, elbows, knees, and inner biceps take more abuse. Outer arms, calves, thighs, and upper backs usually age nicer.
First few days, it’s an open wound, treat it like that. Gentle unscented soap.
A thin layer of ointment. No picking, pools, or gym friction.
Your artist’s healed portfolio should settle the final call. Fresh ink is bright. Healed ink is the receipt.
Forest Tattoo Costs, Timing, and Healing
Typical US shop minimums start around $50 to $100, while many artists charge about $100 to $250 per hour. Your final cost depends on your region, artist, detail level, and whether the design needs more than one session.
Surface healing usually takes about 2 to 3 weeks. Full settling can take 2 to 3 months, especially with dense shading. You’ll see a shiny “silver skin” stage after peeling.
Leave it alone. It heals nice when you don’t pick at it.
A Few Things Worth Answering
How much does a Forest Tattoo Design usually cost?
A forest tattoo design usually costs about $100 to $300 for a small-to-medium piece, though shop minimums often run $50 to $100 and hourly rates can reach $250. Placement and detail drive the price more than the subject itself.
– Small wrist pines – Forearm silhouette – Multi-session realism
Are Forest Tattoo Design a good idea for a first tattoo?
Yes, forest tattoo designs are a solid first tattoo if you choose a forgiving placement and keep the design readable. Simple black linework ages well on an outer arm, calf, or thigh, and you can make it personal without making it busy.
– Outer forearm flow – Calf-friendly scale – Clean negative space
How do I choose a tattoo artist for Forest Tattoo Design?
Choose an artist with healed photos that match the style you want. Crispy healed linework matters more than a pretty fresh post.
For realistic redwoods, look for realism. For fine pines, look for clean fine-line work.
See how artists develop references with this how to design your own tattoo guide.
How much do Forest Tattoo Design hurt?
Forest tattoos hurt according to placement, not tree count. Outer arms, thighs, and calves are usually more tolerable; ribs, feet, hands, and sternum are spicier because of bone, thin skin, or nerve density.
– Lines, sharper feeling – Shading, dull burn – Color packing, hottest part
How long does a Forest Tattoo Design take to heal?
Most forest tattoos surface-heal in about 2 to 3 weeks and settle fully in 2 to 3 months. Gentle aftercare protects the result. Wash with unscented soap, use a thin moisturizer layer, and avoid pools and direct sun.
What’s the best placement for Forest Tattoo Design?
The outer forearm is the best all-around placement if you want visibility, easy flow, and reliable aging. The thigh is better for detail because it gives your artist enough skin for larger trunks, mist, and realistic depth.
Where I’d Start First
If I had to pick one, I’d start with the pine forest silhouette across the forearm. It gives every tree enough air, so the design still reads after years of wear. Pin that forest tattoo design for later and compare it with these snake tattoo design ideas.