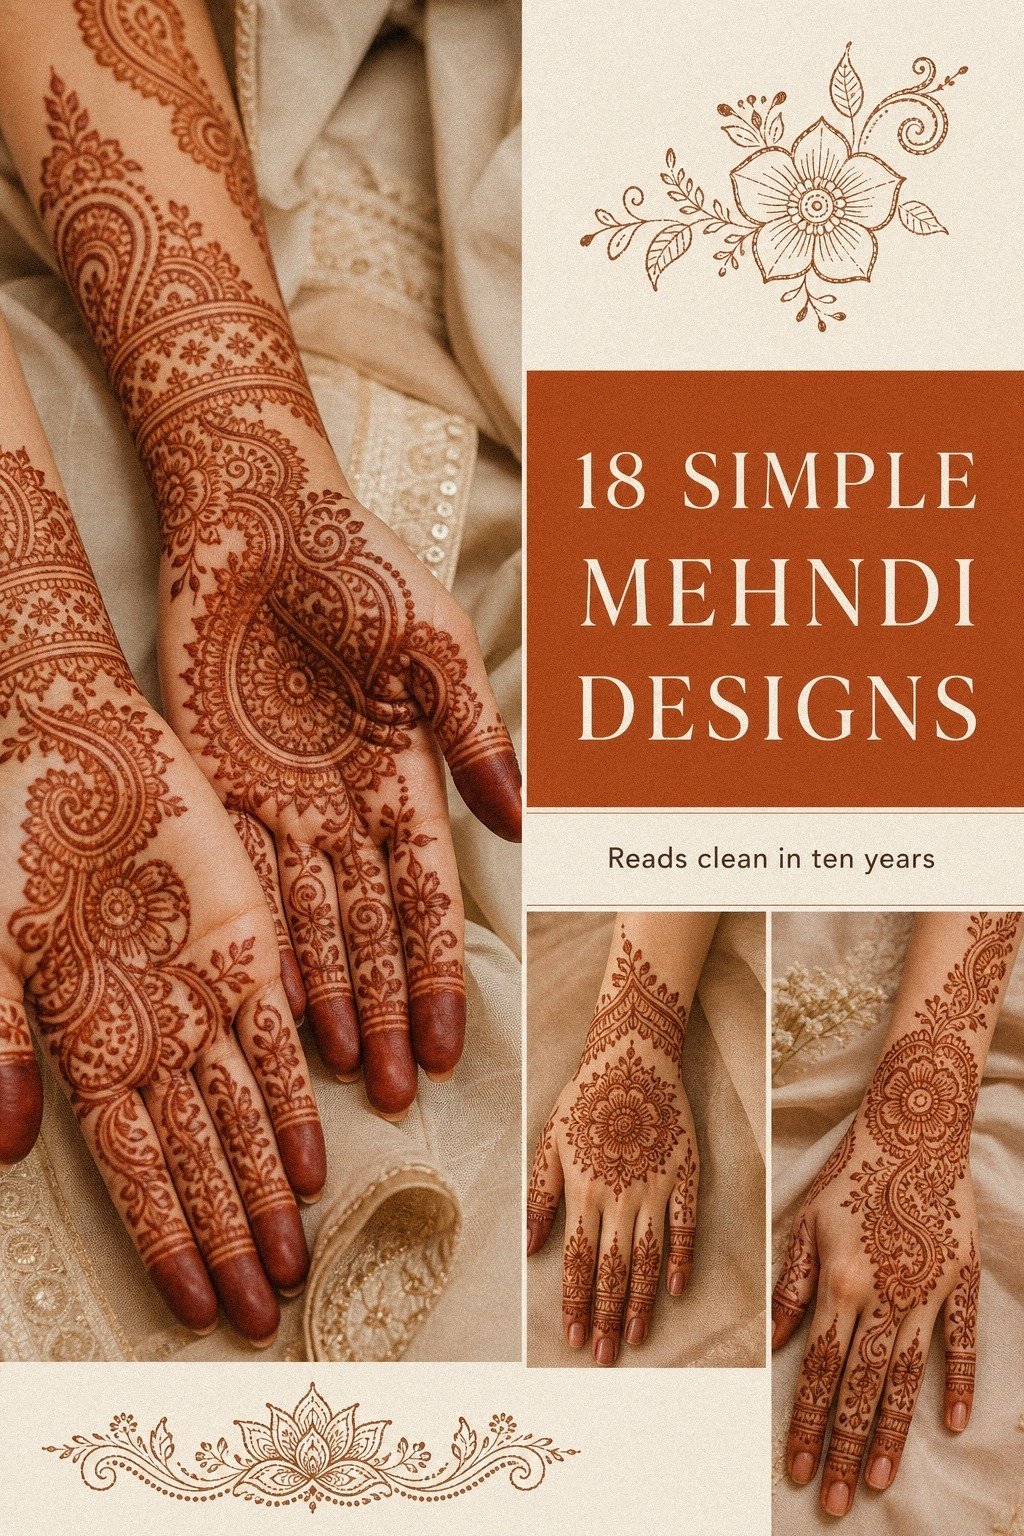
Simple mehndi designs front hand easy only look easy when the layout is doing the heavy lifting. I see people crowd the palm, rush the fingers, then wonder why the whole thing turns to visual soup before it even stains. If you want clean flow, solid value, and a result that’s actually worth your time, you need order first. I’m going step by step so your lines stay crisp, your negative space breathes, and the finished hand still reads cute in a photo.
Don’t overthink: Palm Mandala, But Keep It Light.
- Start With A Clean Front Hand Layout
- Palm Mandala, But Keep It Light
- Place Tiny Dots Around Finger Joints
- Why Does Negative Space Matter So Much?
- Plan A Minimal Arabic Finger Trail
- Choose Easy Florals Near The Thumb
- Draw Fine Lines Across Each Finger
- The Lotus Anchor Move
- Frame Fingertips With Light Henna Caps
- Build A Simple Wrist Bracelet Band
- Paisley Bridge Below The Knuckles
- Use Dotwork Around The Palm Center
- Should Finger Lines Echo The Palm?
- Leave Breathing Space Between Henna Strokes
- Check Line Thickness Before Drying
- Fix Smudges With A Cotton Tip
- Slow Stain, Strong Finish
- Photograph The Front Hand In Natural Light
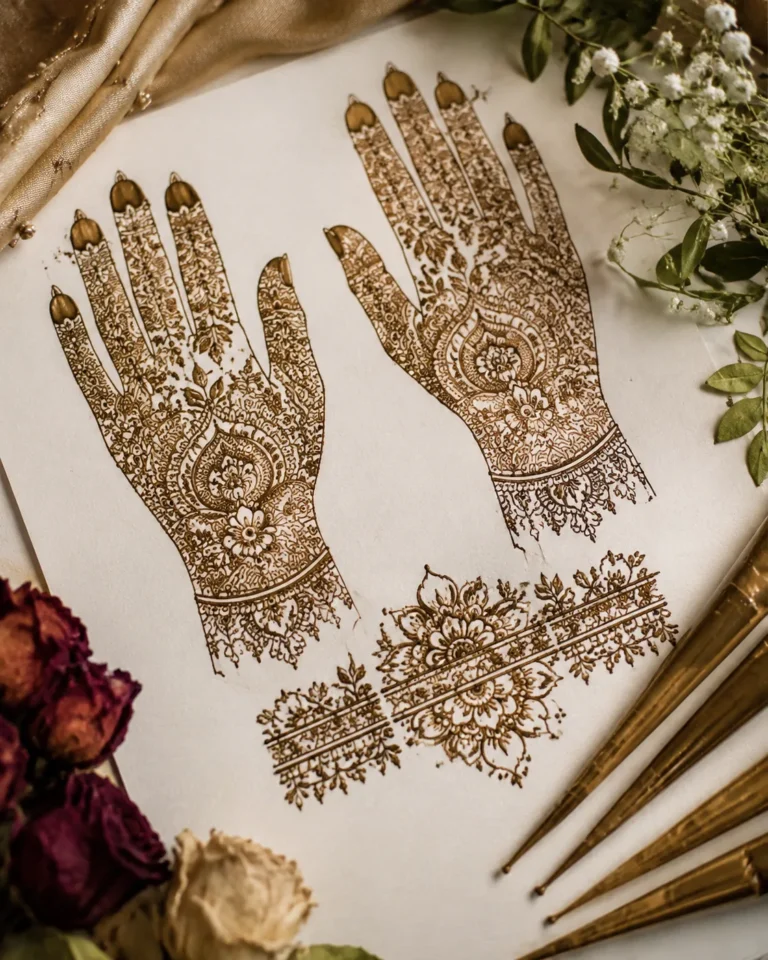
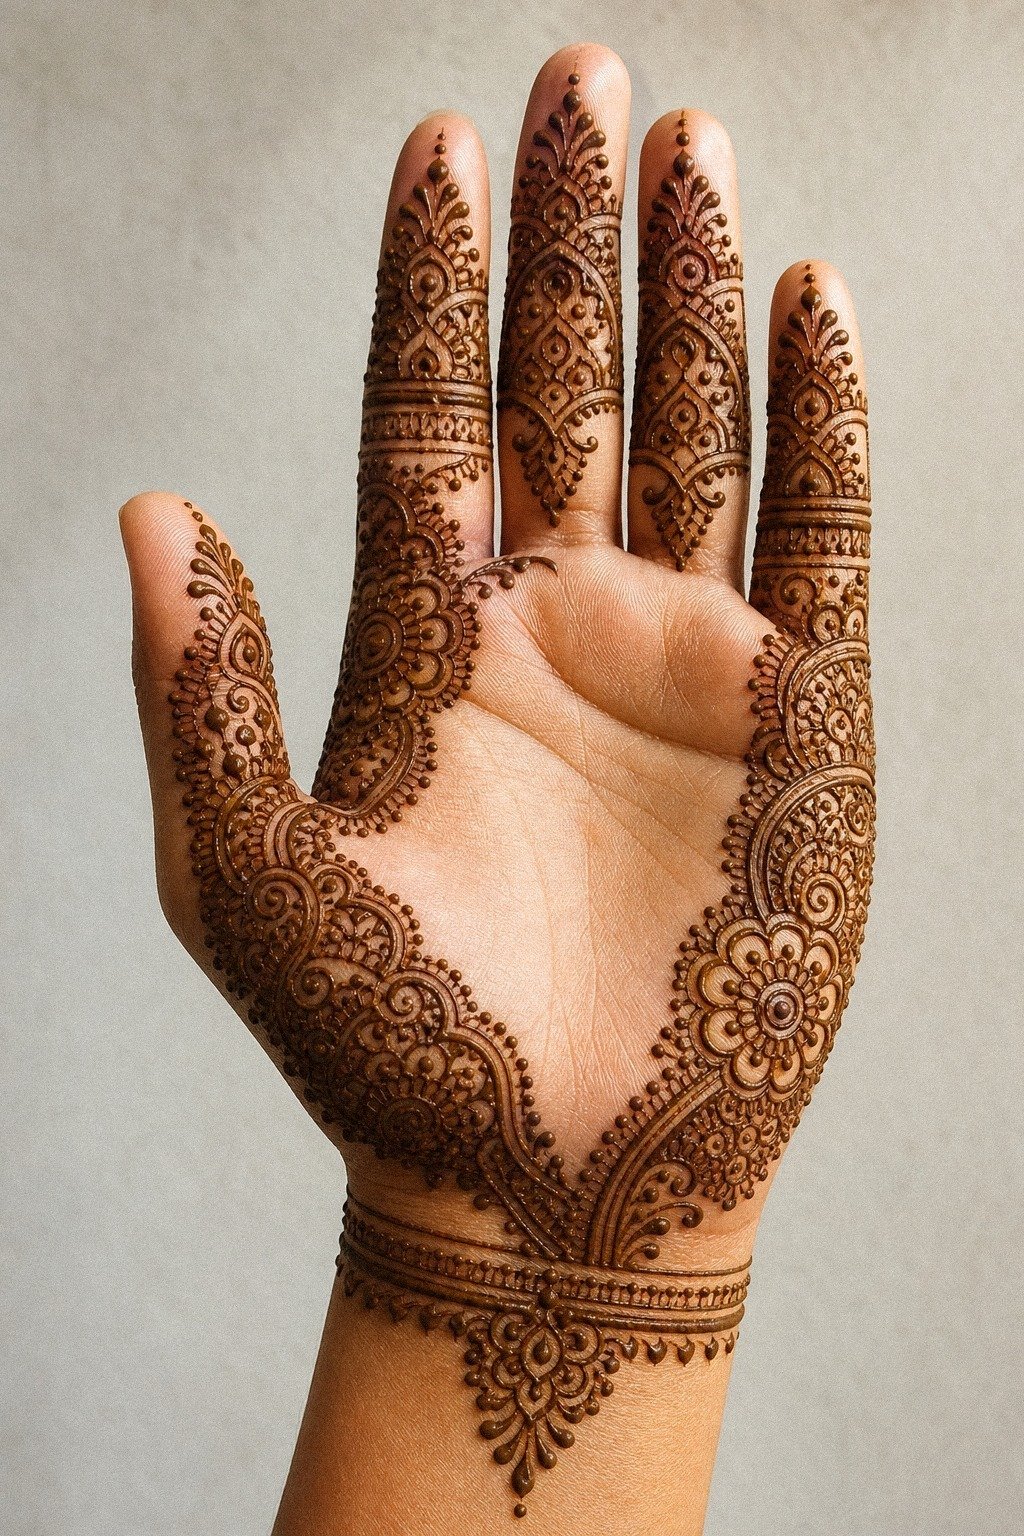
1Start With A Clean Front Hand Layout
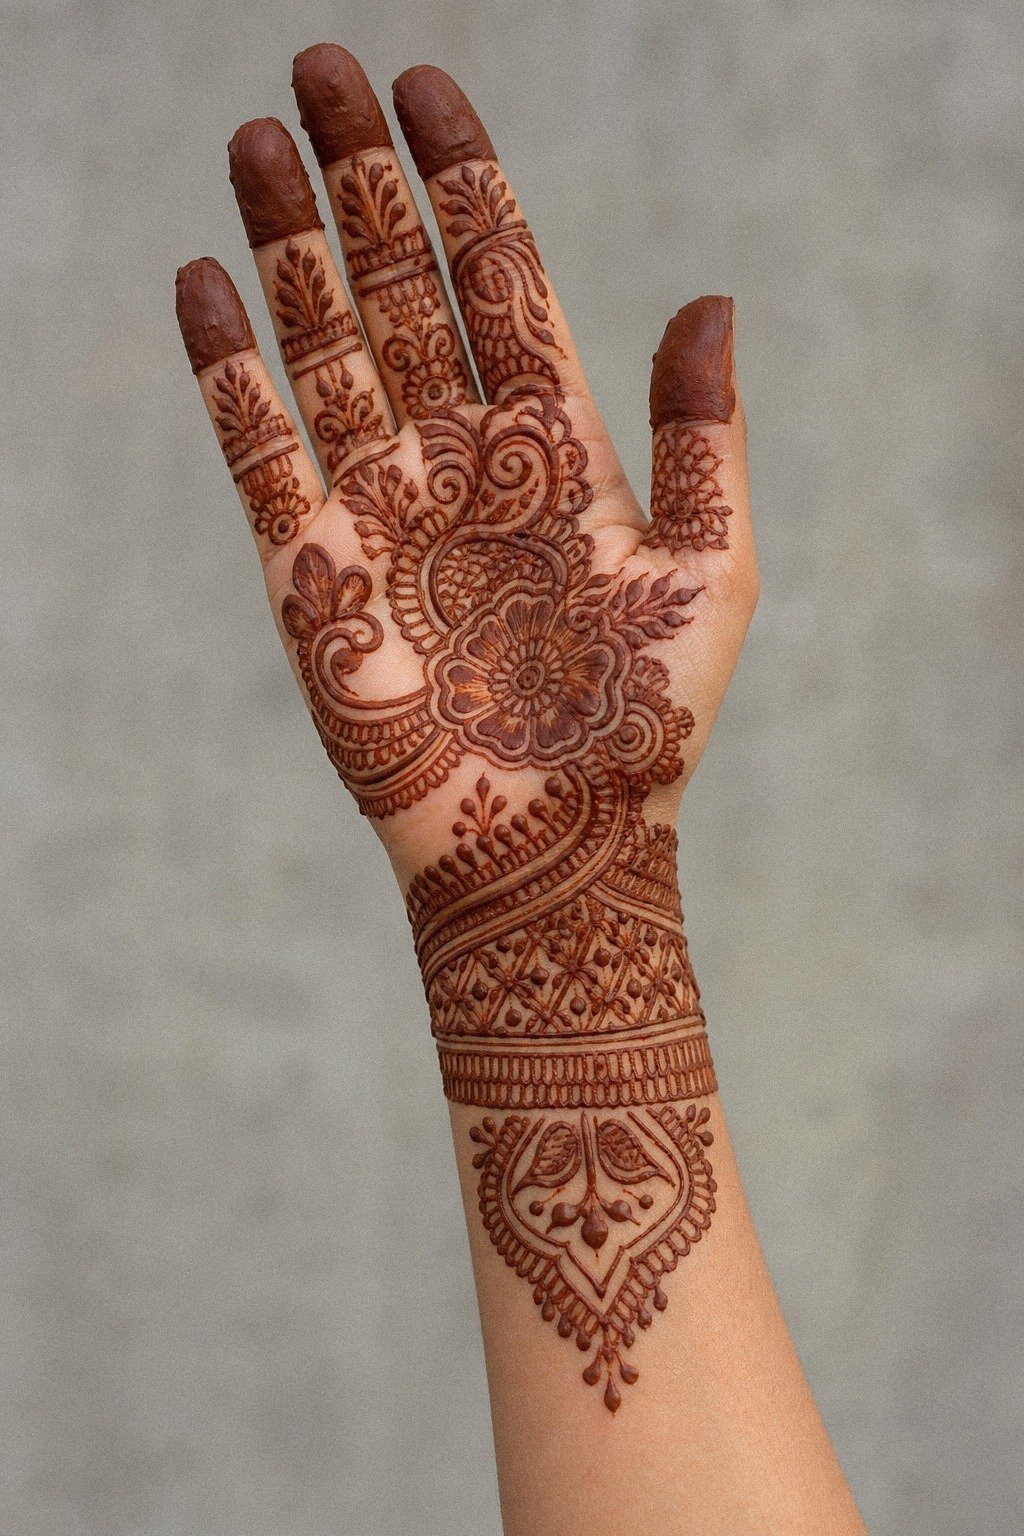
Start by deciding where your eye should land first. On a fair cool-toned front hand, a reddish-brown henna cone will show every wobble, so I like to mark one center path before I draw anything decorative. You want a palm focal point, one finger direction, and a clean stop near the wrist.
Then lightly ghost the route with tiny air-drawn motions before the paste touches skin. I do this with a cellophane-wrapped practice cone in my hand so I can check spacing without committing. If the design is meant to test-drive a future tattoo, keep the main flow inside a 2 to 3 inch zone.
That size usually gives you the best value because it stays readable on skin instead of getting muddy fast. A front hand placement map saves you from wasting effort on details nobody will see clearly later. For more front-facing pattern references, scroll front hand mehndi designs.
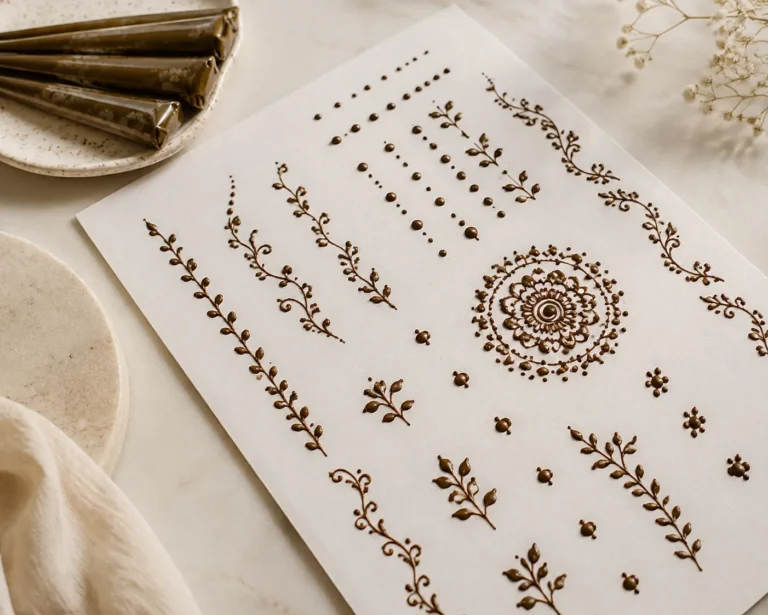
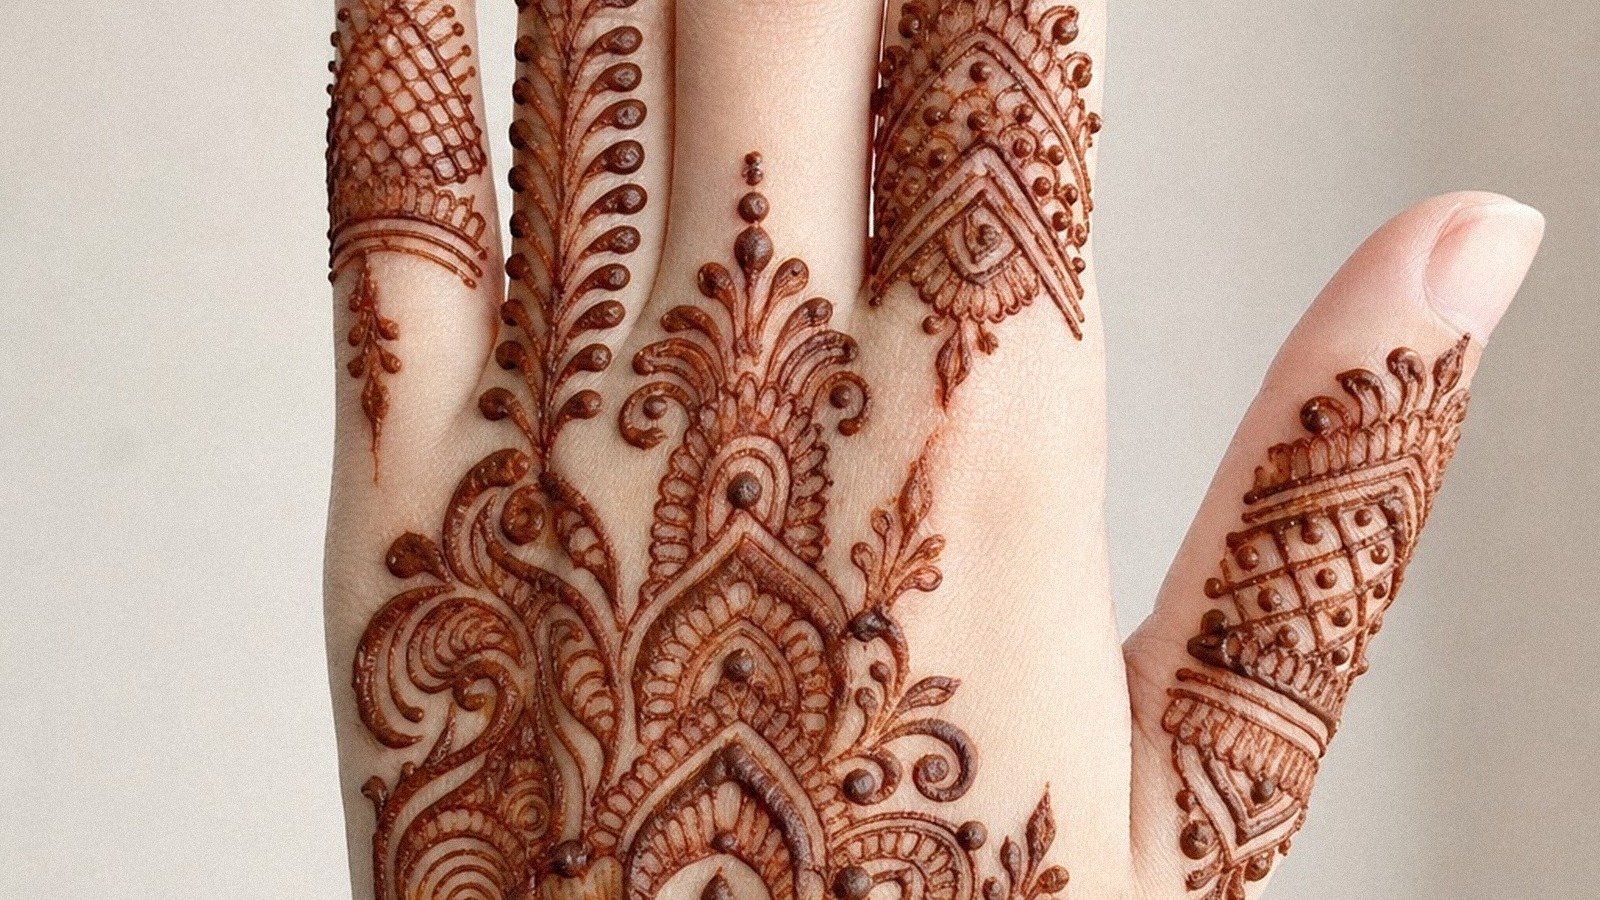
2Palm Mandala, But Keep It Light
Choose a palm mandala with six or eight petals, not a tiny overworked bloom.
3Place Tiny Dots Around Finger Joints
Finger joints can make a simple design look finished fast, but only if the dots stay tiny and evenly paced. On medium olive skin, henna dot clusters look soft when they’re spaced like jewelry, not stacked like gravel.
Use pressure from the whole hand, not just your fingertips. Touch down, lift clean, repeat.
If one dot grows bigger, don’t chase it with three more. That kind of panicked filler is cheap visually, and it lowers the whole design’s value.
I thin the rhythm out as it moves toward the knuckles because the anatomy is already busy. A clean dot cadence keeps the linework elegant and keeps your future tattoo reference from reading fussy. You can compare cleaner finger pacing in 15 stylish mehndi designs for front hand that flow right.
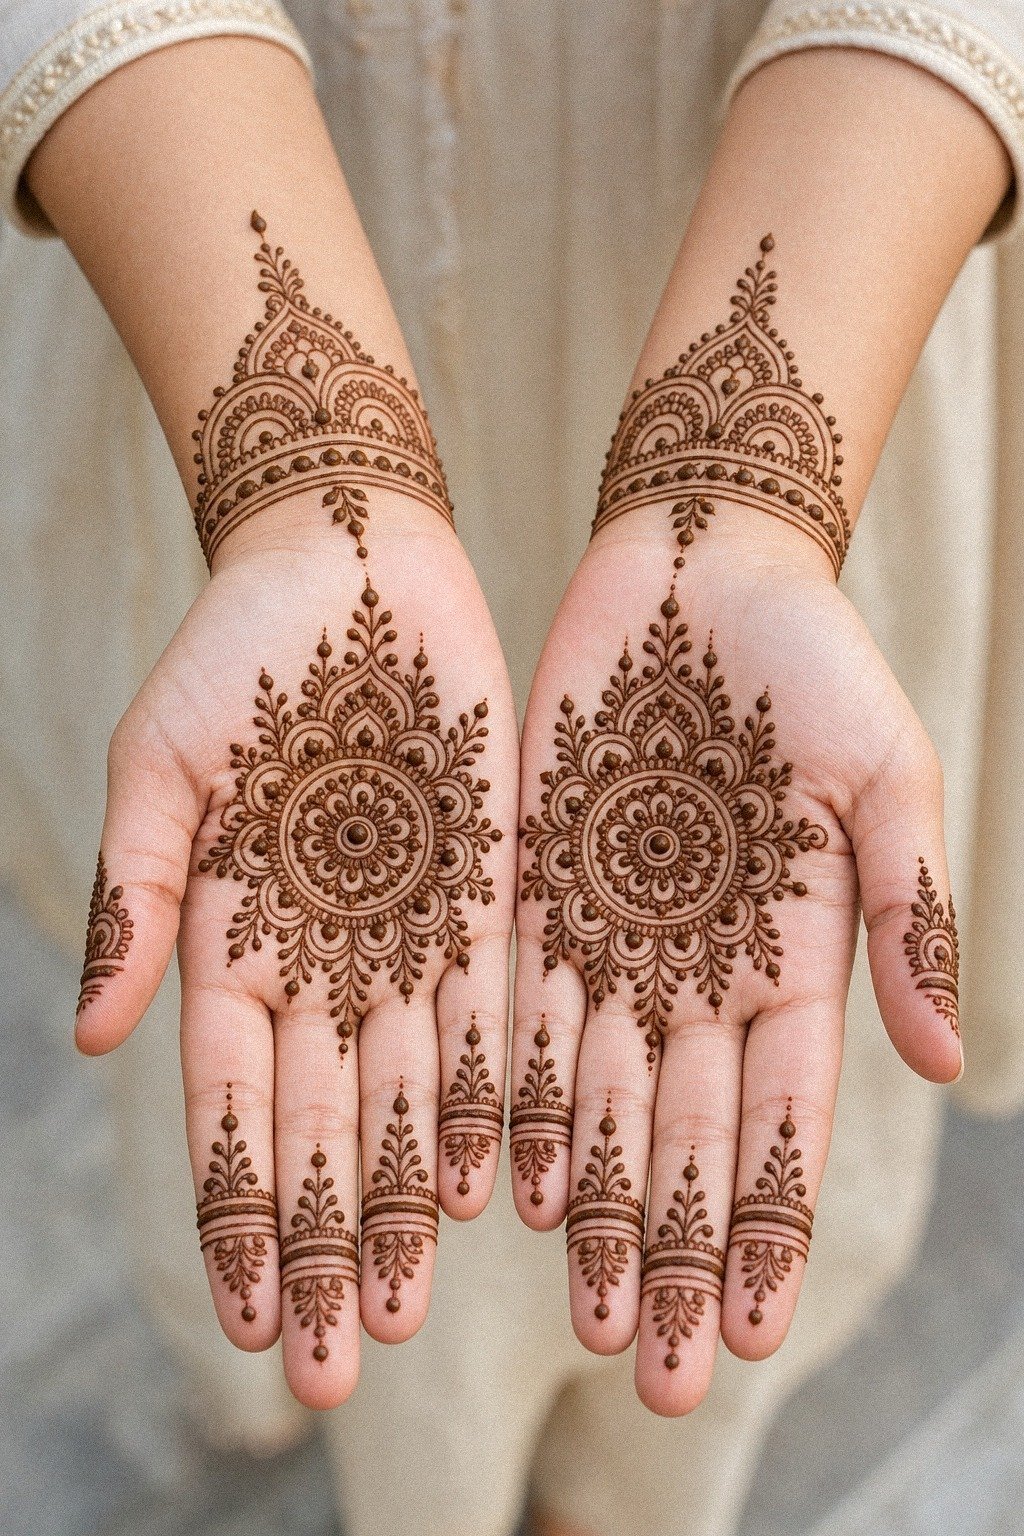
4Why Does Negative Space Matter So Much?
Negative space is what makes a front palm design breathe.
5Plan A Minimal Arabic Finger Trail
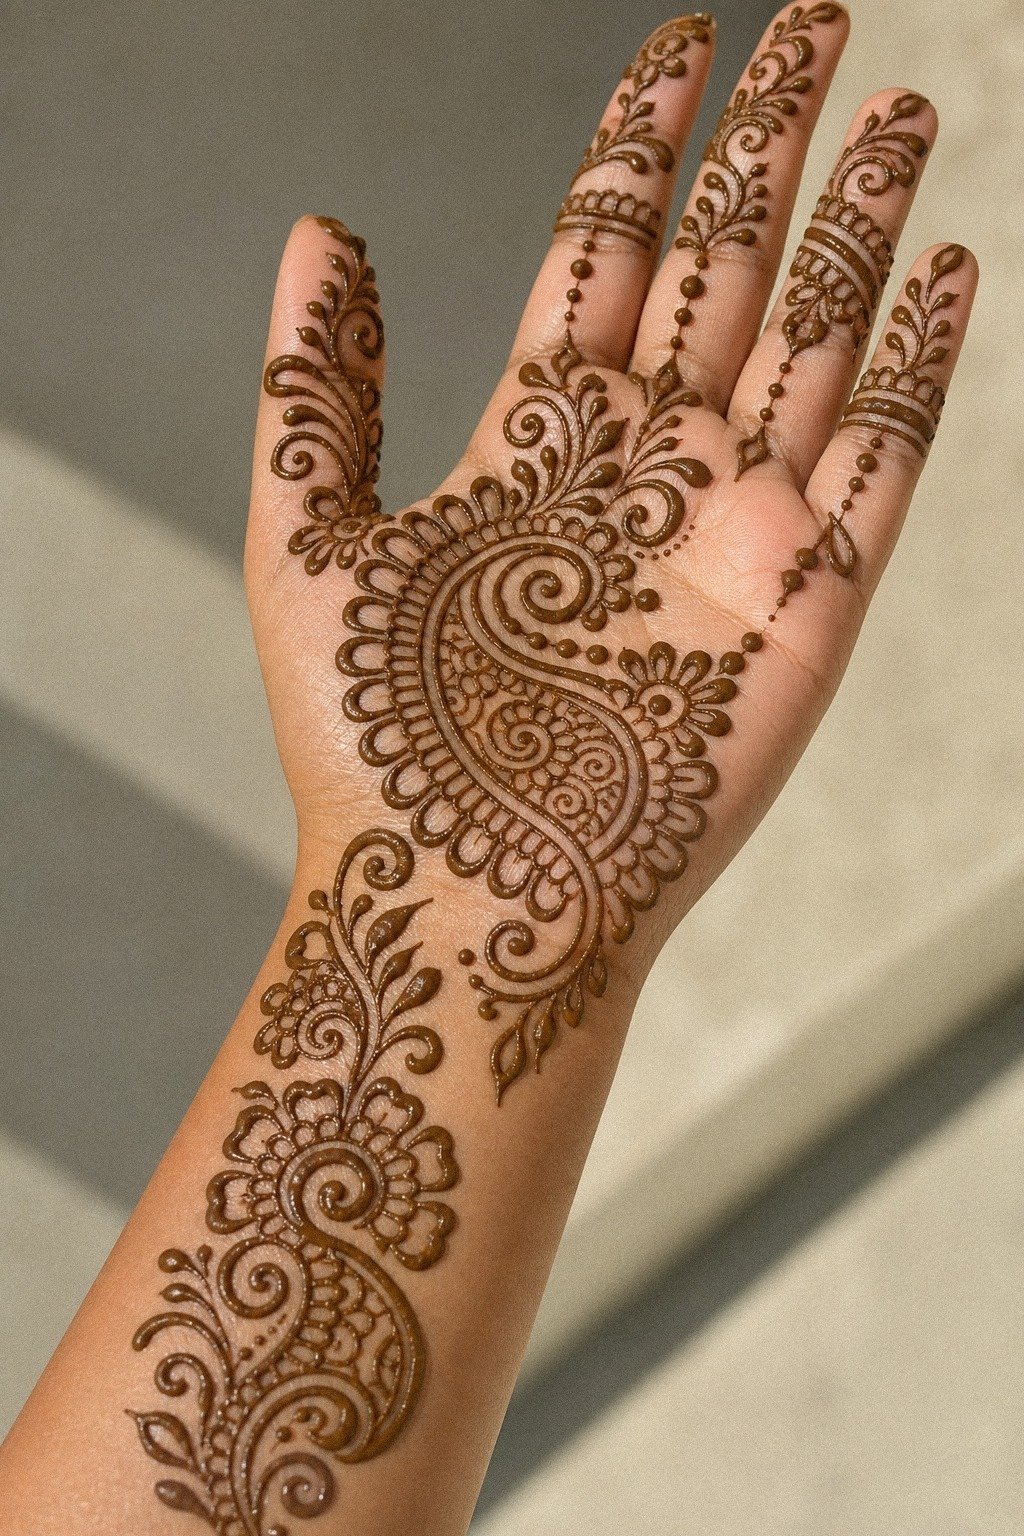
Arabic-style movement looks best when it travels, not when it clumps. So instead of covering the full finger, let one slim vine trail move from the side of the index or ring finger into the palm.
Keep the trail asymmetric. One leaf, one curve, one small paisley, then space. I like using a rolled mylar practice sheet first because it shows whether your trail pulls left or right before skin gets involved.
Why force symmetry if the soft drift is the whole charm? That looser path feels current, keeps the front hand from looking boxed in, and gives you solid visual payoff for very little effort or budget. You can see good flow cues in 17 latest simple mehndi designs that transcend trends.
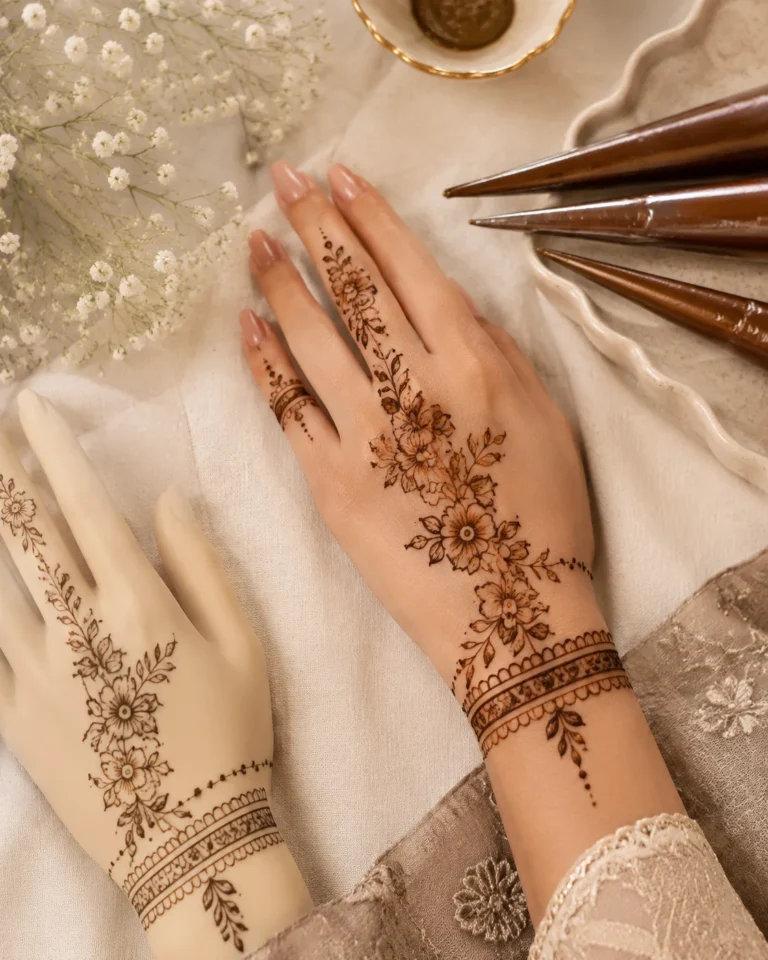
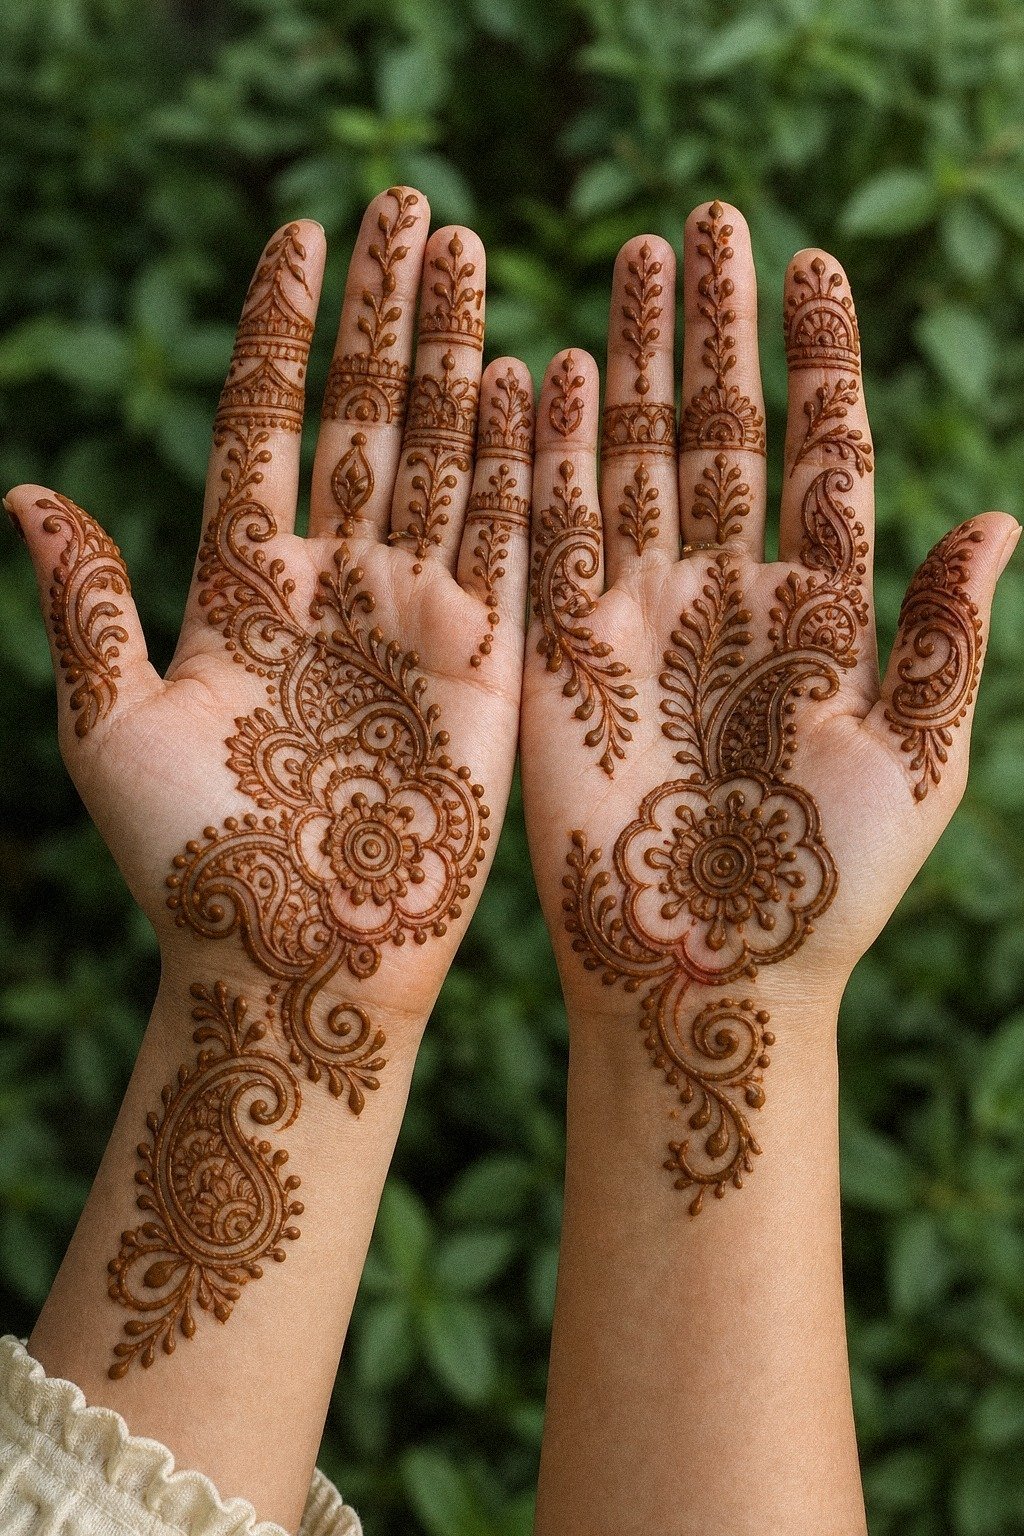
6Choose Easy Florals Near The Thumb
The thumb mound is a sweet spot for florals because it gives you curve without a ton of crowding.
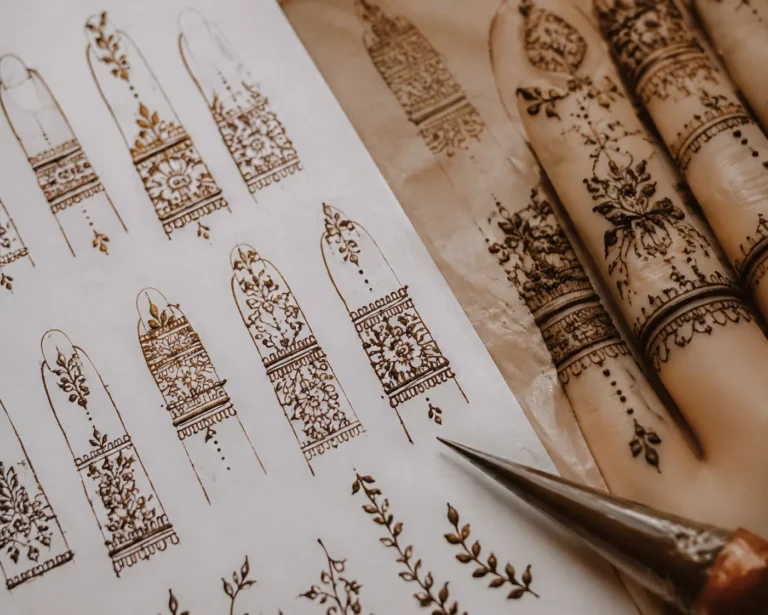
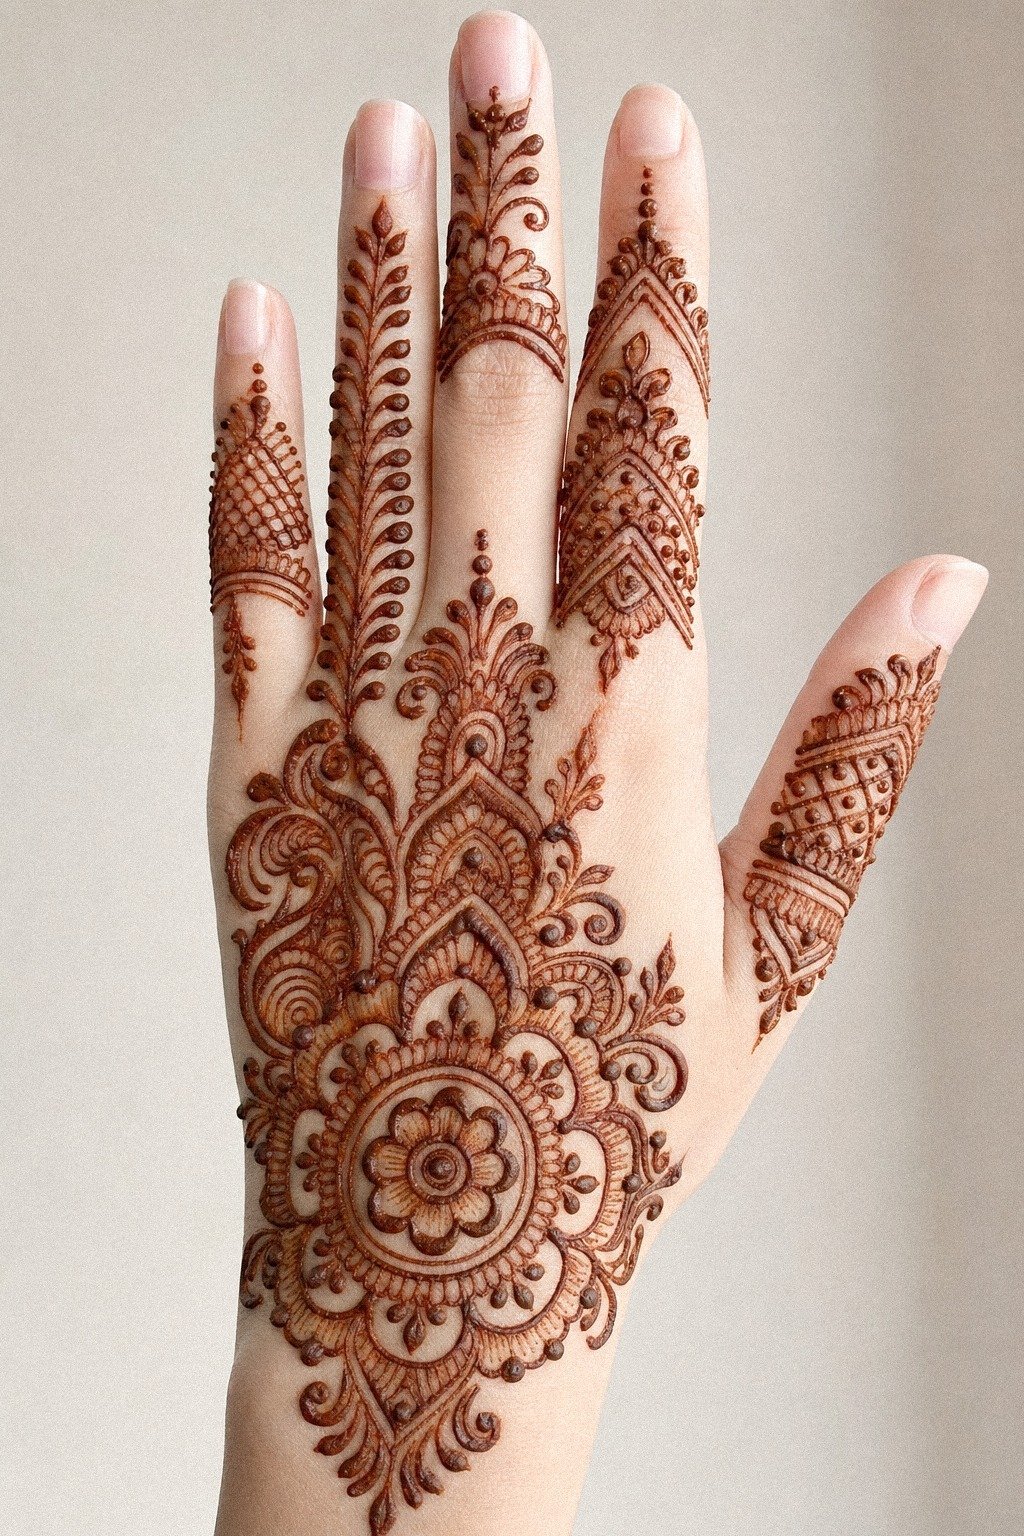
7Draw Fine Lines Across Each Finger

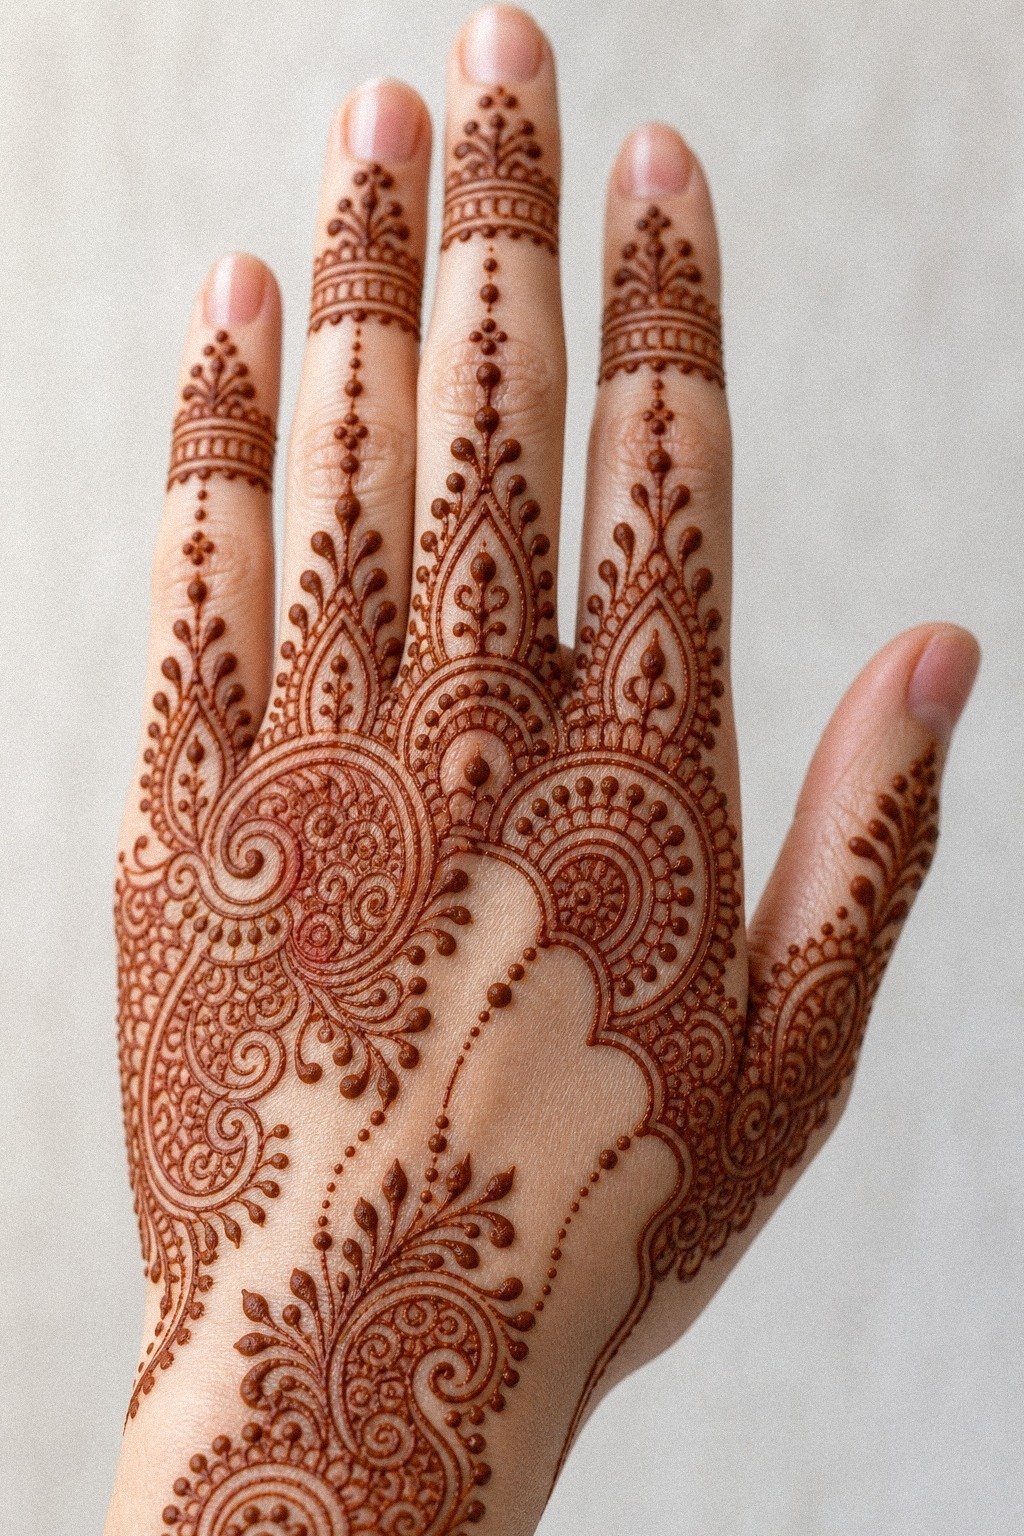
Finger bands need confidence more than detail. On fair cool-pink skin, single-pass henna lines look clean when each stripe has one job: guide the eye up the finger and echo the palm motif.
I draw the longest line first, usually on the middle finger, then mirror the rhythm on the others without making them identical. A practice cone with a trimmed narrow tip helps you feel that pressure change.
Don’t try to fix a shaky line by tracing it again. That’s how you get fuzzy edges and pasted-over thickness instead of crispy lines, and that kind of repair job never feels worth it. For different finger pattern pacing, look at back hand mehndi designs.
8The Lotus Anchor Move
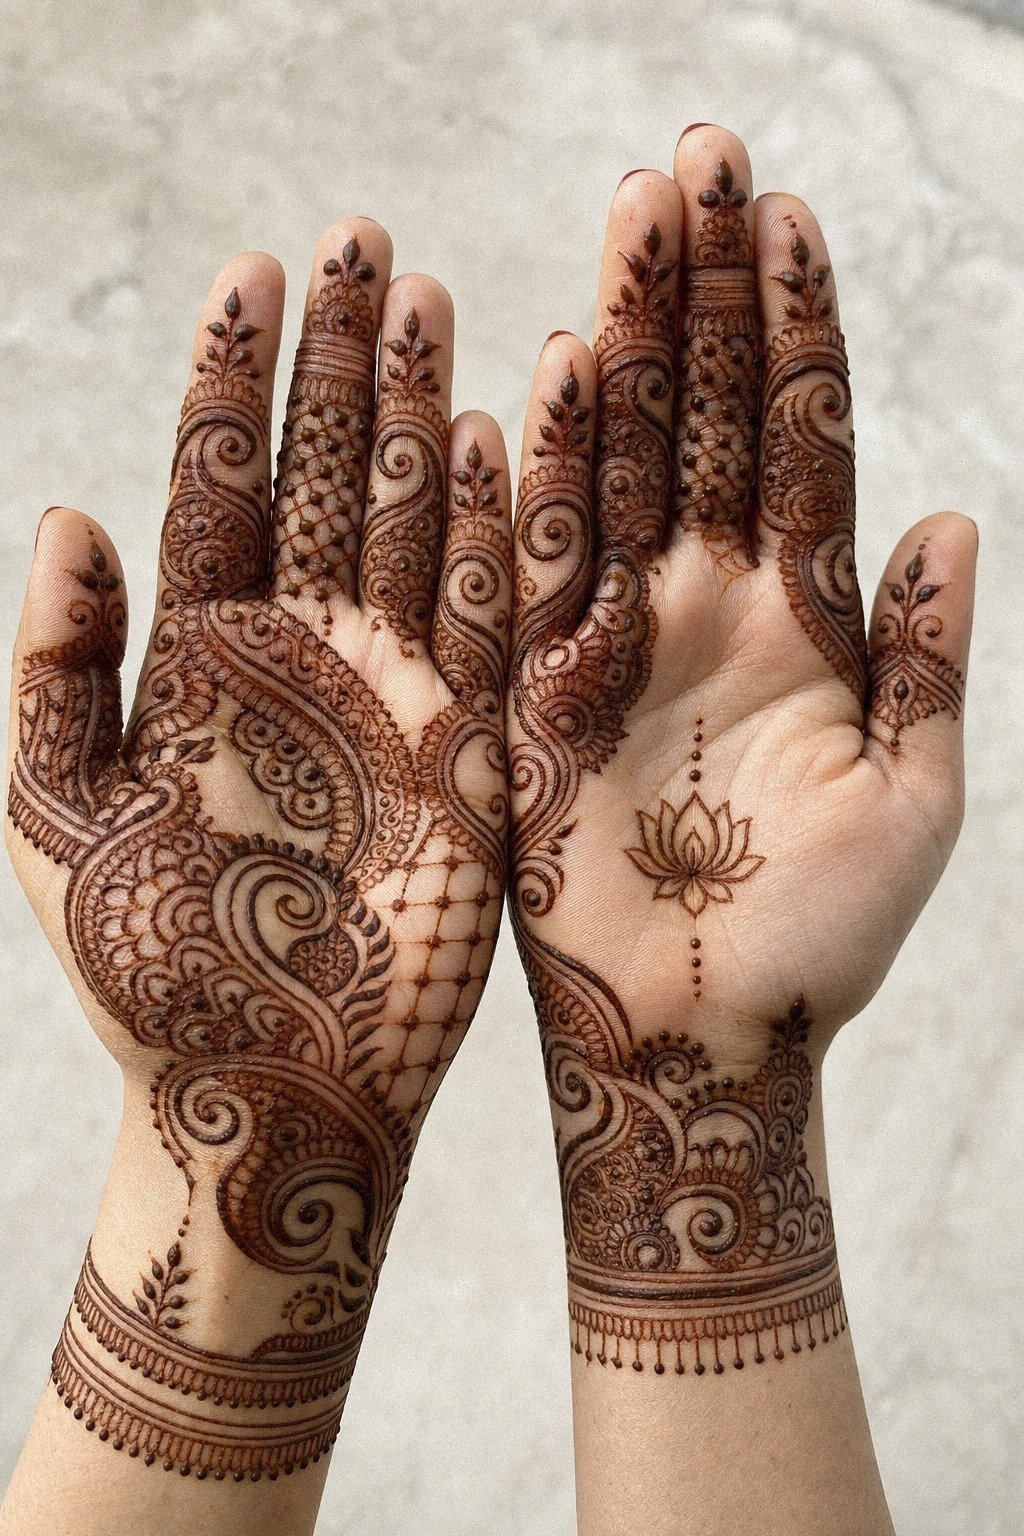
A small lotus works when it supports the mandala instead of replacing it.
9Frame Fingertips With Light Henna Caps
Henna caps on the fingertips should look dipped, not dipped and drowned. On medium olive skin, light fingertip fills give the hand a traditional finish while still keeping the design airy.
I leave a slim clean border under the cap so each finger still has shape. That little break matters more than people think! A soft cosmetic brush handle pressed against paper is a cheap little practice tool that helps you learn that smooth edge fast.
Work one fingertip at a time and keep the fill shallow. Just the top segment is plenty for a simple look, and that choice gives you more elegance without adding extra cost, extra mess, or extra maintenance. More restrained options show up in front hand mehndi designs.
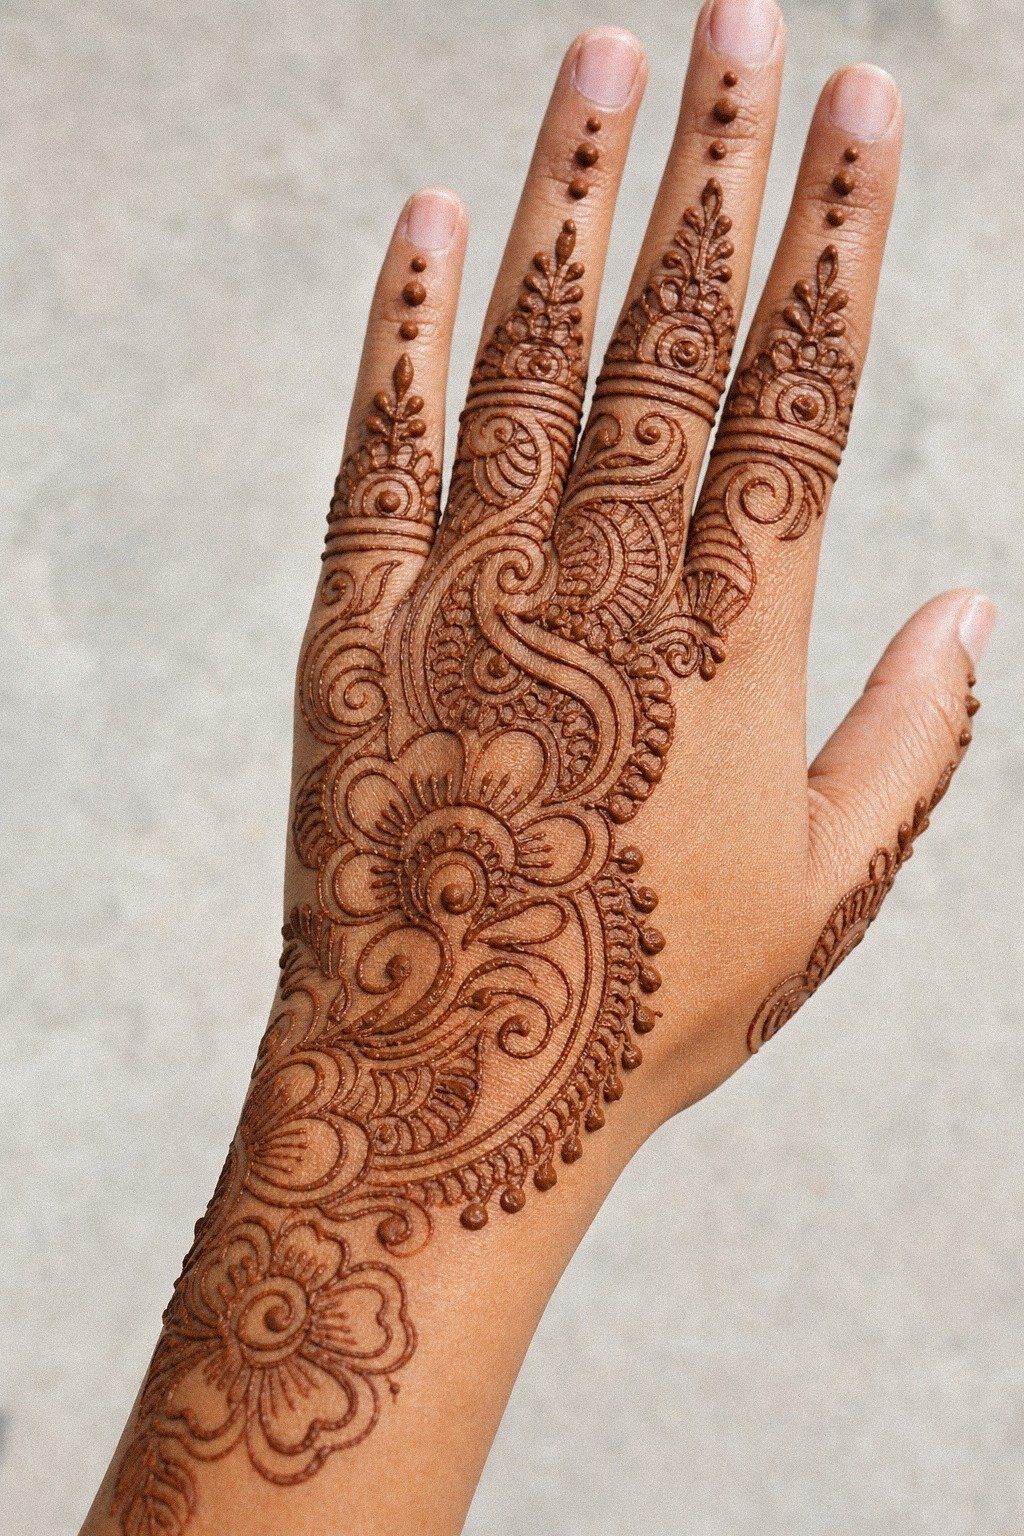
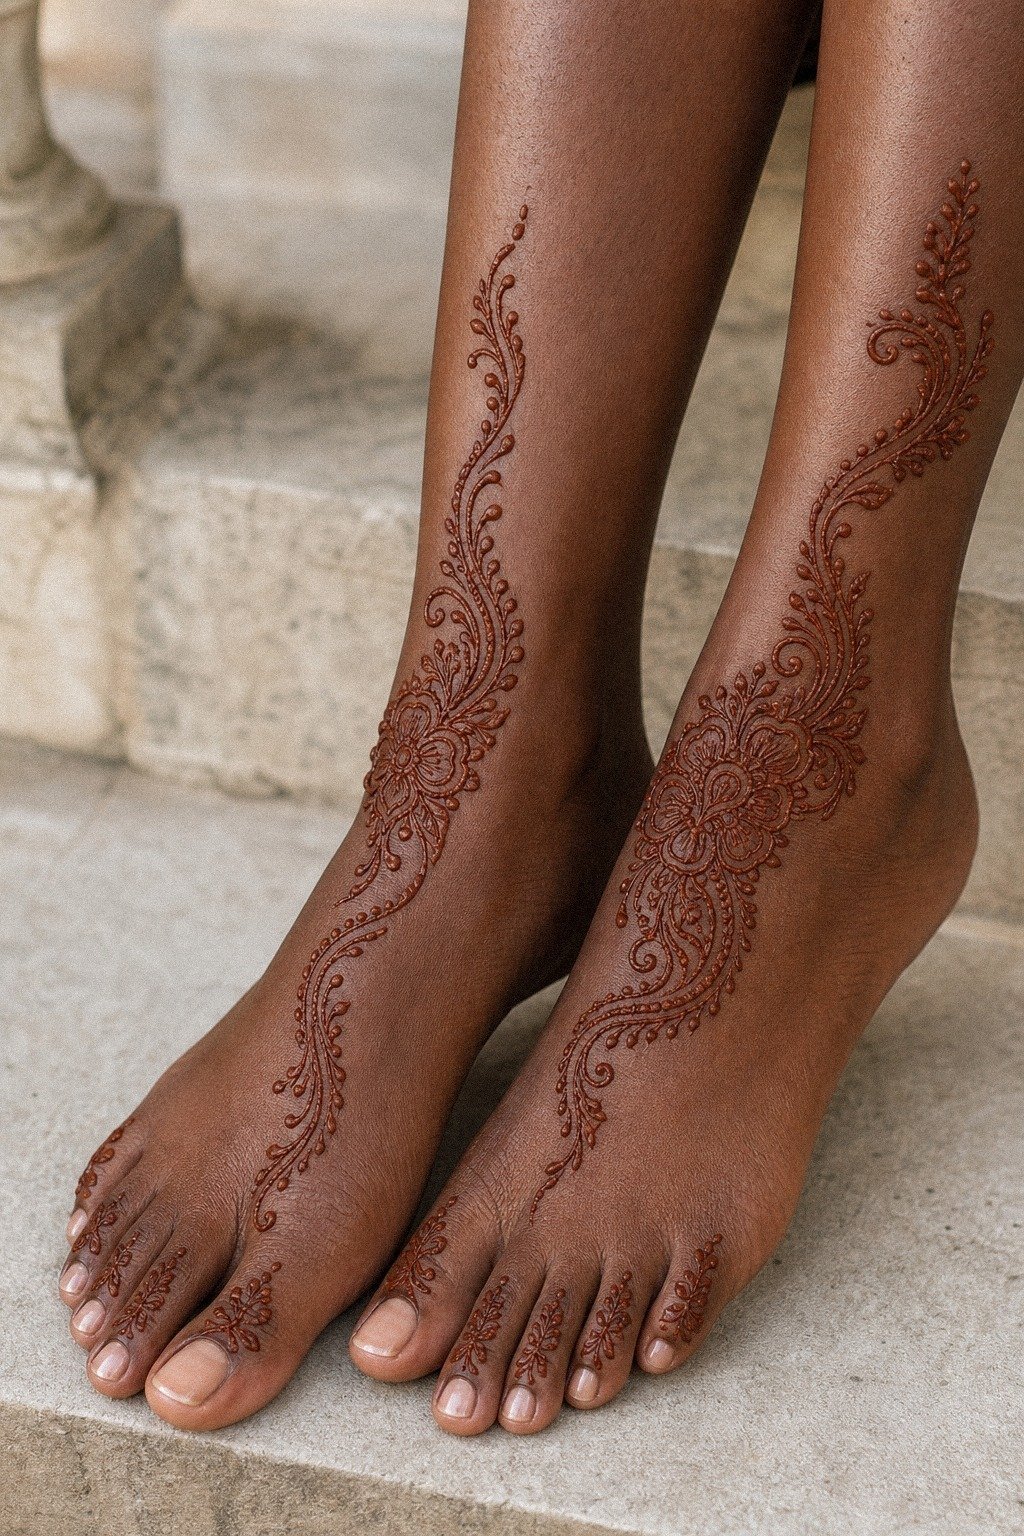
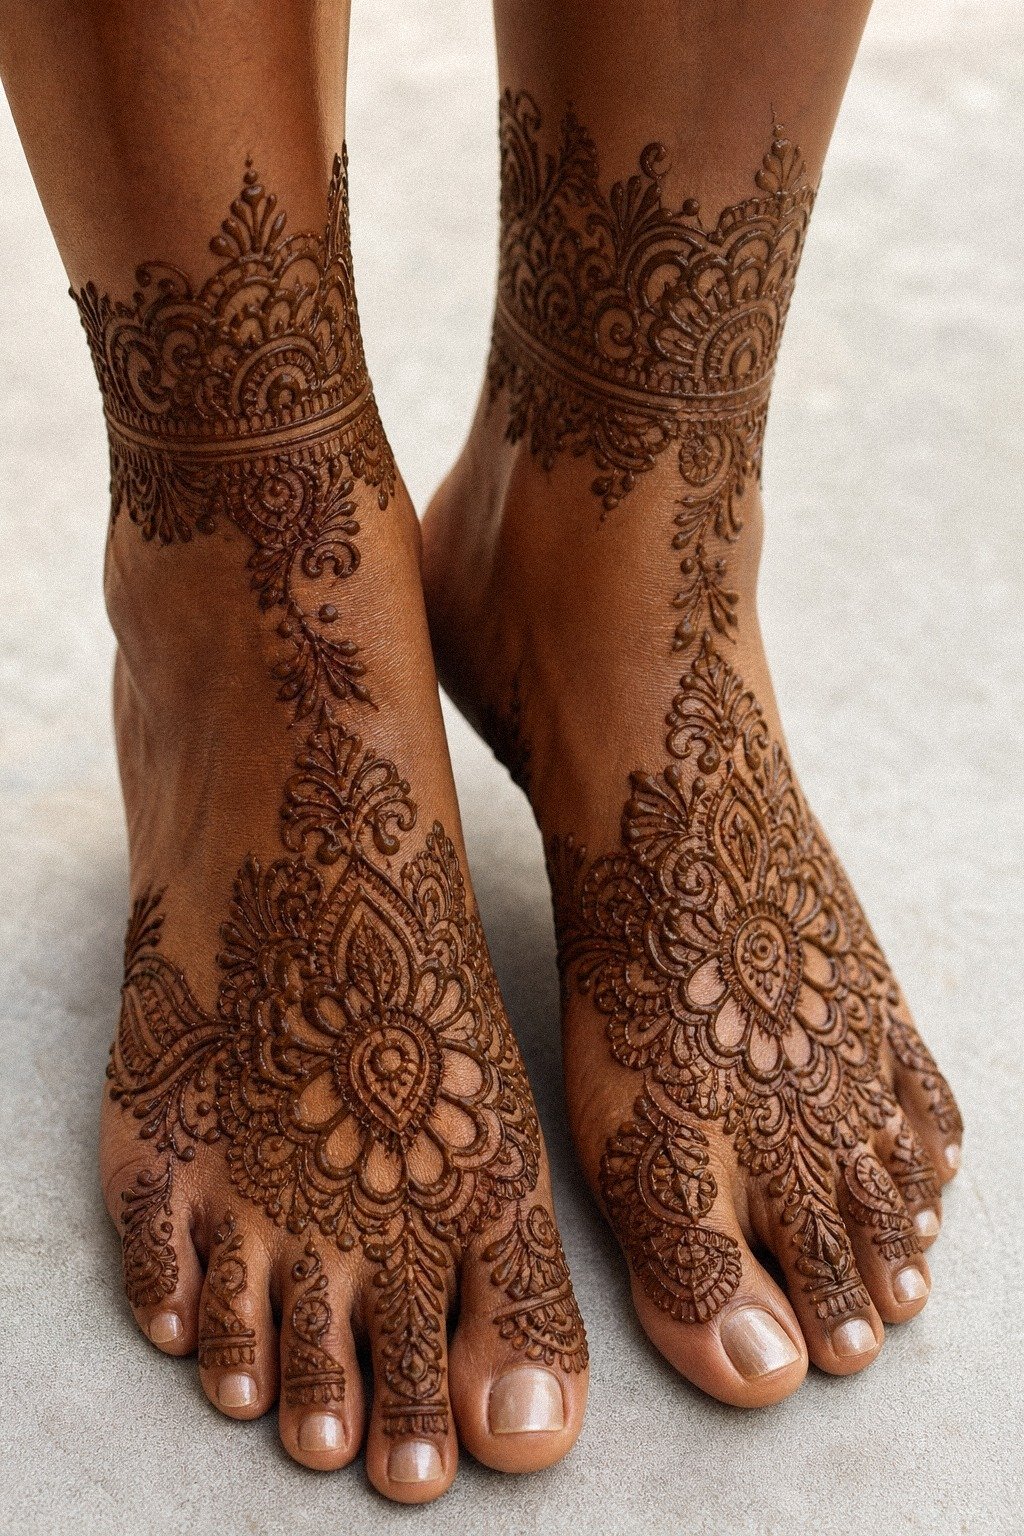
10Build A Simple Wrist Bracelet Band
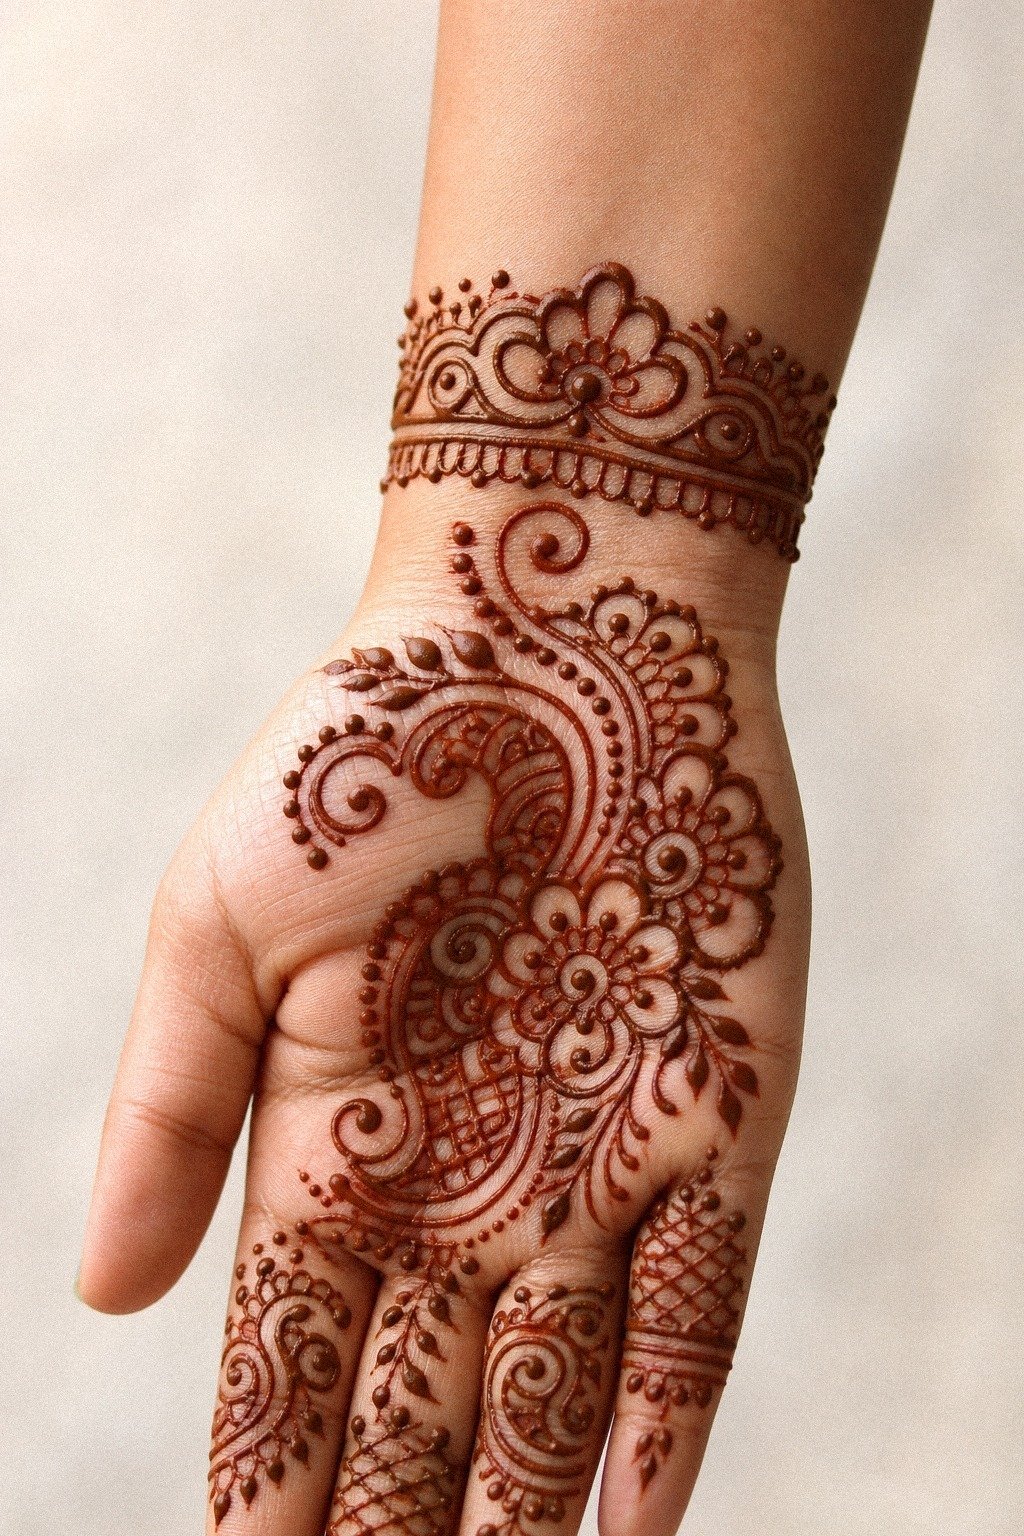
A wrist band should finish the hand, not drag it downward. On golden tan skin, bracelet-style henna bands look solid when they stay narrow and sit just above the wrist crease.
I treat this like the hemline of the design. Too thick, and it starts fighting the palm for attention.
Too thin, and it disappears the second you photograph it. A 2 mm spacing card cut from cardstock keeps the band even all the way around.
But I won’t build three stacked bracelets unless the rest of the hand is stripped back hard. One band with intention gives you better visual value than a pile of fussy extras, and it keeps your design budget focused where it matters. For more banded layouts, see 15 stylish mehndi designs for front hand that flow right.
11Paisley Bridge Below The Knuckles
Paisleys below the knuckles work because they bridge finger work and palm work in one move.
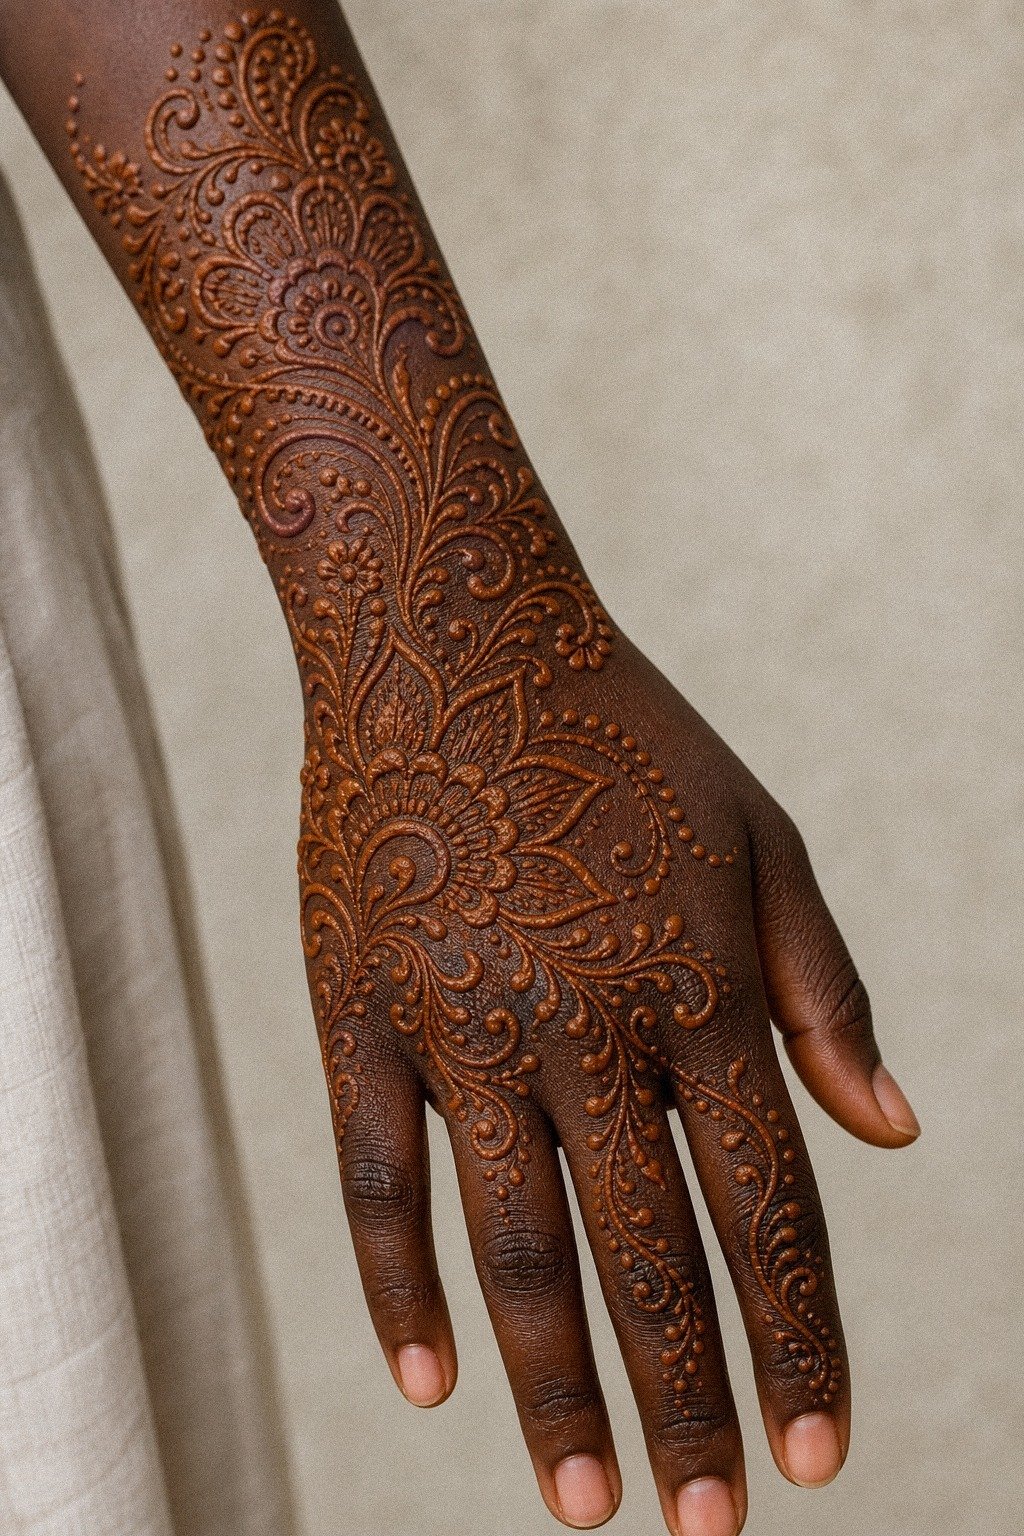
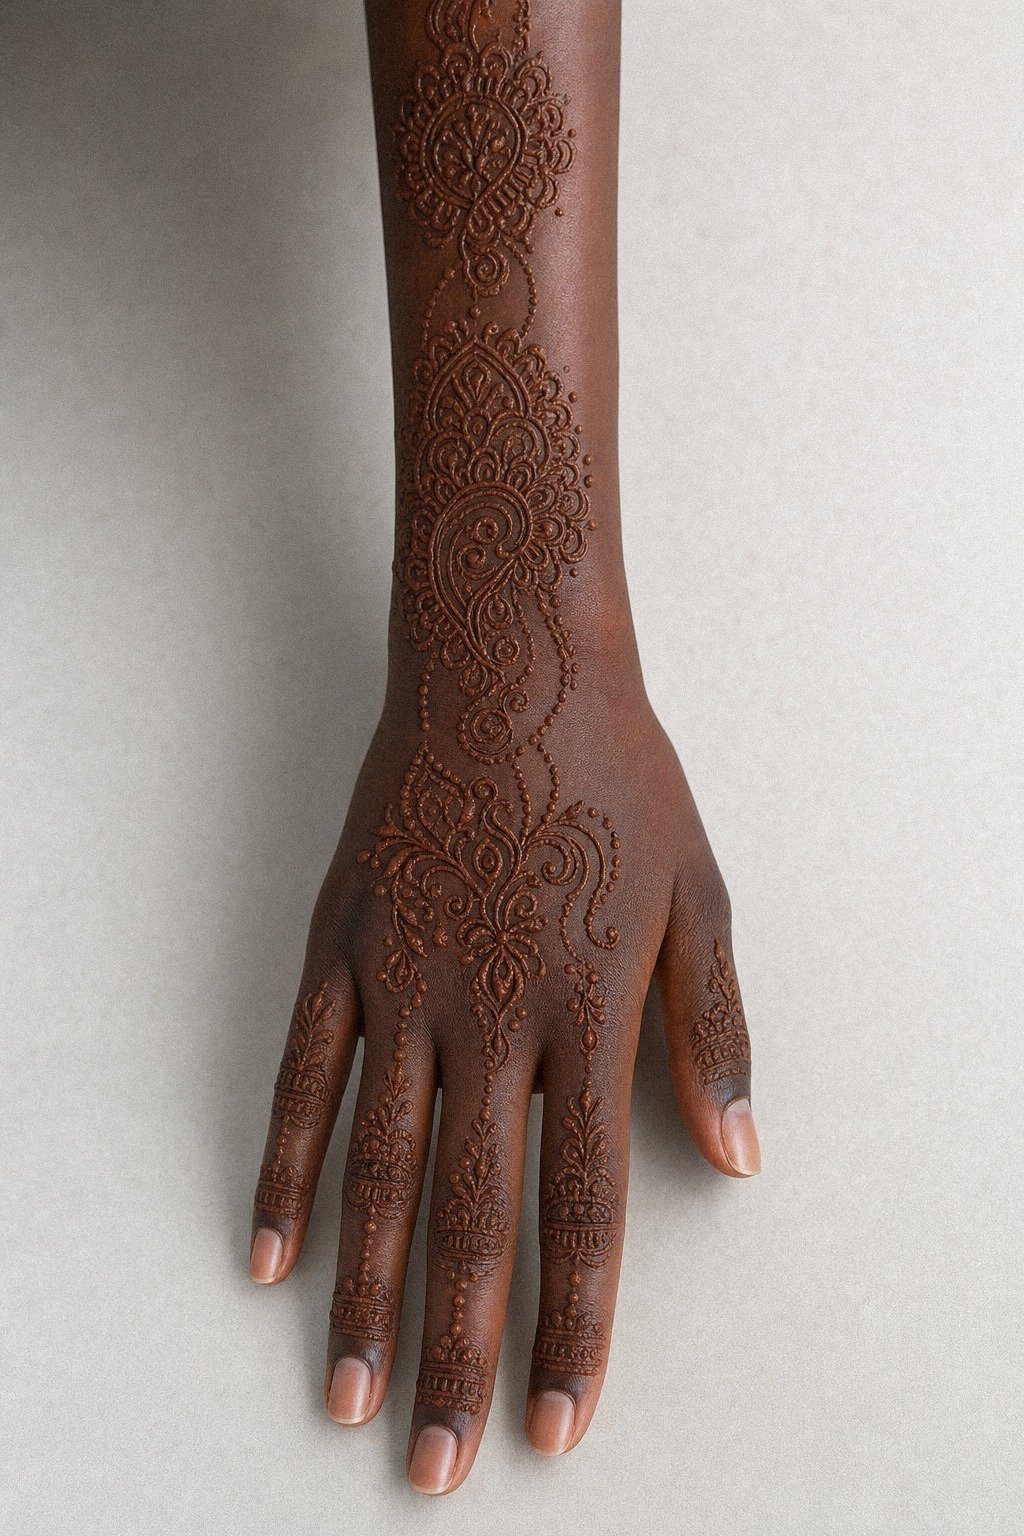
12Use Dotwork Around The Palm Center
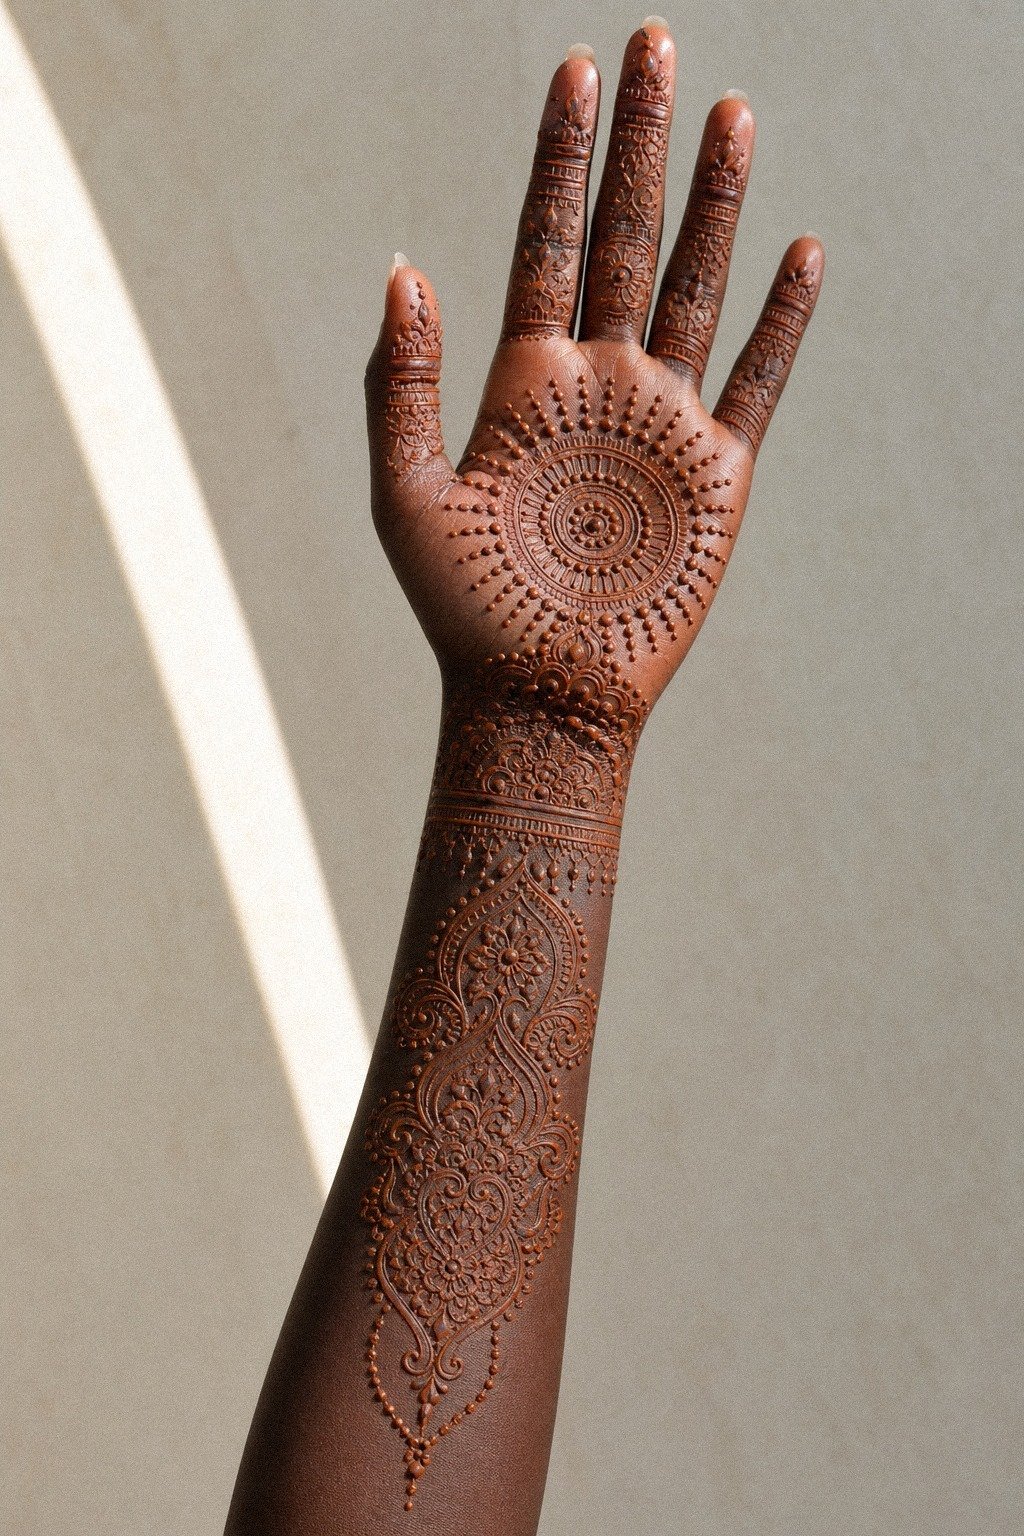
Dotwork is the easiest way to soften a center without muddying it. On deep ebony skin, dense henna dots can glow beautifully around a central shape, but only if the size change is intentional.
I use the smallest dots closest to the edge of the motif, then open them up as they move outward. That gradient keeps the palm from looking flat. A micro-tip practice bottle filled with water is a smart drill tool because it lets you rehearse spacing before you waste paste.
Think halo, not confetti. If the center already has a lotus or mandala, dotwork should support the focal point, not smother it, and that edit gives you more style for the same budget. You can compare heavier and lighter finishes in latest simple mehndi designs.
13Should Finger Lines Echo The Palm?
Yes, they should. If your palm has scallops, the fingers can carry tiny arcs. If the palm is built from petals, let the fingers use slim leaf or teardrop shapes.
On fair cool-pink skin, coordinated line motifs make the whole hand feel deliberate.
I call this my clean-repeat rule. Repeat one shape family two or three times, then leave it alone. A graph paper sketch card helps you test those repeats before you freehand them.
And yes, this is the same thing I tell tattoo clients choosing ornamental linework: if every element speaks a different language, the piece won’t heal with the same clarity or the same value. For more balanced references, open 17 latest simple mehndi designs that transcend trends.
14Leave Breathing Space Between Henna Strokes
Breathing space is where the elegance lives. On medium warm ivory skin, clean skin gaps make the stain look richer because your eye can separate each stroke instead of reading one heavy block.
I leave more room than beginners expect, especially between finger bands and palm details. Wet paste always looks thinner than the final stain feels. A clear acrylic ruler is handy when you want to check even spacing across a flat practice sketch.
So pause after every cluster and ask one question: does this area still breathe? If the answer is no, stop adding.
That restraint gives you the best return on effort, and it keeps a pretty design from tipping into expensive-looking clutter. Compare airy layouts in 22 very simple mehndi designs that look effortlessly intentional.
15Check Line Thickness Before Drying
Before the paste sets, check whether your thick and thin lines still make sense together. On medium olive skin, fresh henna ridges are easy to judge in side light, and that quick check can save the whole piece.
I look for one thing first: are the bold lines carrying the design, or are they swallowing the delicate parts? A clean wooden cuticle stick lets you shave a fat edge while the paste is still soft.
Turn the hand slightly and inspect from fingertip to wrist. Don’t keep touching every line just because you’re nervous.
Overworking is what makes a clean drawing go messy in the last minute, and that kind of fix never adds value. For more line-balance references, revisit mandala mehndi designs.
16Fix Smudges With A Cotton Tip
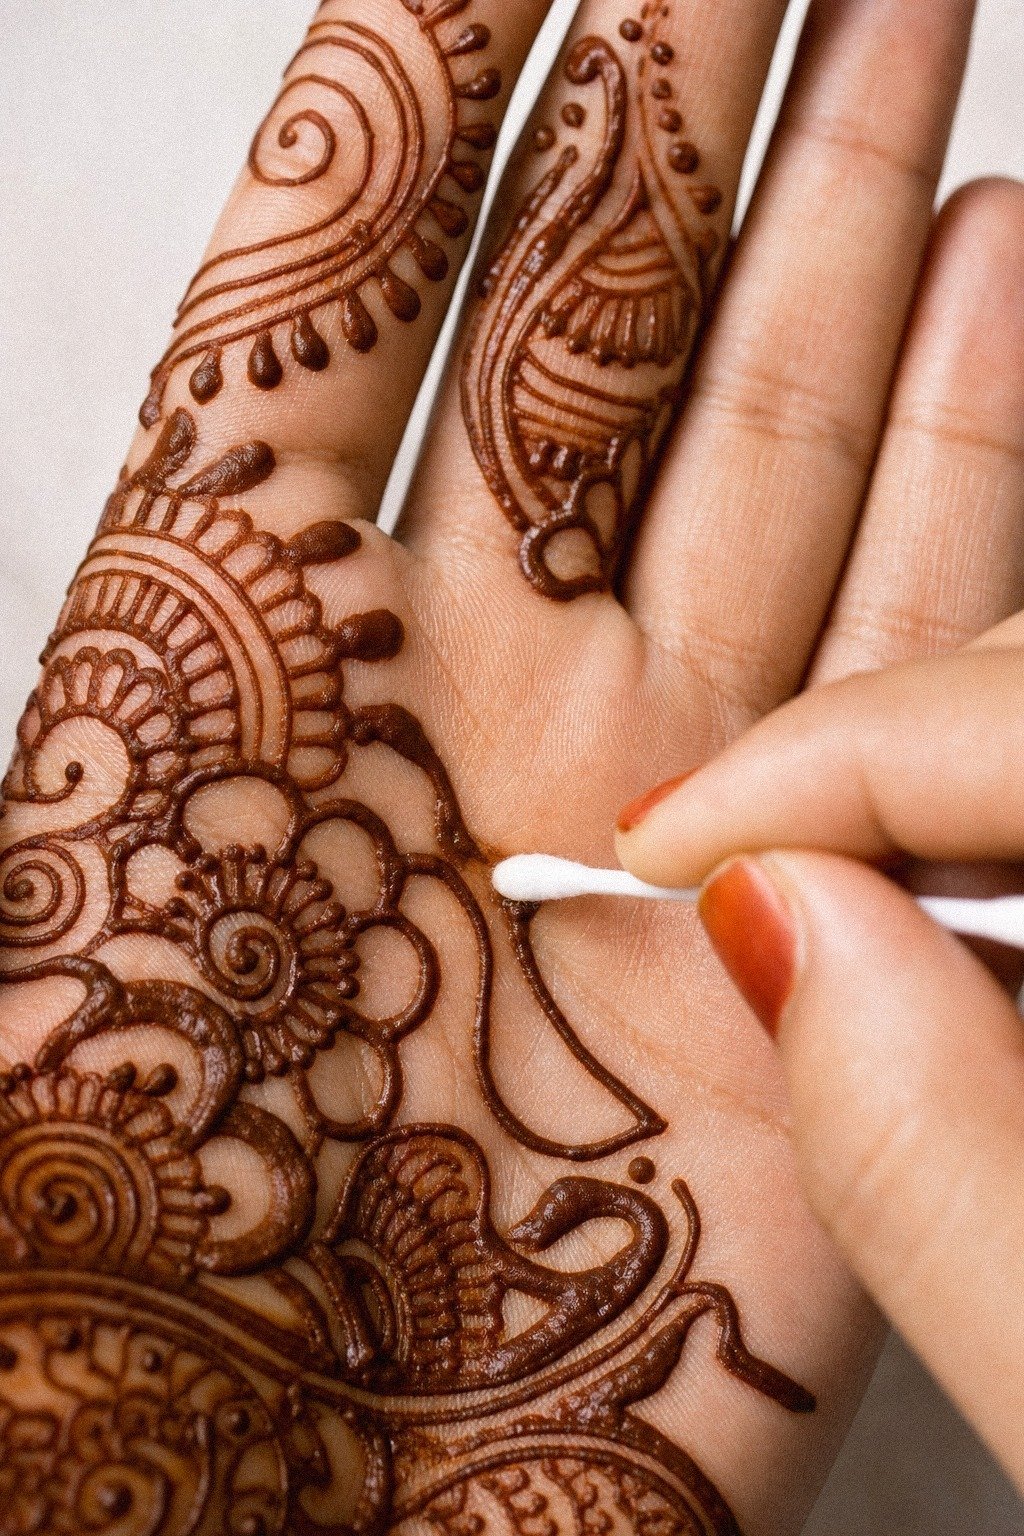
Smudges happen, especially near the palm heel where your other fingers want to rest. The fix is simple if you move fast. On golden tan skin, fresh paste smears can usually be lifted cleanly with the point of a cotton tip before they flatten into a stain.
I keep one dry and one barely damp because each handles a different kind of mistake. A plain cotton swab from any drugstore works fine, so this is one of the rare repair steps that costs almost nothing.
Use the dry tip first to pick up excess paste. If the mark is still there, touch the edge with the damp one and lift, don’t scrub.
That small move preserves the design’s clean value and keeps one ugly smudge from dragging down the whole hand. You can study simpler salvage-friendly layouts in henna mehndi designs.
17Slow Stain, Strong Finish
The stain gets better when you stop fussing with it.
18Photograph The Front Hand In Natural Light
A good photo tells you whether the design is clean from a normal viewing distance. On deep ebony skin, natural window light shows contrast beautifully without washing out the reddish stain.
I like to shoot with the hand relaxed, fingers slightly apart, and the wrist soft so the pattern sits naturally instead of looking stiff. A phone camera at 1x is usually better than portrait mode because it keeps the finger edges honest.
Skip harsh overhead bulbs and skip heavy filters. They hide the real line quality.
If the design still reads clear in daylight, you nailed the balance, and that kind of honest photo gives you better tattoo consultation value later. You can compare finished-photo angles in 23 full hand mehndi designs to show your artist first.
The Clean-Stain Rule I Use Before Any Hand Tattoo Test
When someone brings me a hand tattoo idea, I almost always talk about clarity before style. That’s true whether we’re looking at a fine-line ornamental tattoo, a botanical piece, or a mehndi-inspired temporary design like this one.
The front hand is visible, mobile, and unforgiving. If the layout is messy, you won’t stop seeing the mess. If the spacing is solid, the whole thing feels calm even when the pattern itself is detailed.
Here’s the honest part: tiny detail is addictive when you’re planning by screenshot. Everybody wants the extra dots, the extra petals, the extra lace edge.
Then the design lands on real skin and suddenly none of it breathes. I learned this early when I was sketching ornamental hand references for clients who wanted delicate work that still looked crisp.
The versions that won were never the busiest ones. They were the ones with one clear focal point, smart repeats, and enough open skin to let the eye rest.
That’s why I like simple mehndi as a test bed for tattoo flow. You get to live with the placement for a day or two.
You see where the pattern catches your eye when you reach for your phone, where it folds near the thumb, and where finger lines start feeling cramped. That is useful information.
Real useful. Hand tattoos usually hurt more than forearm or outer arm tattoos, and they’re also more exposed to sun, washing, friction, and daily wear. So if your temporary layout already feels too crowded, a permanent version definitely won’t age nicer just because the ink is black.
If you’re deciding whether a hand tattoo is worth the cost, this is where I get blunt. A front hand piece can be beautiful, but it is a high-wear zone with real upkeep, possible touch-ups, and a higher pain bill than calmer placements.
That doesn’t make it a bad value. It makes it a placement that needs a smarter budget and a cleaner design.
If you want that same ornamental mood with less maintenance, compare modern mehndi designs, arabic mehndi designs, and finger mehndi designs before you book.
A Few Things Worth Answering
How much does a Simple Mehndi Designs Front Hand Easy usually cost?
If you’re talking about the henna itself, the supply cost is low. But if you’re using this as a trial run for a real hand tattoo, US shop minimums are usually about $50 to $100, and many artists charge about $100 to $250 an hour.
Small hand pieces still cost more than people expect because placement is technical. If you’re comparing value, 23 full hand mehndi designs to show your artist first helps you sort dense ideas from cleaner ones.
Are Simple Mehndi Designs Front Hand Easy a good idea for a first tattoo?
Yes, as a trial concept they’re smart because you can test flow first. A temporary mehndi-style layout lets you see whether the placement feels right on your hand before you commit to permanent ink.
I’d still keep a first real tattoo slightly larger and cleaner so the lines age nicer and the money feels worth it. For comparison, simple henna designs for beginners and latest simple mehndi designs are useful.
How do I choose a tattoo artist for Simple Mehndi Designs Front Hand Easy?
Pick someone whose portfolio shows crispy healed linework. You want fresh photos, healed photos, and hand placement examples if they have them. Clean studio.
Strong hygiene. No scratchy lines, no fuzzy edges, and no artist who promises Pinterest-exact copies instead of building something that fits your hand. I also tell people to compare ornamental references in 16 mandala mehndi designs that prove symmetry is sacred before they book.
How much do Simple Mehndi Designs Front Hand Easy hurt?
If you mean a real tattoo version, hand work is usually spicier than outer arm or thigh. Lines feel sharper on bony spots, and color packing is often the roughest part.
Mehndi itself shouldn’t hurt, but a permanent front hand tattoo is not the chillest first-session placement. If you’re still weighing pain against visual payoff, 16 peacock mehndi designs with feathers worth tracing shows how detail density changes the feel.
How long does a Simple Mehndi Designs Front Hand Easy take to heal?
For a real tattoo, the top layer usually settles in 2 to 3 weeks, and the full healing window is more like 2 to 3 months. Wash with gentle unscented soap, use a thin layer of moisturizer, and stay out of pools and hard sun while it heals. First few days, treat it like an open wound.
If you want more skin-first planning, bridal mehndi designs is helpful for seeing fuller coverage.
What’s the best placement for Simple Mehndi Designs Front Hand Easy?
The front hand is pretty, but it’s also high wear and high maintenance. If you want the same ornamental feel with easier healing, bump the design up the forearm.
If you want maximum visibility and accept touch-ups, the front hand delivers. That’s the trade-off, plain and simple.
For more comparison shots, peacock mehndi designs and mandala mehndi designs make the contrast obvious.
Where I’d Start First
If I had to pick one step, I’d start with the clean front hand layout. Bad spacing ruins everything downstream. Get the flow right first, and even a simple cone design looks intentional, polished, and much easier to photograph.
Pin that idea for later, then compare it with 16 mandala mehndi designs that prove symmetry is sacred.