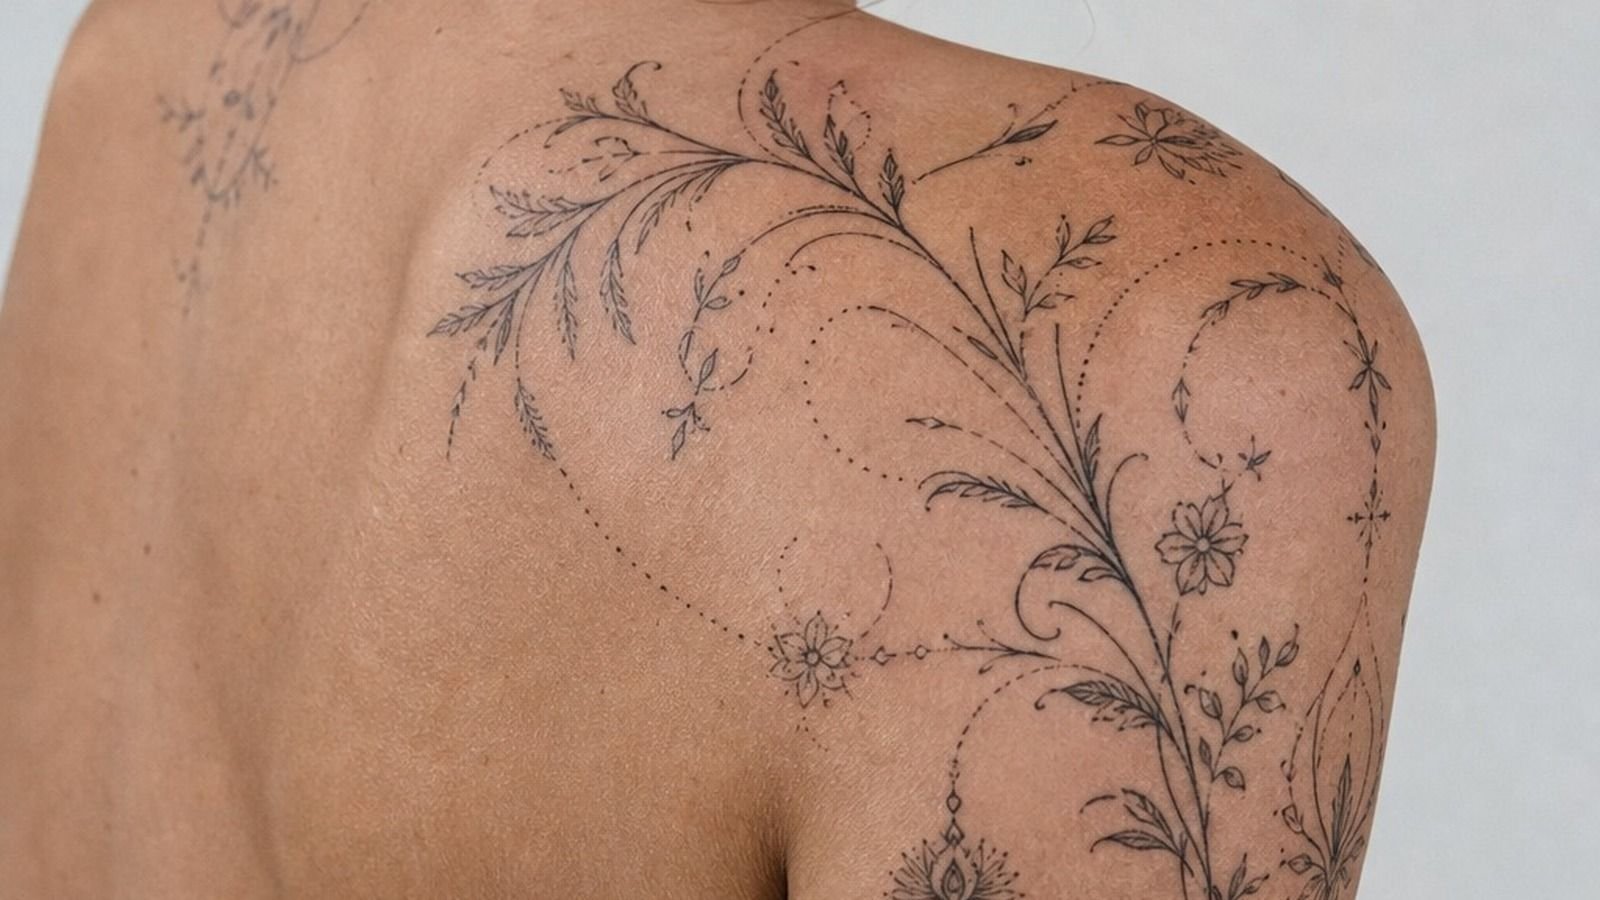
[IMAGE: Close-up of a fresh single-needle shoulder cap tattoo with clean stencil lines visible on the deltoid dome, photographed on fair skin under natural daylight]
Don’t overthink: Start with a single-needle round liner for crisp edges.
The shoulder cap might be the placement I redraw the least and admire the most. It curves, it moves, it catches light across the deltoid like nowhere else on the body.
I’ve been tattooing this dome for years, and I’ll tell you straight: it’s one of the most forgiving spots you can pick, but it punishes sloppy planning fast. Here’s what actually matters before any ink goes in.
[IMAGE: Wide shot of a healed floral shoulder cap tattoo wrapping from front shoulder onto the deltoid, worn with a tank top]
- Pick a stencil that wraps the full shoulder dome
- Start with a single-needle round liner for crisp edges
- Place the central motif right at the deltoid peak
- Keep the first session short to protect the line
- Side shoulder vs front shoulder: which canvas are you drawing on?
- Pick a contrast level your skin tone can hold
- Why does a tiny symbol work better than a packed design?
- Place a fine line floral arch over the cap edge
- Saniderm, Aquaphor, and when to ditch the wrap
- Plan a collarbone edge design that meets the cap
- Start dotwork shading where the muscle rounds out
- Pick a black-and-grey fade for shoulder cap depth
1Pick a stencil that wraps the full shoulder dome
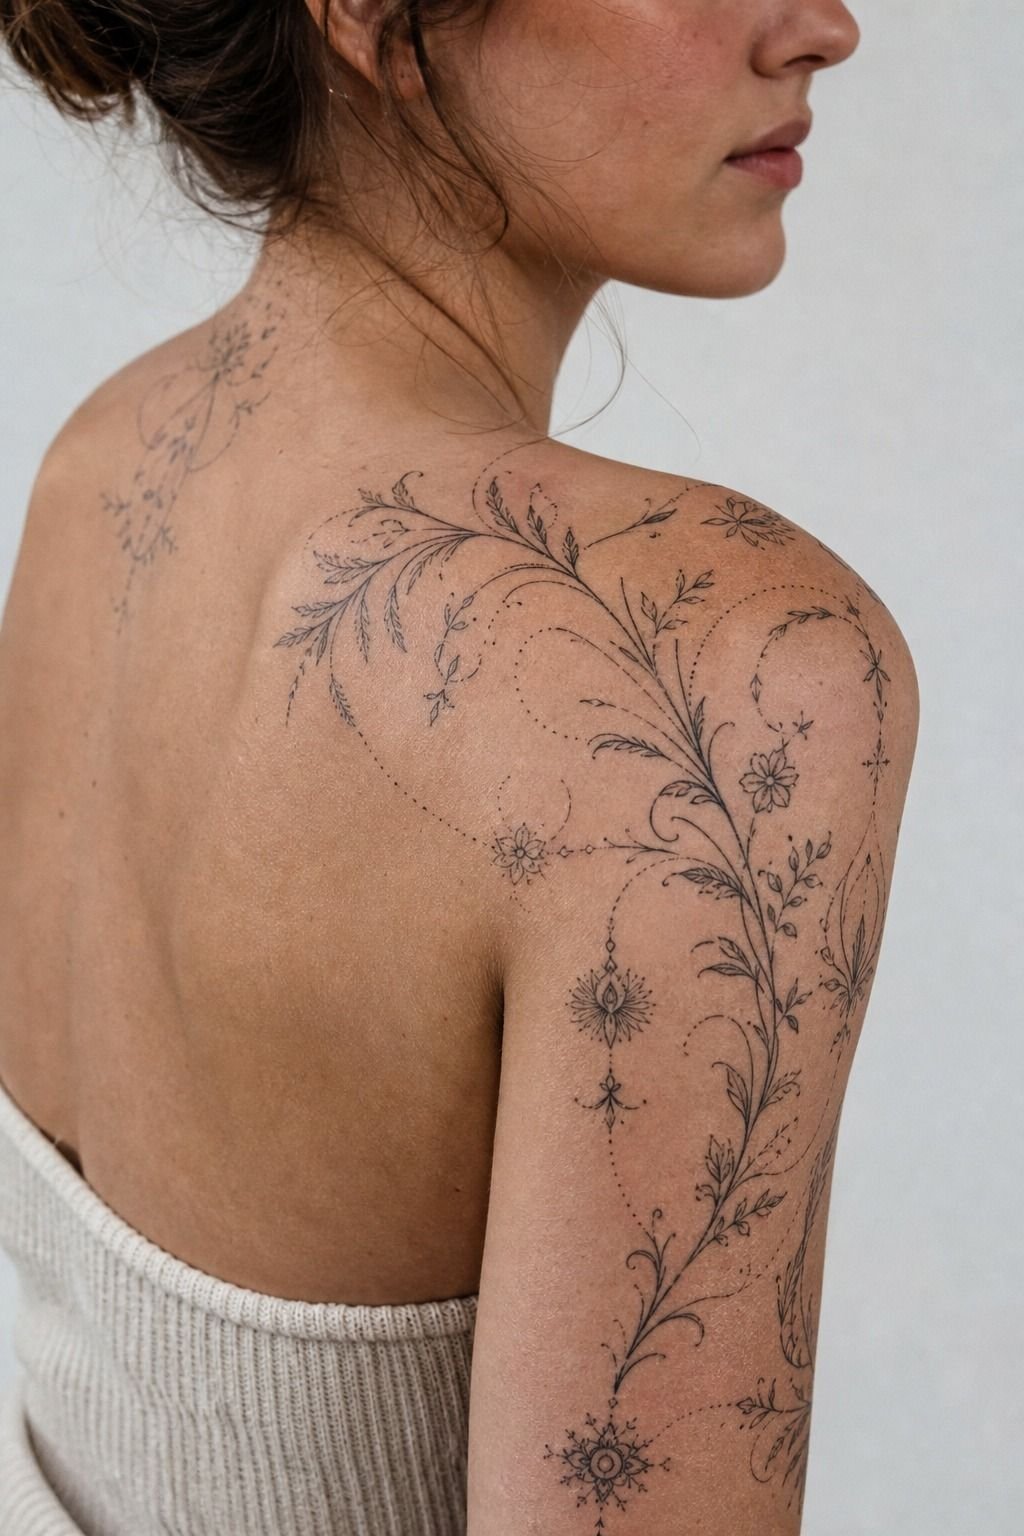
If the stencil doesn’t follow the actual dome of your shoulder, it doesn’t matter how good the artist is. The linework will fight the muscle on day one and look chewed up by month six.
I’ve re-stenciled more shoulders than I can count, and the ones I have to fix always started with a flat, two-dimensional drawing slid onto a three-dimensional surface. The fix is boring but important: the stencil has to bend with the deltoid, sit on the cap, and continue down the side without a hard break.
A real stencil wraps front-to-back-to-side in one continuous motion. It mirrors the way the muscle moves when you raise your arm, so the linework reads natural from every angle, not just the mirror pose you took for the Instagram photo. That is also why a good placement reads well in a fitted T-shirt and not just in a tank top.
Most of my shoulder cap clients sit for the consultation in a sports bra or a tank top so I can see the full dome in motion. I’ll have them flex, drop the arm, and rotate.
Where the skin folds when you bend forward tells me where the stencil has to break or curve. If your artist isn’t asking you to move, the stencil isn’t being designed for your body.
It’s being designed for a reference photo. Those two things aren’t the same.
Ask to see the stencil in transfer gel before any ink goes in. If it looks like a sticker slapped on, push back. I want my clients to wear the stencil home for an hour, take a photo in different lighting, and text me back.
The ones who do that end up with tattoos that look like they’ve always been part of their shoulder. The ones who rush it end up coming back for a rework within a year, and rework is never cheap or easy.
For a fuller breakdown of how placement shapes the long-term look, our shoulder tattoo ideas roundup walks through where linework holds and where it doesn’t. If your piece is going to flow past the deltoid onto the back, our shoulder blade tattoo ideas guide is worth a scroll before the consultation. For step-by-step prep before you sit down, the tattoo appointment checklist covers what to bring so the stencil day runs clean.
[IMAGE: Tattoo artist wearing black gloves pressing a transfer-gel stencil onto a client’s shoulder dome, showing the wraparound line on real skin]
2Start with a single-needle round liner for crisp edges
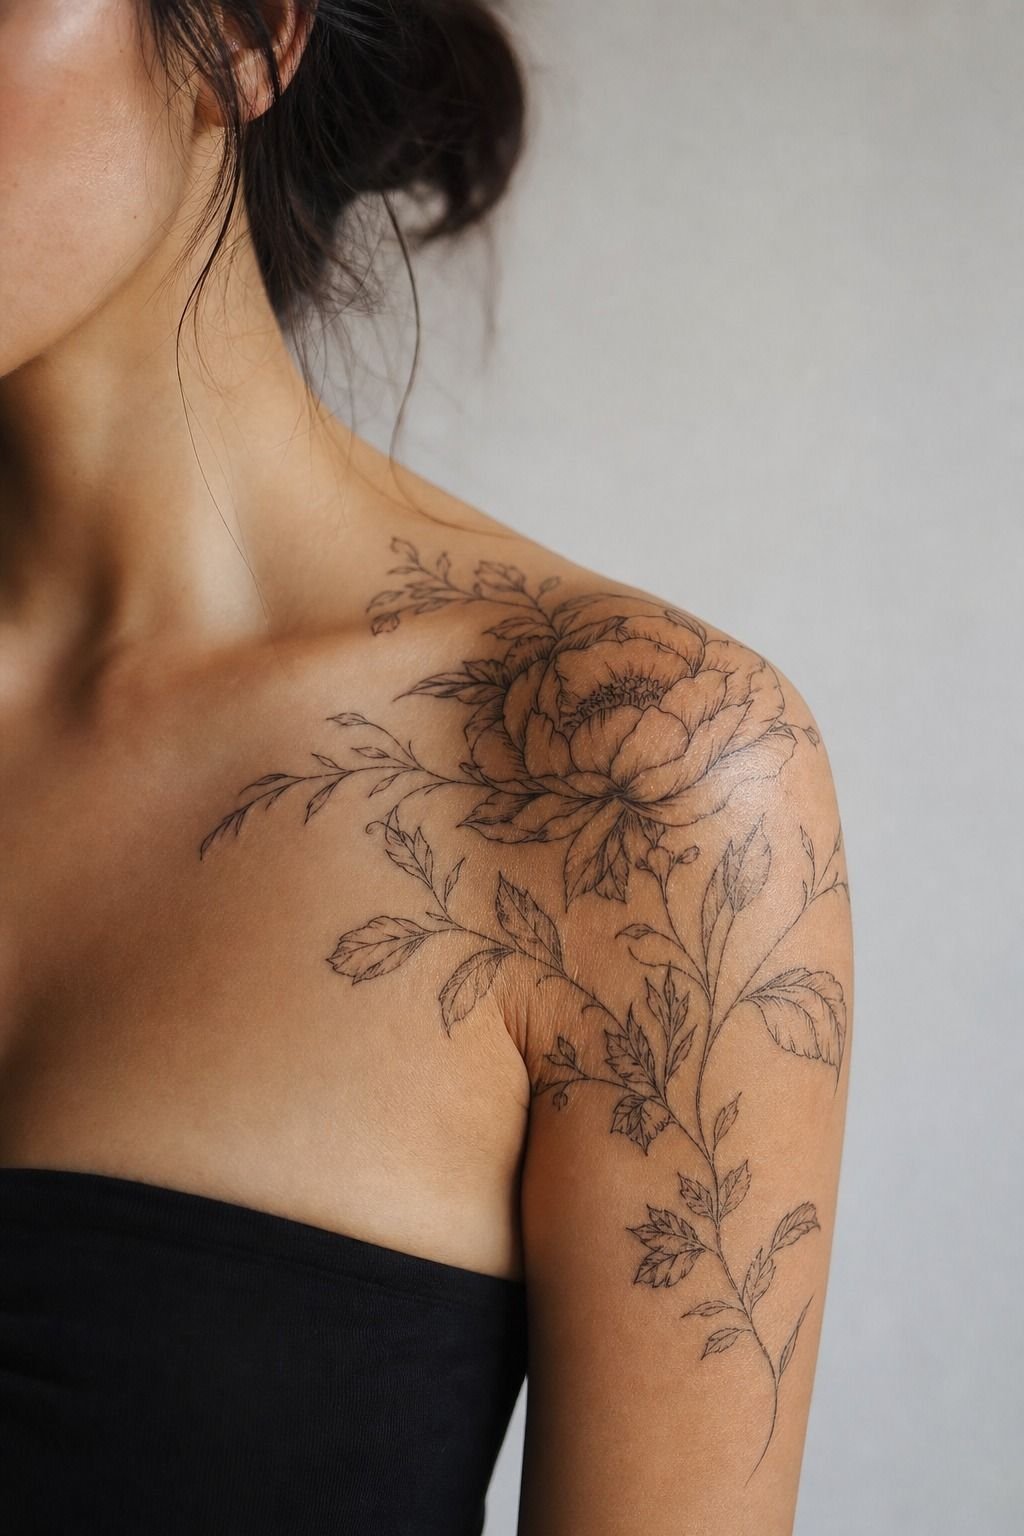
A single-needle round liner lays down the thinnest, crispest line I can pull, and on a shoulder cap that precision is what keeps a small design from turning to soup. One clean pull, not ten fuzzy ones.
The tradeoff is that a fine line sits shallow, so it wants an artist with a steady hand and a light touch. Scratchy work shows instantly at this weight, and there’s nowhere to hide it.
A standard 3-round liner lays down a thicker line that ages softer but loses fine detail fast. On the deltoid, where the muscle stretches every time you raise your arm, that extra weight is actually a friend for bolder designs.
A hair-thin line can spread a touch over ten years as the skin moves, so bold will hold where fine can fade. I’ve watched single-needle work stay crisp on low-movement spots and go a little fuzzy right at the cap where the arm rotates most.
So which wins? It depends on the design. A tiny minimalist symbol reads best in single-needle because a thick line would swallow it whole.
A larger floral or geometric piece holds better with a bolder liner that keeps its shape as you age. If you’re leaning delicate, our fine line tattoo ideas guide walks through where thin linework survives and where it struggles.
Match the needle to the design, not to a trend you saw on Pinterest.
3Place the central motif right at the deltoid peak
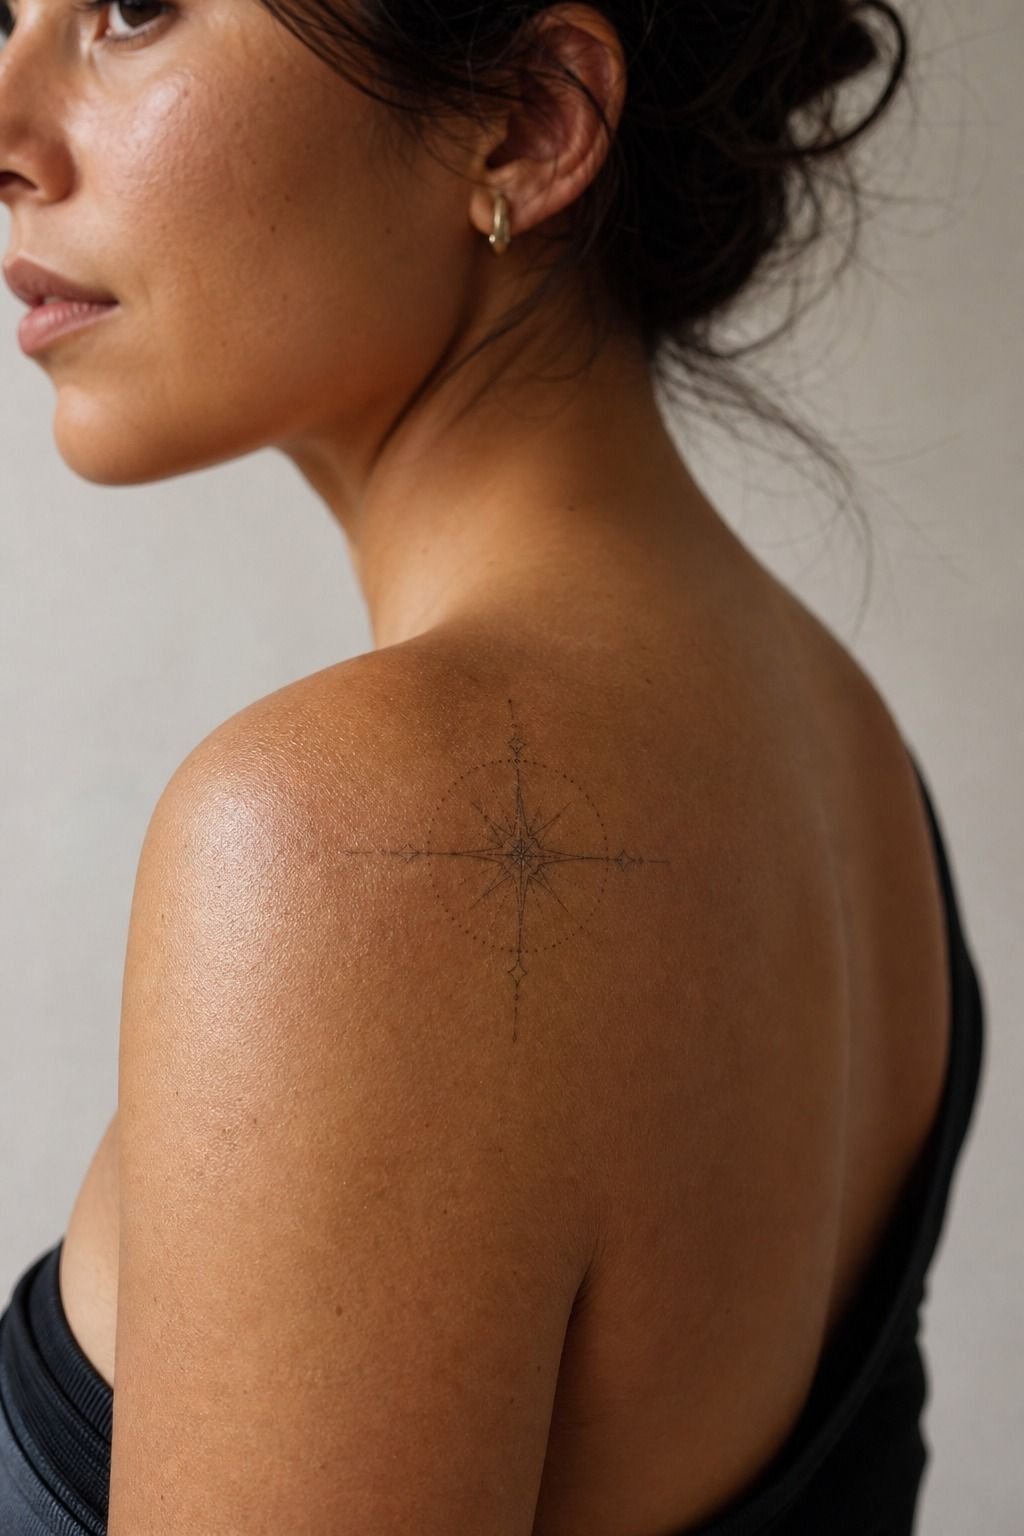
The deltoid peak is the highest point of your shoulder when your arm is relaxed, and that is where the eye lands first. If your main motif sits even two inches off that point, the whole design reads lower than it should, and the tattoo looks like it is sliding down your arm.
I have fixed plenty of “almost right” shoulder caps where the central piece was set too far forward or too far back. The fix is a fresh stencil and a redo session, both of which add cost.
For a single fine line symbol (a crescent moon, a small flower, a minimalist wave), the deltoid peak is the only place I recommend. Anything else and the symbol gets lost in the dome. For a larger wraparound (florals, koi, geometric mandala, dragon shoulder piece), the peak is still the anchor, but the design flows outward from there.
The cap is the center, not the edge.
Pin the placement before the ink. Take a phone photo from three angles (front mirror, side, three-quarter back) with the stencil in place.
If the peak is not landing where you want, this is the moment to say so. Not after the line goes in.
For a full placement reference map, our tattoo placement chart shows how the deltoid compares to other anchor zones on the body.
[IMAGE: Side profile photo of a client with a small crescent moon stenciled on the deltoid peak, deltoid muscle raised]
4Keep the first session short to protect the line
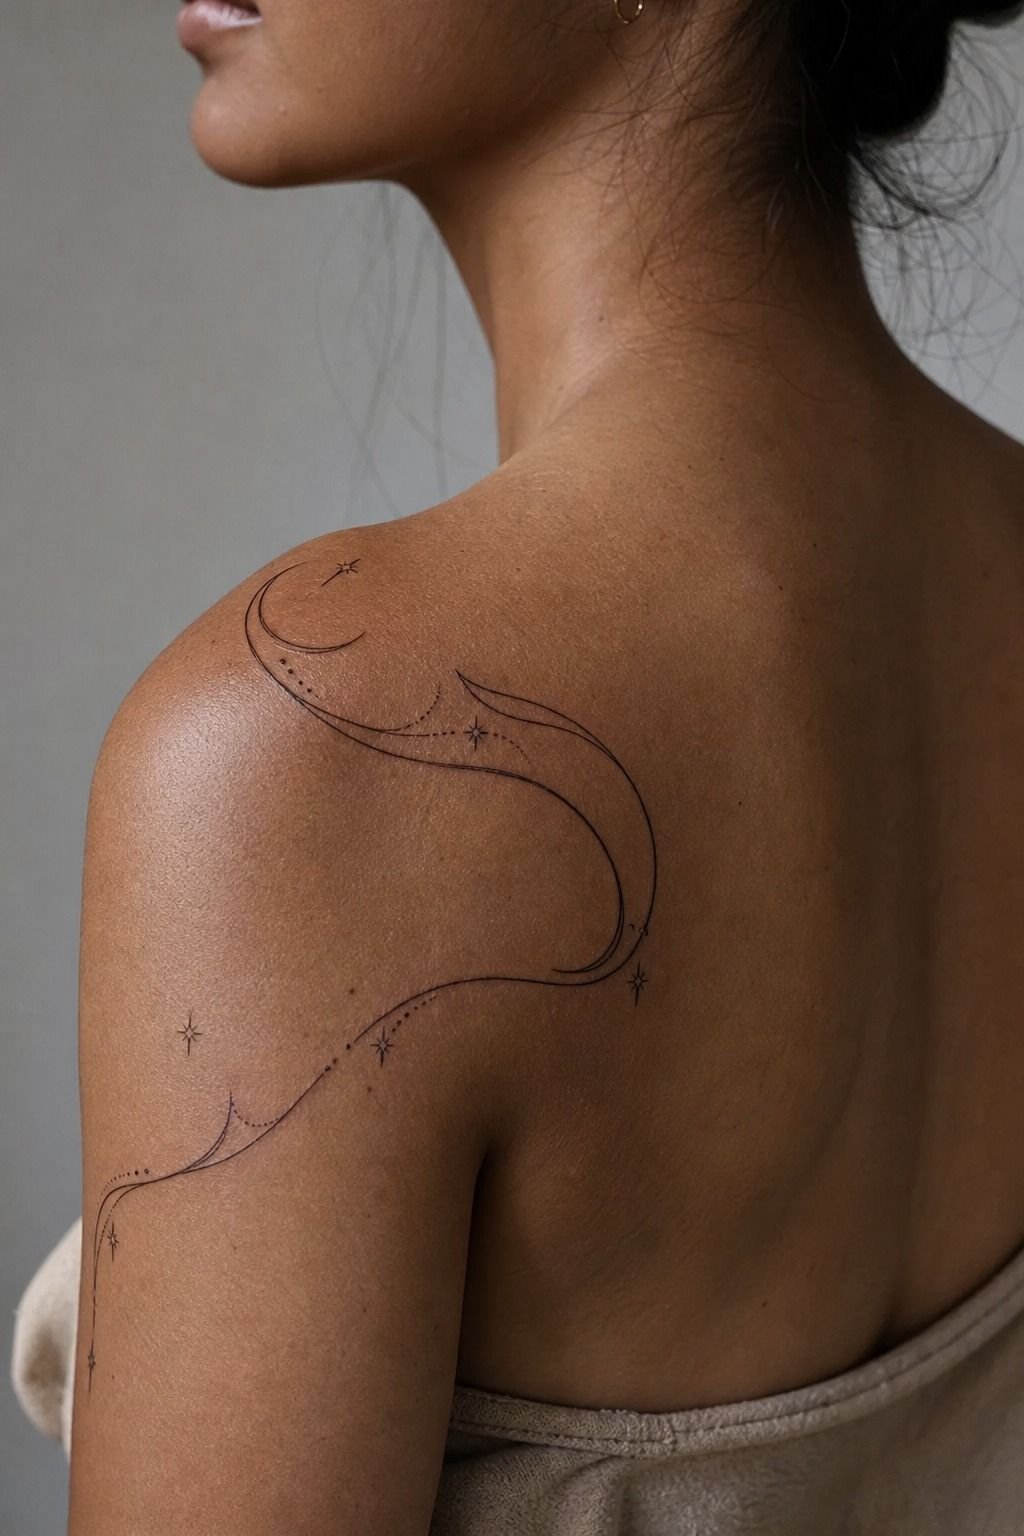
The single biggest mistake I see with shoulder cap tattoos is the marathon first session. New clients walk in wanting the full wraparound finished in one sitting, and I have to talk them down.
A two-hour cap is plenty for a first pass, and honestly it is the right call for the skin, too. After ninety minutes the dermis swells, the line starts to drift, and the artist compensates by going deeper. That is how overworked shoulders end up patchy at the six-month mark.
Book the wraparound across two to three sessions of ninety minutes each, and the linework will thank you. It is the difference between a tattoo that ages clean and one that needs a paid touch-up at year two.
[IMAGE: Tattoo artist wiping excess ink from a shoulder cap mid-session, client resting with arm down]
5Side shoulder vs front shoulder: which canvas are you drawing on?
Side shoulder and front shoulder are not the same canvas. The side shoulder is a flatter plane with less muscle definition, and the skin stretches differently when you reach overhead.
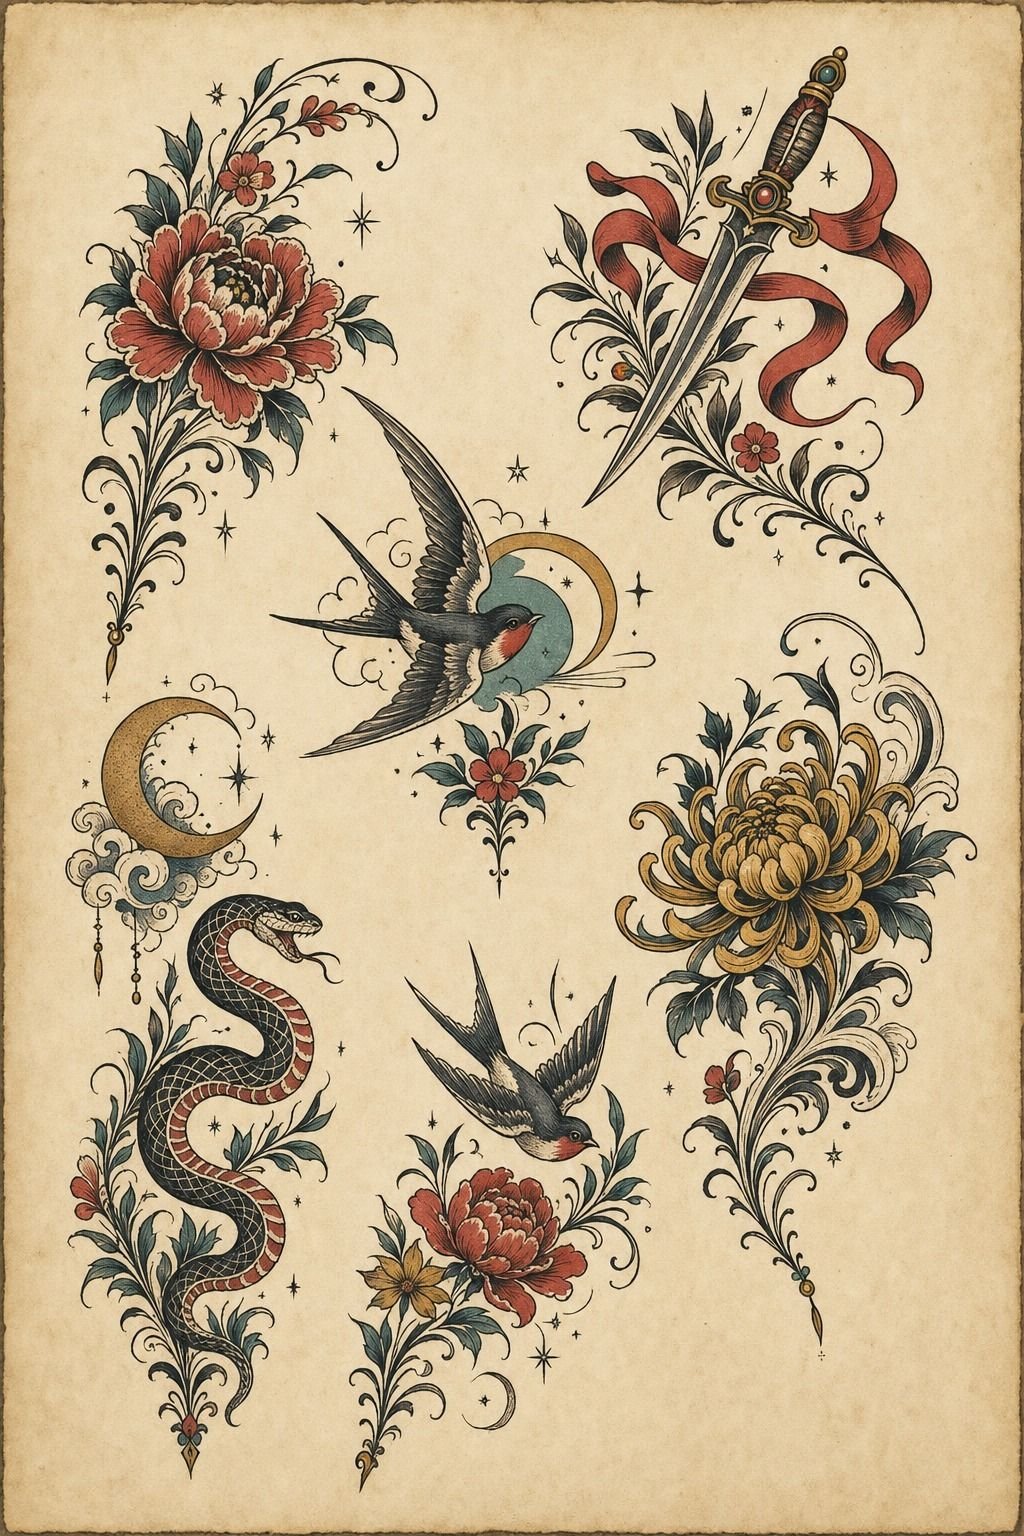
A piece that looks balanced from the front can read awkward from a side profile, and vice versa. I have turned away plenty of flash sheets that work on the front shoulder but collapse on the side because the curve is wrong.
The fix is to design the piece as it sits on the body, not as it looks on paper. I will draw directly on the skin with a skin-safe marker before any stencil transfer so I can see how the linework behaves when the client rotates.
If a curve fights the muscle when she reaches up, I redraw it. If a motif crowds the armpit when the arm drops, I move it.
For wraparound designs, the flow from front to side to back has to feel continuous. The eye should follow the line without a hard stop.
Where the design transitions from side shoulder onto the deltoid cap is the highest-stakes zone. Get that break right and the whole piece sings.
Get it wrong and it looks like two tattoos glued together, which I have had to fix more than once! For a closer look at how a wrap reads from every angle, our collarbone tattoo ideas gallery is the closest sister piece, since the collarbone shares that same side-to-front transition.
[IMAGE: Wide shot of a wraparound shoulder tattoo photographed from front and side angles to show flow continuity]
6Pick a contrast level your skin tone can hold
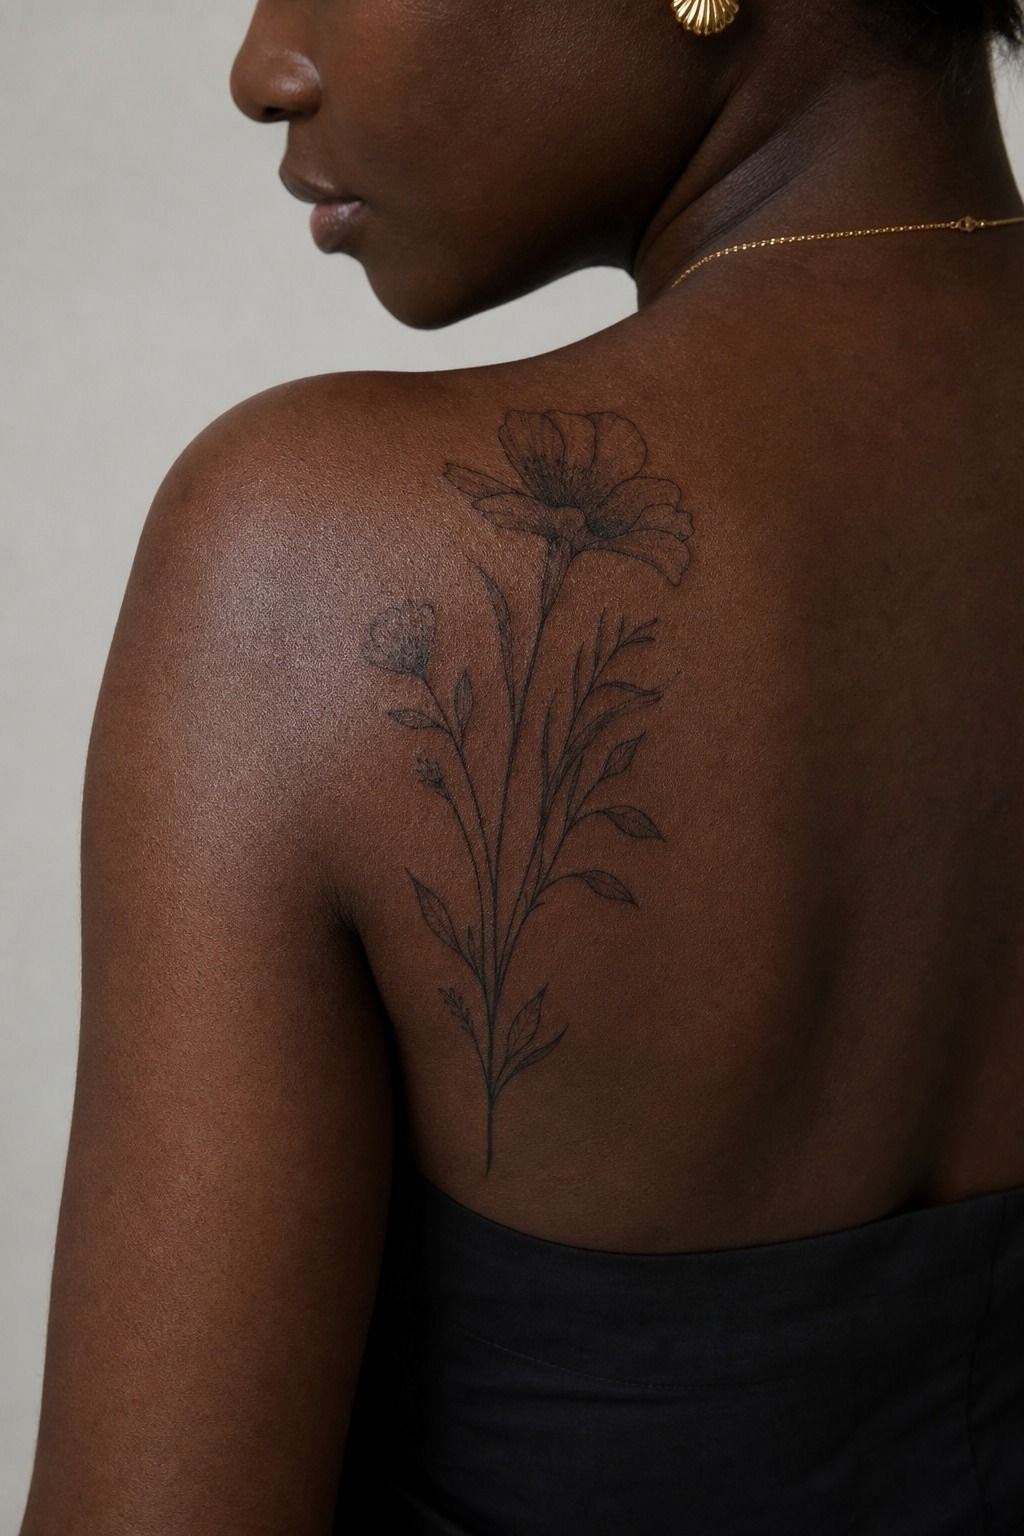
Contrast is everything on a shoulder cap, and how much you can hold depends on your skin tone. On fair skin, black-and-grey reads sharp with a wide range, so you can push from near-white highlights to solid black and it’ll read from across the room.
On medium skin, I lean into stronger mid-tones and skip the faintest greys because they get lost as the tattoo settles. On deep skin, black and bold blackwork are your best friends, and I dilute less so the design keeps its punch through the heal.
The dilution is where a good artist earns the rate. Grey wash is just black ink cut with distilled water, and the ratio decides how the piece heals.
Too watery on deep skin and it heals patchy and flat. I mix my washes to the skin in front of me, not to a chart, and I push the contrast a notch harder than looks right fresh, because a tattoo always heals a little softer than it goes in.
Here’s the honest aging truth: black is your best friend for longevity, color is spice. High-contrast black-and-grey with simple shapes still reads clean in ten years.
Color fades faster and needs more upkeep, especially up on the cap where sun hits. If you want a piece that holds, prioritize contrast over a rainbow.
Our black and grey tattoo ideas gallery shows healed work across every skin tone so you can see what actually lasts.
7Why does a tiny symbol work better than a packed design?
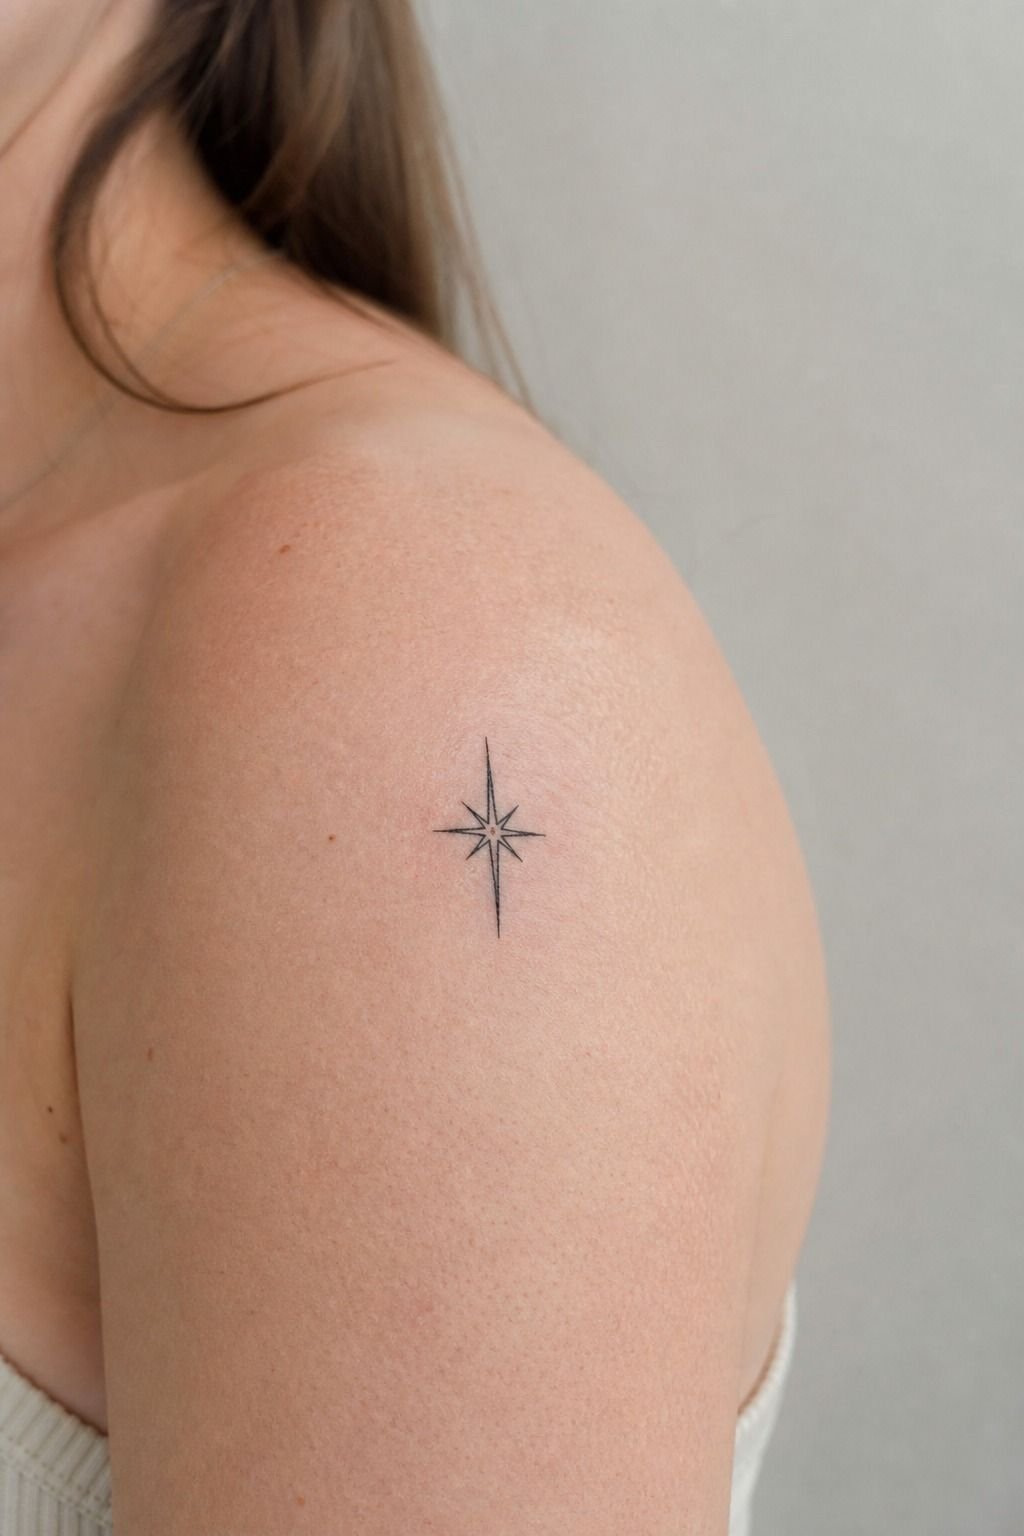
Not every shoulder cap tattoo needs to be a full wraparound. The smallest pieces often age the best, and the most popular first-tattoo placement on the dome is a tiny symbol no bigger than a quarter. I have watched tiny single-needle moons, stars, and minimalist waves outlast packed five-inch mandalas because there is just less ink to degrade.
Tiny does not mean cheap. A small, well-placed symbol by an experienced fine line artist will run $100 to $250 and is worth every penny.
A packed design crammed into the same spot turns to soup in three years because the ink has nowhere to settle but on top of itself. Bold will hold. Tiny details mush out.
That is the rule, and it has saved me a ton of rework!
For a first tattoo, this is the move. The deltoid peak heals predictably, the pain level is moderate, and the small footprint means easy cover-up if your taste changes in a decade.
If you are set on a first piece that is small and meaningful, our first tattoo ideas roundup has plenty of cap-friendly symbols. For first-timer pain expectations, our least painful places to get a tattoo chart lists the deltoid right where it belongs: low on the spicy scale.
[IMAGE: A tiny crescent moon single-needle tattoo on the deltoid peak at quarter-coin scale, healed two years]
8Place a fine line floral arch over the cap edge
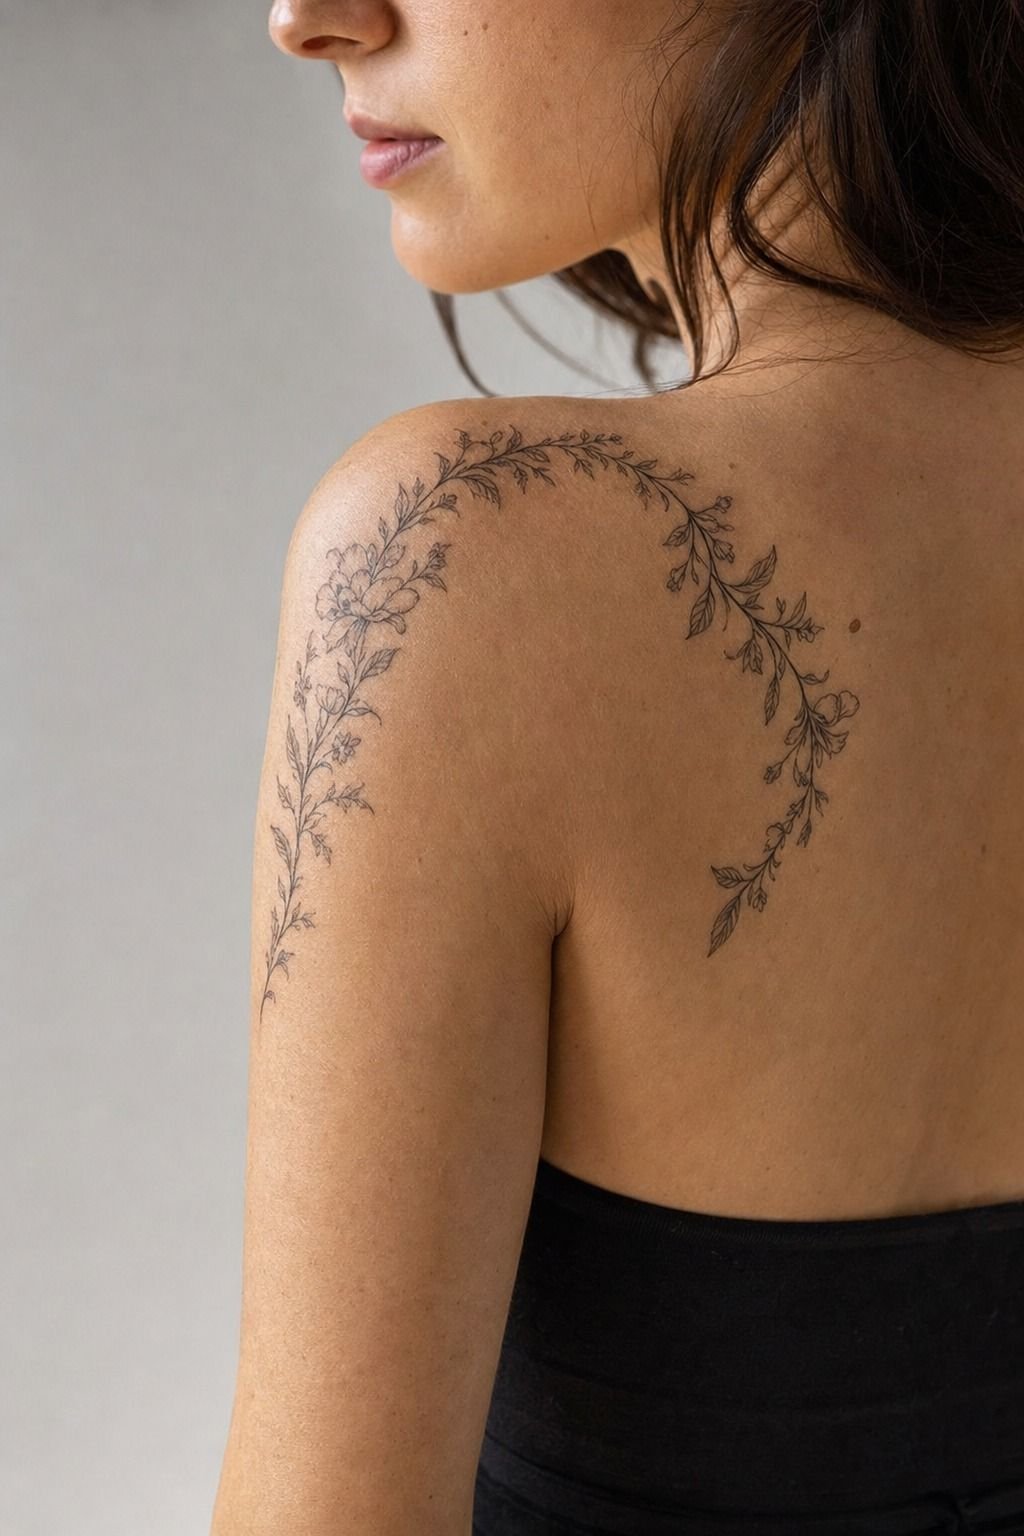
Florals and the shoulder dome are a great pairing, and the arch is the shape that flatters the cap best. I size a floral arch to follow the curve of the deltoid, usually three to five inches across the top of the shoulder, tapering as it drops toward the arm.
Too small and the detail mushes out. Too sprawling and it fights the muscle line. The sweet spot sits right along the natural ridge of the cap.
The magic of an arch is that it reads clean from every angle because it borrows the shoulder’s own geometry. When you raise your arm, the flowers stretch with the muscle instead of bunching.
I draw the arch on with a skin-safe marker first and have the client rotate, because a curve that looks balanced flat can pinch at the front of the shoulder once the arm moves. Get the curve matched to your anatomy and it ages cute on you.
Fine line florals look delicate and gorgeous fresh, but I’ll be straight with you: thin botanical work on a high-movement spot needs a touch-up every few years to stay crisp. If you want low maintenance, a bolder neo-traditional floral with solid line weight holds its shape far longer. Neither is wrong, they just age differently.
For arch inspiration that flatters the cap, our shoulder tattoos for women gallery and floral tattoo ideas roundup are the two I send clients to most.
9Saniderm, Aquaphor, and when to ditch the wrap
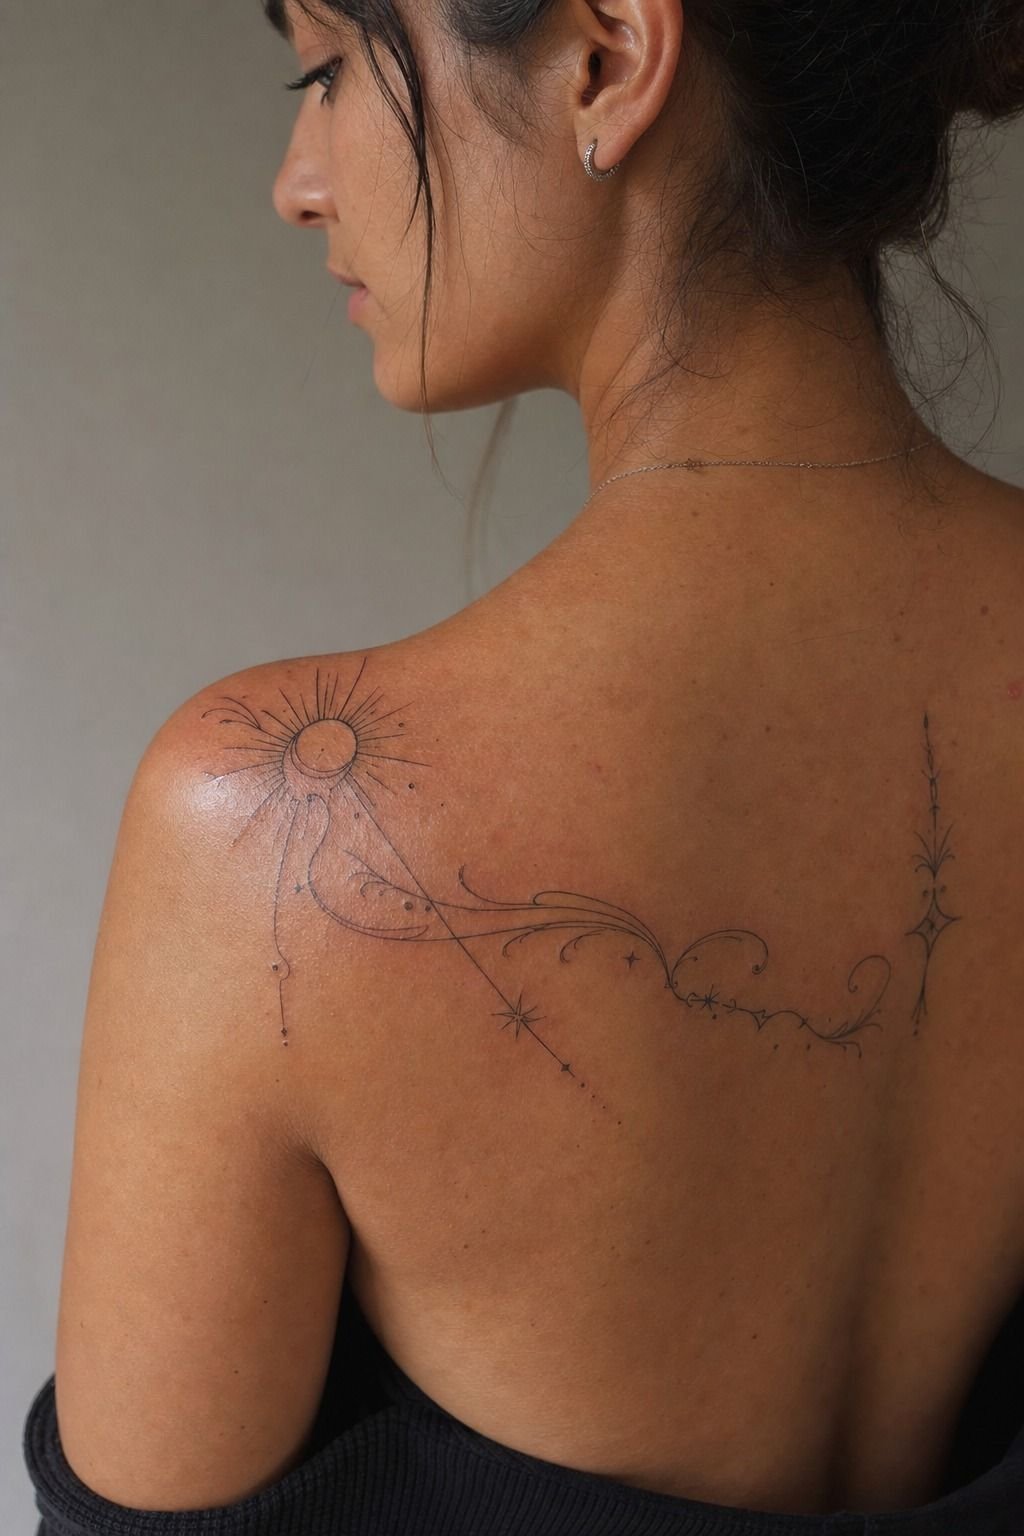
The first 24 hours of aftercare decide how your shoulder cap heals. Most artists, myself included, send clients home with a light wrap or a second-skin adhesive bandage like Saniderm or Dermalize. The wrap protects the fresh tattoo from friction and contamination, but it has to come off at the right time.
For the first three to six hours, the wrap stays on. After that, remove it gently and let the tattoo breathe. The single biggest mistake I see is leaving the wrap on overnight or, worse, re-wrapping the next day.
Fresh ink needs airflow to start the healing process. A suffocated tattoo traps moisture and bacteria, and you will end up with a weepy, slow-healing mess.
Once the wrap is off, wash the area once with lukewarm water and a gentle unscented soap. Pat dry with a clean paper towel.
Do not rub. Do not use a cloth towel. Paper towels only for the first week, because cloth can harbor bacteria and fibers that pull at the healing skin.
Then comes the thin layer of ointment. I recommend a pea-sized amount of unscented healing balm or a tattoo-specific aftercare product.
Aquaphor works, but use it sparingly; a thick layer suffocates the tattoo. The ointment should be barely visible on the skin.
If you can see a shiny coat, you have used too much.
The tattoo will start to peel around day four or five, looking like a mild sunburn. That is normal. Do not pick the flakes.
Do not scratch. Do not pull at the edges of the healing skin. Picking pulls pigment out, and you will end up with patchy color and faded linework. Just let it do its thing.
For a full day-by-day walkthrough with photos, our tattoo healing stages guide is the cleanest reference I have seen, and our Saniderm tattoo aftercare page covers the wrap-on, wrap-off timing in detail. For a longer recovery arc, how long tattoos take to heal breaks down the surface versus deep-tissue timeline.
For the first two weeks, avoid submerging the tattoo in water. Showers are fine.
Baths, pools, hot tubs, and the ocean are not. The shoulder cap area is easy to cover with a T-shirt, but sunscreen is non-negotiable once you are past the initial healing phase.
UV exposure is the number one killer of tattoo longevity, and our tattoo sunscreen guide breaks down which SPF actually holds up on ink.
[IMAGE: A second-skin Saniderm bandage freshly applied to a shoulder cap tattoo, showing the seal at the edges]
10Plan a collarbone edge design that meets the cap
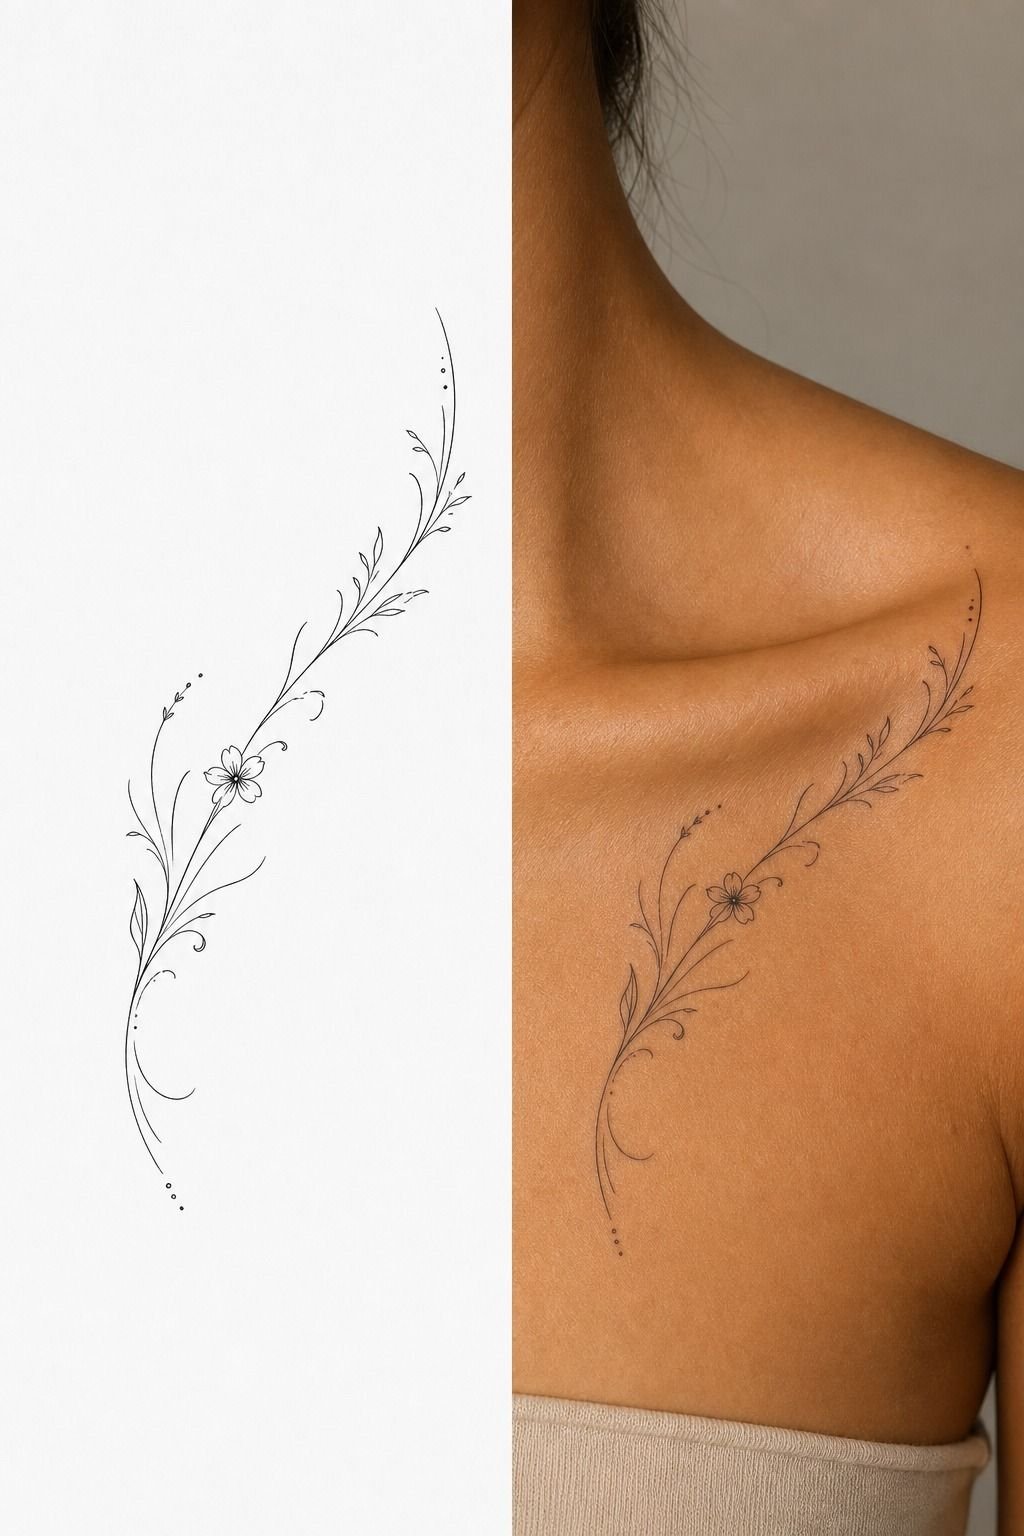
The shoulder cap and the collarbone live close together, but they are two different placements with two different healing profiles. The cap is muscle and padding.
The collarbone is thin skin stretched right over bone, which means it’s spicier to tattoo and it holds a line differently. When a design travels from one to the other, the transition zone is where most pieces succeed or fall apart.
A flow works when the linework crosses the soft valley between the deltoid and the clavicle without a hard stop. I keep the elements loose and connected through that gap, so the eye follows the line naturally. A flow breaks when you cram detail into that hollow, because the skin folds there when you shrug and any fine work bunches and blurs.
Rule of thumb: keep the busy focal pieces on the cap and the collarbone, and let the connector between them breathe.
For sizing, I plan the connector to be roughly a third narrower than the anchor motifs on either end, so it reads as a bridge, not a third design competing for attention. A full cap-to-collarbone piece usually runs three to five hours across two sessions once you factor the transition. If your design is heading toward the clavicle, our collarbone tattoo ideas gallery shows how that thin-skin zone wears over time.
11Start dotwork shading where the muscle rounds out
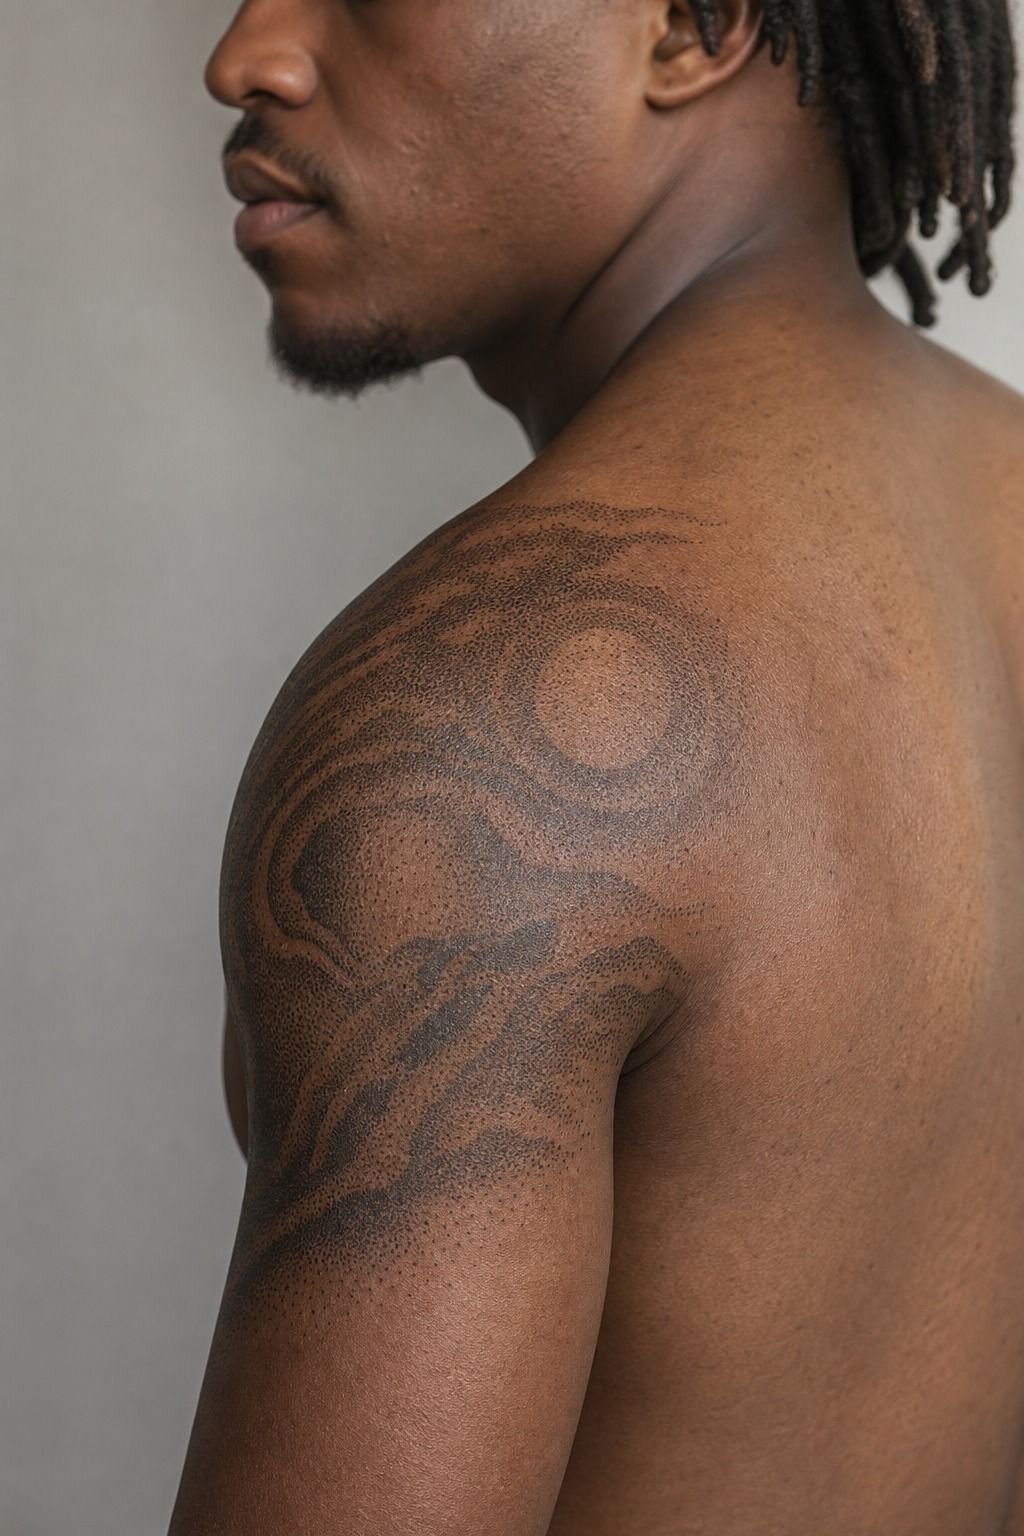
Dotwork is a different beast than grey wash. Where grey wash lays down diluted black ink in smooth gradients, dotwork builds tone through thousands of individual needle points, each one holding its own space in the skin. The result is a textured, almost granular look that ages slower than smooth shading because there is no continuous patch of ink to fade unevenly.
For the shoulder dome, I start dotwork where the muscle rounds out toward the deltoid peak. That is where the skin catches light, and dotwork reads as natural shadow rather than artificial gradient. Pulling dotwork too high onto the cap edge flattens the design, because the bone does not create the same shadow gradient.
Dotwork sessions run longer than grey wash sessions. Each dot is its own needle insertion, and a fully shaded shoulder cap can take three to four hours per session.
Budget for two to three sessions, and expect to pay the higher end of the artist’s hourly rate because dotwork is slow, skilled labor. Worth the splurge if you want shading that ages clean.
The other thing about dotwork: it heals velvety. Where grey wash can look patchy if the artist rushed the dilution, dotwork settles into the skin in a soft, almost printed way.
It holds contrast for years and does not get that muddy look you sometimes see on aged grey wash. If your artist offers both, ask to see healed examples of each on the same skin tone.
For the broader shading style breakdown, our dotwork tattoo guide and black and grey tattoo guide compare the two side by side on real healed skin.
[IMAGE: Healed dotwork shading across a shoulder cap dome, showing the soft granular texture on fair skin]
12Pick a black-and-grey fade for shoulder cap depth
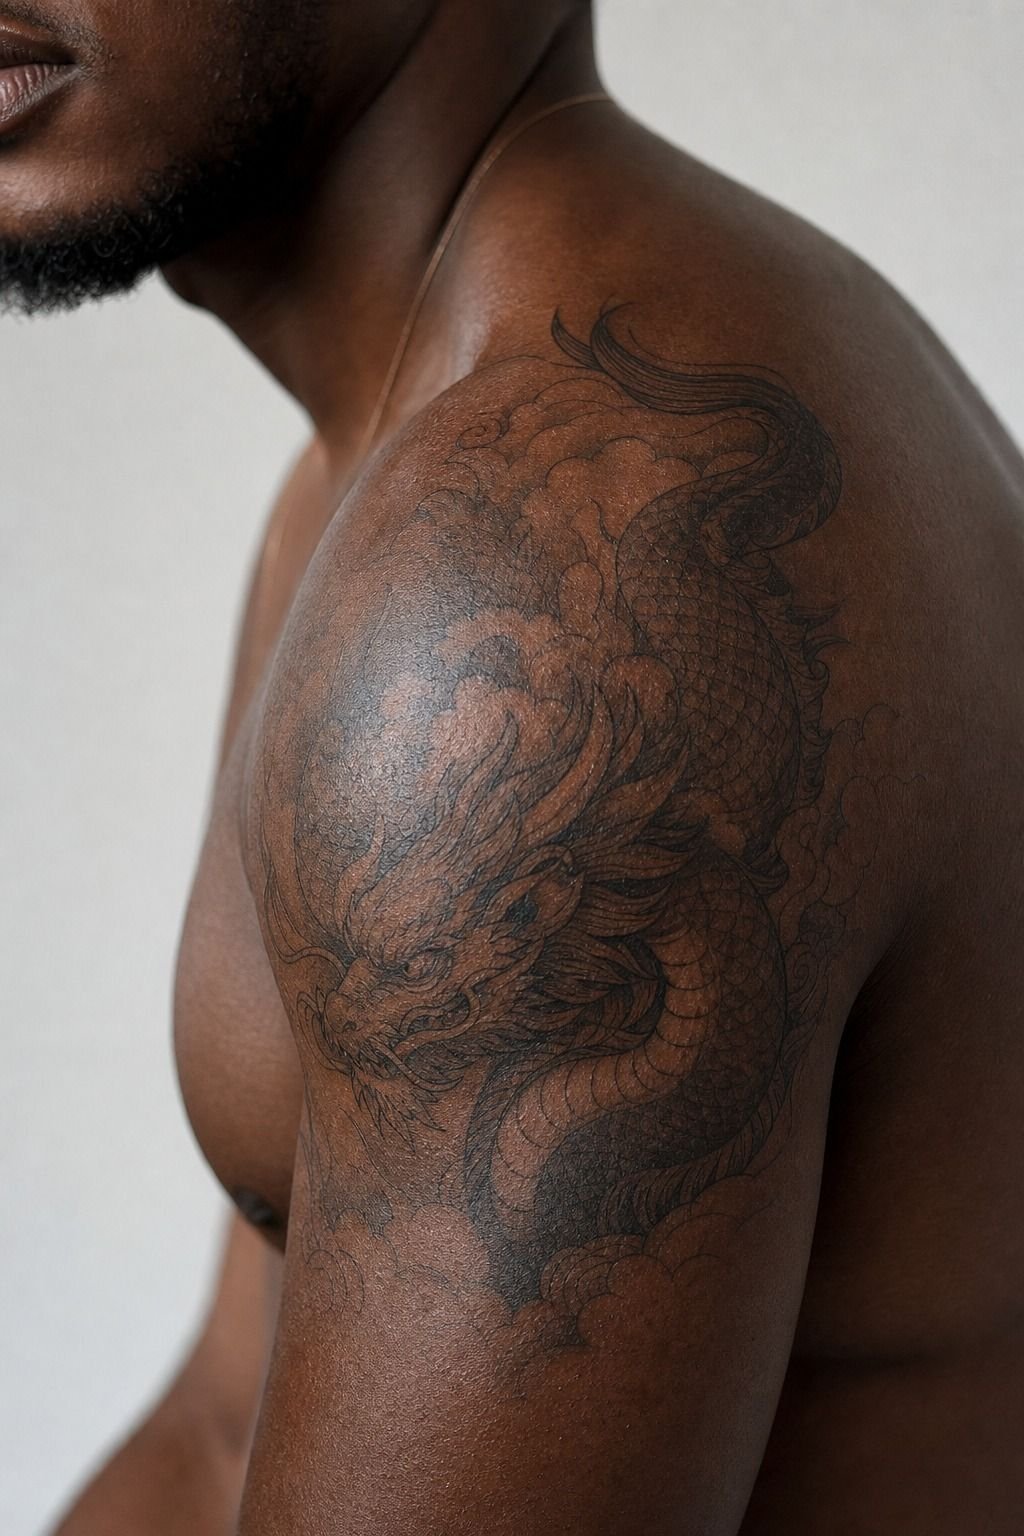
For the shoulder dome specifically, a black-and-grey fade can mimic the way natural light falls across the muscle, and there’s more than one way to lay it down. Whip shade flicks the needle out of the skin for a soft gradient that’s great for feathery edges. Grey wash builds smooth tone with diluted black in controlled passes.
A true black-and-grey fade blends both, packing solid black at the base and pulling it out to nothing across the crown of the cap.
On the dome, I push the contrast a little harder than looks right fresh, because a fade always heals softer, and a fade that heals flat just looks muddy. Soft so it heals velvety, not patchy. The rounded shape of the shoulder actually helps here, since the muscle catches real light and the gradient reads as natural shadow.
Simple shapes with strong contrast are what still read from across the room a decade later.
Now the honest part: a good fade is slow. Expect two to three hours per session and usually two sessions for a full cap, at an experienced artist’s $150 to $250 per hour.
Rushing a fade to save money is how you end up with scratchy, uneven shading you’ll pay more to fix later. Get it done right the first time.
For healed examples across skin tones and a breakdown of the technique, our black and grey tattoo guide is the reference I trust.
Why the shoulder dome is one of the most forgiving placements
I get asked all the time where a first tattoo should go, and more often than not I point at the shoulder cap. After years of watching pieces heal on every part of the body, I’ve come to think of the dome as the placement that gives you the most room to make mistakes and still walk away happy. There’s a reason so many of my cleanest healed photos live right here.
Part of it is the anatomy. The deltoid is muscle and padding, so the pain sits at a dull burn instead of the sharp bone-buzz you get on ribs or ankles. That padding also means the skin heals predictably, without the blowout risk you fight on fingers or the constant friction that chews up feet and elbows.
It’s a low-wear zone, and low-wear zones age gracefully. I’ve seen ten-year-old shoulder caps that still look like they were done last month, and I’ve seen two-year-old finger tattoos that already look like a bruise.
The placement does half the work.
But forgiving isn’t the same as foolproof, and this is the part I wish more people understood. A forgiving canvas rewards good planning and quietly punishes laziness.
The dome will hold a well-placed, well-shaded piece for decades, but it’ll also hold a rushed one, and you’re the one who has to look at it every morning. So I don’t treat the shoulder as an easy spot to phone in. I treat it as the spot where doing it right pays off the longest.
That’s the whole philosophy: pick a placement that works with your body, then respect it enough to plan the design like it’s going to outlive the trend that inspired it. Because on the shoulder cap, it just might.
Cost & time at a glance
Ranges reflect typical US studio pricing in 2026. Hourly rates climb past $300/hr in major metro shops with waitlists.
A standard tip is 20% of the pre-tax total, and the tipping a tattoo artist breakdown walks through when to tip on the card versus cash. For the broader cost picture across all placements, our tattoo cost guide has the full breakdown.
The Questions I Get Asked Most
How much does a Shoulder Cap Tattoo usually cost?
A small symbol on the deltoid peak typically runs about $100 to $250 at most US studios, while a medium wraparound design lands in the $400 to $900 range. Hourly rates for experienced artists sit between $150 and $250 per hour, with minimum shop fees of around $50 to $100 to cover setup and materials.
Worth it if you pick the right artist, expensive regret if you don’t. The full cost picture is in our tattoo cost guide.
Are Shoulder Cap Tattoos a good idea for a first tattoo?
Yes. The shoulder cap is one of the more forgiving placements for a first tattoo because the muscle provides natural padding, the pain level is moderate, and the area heals predictably.
A fine line or small symbol at the deltoid peak is a smart starting point, and it’s easy to keep covered at work while it’s fresh. For more first-timer context, our first tattoo ideas roundup is a useful scroll before the consultation.
How do I choose a tattoo artist for a Shoulder Cap Tattoo?
Look at healed photos, not just fresh ink. Check that the artist’s portfolio includes shoulder cap work specifically, with linework that holds its shape after months of healing. Studio hygiene matters too: single-use needles, autoclave sterilization, and clean workstations should be non-negotiable.
If the artist can’t show you healed photos on shoulders, find someone else. Our how to choose a tattoo artist checklist covers what to verify, and the tattoo red flags page lists the walk-away signals.
How much do Shoulder Cap Tattoos hurt?
The dome of the shoulder is moderate, around a 2 to 3 out of 5. The cap edge and the side shoulder are slightly spicier because the skin is thinner over bone.
Color packing tends to be the spiciest part of any session. The deltoid itself is mostly muscle and padding, so most of the time you’re dealing with a dull burn rather than a sharp sting.
Tap out for five rather than pass out on me. For the full body pain map, our most painful tattoo spots chart lines the cap up against ribs, spine, and ankle.
How long does a Shoulder Cap Tattoo take to heal?
Surface healing takes about 2 to 3 weeks, and the tattoo fully settles into the skin over 2 to 3 months. Avoid sun exposure, pools, and tight clothing across the healing area for the first two weeks to protect the linework.
SPF 50 once you’re past the peeling stage, every single day, no exceptions. Our tattoo peeling guide has photos of the day-by-day stages so you know what’s normal.
What’s the best placement for a Shoulder Cap Tattoo?
The deltoid peak is the visual anchor and the most forgiving placement. For feminine designs, a floral arch along the cap edge or a soft wraparound toward the clavicle reads beautifully.
For bolder work, dotwork or black-and-grey fade across the dome gives you the most depth. Browse our shoulder tattoos for women gallery for cap-edge floral inspiration.
If I Had to Pick One Step
If I had to pick one step, I’d start with the stencil. Get the placement right, watch your artist wrap the dome in transfer gel, and wear that stencil home for an hour before any ink goes in.
A tattoo that’s placed well heals well. A tattoo that’s placed fast heals loud.
Take the extra twenty minutes at the consultation. They’ll save you a year of regret.