Indian mehndi designs hold up best when you treat them like pattern maps, not tiny lace you cram into high-wear skin. I see the same miss over and over. People bring in a gorgeous reference, then shrink it onto a hand or finger where those crisp trails can’t stay clean as the stain develops. This guide fixes that by walking you through line weight, open skin, placement, and the stuff that stains evenly.
Before You Start, What Matters Most In The Three-Filter Rule?
Before you commit, run every mehndi reference through three filters: placement, line weight, and drying time. If your goal is a stain that still reads clean after it deepens, you need all three. A hand can look gorgeous fresh, sure, but it’s a high-wear zone, and those tiny loops can get messy fast if your mehndi artist has no clearance to pull one clean line.
I tell clients to screenshot the reference and zoom all the way in. Count how many details live inside one inch.
If you can’t separate the paisleys, dots, and micro leaves at arm’s length, your artist will either enlarge it or simplify it. That’s not them being difficult.
That’s longevity.
Here are the real US benchmarks I use when I talk someone through a mehndi application:
- Start With A Classic Indian Palm Mandala
- Pick A Stylish Front Hand Mehndi Trail
- Place Paisley Fill Around The Palm Center
- Keep Finger Lines Clean And Even
- Plan A Bridal Wrist To Finger Layout
- Choose Indian Florals Across The Knuckles
- Add Fine Dotwork Around Finger Joints
- Frame Fingertips With Bold Henna Caps
- Build A Full Hand Indian Mehndi Pattern
- Map A Trendy Arabic Indian Vine
- Use Negative Space Between Dense Details
- Shape A Lotus Motif Near The Wrist
- Layer Bridal Paisleys With Clean Borders
- Match Thumb Details To Finger Trails
- Extend Henna Lines Toward The Forearm
- Balance Dense Fill With Open Skin
- Refine Every Curve Before Paste Dries
- Photograph The Design In Natural Light
- Choose The Indian Mehndi That Fits Best
1Start With A Classic Indian Palm Mandala
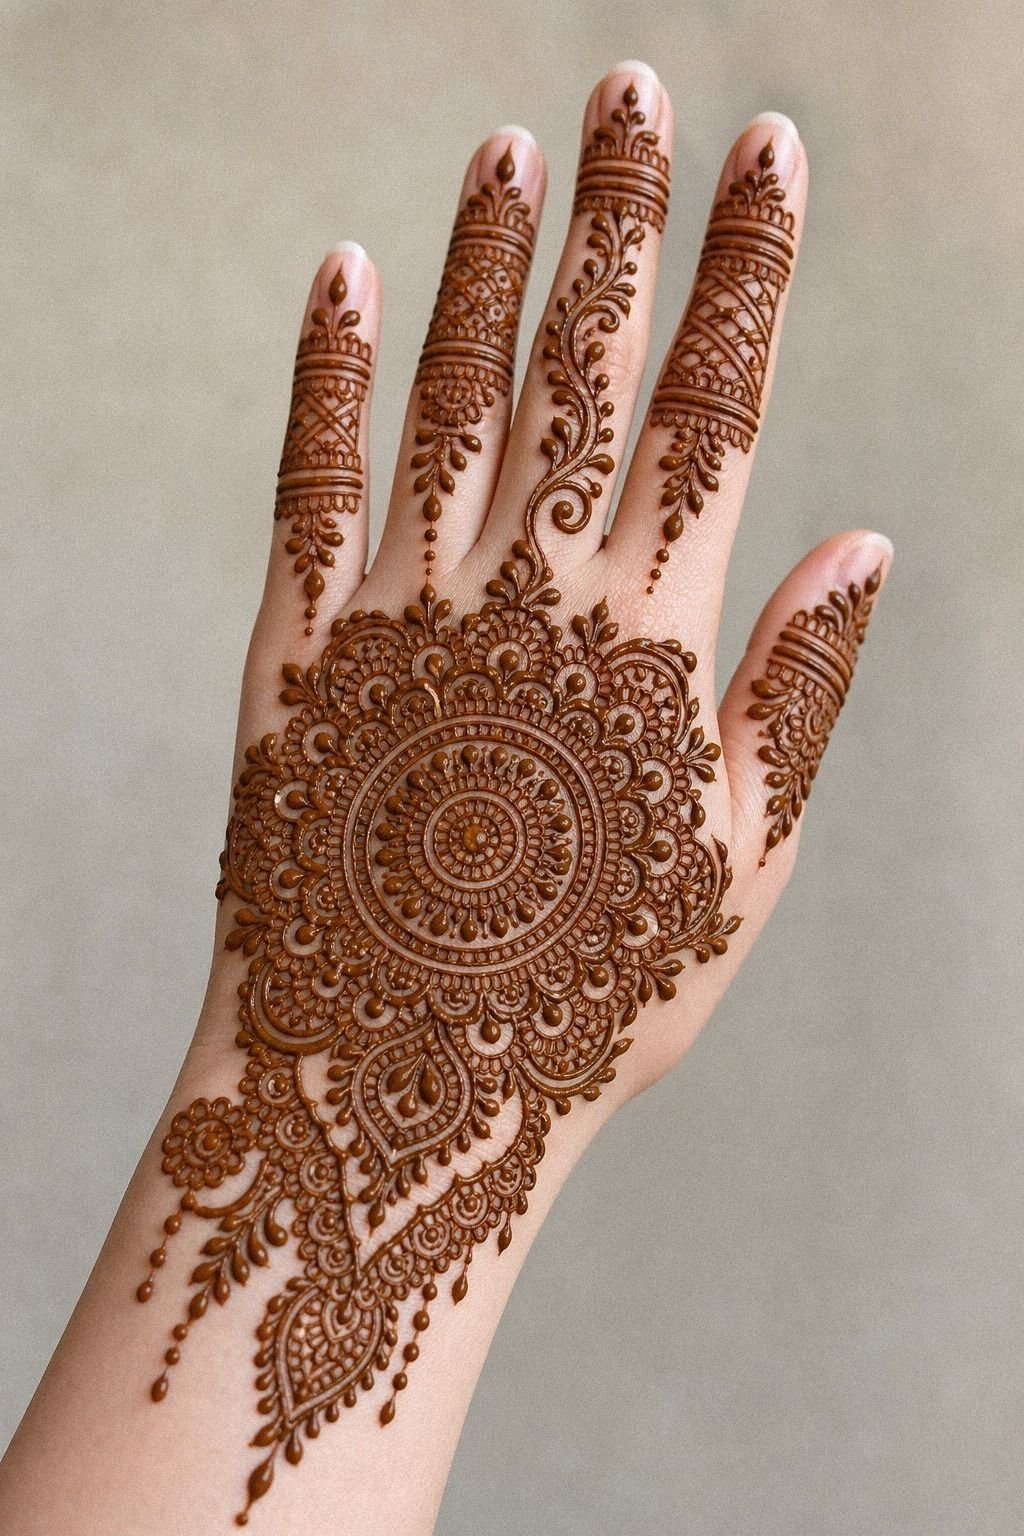
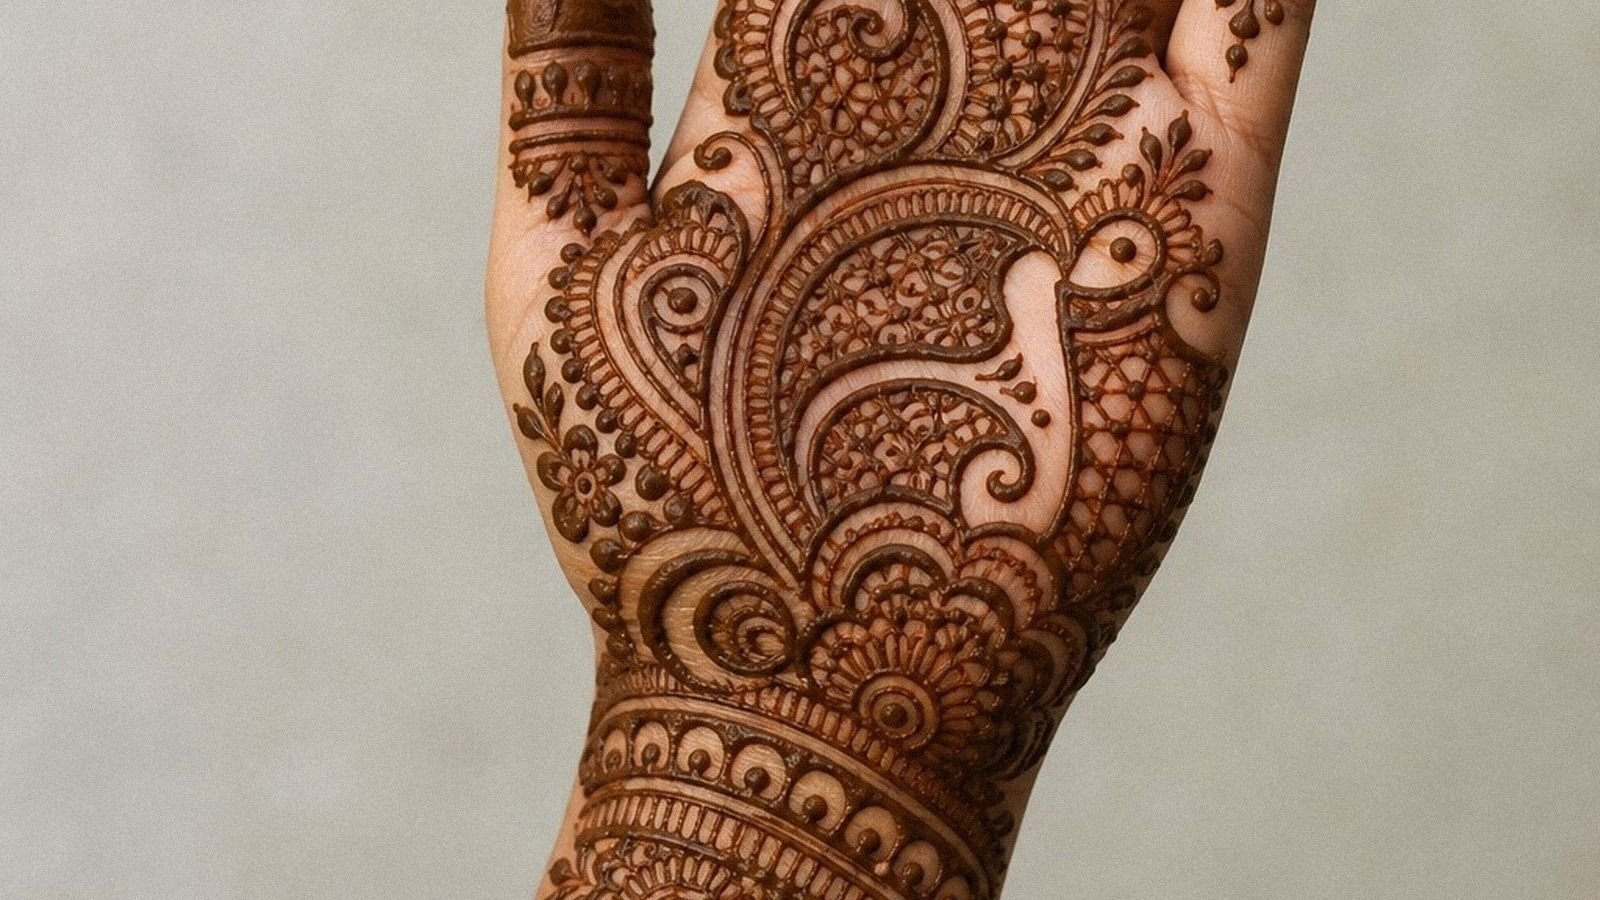
Start with a strong center. A classic back-of-hand palm mandala works because your eye lands on one big read before it starts chasing details, and that is what keeps the whole mehndi pattern from turning busy as the stain develops.
In the photo, you can see that rich reddish-brown circle sitting proud over fair skin, with the finger trails supporting it instead of fighting it. That’s the move you want.
Ask for the mandala core to be built with a 7RL liner or another grouping your artist trusts for crisp petals. I’d not squeeze twelve tiny rings into a 2-inch circle on a hand. Too cute on day one, too muddy by year three.
If you love this layout, pair it with ideas from mandala mehndi designs so your artist can simplify without losing the Indian feel.
Keep the outer petals a little bolder than the finger trails. That contrast matters.
And if you’re torn between more lace and more open skin, choose the open skin. Your future self will thank you!
2Pick A Stylish Front Hand Mehndi Trail
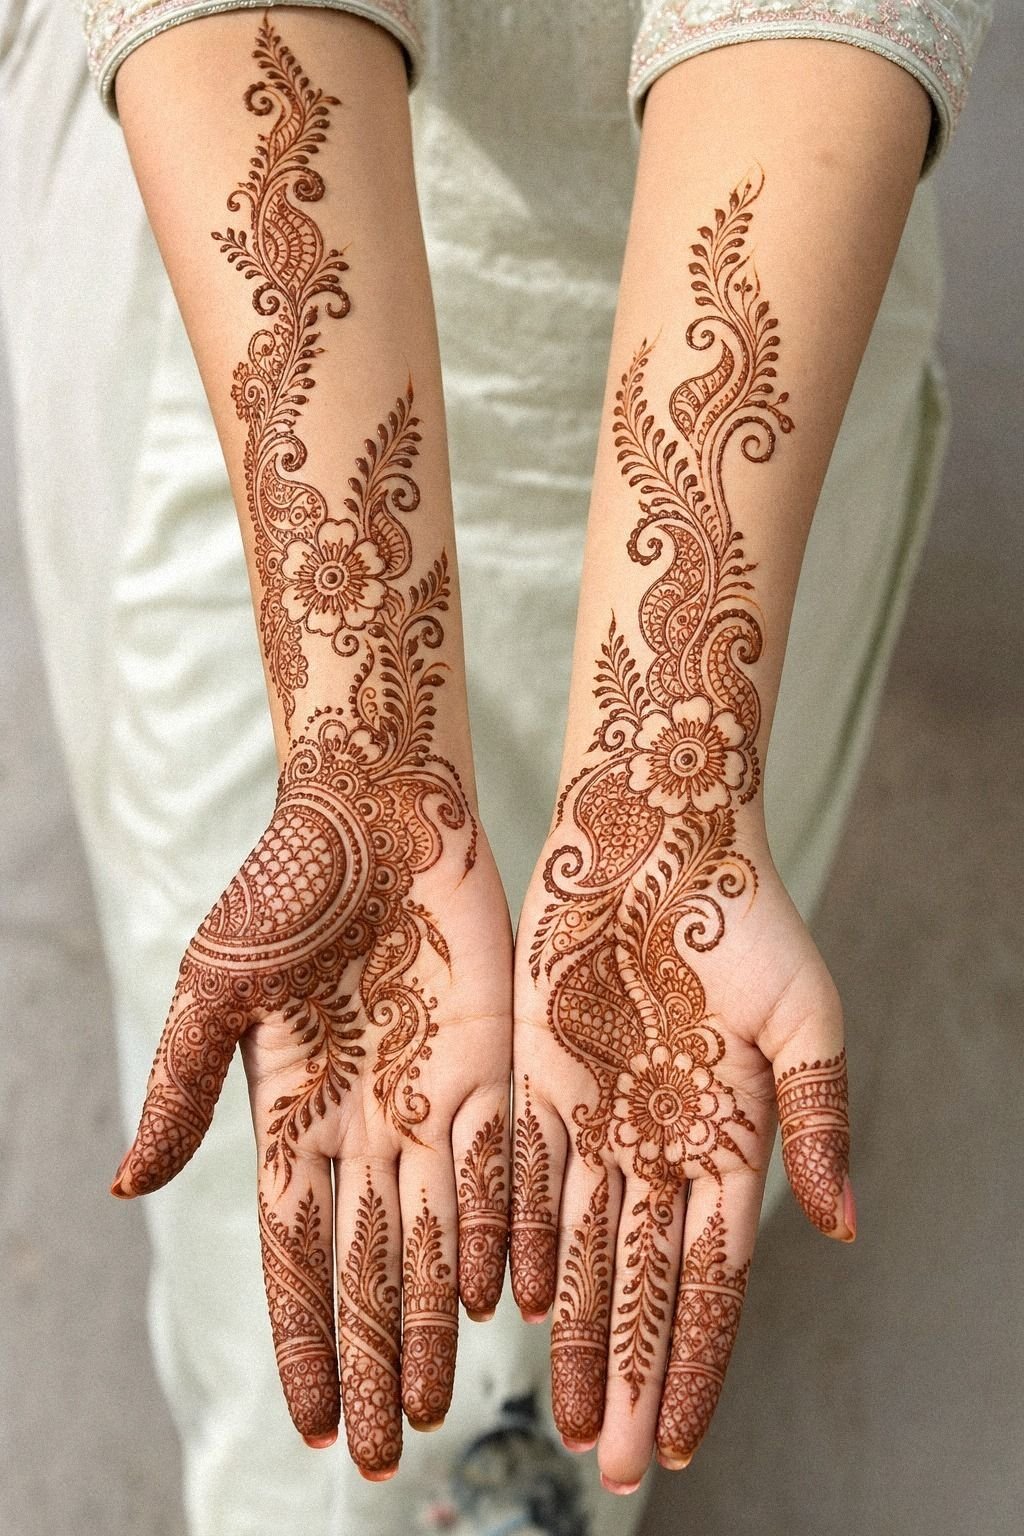
For a front-hand trail, think flow before density. The photo shows both palms with center trails that travel down the middle and fan toward the fingers, and that is why it looks clean instead of busy. You want the eye to move in one direction, not stop at ten competing medallions.
I like a palm trail when you borrow from front hand layouts because it gives your mehndi artist an easy way to extend the pattern up the forearm later. The cleaner the trail, the easier it is to apply evenly instead of patchy. If you’re gathering references, stylish mehndi designs for front hand gives you good examples of that center-led sweep.
Skip packed filler under every finger. You need clearance between the teardrop repeat or you’ll lose the rhythm fast. But keep one repeating shape, usually a teardrop or leaf, so your design still feels intentional.
3Place Paisley Fill Around The Palm Center
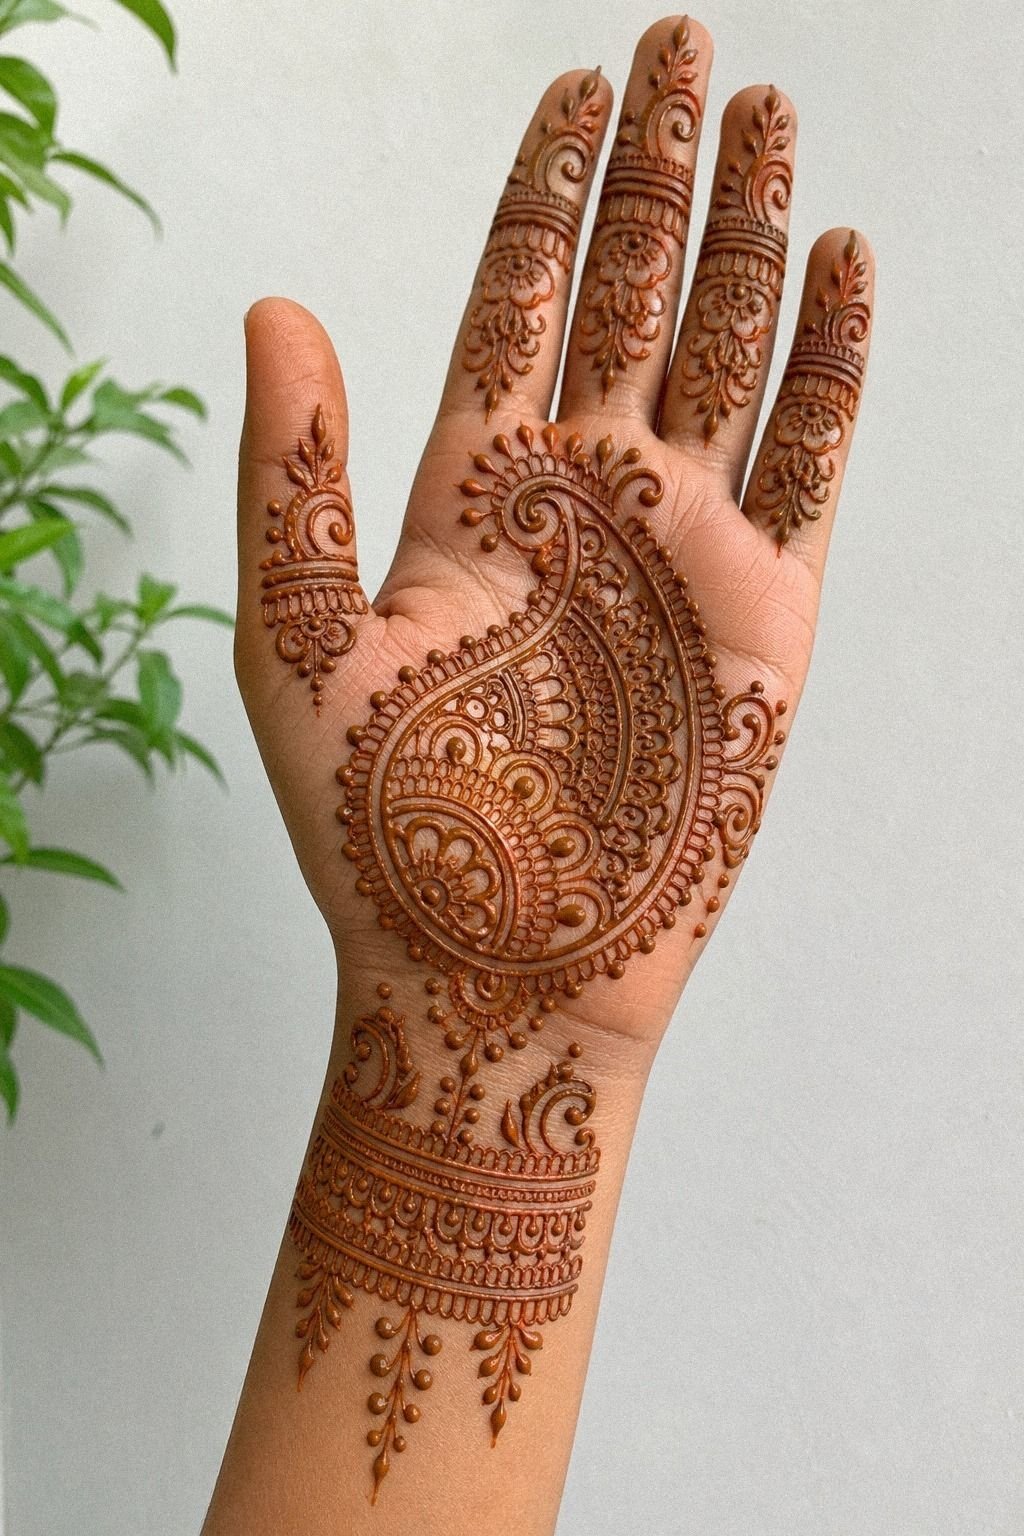
Paisley fill works best when it orbits the palm center instead of swallowing it. On medium olive skin like the photo, those reddish-brown paisleys sit around the middle and leave the eye a place to rest.
That’s exactly how I map a mehndi design for a clean application. The main shape reads first, and the filler supports it.
Tell your artist you want paisley clusters in bands, not wall-to-wall packing. A cluster can hold three or four internal cuts and still age cute on you if there is open skin between each one.
I made the mistake of approving a tighter version once, and the healed result looked flatter than the stencil. Lesson learned.
If you’re not sure how much fill is enough, compare your reference against modern mehndi designs. The better ones know when to stop. More detail is not always more beautiful.
4Keep Finger Lines Clean And Even
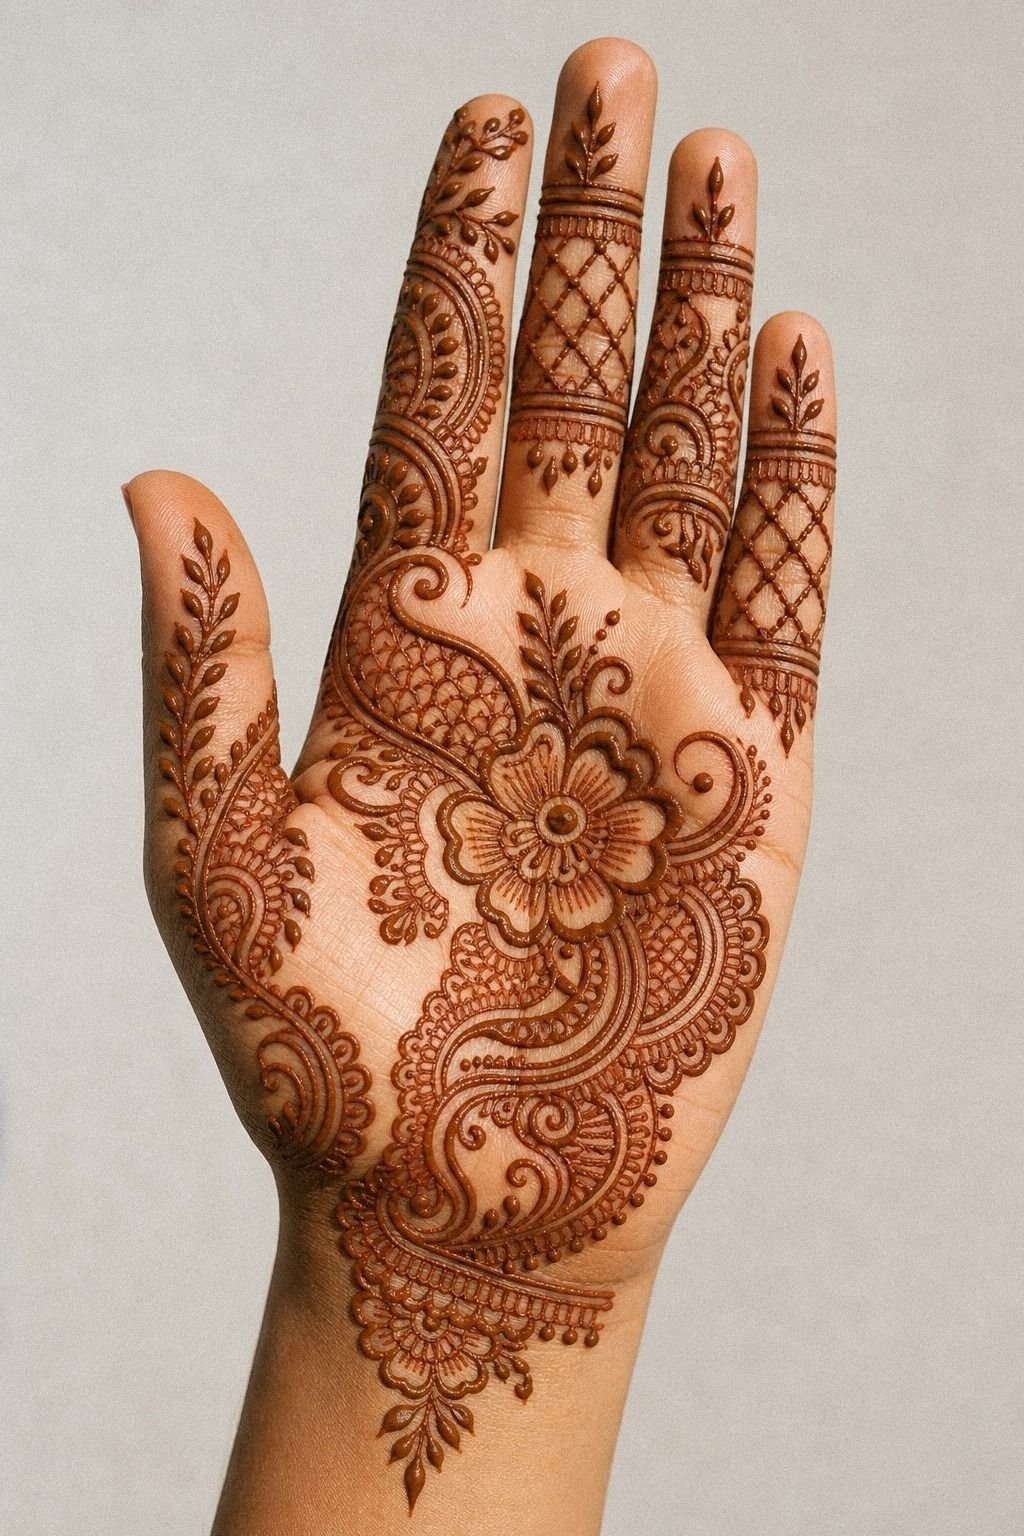
Finger work is where a pretty idea gets exposed. In the photo, the golden tan fingers carry slim finger bands that stay even from knuckle to tip, and that is why the design still feels polished. If those lines wobble, crowd, or change thickness every few millimeters, the whole mehndi pattern starts reading messy.
Ask for your artist’s most confident single-pass linework here. One clean pull beats ten fuzzy ones every time.
I don’t love micro chevrons stacked on all four fingers because fingers are high-wear, high-motion skin. They fade.
They blur. They ask for touch-ups.
Want a safer version? Move the same finger rhythm onto the outer forearm and keep the hand as the reference photo only. You can still mine simple mehndi designs front hand easy for pattern ideas without tattooing every tiny detail on the hand itself.
5Plan A Bridal Wrist To Finger Layout
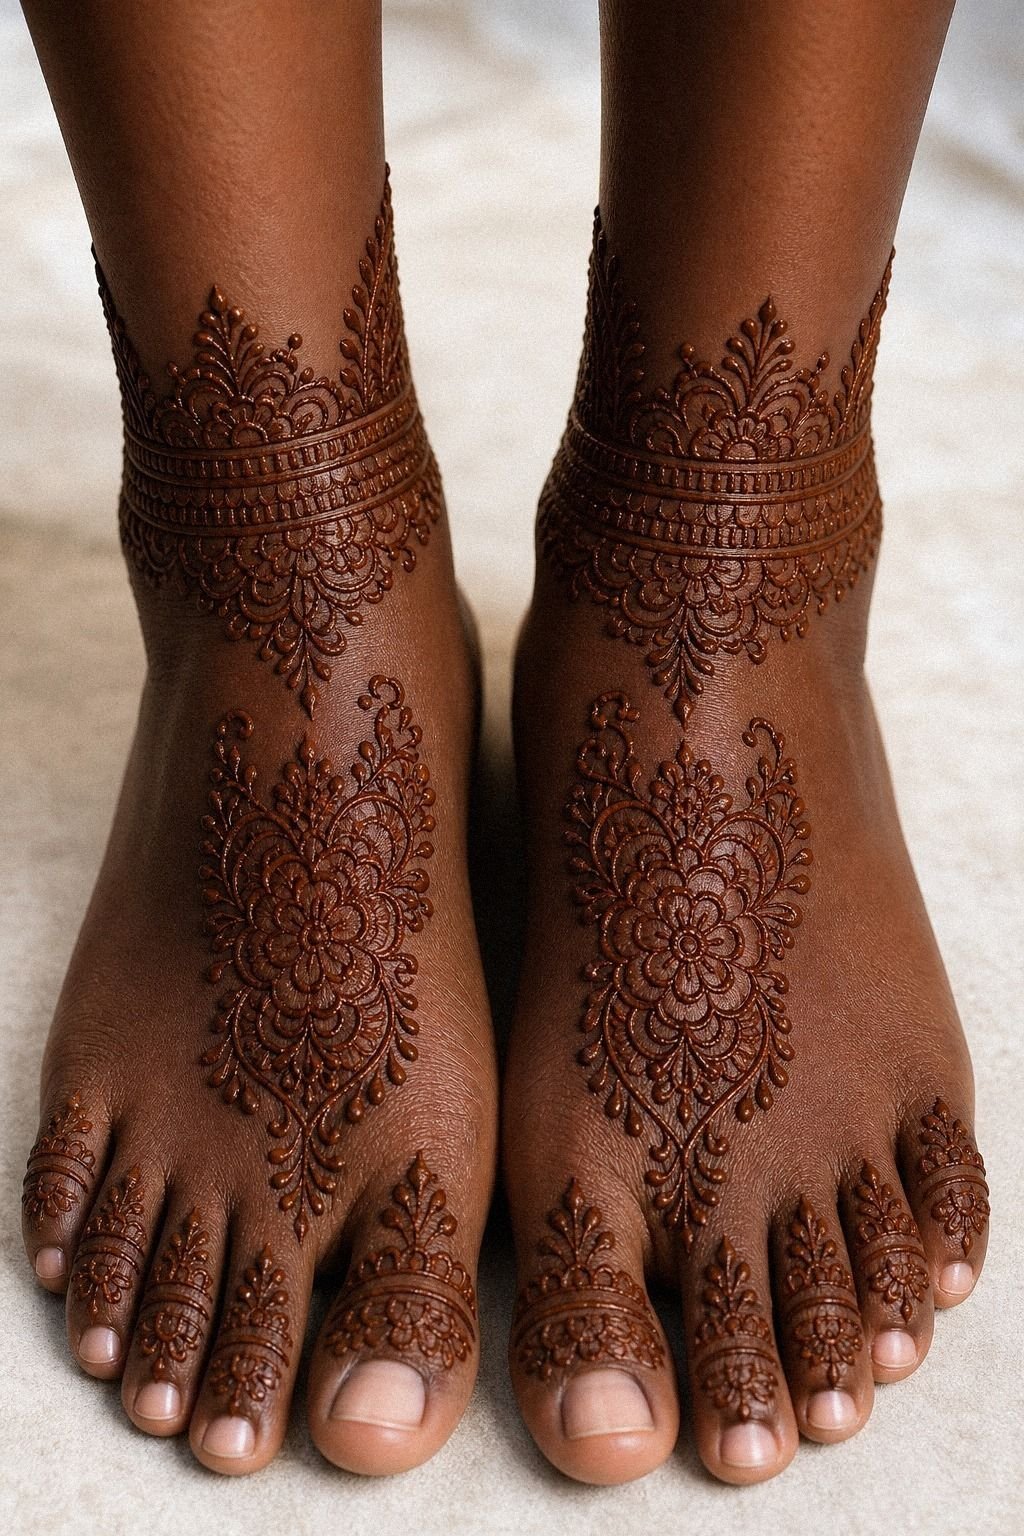
Bridal layouts need a route. Even though the photo shows feet and ankles on deep brown skin, the same bridal route still applies: you want one clean path that leads the eye from the anchor area into the smaller details. If you’re planning the application, map the route from wrist to finger first, then decide where the heavy fill belongs.
I build these with an anchor chain: cuff, connector, then lighter finger motifs. On feet or ankles, that might mean a bolder band near the ankle bone and softer vines over the top.
On hands, it means the wrist carries the weight so the fingers don’t get overloaded. Why rush the route and fix it later?
For bridal references, pakistani mehndi designs are useful because they show how dense and delicate can live together. You still need editing, though. The cone gives you less room to correct once the paste starts drying.
6Choose Indian Florals Across The Knuckles
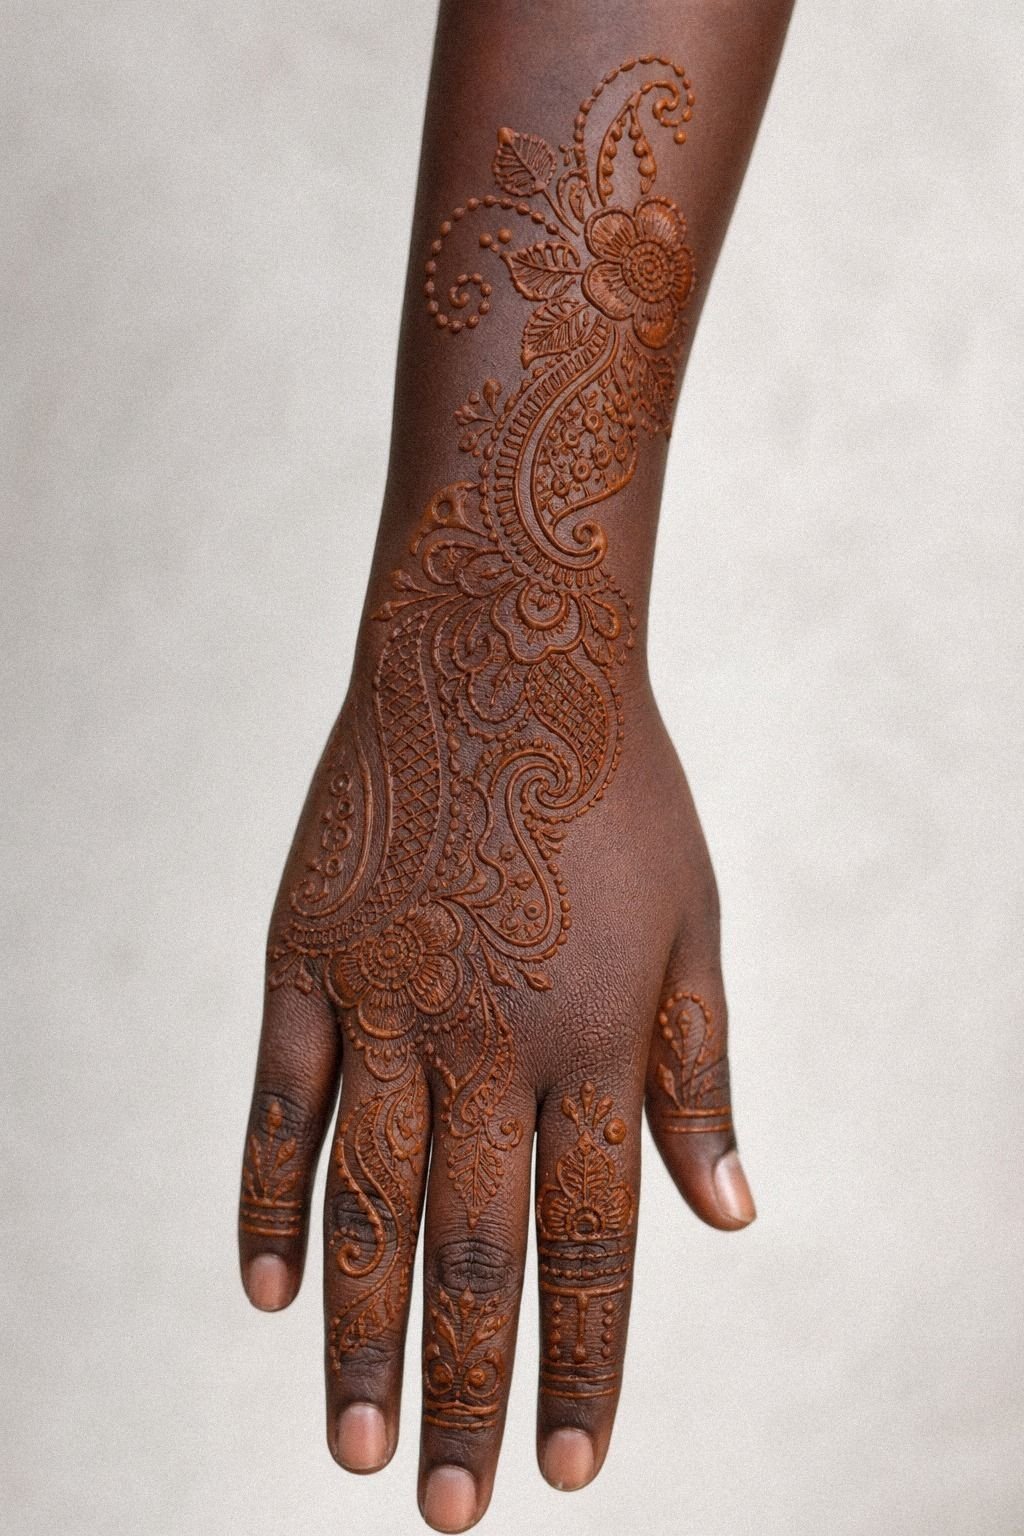
Florals across the knuckles can look solid if the petals are simplified.
7Add Fine Dotwork Around Finger Joints
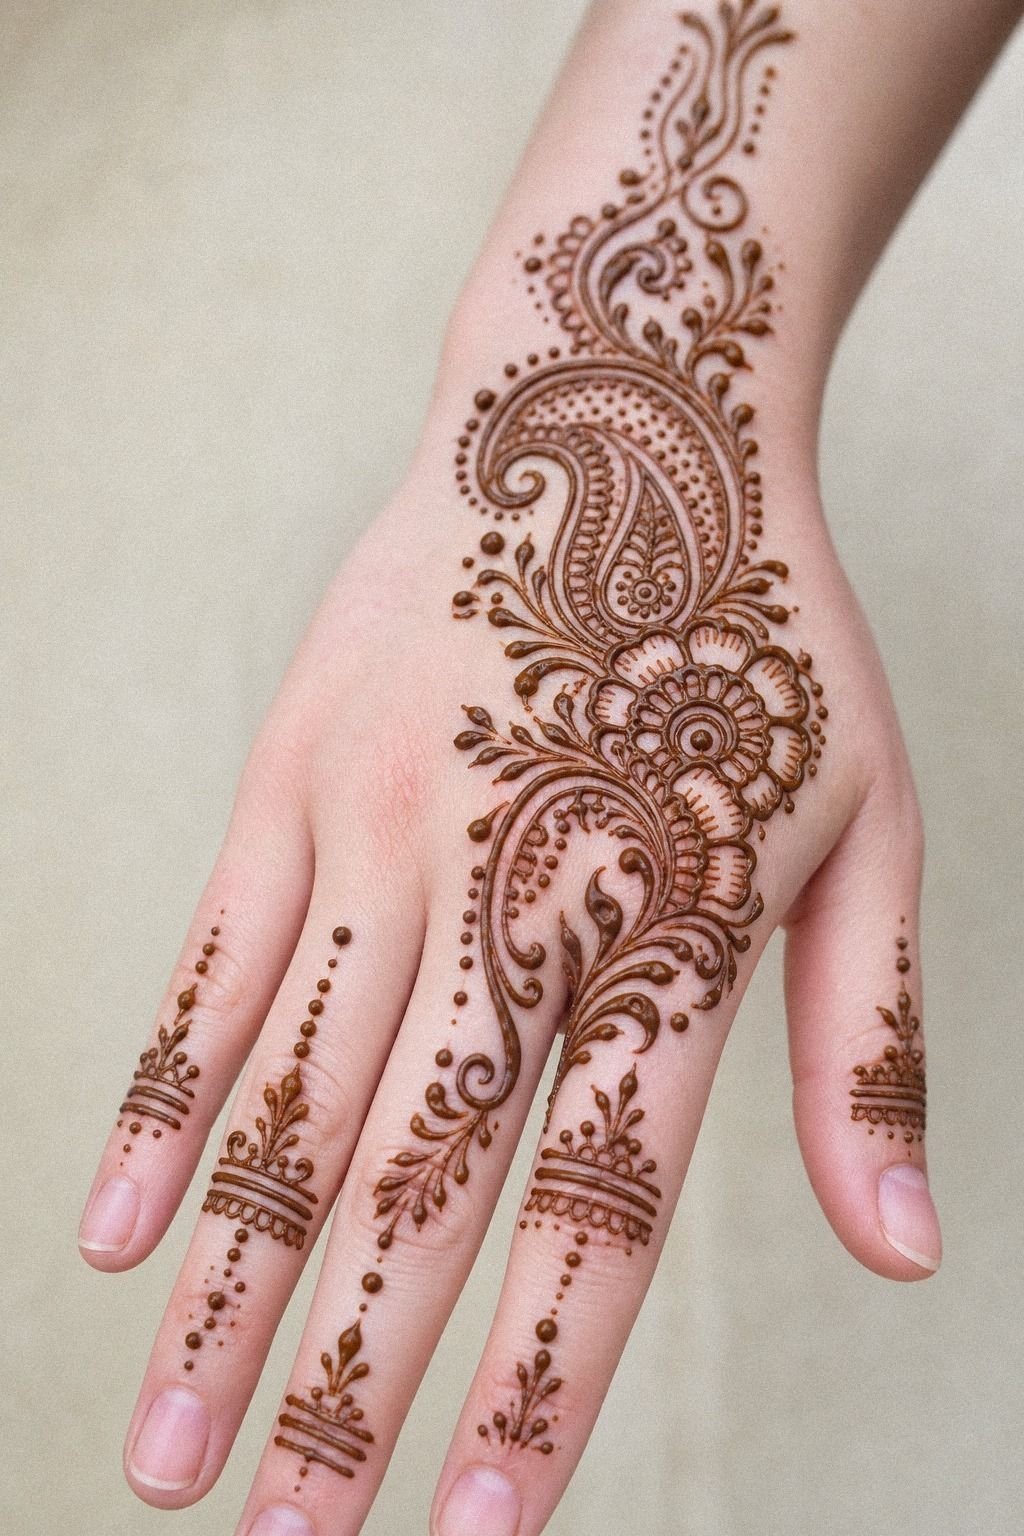
Dotwork around the joints should whisper, not shout. The fair cool hand in the photo has tiny dot accents around the fingers that soften the geometry, and that is the right job for dots. They should frame the linework and help the design sit cleaner on skin, not clog every hinge.
I like micro dot chains only when the main lines are already bold enough to carry the piece. If all you have is delicate dots and hairline curves, the design will not have enough visual weight once the stain settles.
Keep the dots in short runs near one or two joints, then back off. Your knuckles move all day, and motion changes how crisp tiny marks stay.
If you want more dot references without overdoing it, trendy mehndi designs front hand can still teach rhythm. Just tell your artist to simplify every second accent. It keeps things cleaner.
8Frame Fingertips With Bold Henna Caps
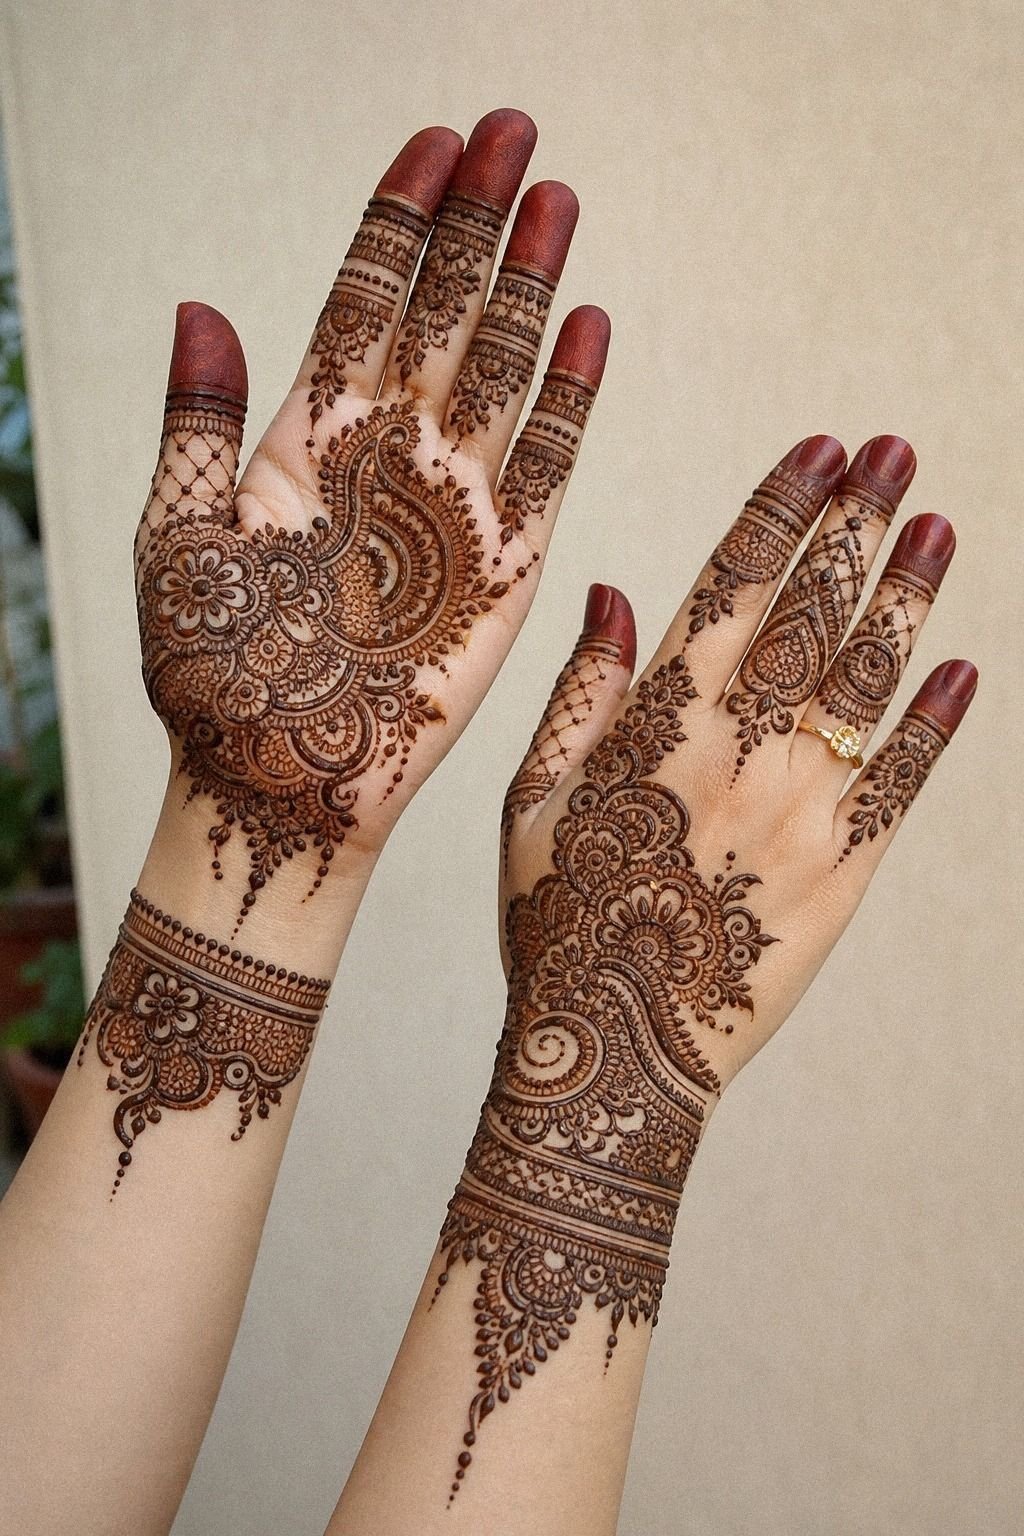
Bold fingertip caps are the spicy option. They look great in the photo because both palms carry dense fingertip caps that clearly stop and start, so your eye reads them as punctuation instead of a smudge. That clean edge is everything when you borrow the idea for mehndi planning.
I’d only use dense fingertip caps in mehndi if you accept a bolder stain. Fingertips fade quickly.
Hands get washed, bumped, sun-hit, and dried out. If you still love the look, make sure the cap edge is blunt and obvious, not feathery.
A mushy border on a fingertip ages rough fast.
For a softer version, cap only the index finger and middle finger, then let the rest stay open. That keeps the drama and cuts the risk.
But don’t ask for four different fill textures on four fingertips. That’s where the design starts fighting itself.
9Build A Full Hand Indian Mehndi Pattern
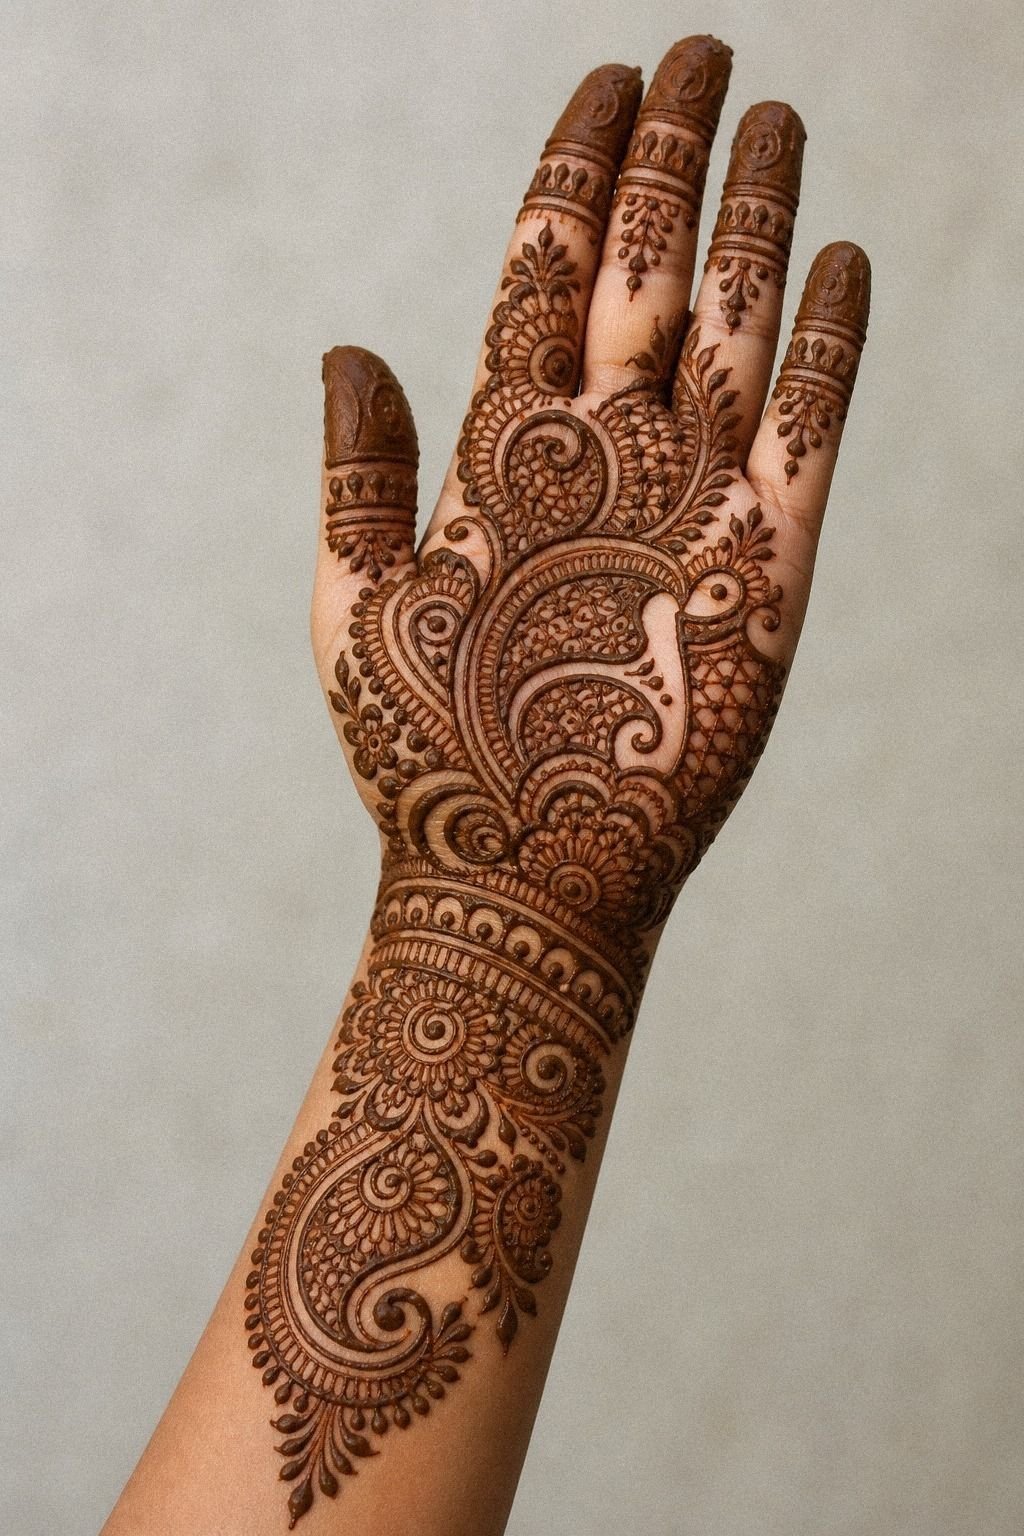
A full hand pattern needs hierarchy or it turns into wallpaper. In the photo, the medium olive hand and wrist are loaded with dominant motifs, but your eye still finds the big shapes first.
That’s because the artist gave the hand a few dominant forms, then let the smaller pieces support them. Smart.
Use three focal zones: one at the hand center, one on the wrist, one shared across two fingers. I tell clients to stop there.
If you try to make every inch equally loud, nothing reads. A full hand mehndi application also takes more time than people expect, usually one longer appointment or two shorter ones depending on the artist and how much cleanup the symmetry needs.
But if you’re chasing a denser look, compare it with peacock mehndi designs. Peacock layouts teach hierarchy really well because the feather eye naturally becomes your focal point.
10Map A Trendy Arabic Indian Vine
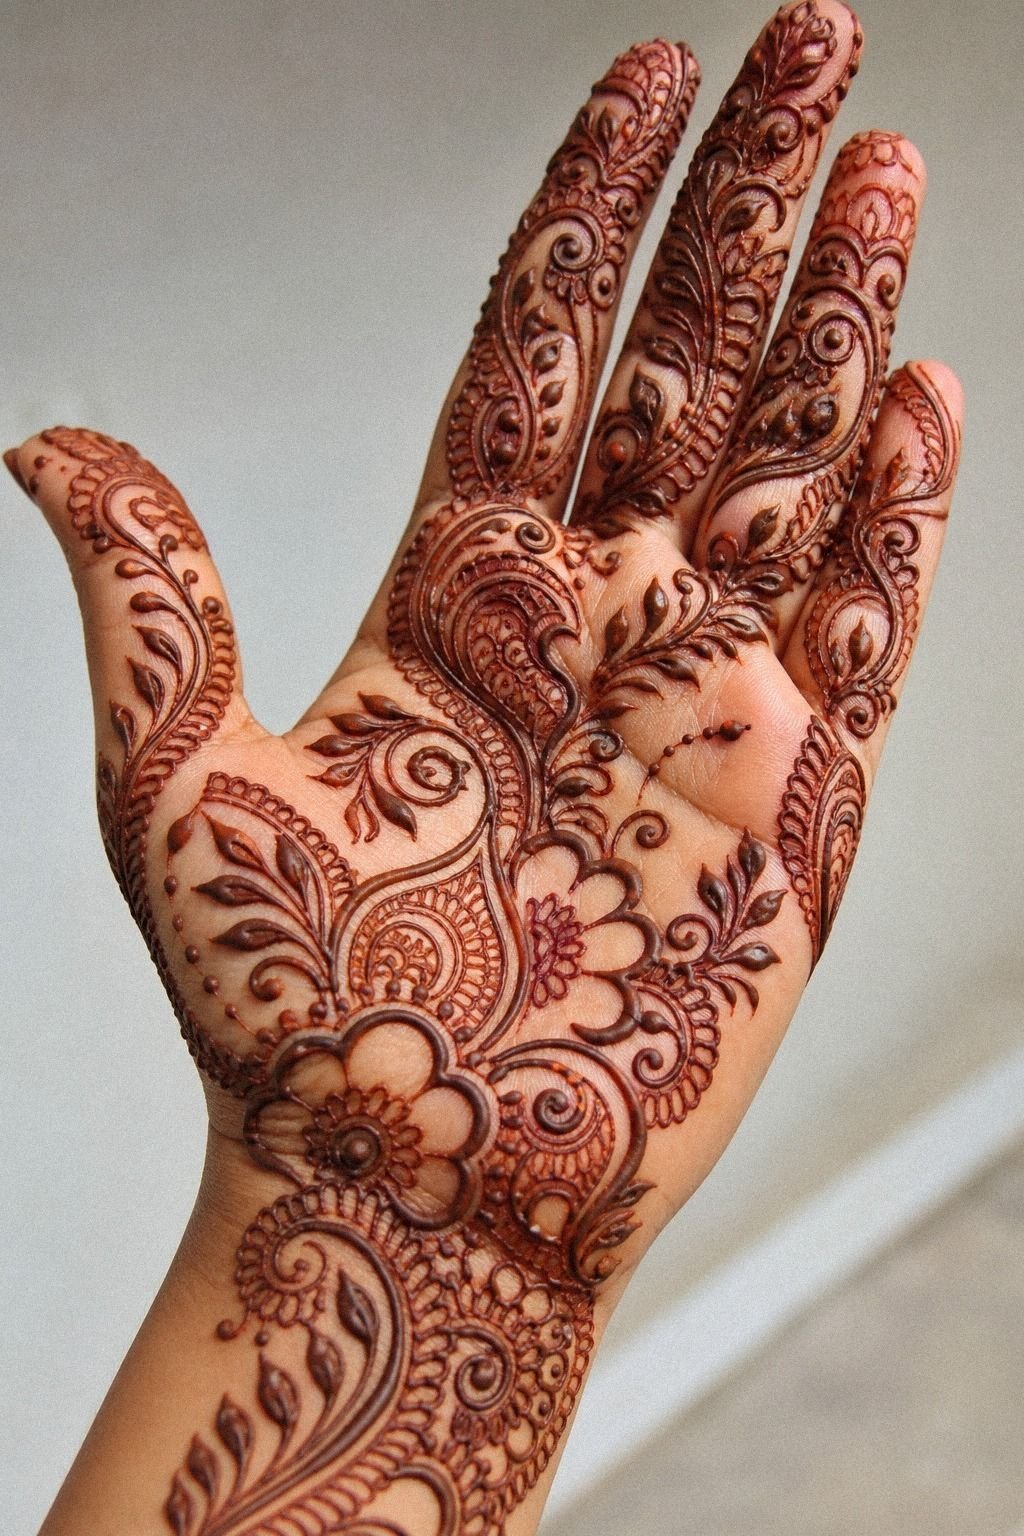
A vine layout wins when the motion feels loose but the structure stays controlled. The golden tan fingers and palm in the photo show that classic diagonal vine sweep, and that is why Arabic-leaning mehndi references feel lighter on skin.
You get movement. You get elegance.
You also get fewer packed zones that can blur together.
Ask for vine spacing that opens as it moves away from the palm. Tight at the base, looser near the wrist or forearm. I’d not force a mirrored vine on both sides of the hand unless your artist is very strong at symmetry.
One confident trail usually dries cleaner than two competing ones.
If you want more ideas in that lane, modern mehndi designs and peacock mehndi designs 2 are solid starting points. The key is editing. Take the leaf rhythm, not every leaf.
11Use Negative Space Between Dense Details
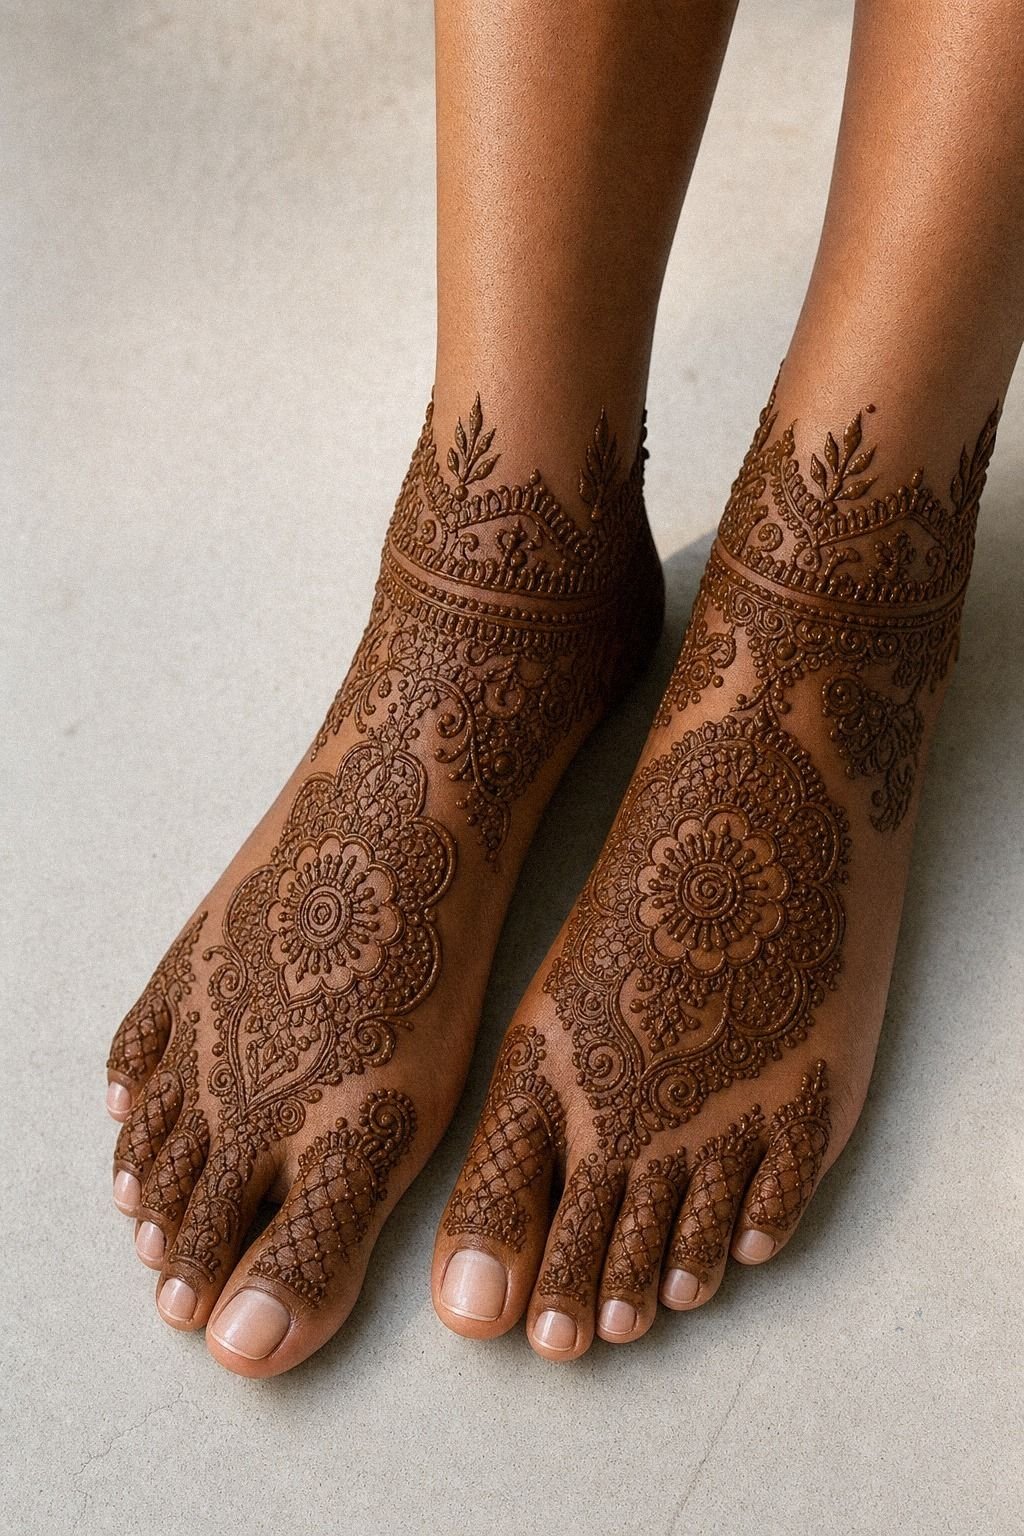
Negative space is what keeps dense mehndi from collapsing into brown noise. On the foot and ankle photo, the deep brown skin shows clean negative-skin breaks between the busy zones, and those breaks are doing real work. They let each paisley and band finish its sentence before the next one starts.
I call this the Open-Skin Rule. For every dense cluster, you need a clean break nearby, especially on hands and feet.
If your reference has no visible skin between motifs, enlarge it or delete pieces. That’s not killing the design. That’s protecting it.
You can see better pacing in mandala mehndi designs when the center sits bold and the outer ring loosens up. Follow that logic and your dense cluster will read cleaner for longer. Big win!
12Shape A Lotus Motif Near The Wrist
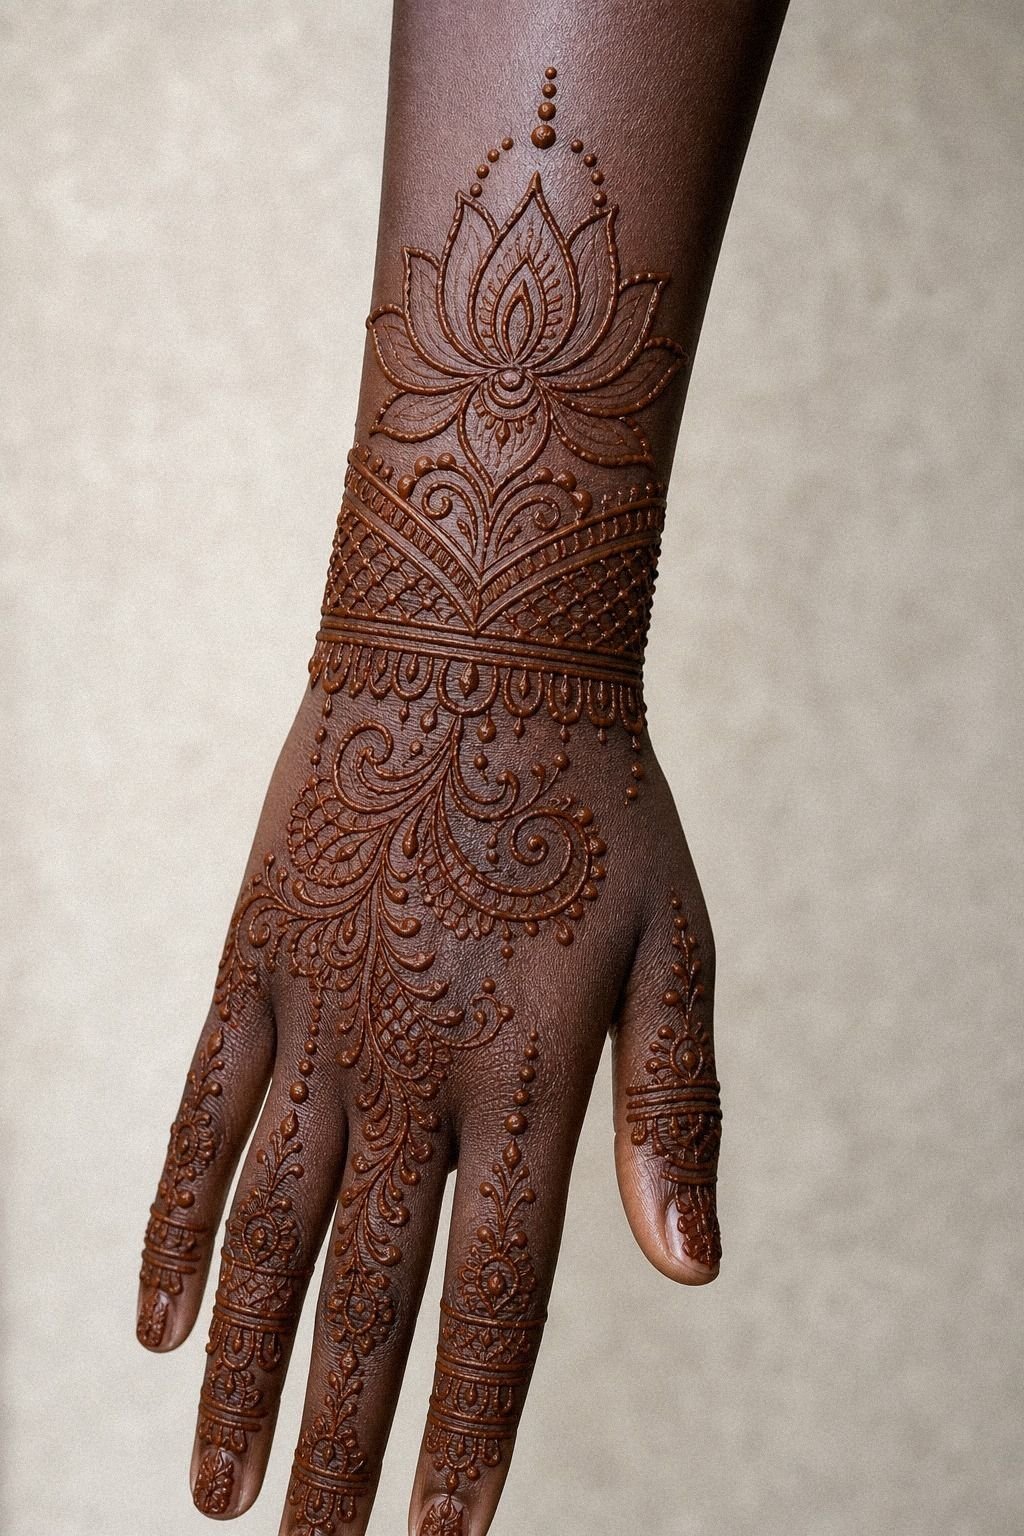
A lotus near the wrist gives the pattern a clean landing point. In the photo, the deep ebony forearm and hand carry a lotus motif close to the wrist, and that placement works because the wrist has flatter skin and more visual stability than the fingers. Your artist gets clearance to pull crisp curves without fighting as much motion.
Ask for the lotus to be built with 5RL petals and a simple center, not a bunch of tiny veins. I like the wrist for this because it can anchor the whole design while leaving the hand lighter.
If you’re planning your first mehndi application, that balance matters. The wrist can be tricky, sure, but it holds a clear route better than micro details stacked over every knuckle.
Need more floral direction? Pull shape ideas from very simple mehndi designs and keep the wrist anchor clean.
You can always add more later. Fixing blur is harder.
13Layer Bridal Paisleys With Clean Borders
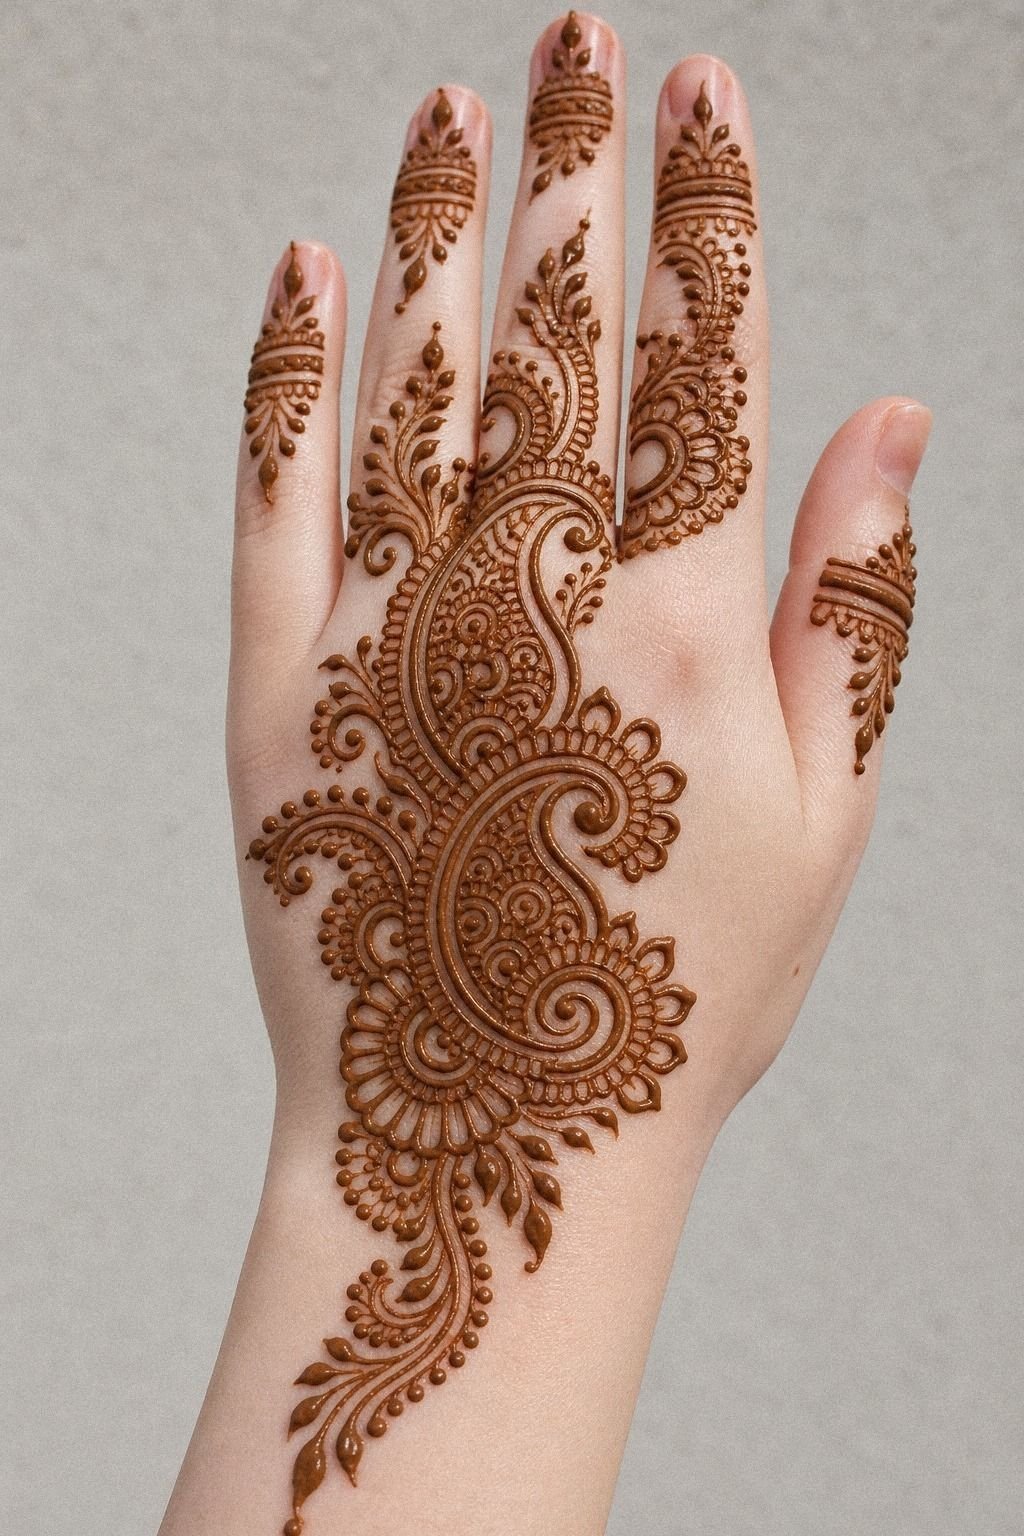
Bridal paisleys only stay elegant when the borders stay obvious.
14Match Thumb Details To Finger Trails
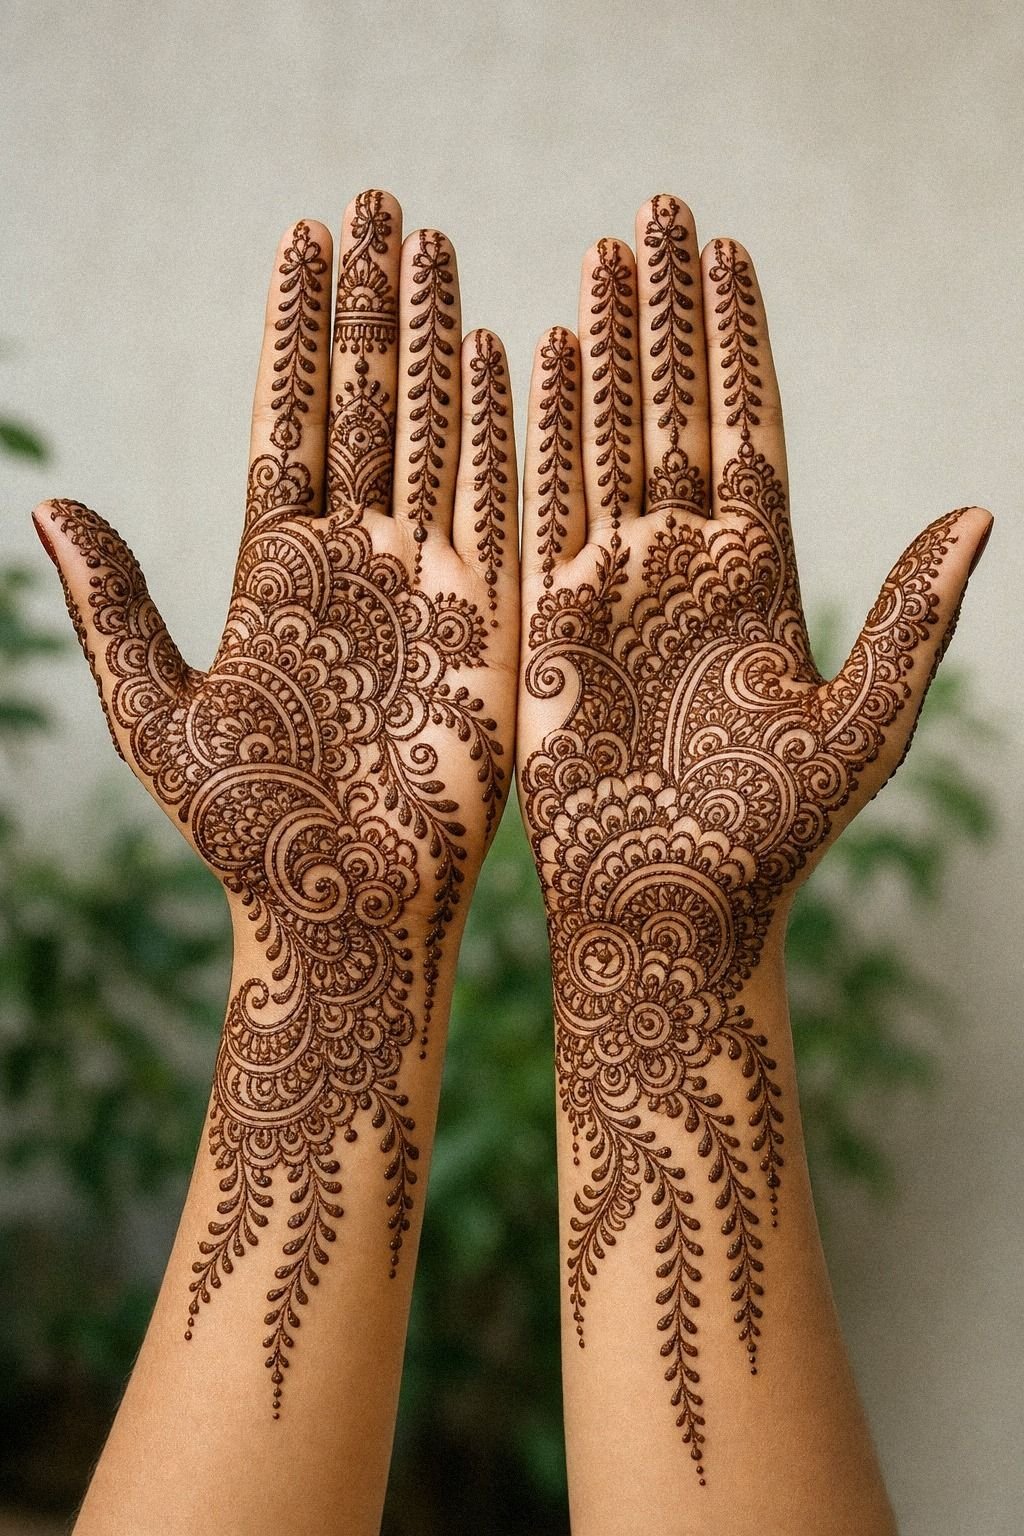
The thumb cannot look like it belongs to a different design. In the photo, both palms show thumb details that echo the finger trails, and that is why the whole layout feels finished.
You want repetition, not randomness. Same curve family. Same density.
Same rhythm.
I use a mirror-echo rule here: repeat one motif from the fingers on the thumb, then stop. If the fingers carry leaf trails, the thumb gets a leaf trail.
If the fingers use teardrops, the thumb gets one version of that. But don’t let the thumb become the most detailed part unless you want it stealing focus every time your hand turns.
You can study that echo effect in stylish mehndi designs for front hand or simple front hand ideas. Consistency is what makes the whole layout feel expensive.
15Extend Henna Lines Toward The Forearm
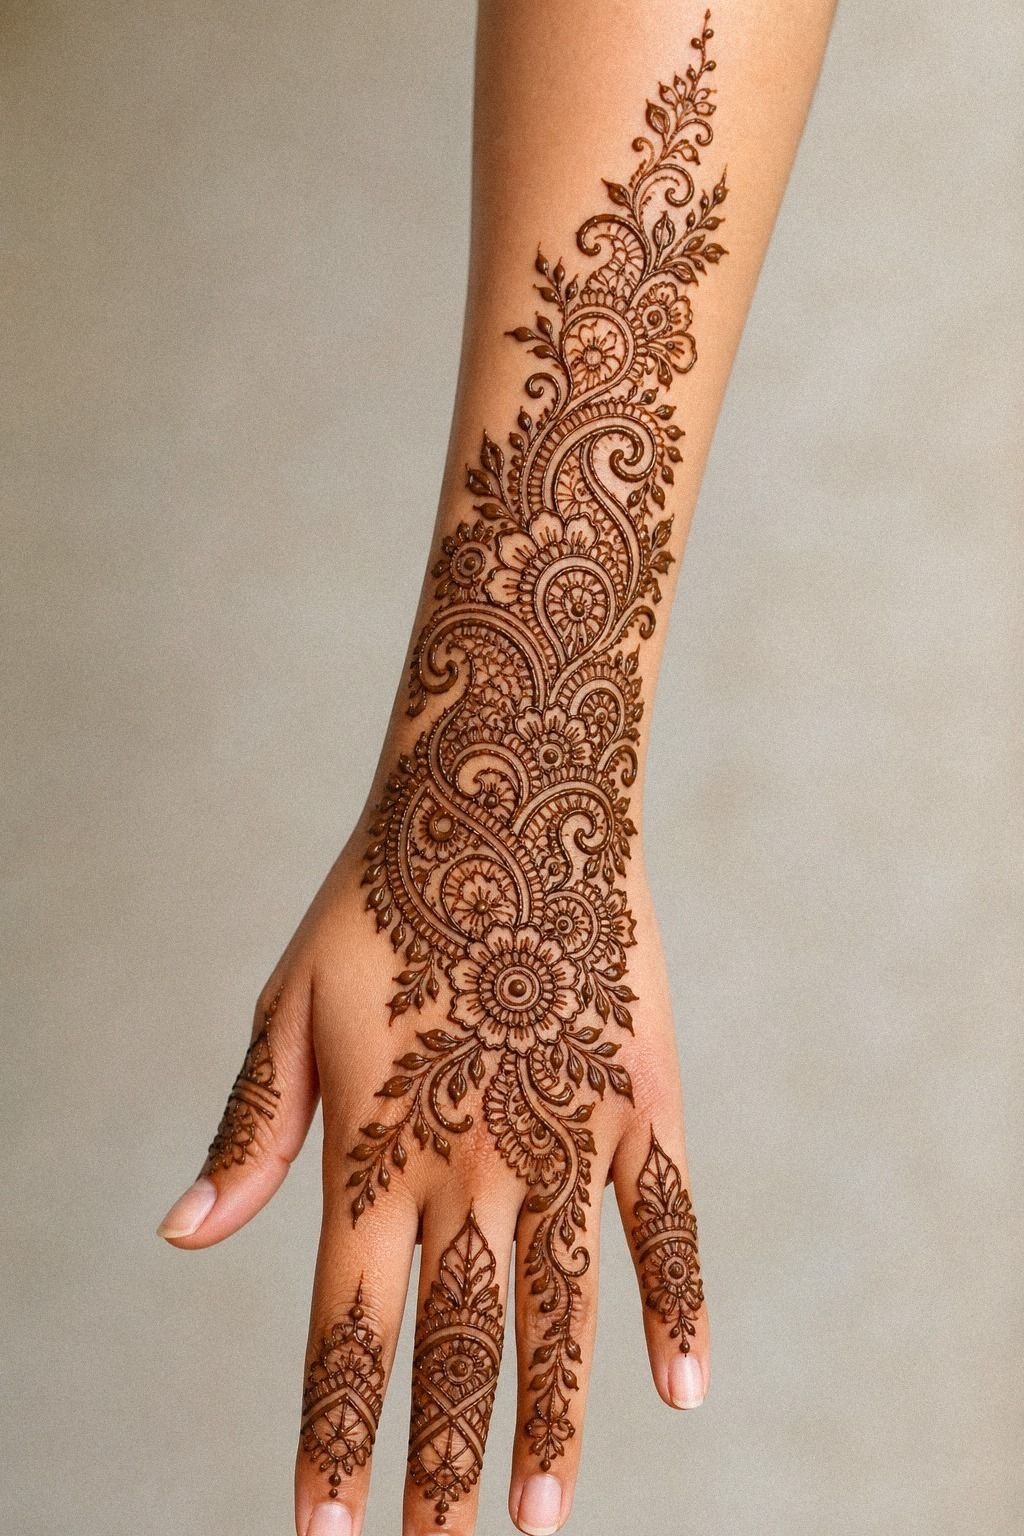
Extending the pattern toward the forearm is often the smartest edit in the whole design.
16Balance Dense Fill With Open Skin
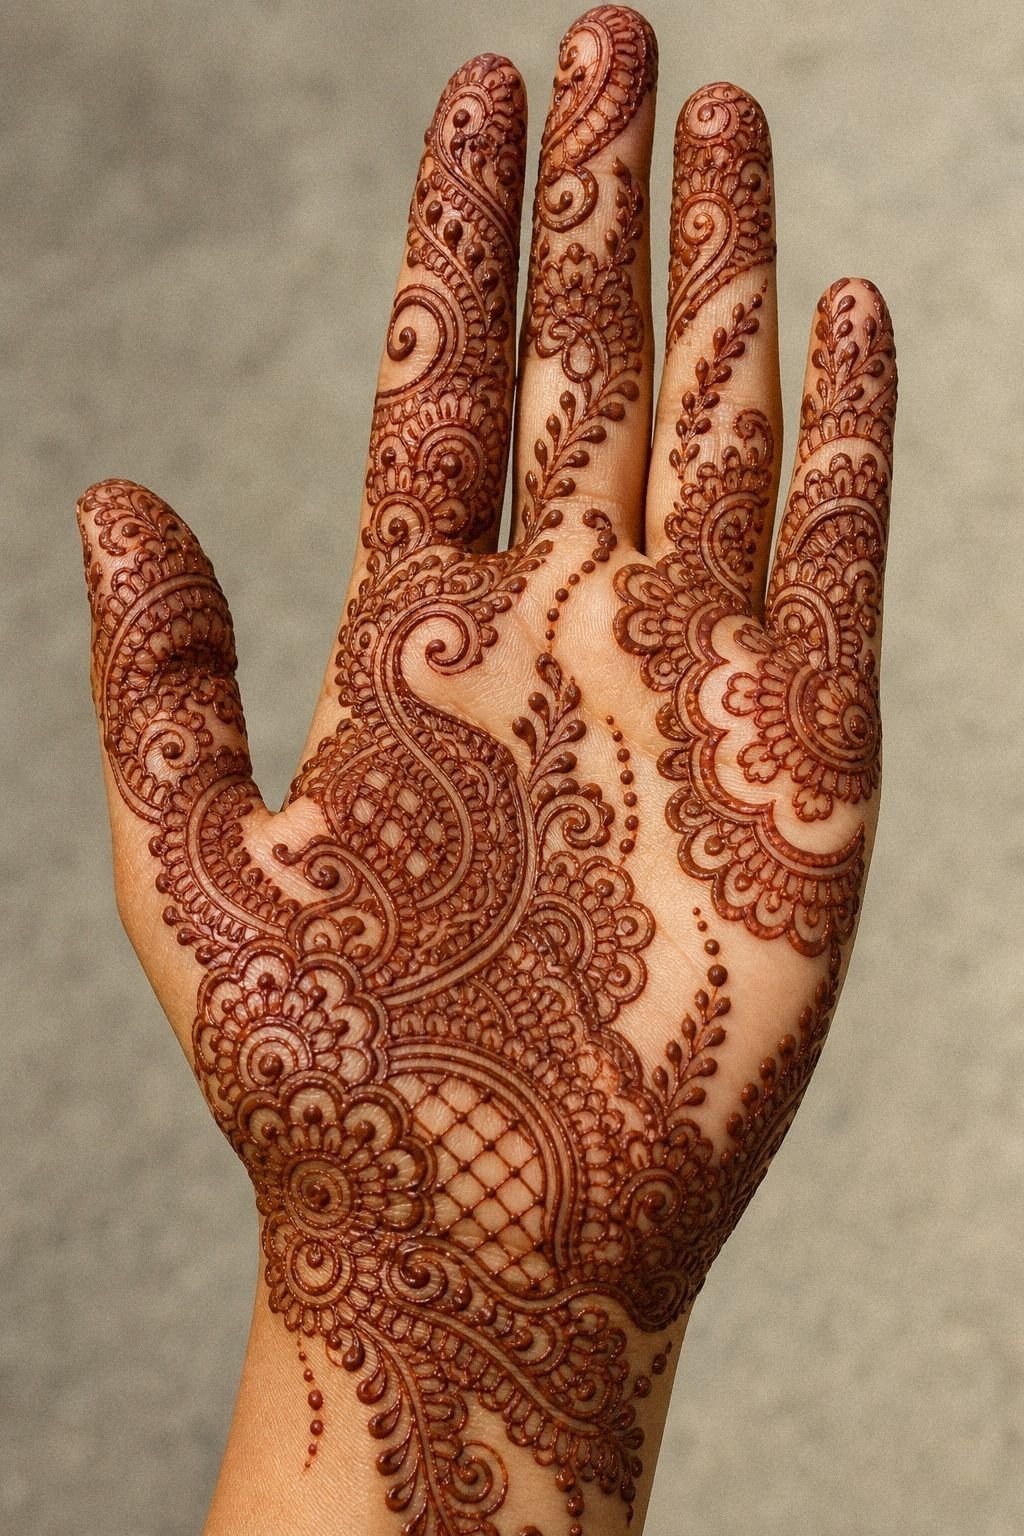
Dense fill only looks clean when open skin gets equal respect. The golden tan palm in the photo proves it.
Busy zones hit hard, then the untouched open skin resets your eye before the next run of detail. That’s why the pattern reads as intentional instead of messy.
I call this the Half-Step Rule: after every dense section, leave a lighter band or a plain break before the next one starts. If you skip that pause, your mehndi artist has nowhere to create contrast. And contrast is what keeps the pattern readable at a glance.
Use mandala mehndi designs or new bridal references to study where the best artists pause the pattern. The lighter band is not empty. It is structure.
17Refine Every Curve Before Paste Dries
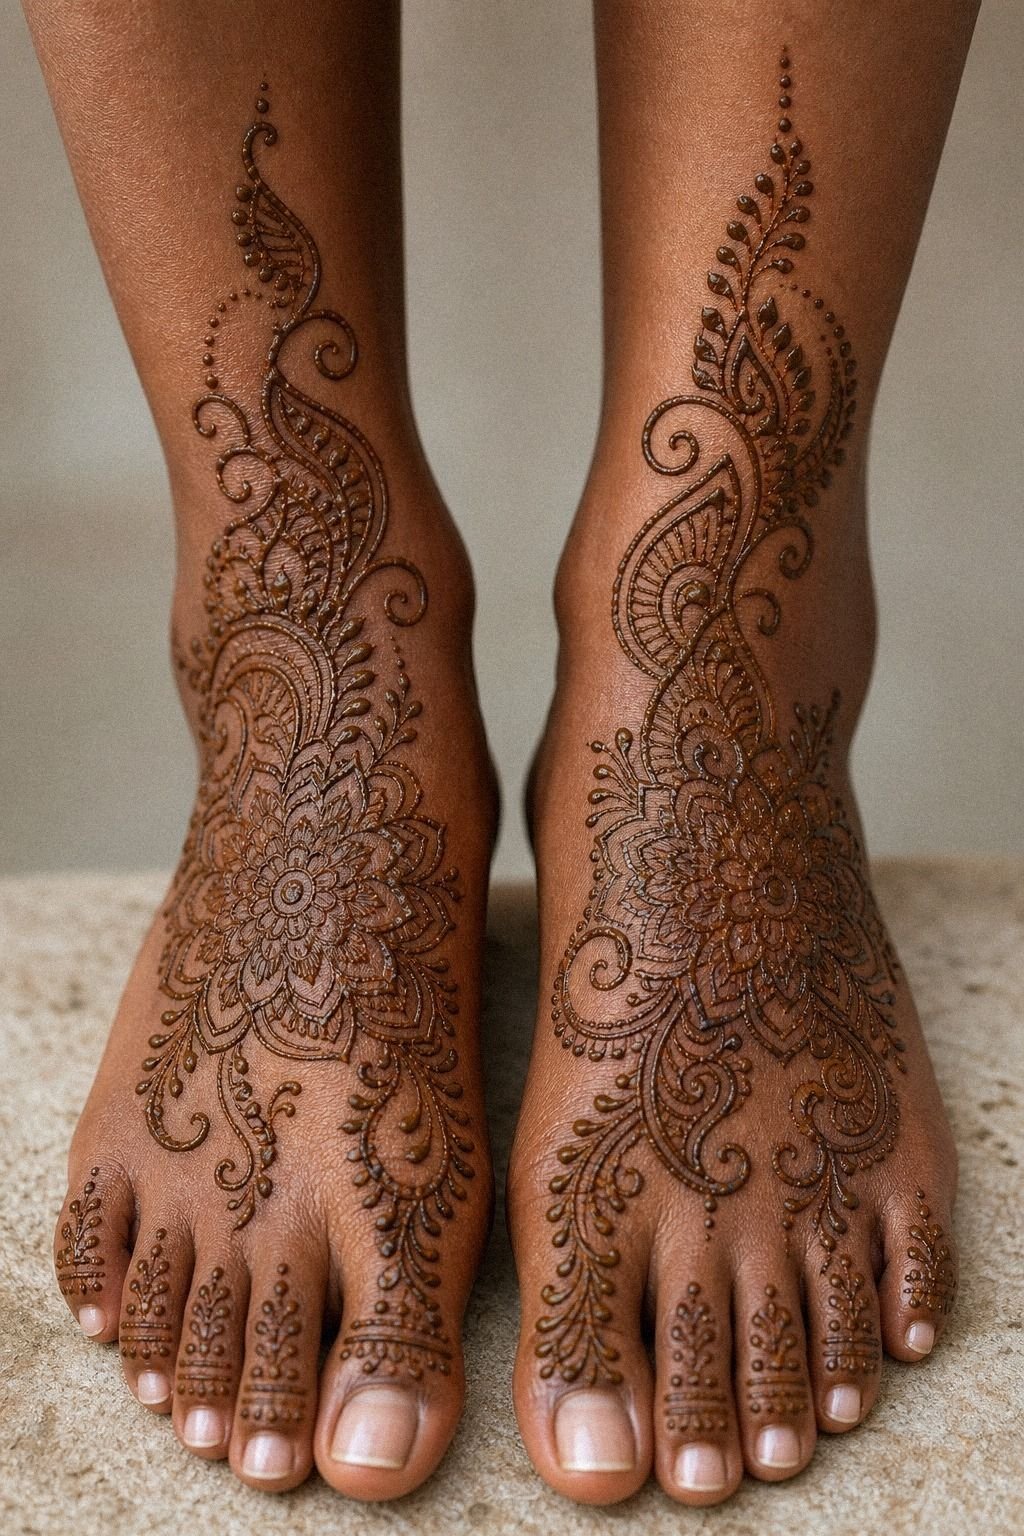
This is where clean work separates itself from scratchy work. On the foot and ankle reference, the reddish-brown curves stay smooth all the way through the turns, and that tells you the artist checked every curve break before the paste set.
Tattooing needs the same discipline. Once the line is in, cleanup is limited.
Ask your artist to show you the stencil and the first major stencil lines before they commit to all the filler. I like catching problems early, especially on mirrored or bridal-style layouts.
A curve that looks a little off at stencil stage will not magically fix itself after shading. Been there.
And if you ever feel rushed, pause the appointment for five. Better that than letting a crooked curve path live on your skin for years.
Clean lines first. Fancy filler second.
18Photograph The Design In Natural Light
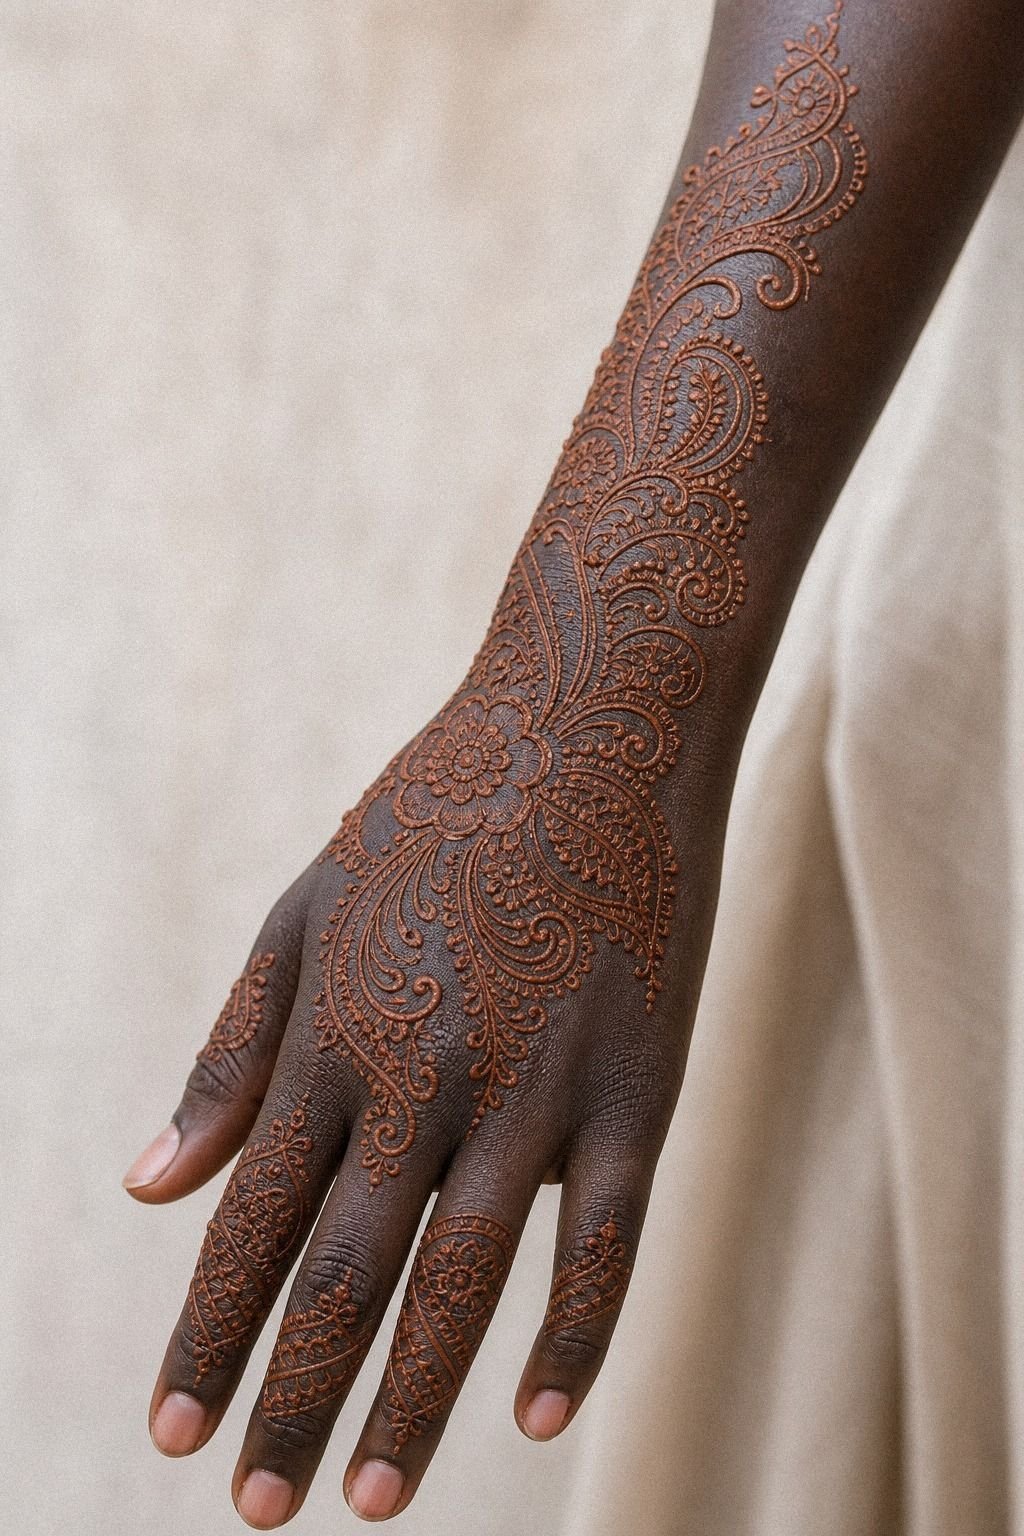
Natural light tells the truth. The deep ebony forearm and hand in the photo show that warm reddish-brown henna stain clearly because the light is even, and that makes it easier to judge whether the pattern is balanced. Studio shadows can hide shaky borders or overcrowded filler.
Take reference photos in window light before you send them to an artist. I want to see the whole hand or forearm, one close crop, and one angle shot. That gives me enough information to tell a client what can stay, what needs cleaner spacing, and what should move to a lower-wear placement.
But this also helps you build a better inspiration board with modern mehndi designs and peacock mehndi designs. Clear photos save time. And yes, they save money too!
19Choose The Indian Mehndi That Fits Best
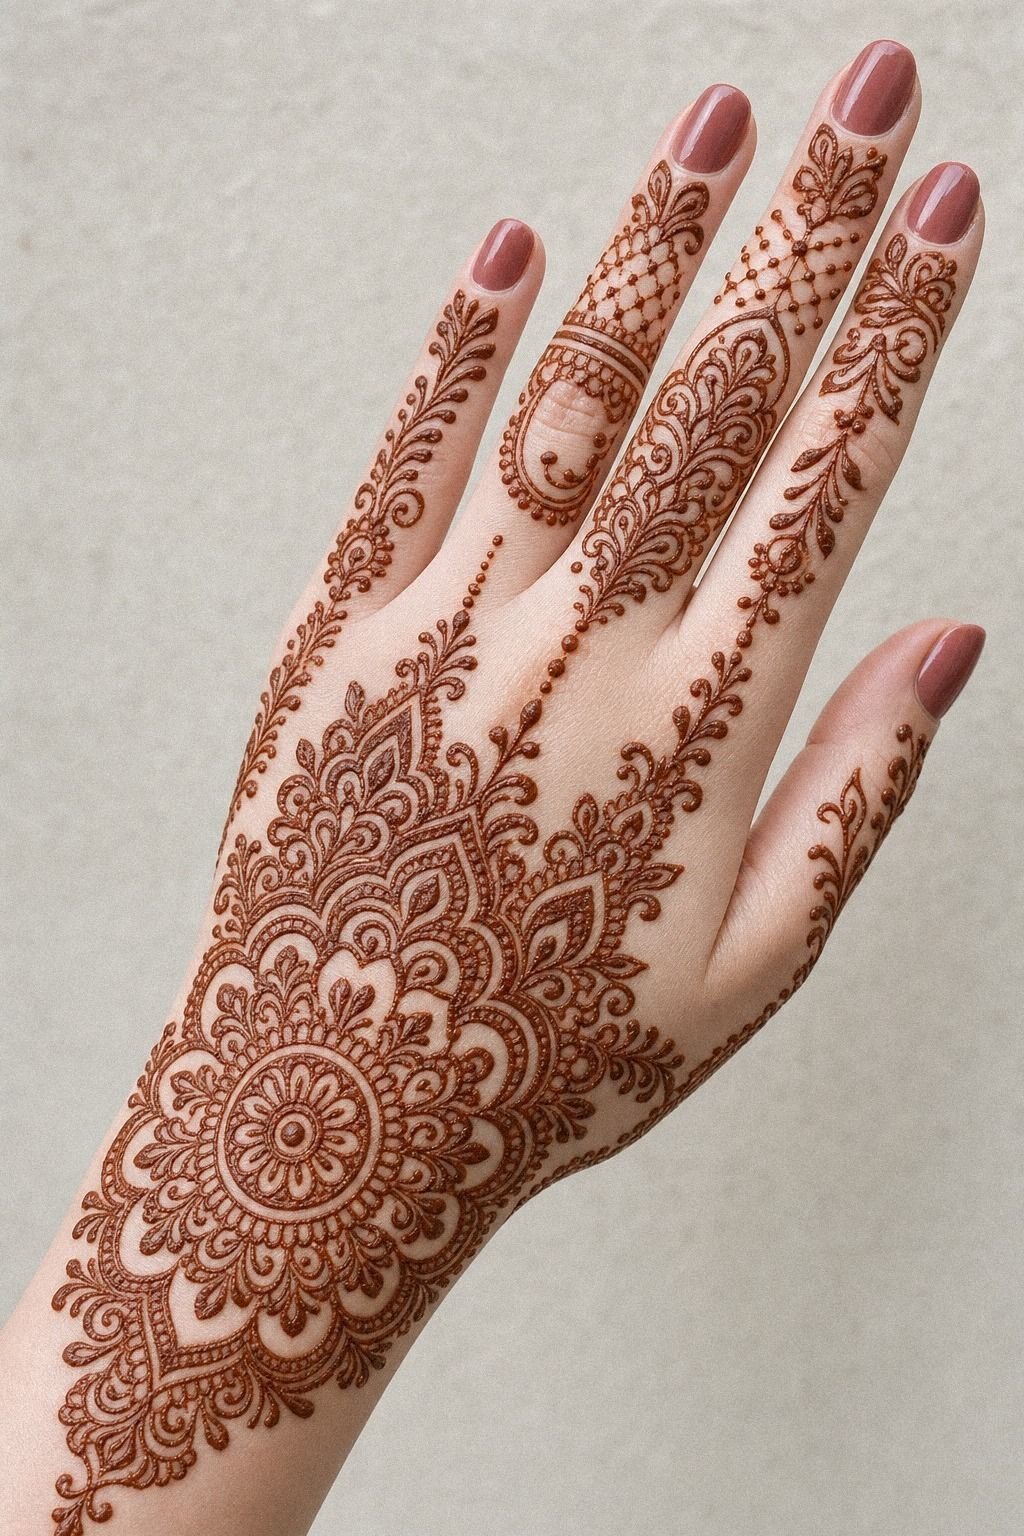
The best mehndi design is the one that suits your skin, your pain tolerance, and your maintenance reality. The fair hand in the photo looks clean because the pattern choice matches the placement and the detail scale. That’s what you should be measuring, not just whether the reference looks pretty on Pinterest.
If you want the safest long-term read, choose forearm placement with a palm-mandala or vine-led layout and keep the hand detail edited down. If you want the hand or fingers, go in knowing you’ll pay more attention to sun, friction, and touch-ups.
That is fine. Just be honest with yourself.
But I always ask one last question: will this still look solid when the lines soften a little? If the answer is yes, you have probably picked well. If not, simplify it now.
The Clean-Stain Rule Over More Detail
I’m Hazel, and this is the part I wish more first-timers heard before they booked a mehndi artist. Most mehndi designs do not look weak because the idea was weak.
They look less defined because nobody edited for real skin. Fresh henna can carry whisper-thin filigree trails over hands, fingers, and feet because the paste sits on top. Once it flakes away, the stain is softer and more delicate.
It settles, it softens, and on high-wear zones it has to fight washing, sun, friction, and motion every single day.
So when I say simplify, I’m not telling you to lose the Indian character. I am telling you to protect it.
The paisley can stay. The lotus can stay.
The bridal rhythm can stay. What usually has to go is the fifth tiny border, the extra dot halo, the tiny checkerboard filler nobody will read once the paste dries and the stain settles.
That edit’s where the good work starts.
I also think people choose the wrong battleground. They try to prove bravery by putting the most delicate version on the hand, even when the forearm would let the same design live cleaner and longer.
Real talk: pain is not the only question. Longevity is.
Cost is. Maintenance is.
A hand mehndi design may be worth it to you, but it should be a decision you make with your eyes open, not because the reference looked dreamy for three seconds on your phone.
And here is the honest frame I use in the studio. If the design depends on tiny details to feel special, it is too fragile for a hand.
If it still feels beautiful after you remove twenty percent of the filler, it is probably ready for skin. That is the clean-stain rule.
Keep the core. Edit the noise.
You’ll end up with something that dries clean and still looks like you meant it.
A Few Things Worth Answering
How much does a Indian Mehndi Designs usually cost?
A mehndi application usually costs about $20 to $150 for a small to medium design, though bridal and event work can run higher. If you are choosing dense hand work, time adds up fast.
– Small forearm version, one clean focal motif – Hand placement, more redraw time and more upkeep – Strong linework, worth paying for
Are Indian Mehndi Designs a good idea for a first mehndi application?
Yes, they can be a very good first mehndi application if you keep the pattern clean and pick low-wear placement. You get elegant motifs, personal symbolism, and a stain that can develop richly without needing dense fills.
– Outer forearm or upper arm – Edited motif count – Clearer stain, less risk of patchiness
How do I choose a mehndi artist for Indian Mehndi Designs?
Choose an artist with crispy healed linework, not just pretty fresh photos. You want to see symmetry, clean curves, and examples on real skin tones, plus a studio that treats hygiene like the baseline.
– Healed photos, not only day-one shots – Fine line or ornamental specialty – Clean setup, strong stencil placement
How much do Indian Mehndi Designs hurt?
Pain depends on placement. Hands, fingers, feet, ribs, and sternum are the spicy zones, while the outer forearm and upper arm are usually more chill. Lines feel sharper, shading feels like a dull burn.
– Hands and feet, higher sting – Forearm and thigh, easier sit – Breaks when you need them
How long does an Indian Mehndi Designs stain last?
The paste usually dries in 1 to 2 hours, then the stain starts orange and deepens by day two. A lemon-sugar seal can help keep the paste in place, and the finished stain usually lasts 1 to 3 weeks as it fades gradually.
– Gentle unscented soap – Thin lotion layer – No pool, no sun, no picking
What’s the best placement for Indian Mehndi Designs?
The best placement is usually the outer forearm if you want the lines to stay clean, with the upper arm as another safe pick. You get more width, less friction, and detail that reads clearly longer.
– Forearm for vines and mandalas – Upper arm for larger bridal edits – Hand only if you accept touch-ups
Where I’d Start First With The One-Focal-Point Rule
If I had to pick one step, I’d start with the classic palm mandala. It gives your artist one strong focal read, and that makes every later choice easier. Save that shape first, then decide whether your skin can handle the extra filler.